

- Jul 2, 2018
- 3,682
 |  |

| Type: | Equipment: |
|---|---|
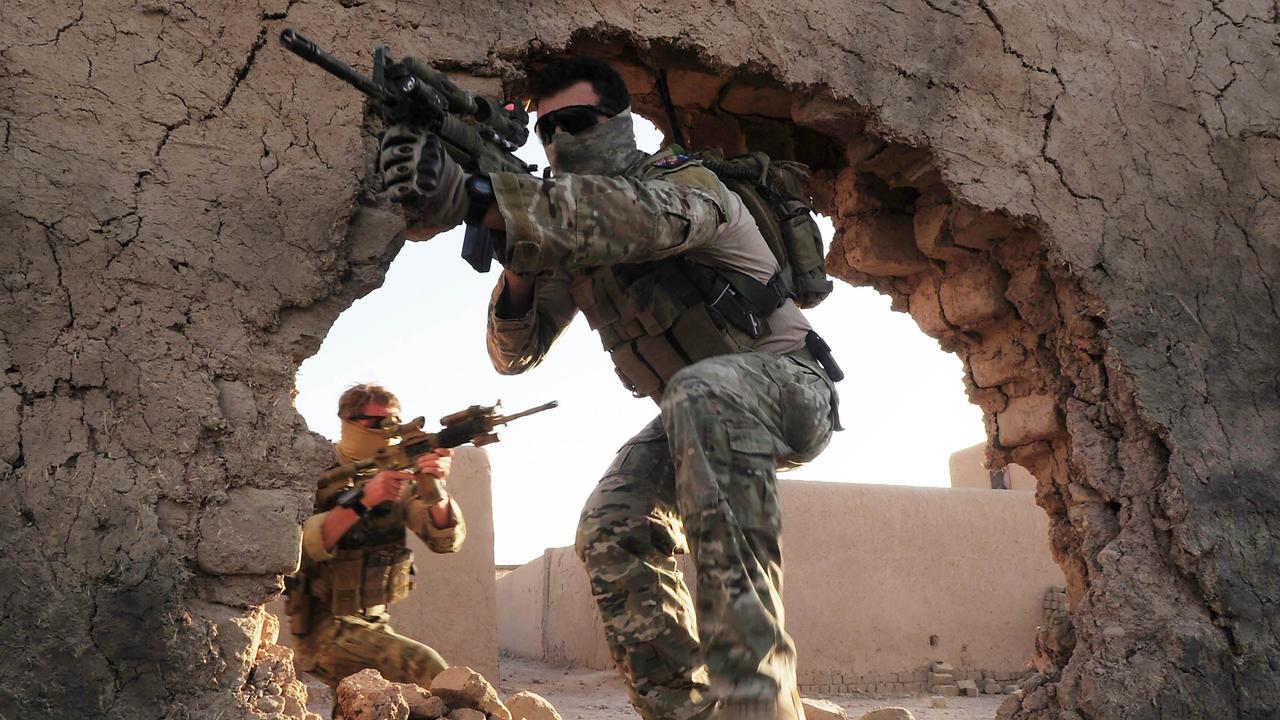
| Assault Rifles and Carbines |
|
| Precision Rifles |
|
| Machine Guns |
|
| Pistols |
|
| Submachine Guns |
|
| Shotguns |
|
| Grenade Launchers |
|
| Anti-Armour |
|
| MANPADS |
|
| Mortars |
|
| Grenades and Mines |
|
| Bayonets |
|
| Uniforms (non-Dress) and Personal Equipment |
|
| Type: | Equipment: |
|---|---|
| Artillery Shells |
|
| Surface-to-Surface Missiles |
|
| Surface-to-Air Missiles |
|
| Air-to-Surface Missiles |
|
| Anti-Tank Missiles |
|
| Tank Rounds |
|


| Type: | Amount: | Image: |
|---|---|---|
| Bushmaster Protected Mobility Vehicle | 1,000 |  |
| Mercedes-Benz G-Wagon 4x4 | 1,600 |  |
| Mercedes-Benz G-Wagon 6x6 | 0/700 |  |
| RMMV HX40M | 0/2,200 | 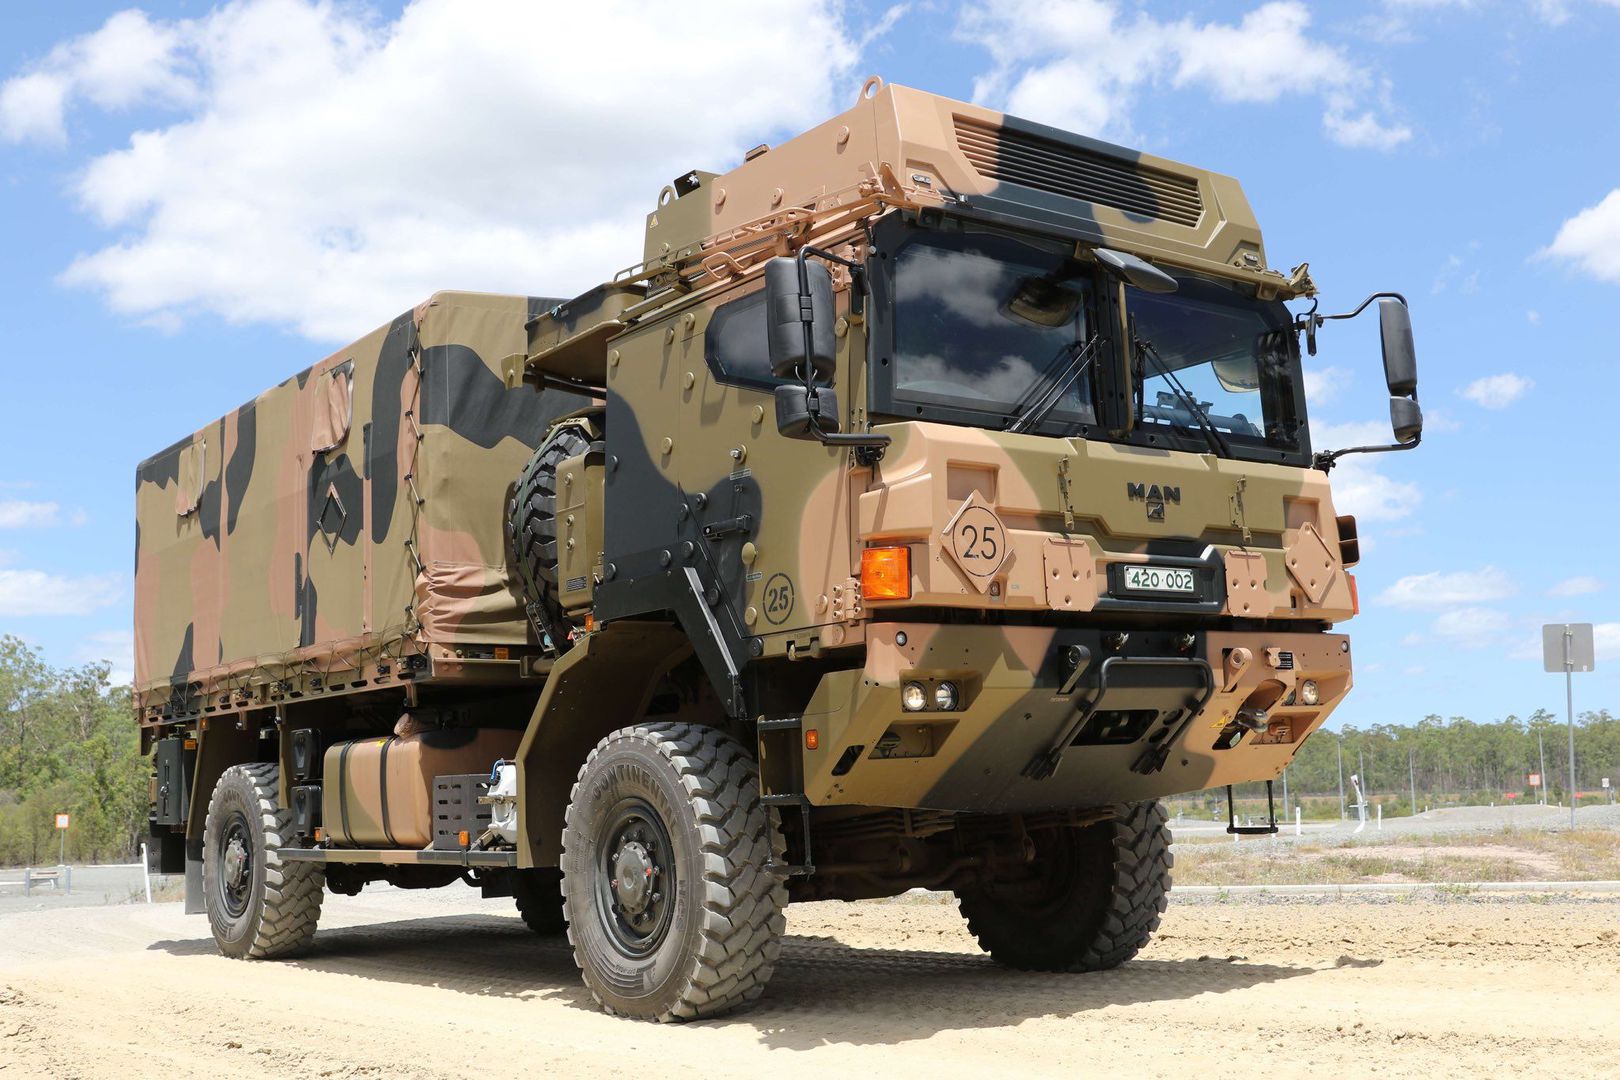 |
| RMMV HX77 | 1,250 | 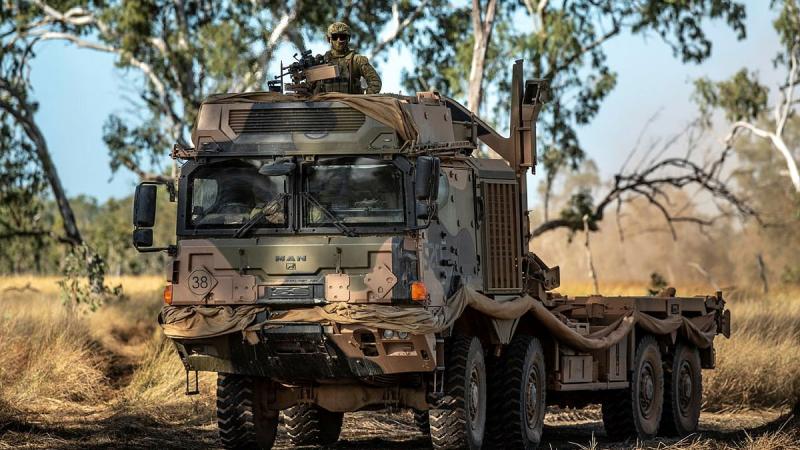 |
| RMMV HX81 (HET) | 150 | 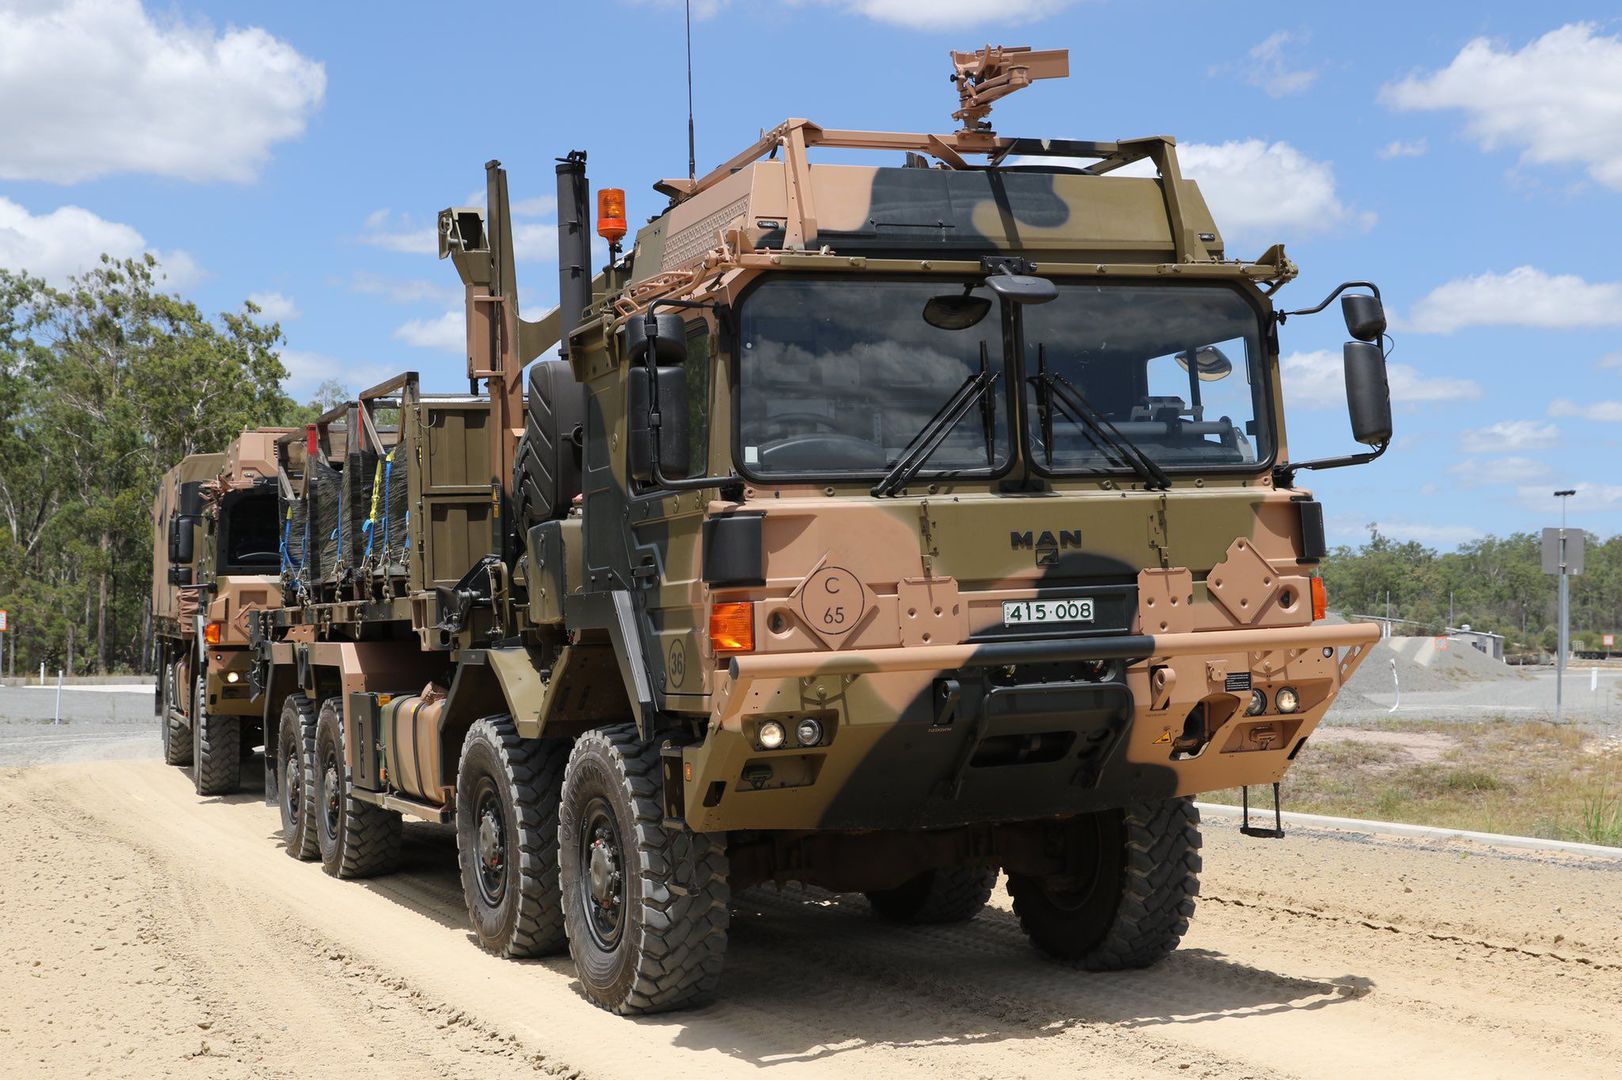 |
| HMT Extenda | 0/120 | 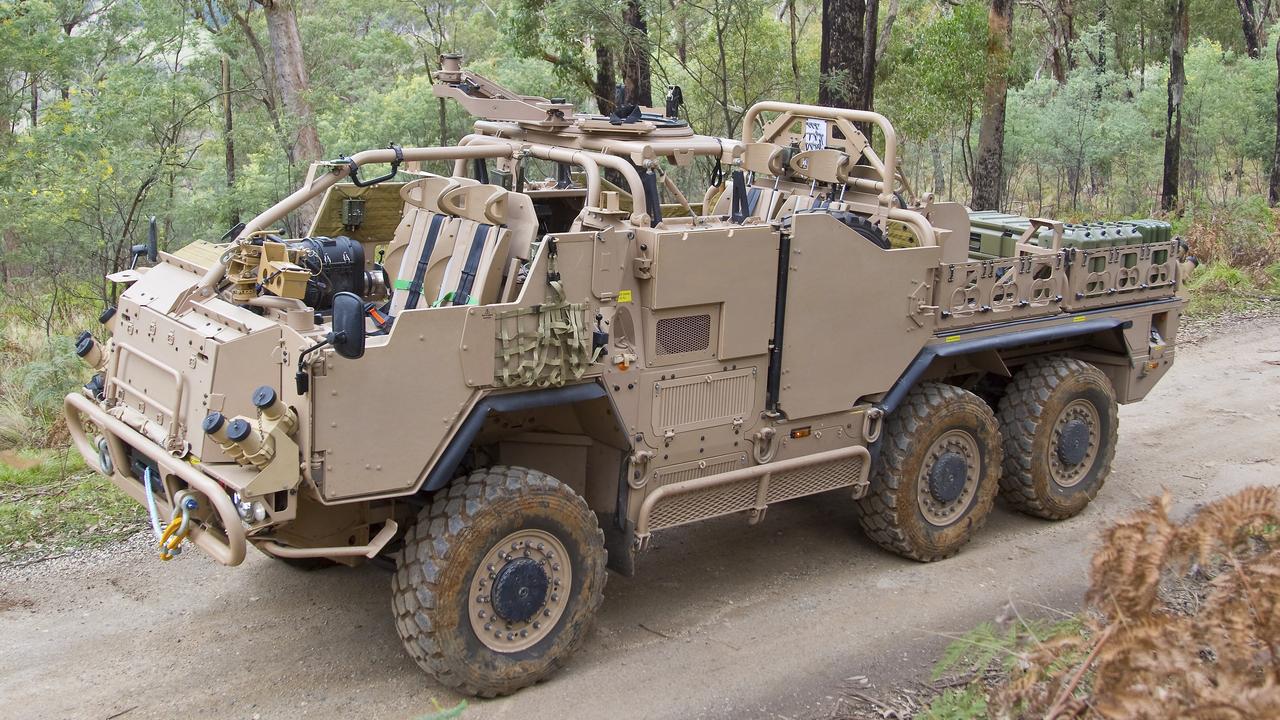 |
| M88A2 Hercules Recovery Vehicle | 18 |  |
| AS10 Armoured Ammunition Resupply Vehicle | 0/30 |  |
| M1150 Assault Breacher Vehicle | 30 | 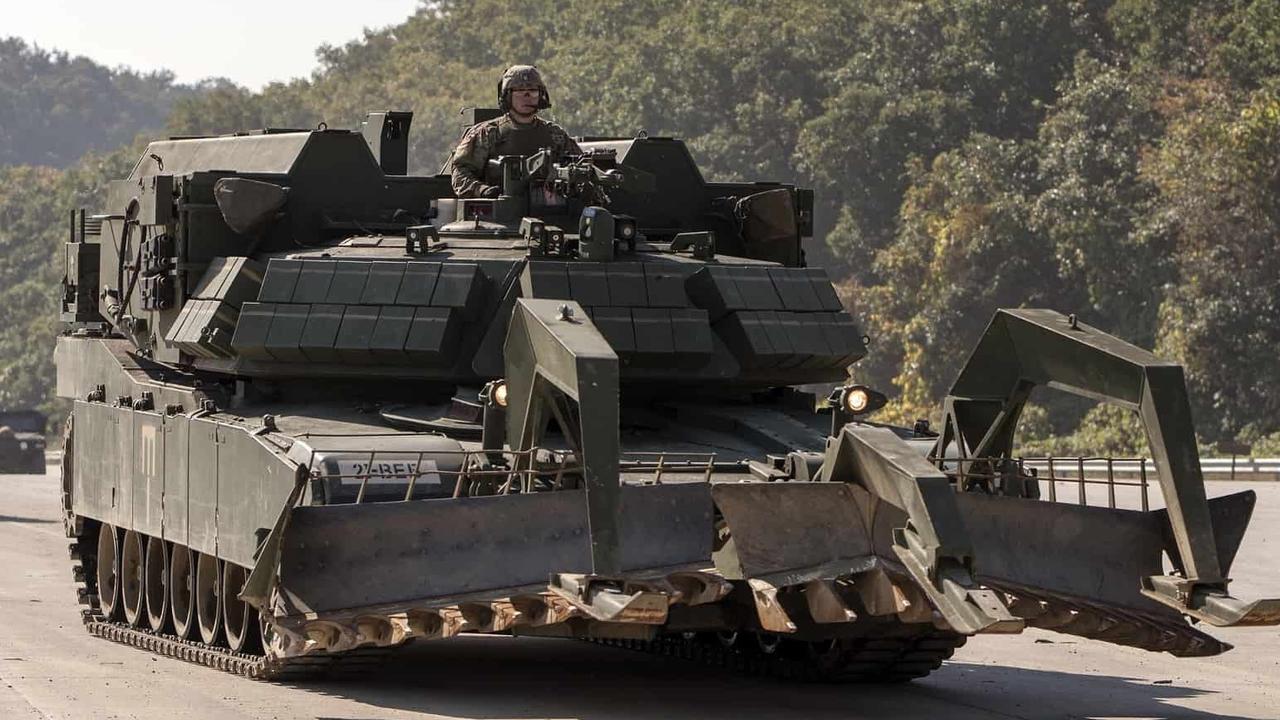 |
| M1074 Joint Assault Bridge System | 0/18 | 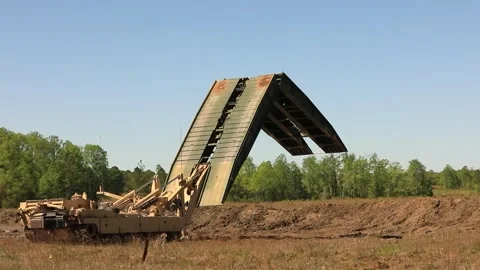 |
| JCB High Mobility Engineer Excavator (HMEE) | 10 |  |
| Husky Vehicle-Mounted Mine Detection (VMMD) Mark III | 12 |  |
| Police Cars (non-produced) | 60 |  |
| Type: | Amount: | Image: |
|---|---|---|
| AS9 Huntsman | 0/60 | 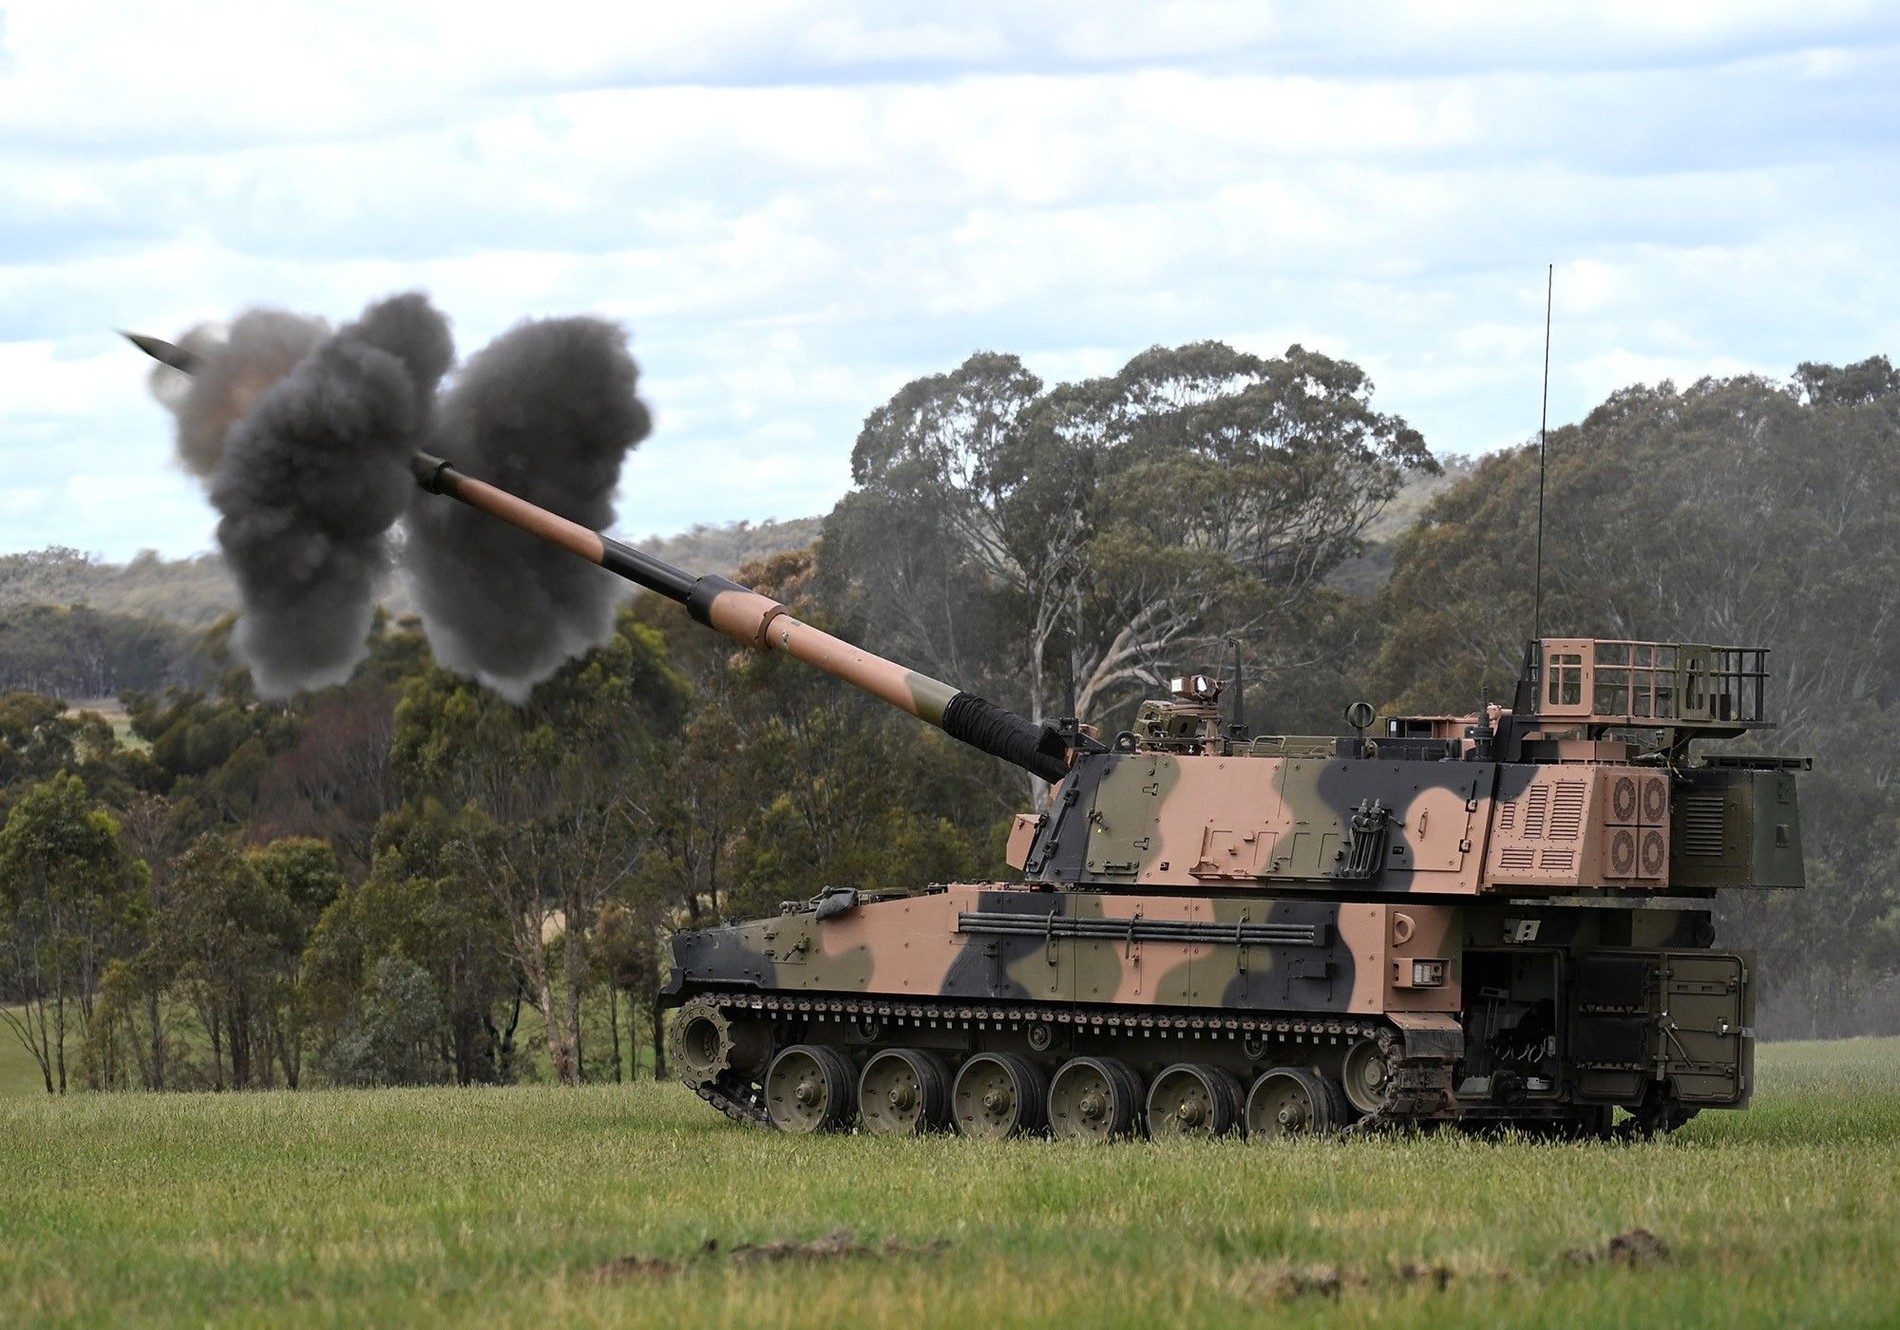 |
| M142 HIMARS | 0/42 |  |
| M777 Howitzer | 120 | 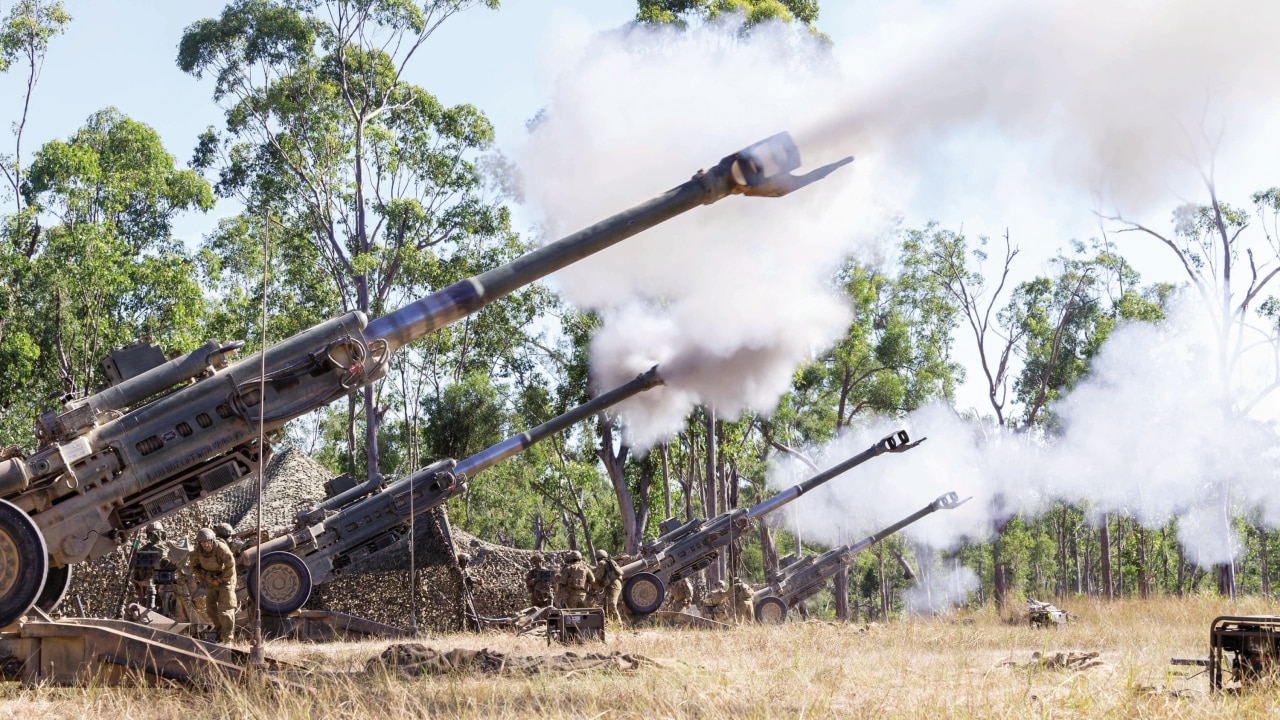 |
| NASAMS 2 | 0/6 | 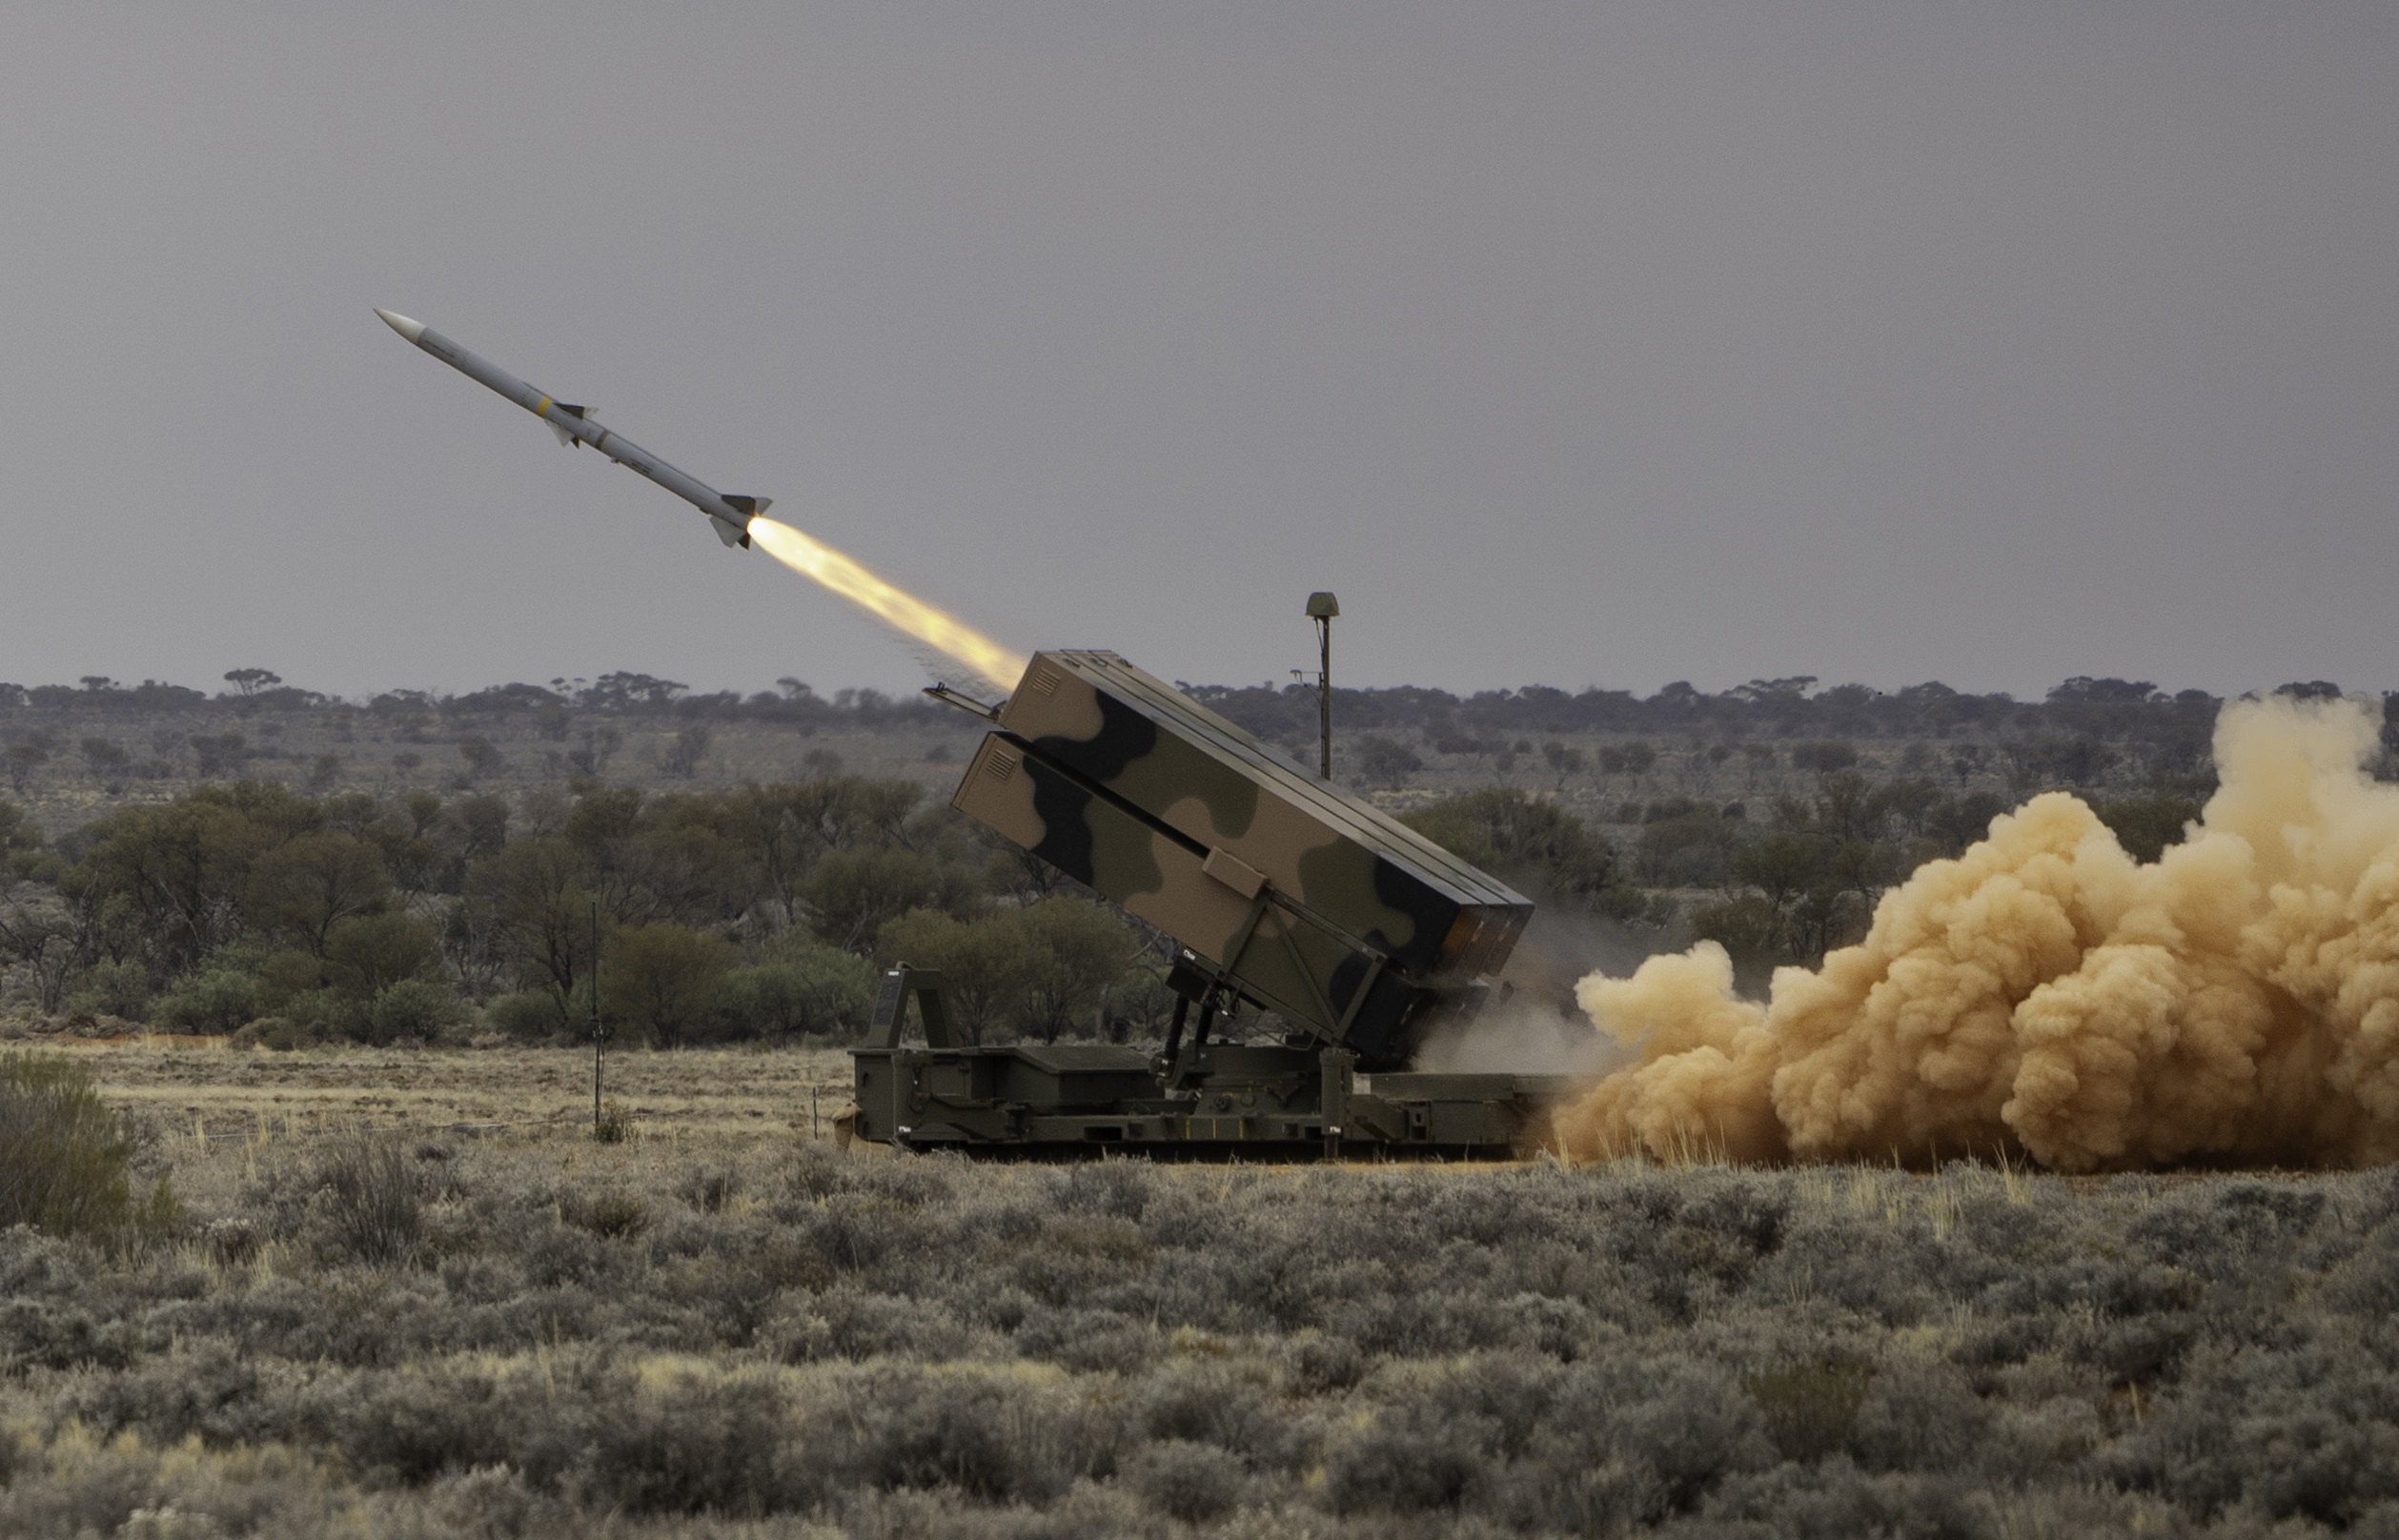 |


| Type: | Amount: | Image: |
|---|---|---|
| AN/TPQ-36 Firefinder Radar | 0/7 | 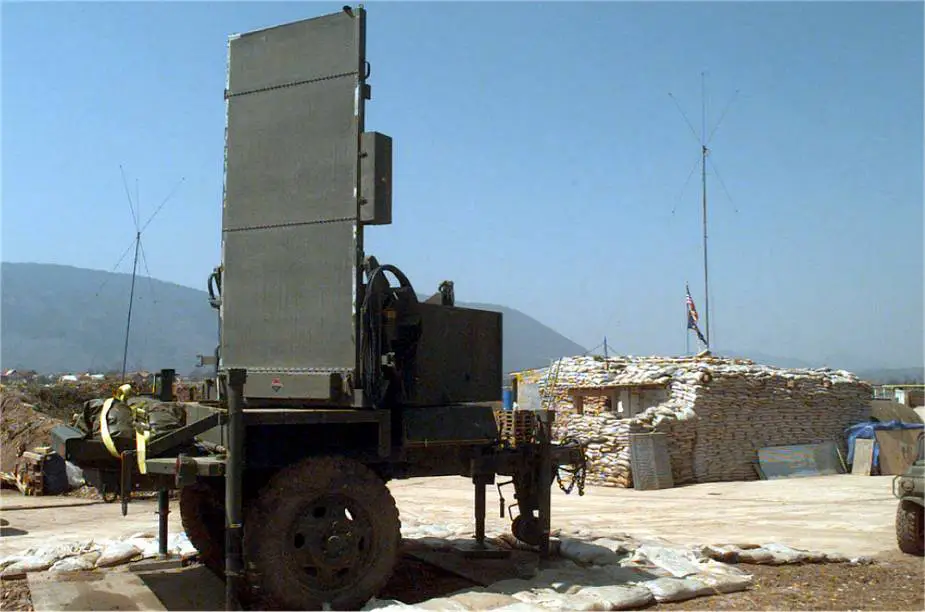 |
| Giraffe AMB Radar | 0/5 | 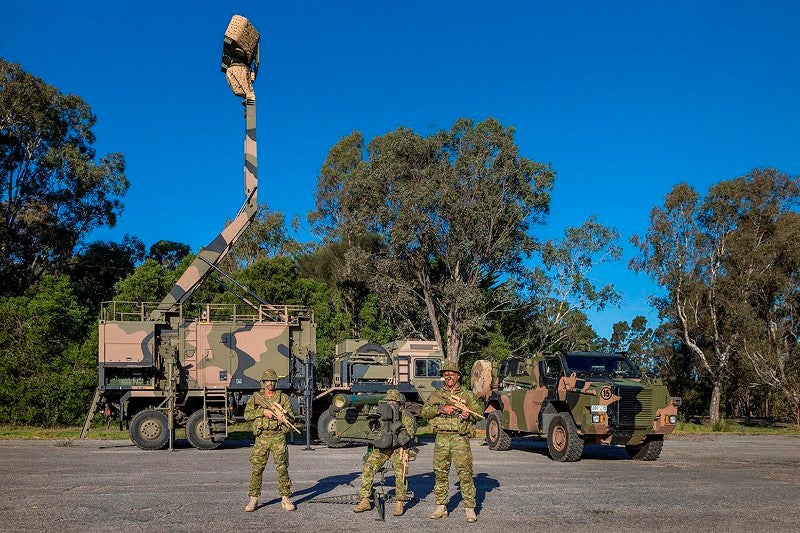 |
| AN/TPQ-48 Lightweight Counter Mortar Radar | 0/5 |  |


| Base: | Location: | Occupants: |
|---|---|---|
| Victoria Barracks | Sydney, New South Wales |
|
Holsworthy Barracks
| Sydney, New South Wales (Liverpool Military Area) |
|
| Steele Barracks | Sydney, New South Wales (Liverpool Military Area) |
|
| Randwick Barracks | Sydney, New South Wales |
|
| Timor Barracks | Sydney, New South Wales |
|
| Lancer Barracks | Sydney, New South Wales |
|
| Bullecourt Barracks | Newcastle, New South Wales |
|
| Blamey Barracks | Wagga Wagga, New South Wales (Kapooka Military Area) |
|
| Lone Pine Barracks | Singleton, New South Wales |
|
| Romani Barracks | Orange, New South Wales |
|
| North Fort | Sydney, New South Wales |
|
| HMAS Albatross | Nowra, New South Wales |
|
| RAAF Base Richmond | Richmond, New South Wales |
|
| Wagga Wagga Army Reserve Depot | Wagga Wagga, New South Wales |
|
| Wollongong Army Reserve Depot | Wollongong, New South Wales |
|
| Tamworth Army Reserve Depot | Tamworth, New South Wales |
|
| Port Macquarie Army Reserve Depot | Port Macquarie, New South Wales |
|
| Lismore Army Reserve Depot | Lismore, New South Wales |
|
| Dubbo Army Reserve Depot | Dubbo, New South Wales |
|
| Maitland Army Reserve Depot | Maitland, New South Wales |
|
| Bathurst Army Reserve Depot | Bathurst, New South Wales |
|
| Pymble Army Reserve Depot | Sydney, New South Wales |
|
| Dee Why Army Reserve Depot | Sydney, New South Wales |
|
| Bankstown Army Reserve Depot | Sydney, New South Wales |
|
| Erina Army Reserve Depot | Central Coast, New South Wales |
|
| Grafton Army Reserve Depot | Grafton, New South Wales |
|
| Tweed Heads Army Reserve Depot | Tweed Heads, New South Wales |
|
| Coffs Harbour Army Reserve Depot | Coffs Harbour, New South Wales |
|
| Kempsey Army Reserve Depot | Kempsey, New South Wales |
|
| Taree Army Reserve Depot | Taree, New South Wales |
|
| Muswellbrook Army Reserve Depot | Muswellbrook, New South Wales |
|
| Armidale Army Reserve Depot | Armidale, New South Wales |
|
| Base: | Location: | Occupants: |
|---|---|---|
| Irwin Barracks | Perth, Western Australia |
|
| Campbell Barracks | Perth, Western Australia |
|
| Palmer Barracks | Perth, Western Australia |
|
| Artillery Barracks | Perth, Western Australia |
|
| Taylor Barracks | Karratha, Western Australia |
|
| Broome Regional Force Surveillance Depot | Broome, Western Australia |
|
| Tom Price Regional Force Surveillance Depot | Tom Price, Western Australia |
|
| Port Hedland Regional Force Surveillance Depot | Port Hedland, Western Australia |
|
| Newman Regional Force Surveillance Depot | Newman, Western Australia |
|
| Geraldton Army Reserve Depot | Geraldton, Western Australia |
|
| Albany Army Reserve Depot | Albany, Western Australia |
|
| Kalgoorlie Army Reserve Depot | Kalgoorlie, Western Australia |
|
| Rockhampton Army Reserve Depot | Perth, Western Australia |
|
| Joondalup Army Reserve Depot | Perth, Western Australia |
|
| Katanning Army Reserve Depot | Katanning, Western Australia |
|
| Carnarvon Army Reserve Depot | Carnarvon, Western Australia |
|
| Bunbury Army Reserve Depot | Bunbury, Western Australia |
|
| Northam Army Camp | Northam, Western Australia |
|
| Bindoon Military Training Area | Bindoon, Western Australia |
|
| Lancelin Military Training Area | Lancelin, Western Australia |
|
| Yampi Sound Military Training Area (North Australian Range) | Kimbolton, Western Australia |
|
| Base: | Location: | Occupants: |
|---|---|---|
| Royal Military College, Duntroon | Canberra, Australian Capital Territory |
|
| HMAS Harman | Canberra, Australian Capital Territory |
|
| Majura Military Training Area | Canberra, Australian Capital Territory |
|
| Base: | Location: | Occupants: |
|---|---|---|
| Victoria Barracks | Brisbane, Queensland |
|
Gallipoli Barracks
| Brisbane, Queensland |
|
| Damascus Barracks | Brisbane, Queensland |
|
Lavarack Barracks
| Townsville, Queensland |
|
| RAAF Base Townsville | Townsville, Queensland |
|
| Ross Island Barracks | Townsville, Queensland |
|
| Jezzine Barracks | Townsville, Queensland |
|
| Porton Barracks | Cairns, Queensland |
|
| Kokoda Barracks | Canungra, Queensland |
|
| Borneo Barracks | Cabarlah, Queensland (Darling Downs Military Area) |
|
| Swartz Barracks (Oakey Army Aviation Centre) | Oakey, Queensland (Darling Downs Military Area) |
|
| Sarpeye Barracks | Thursday Island, Queensland |
|
| Weipa Army Reserve Depot | Weipa, Queensland |
|
| Mount Isa Army Reserve Depot | Mount Isa, Queensland |
|
| Toowoomba Army Reserve Depot | Toowoomba, Queensland (Darling Downs Military Area) |
|
| Rockhampton Army Reserve Depot | Rockhampton, Queensland |
|
| Bundaberg Army Reserve Depot | Bundaberg, Queensland |
|
| Caboolture Army Reserve Depot | Brisbane, Queensland |
|
| Ipswich Army Reserve Depot | Brisbane, Queensland |
|
| Loganlea Army Reserve Depot | Brisbane, Queensland |
|
| Gladstone Army Reserve Depot | Gladstone, Queensland |
|
| Southport Army Reserve Depot | Gold Coast, Queensland |
|
| Gympie Army Reserve Depot | Gympie, Queensland |
|
| Maryborough Army Reserve Depot | Maryborough, Queensland |
|
| Yandina Army Reserve Depot | Sunshine Coast, Queensland |
|
| Dalby Army Reserve Depot | Dalby, Queensland |
|
| Warwick Army Reserve Depot | Warwick, Queensland |
|
| Roma Army Reserve Depot | Roma, Queensland |
|
| Wondai Army Reserve Depot | Wondai, Queensland |
|
| Gatton Army Reserve Depot | Gatton, Queensland |
|
| Stanthorpe Army Reserve Depot | Stanthorpe, Queensland |
|
| Greenbank Military Range | Brisbane, Queensland |
|
| Tully Military Training Area (North Australian Range) | Tully, Queensland |
|
| Shoalwater Bay Military Training Area (North Australian Range) | Shoalwater, Queensland |
|
| Cowley Beach Military Training Area (North Australian Range) | Cowley Beach, Queensland |
|
| Base: | Location: | Occupants: |
|---|---|---|
| Keswick Barracks | Adelaide, South Australia |
|
| Hampstead Barracks | Adelaide, South Australia |
|
| Warradale Barracks | Adelaide, South Australia |
|
| RAAF Base Edinburgh | Adelaide, South Australia |
|
| Woodside Barracks | Woodside, South Australia |
|
| Smithfield Army Reserve Depot | Adelaide, South Australia |
|
| Mount Gambier Army Reserve Depot | Mount Gambier, South Australia |
|
| Whyalla Army Reserve Depot | Whyalla, South Australia |
|
| Port Pirie Army Reserve Depot | Port Pirie, South Australia |
|
| Berri Army Reserve Depot | Berri, South Australia |
|
| Port Lincoln Army Reserve Depot | Port Lincoln, South Australia |
|
| Port Wakefield Proof and Experimental Establishment | Port Wakefield, South Australia |
|
| Cultana Military Training Area | Cultana, South Australia |
|
| Murray Bridge Military Training Area | Murray Bridge, South Australia |
|
| Base: | Location: | Occupants: |
|---|---|---|
Robertson Barracks
| Darwin, Northern Territory |
|
| Larrakeyah Barracks | Darwin, Northern Territory |
|
| Alice Springs Regional Force Surveillance Depot | Alice Springs, Northern Territory |
|
| Nhulunbuy Regional Force Surveillance Depot | Nhulunbuy, Northern Territory |
|
| Kangaroo Flats Military Training Area (North Australian Range) | Charlotte, Northern Territory |
|
| Bradshaw Field Military Training Area (North Australian Range) | Timber Creek, Northern Territory |
|
| Mount Bundey Military Training Area (North Australian Range) | Mount Bundey, Northern Territory |
|
| Base: | Location: | Occupants: |
|---|---|---|
| Victoria Barracks | Melbourne, Victoria |
|
| Simpson Barracks | Melbourne, Victoria |
|
| Maygar Barracks | Melbourne, Victoria |
|
| Oakleigh Barracks | Melbourne, Victoria |
|
| Ringwood Barracks | Melbourne, Victoria |
|
| Sunshine Barracks | Melbourne, Victoria |
|
| Tobruk Barracks | Seymour, Victoria (Puckapunyal Military Area) |
|
| Hopkins Barracks | Seymour, Victoria (Puckapunyal Military Area) |
|
| Bridges Barracks | Seymour, Victoria (Puckapunyal Military Area) |
|
| Latchford Barracks | Bonegilla, Victoria (Albury-Wodonga Military Area) |
|
| Gaza Ridge Barracks | Bandiana, Victoria (Albury-Wodonga Military Area) |
|
| Wadsworth Barracks | Bandiana, Victoria (Albury-Wodonga Military Area) |
|
| Pearce Barracks | Portsea, Victoria |
|
| Balcombe Barracks | Mount Martha, Victoria |
|
| Fort Queenscliff | Queenscliff, Victoria |
|
| Fort Gellibrand | Melbourne, Victoria |
|
| Ranger Barracks | Ballarat, Victoria |
|
| Passchendaele Barracks | Bendigo, Victoria |
|
| Somme Barracks | Shepparton, Victoria |
|
| Kiarivu Barracks | Mildura, Victoria |
|
| Messines Barracks | Swan Hill, Victoria |
|
| Tel el Eisa Barracks | Warrnambool, Victoria |
|
| Newland Barracks | Geelong, Victoria |
|
| Horsham Army Reserve Depot | Horsham, Victoria |
|
| St Kilda East Army Reserve Depot | Melbourne, Victoria |
|
| Surrey Hills Army Reseve Depot | Melbourne, Victoria |
|
| Sandringham Army Reserve Depot | Melbourne, Victoria |
|
| Moonee Ponds Army Reserve Depot | Melbourne, Victoria |
|
| Newborough Army Reserve Depot | Moe, Victoria |
|
| Sale Army Reserve Depot | Sale, Victoria |
|
| Bairnsdale Army Reserve Depot | Bairnsdale, Victoria |
|
| Kyneton Army Reserve Depot | Kyneton, Victoria |
|
| Stawell Army Reserve Depot | Stawell, Victoria |
|
| Colac Army Reserve Depot | Colac, Victoria |
|
| Swan Island Military Training Area | Queenscliff, Victoria |
|
| Land Engineering Agency Proving Ground | Monegeetta, Victoria |
|
| Graytown Proof and Experimental Establishment | Graytown, Victoria |
|
| Australian Geospatial-Intelligence Office, Bendigo | Bendigo, Victoria |
|
| Base: | Location: | Occupants: |
|---|---|---|
| Anglesea Barracks | Hobart, Tasmania |
|
| Derwent Barracks | Hobart, Tasmania |
|
| Warrane Barracks | Hobart, Tasmania |
|
| Paterson Barracks | Launceston, Tasmania |
|
| Youngtown Barracks | Launceston, Tasmania |
|
| Kokoda Barracks | Devonport, Tasmania |
|
| Wivenhoe Barracks | Burnie, Tasmania |
|
| Buckland Military Training Area | Richmond, Tasmania |
|
| Stony Head Military Training Area | George Town, Tasmania |
|
| Base: | Location: | Occupants: |
|---|---|---|
| Dieppe Barracks | Sembawang, Singapore |
|
| Nee Soon Camp | Yishun, Singapore |
|
| Sembawang Air Base | Sembawang, Singapore |
|
Viceregal Representatives |
| Insignia: | ||
| Rank: | Governor-General of Australia | Governor of New South Wales Governor of Victoria Governor of Queensland Governor of Western Australia Governor of South Australia Governor of Tasmania |
Commissioned Officers |
| Code: | O-11 | O-10 | O-9 | O-8 | O-7 | O-6 |
| Insignia: |  |  |  |  |  |  |
| Rank: | Field Marshal | General | Lieutenant General | Major General | Brigadier | Colonel |
| Code: | O-5 | O-4 | O-3 | O-2 | O-1 | O-0 | O-0 |
| Insignia: |  |  |  |  |  |  |  |
| Rank: | Lieutenant Colonel | Major | Captain | Lieutenant | Second Lieutenant | Officer Cadet | Staff Cadet |
Enlisted |
| Code: | E-10 | E-9 | E-8 | E-7 | E-6 | E-5 | E-4 | E-3/E-2 | E-1 |
| Insignia: |  |  |  |  |  |  |  | No Insignia | No Insignia |
| Rank: | Regimental Sergeant Major of the Army | Warrant Officer Class 1 | Warrant Officer Class 2 | Staff Sergeant | Sergeant | Corporal | Lance Corporal | Private | Recruit |
Ranked by Order of Precedence |
| Crest: | Corps: | Colonel-in-Chief: | Patch: |
|---|---|---|---|
 | Corps of Staff Cadets | HRH The Duke of Edinburgh |  |
 | Royal Australian Armoured Corps | HRH The Prince of Wales |  |
 | Royal Australian Artillery | HM The Queen |  |
 | Royal Australian Engineers | HM The Queen |  |
 | Royal Australian Survey Corps | HRH The Princess of Wales |  |
 | Royal Australian Corps of Signals | HRH The Princess Royal |  |
 | Royal Australian Infantry Corps | HM The Queen |  |
 | Australian Army Aviation Corps | HRH The Duke of York |  |
 | Australian Intelligence Corps | HRH The Princess Royal |  |
  | Royal Australian Army Chaplains Department | HRH The Earl of Wessex |  |
| Royal Australian Corps of Transport | HRH The Princess Royal | ||
 | Royal Australian Army Medical Corps | The Right Honourable Sir Peter Cosgrove |  |
 | Royal Australian Army Dental Corps | The Right Honourable Sir Peter Cosgrove |  |
 | Royal Australian Army Ordnance Corps | HM The Queen |  |
 | Royal Australian Electrical and Mechanical Engineers | HRH The Duke of Edinburgh |  |
 | Royal Australian Army Educational Corps | HRH The Duchess of Gloucester |  |
 | Australian Army Public Relations Service | HRH The Earl of Wessex |  |
 | Australian Army Catering Corps | HRH The Countess of Wessex |  |
 | Royal Australian Army Pay Corps | HRH The Duke of Kent |  |
 | Australian Army Legal Corps | HRH The Duchess of Kent |  |
 | Royal Australian Corps of Military Police | HRH The Princess of Wales |  |
 | Australian Army Psychology Corps | HRH The Honourable Lady Ogilvy |  |
 | Australian Army Band Corps | HRH Prince Michael of Kent |  |
 | Royal Australian Army Nursing Corps | HM The Queen |  |
| Regiment: | Colonel of the Regiment: | Alliances: | Crest: |
|---|---|---|---|
| Sydney University Regiment | Chancellor of the University of Sydney | None |  |
| University of New South Wales Regiment | Chancellor of the University of New South Wales | None |  |
| Melbourne University Regiment | Chancellor of the University of Melbourne | None |  |
| Monash University Regiment | Chancellor of Monash University | None |  |
| Queensland University Regiment | Chancellor of the University of Queensland | None |  |
| Western Australia University Regiment | Chancellor of the University of Western Australia | None |  |
| Adelaide Universities Regiment | Chancellor of the University of Adelaide | None |  |
| Regiment: | Colonel of the Regiment: | Alliances: | Crest: |
|---|---|---|---|
| 1st Armoured Regiment | Governor-General of Australia |  Royal Canadian Dragoons Royal Canadian Dragoons |  |
| 2nd Cavalry Regiment | Governor-General of Australia | Lord Strathcona's Horse (Royal Canadians) |  |
| 3rd/4th Cavalry Regiment | Governor-General of Australia | 12e Régiment blindé du Canada |  |
| 2nd/14th Light Horse Regiment (Queensland Mounted Infantry) | Governor of Queensland | The Governor General's Horse Guards |  |
| 1st/15th Royal New South Wales Lancers | Governor of New South Wales | The Queen's York Rangers (1st American Regiment) |  |
| 12th/16th Hunter River Lancers | Governor of New South Wales | The British Columbia Regiment (Duke of Connaught's Own) |  |
| 4th/19th Prince of Wales's Light Horse | Governor of Victoria | The 8th Canadian Hussars (Princess Louise's) |  |
| 10th Light Horse Regiment | Governor of Western Australia | The 1st Hussars |  |
| 3rd/9th Light Horse (South Australian Mounted Rifles) | Governor of South Australia | The Sherbrooke Hussars |  |
| Regiment: | Colonel of the Regiment: | Alliances: | Crest: |
|---|---|---|---|
| Royal Australian Regiment | Governor-General of Australia | Princess Patricia's Canadian Light InfantryRoyal Canadian Regiment |  |
| Royal New South Wales Regiment | Governor of New South Wales | Royal Newfoundland Regiment |  |
| Royal Victoria Regiment | Governor of Victoria | The Lake Superior Scottish Regiment |  |
| Royal Queensland Regiment | Governor of Queensland | The Lincoln and Welland Regiment |  |
| Royal Western Australia Regiment | Governor of Western Australia | The Toronto Scottish Regiment (Queen Elizabeth The Queen Mother's Own) |  |
| Royal South Australia Regiment | Governor of South Australia | Royal Regiment of Canada |  |
| Royal Tasmania Regiment | Governor of Tasmania | The 48th Highlanders of Canada |  |
| North-West Mobile Force | Administrator of the Northern Territory | None |  |
| Pilbara Regiment | Governor of Western Australia | None |  |
| Far North Queensland Regiment | Governor of Queensland | None |  |
| Special Air Service Regiment | Governor-General of Australia | None |  |
| 1st Commando Regiment | Governor-General of Australia | None |  |
| 2nd Commando Regiment | Governor-General of Australia | Canadian Special Operations Regiment |  |
 |
| Crest: | Office: | Officeholder: | Image: |
|---|---|---|---|
 | Regimental Sergeant Major of the Army | Warrant Officer Donald Spinks |  |
 |
| Allegiance: | HM Queen Elizabeth II |
| Headquarters: | Victoria Barracks, Sydney |
| Commander: | Major General Elizabeth Cosson |
| Patch: |  |
| Unit: | Size: | Base: | Patch: |
|---|---|---|---|
39th Deployed Forces Support Battalion
| 200x Regular Personnel, 20x Mercedes-Benz G-Wagon 4x4s | Sydney |  |
 |
| Allegiance: | HM Queen Elizabeth II |
| Headquarters: | Victoria Barracks, Brisbane |
| Commander: | Major General Michael Slater |
| Patch: |  |
| Unit: | Size: | Base: | Patch: |
|---|---|---|---|
Headquarters, 1st (Australian) Division and 1st Signals Regiment
| 250x Regular Personnel, 10x Boxer Armoured Fighting Vehicles, 10x Mercedes-Benz G-Wagon 4x4s, 10x Mercedes-Benz G-Wagon 6x6s | Brisbane |  |
| Allegiance: | HM Queen Elizabeth II |
| Headquarters: | Robertson Barracks, Darwin |
| Commander: | Brigadier Ash Power |
| Motto: | "Integrated, Littoral, Lethal" |
| Patch: |  |
| Unit: | Size: | Base: | Patch: |
|---|---|---|---|
1st Armoured Regiment
| 1,000x Regular Personnel, 90x M1A2 Abrams, 18x M88A2 Hercules Recovery Vehicles | Darwin |  |
2nd Cavalry Regiment
| 1,000x Regular Personnel, 80x Boxer Armoured Fighting Vehicles | Darwin |  |
5th Battalion, Royal Australian Regiment ("The Tiger Battalion")
| 1,000x Regular Personnel, 100x Bushmaster Protected Mobility Vehicles | Darwin |  |
7th Battalion, Royal Australian Regiment ("The Pigs")
| 1,000x Regular Personnel, 100x Bushmaster Protected Mobility Vehicles | Darwin |  |
8th/12th Regiment, Royal Australian Artillery
| 250x Regular Personnel, 20x AS9 Huntsmans, 10x AS10 Armoured Ammunition Resupply Vehicles | Darwin |  |
1st Combat Engineer Regiment
| 250x Regular Personnel, 10x M1150 Assault Breacher Vehicles, 20x Bushmaster Protected Mobility Vehicles, 30x RMMV HX40Ms, 10x RMMV HX77s | Darwin |  |
1st Combat Signals Regiment
| 250x Regular Personnel, 20x Mercedes-Benz G-Wagon 6x6s, 30x RMMV HX40Ms | Darwin |  |
1st Combat Service Support Battalion
| 250x Regular Personnel, 10x Mercedes-Benz G-Wagon 6x6s, 70x RMMV HX40Ms, 50x RMMV HX77s, 10x RMMV HX81s | Darwin |  |
| Allegiance: | HM Queen Elizabeth II |
| Headquarters: | Victoria Barracks, Sydney |
| Commander: | Brigadier Jocelyn King |
| Motto: | "Non Sui Sed Aliis" |
| Patch: |  |
| Unit: | Size: | Base: | Patch: |
|---|---|---|---|
1st Health Battalion
| 400x Regular Personnel, 10x Boxer Armoured Fighting Vehicles, 15x Bushmaster Protected Mobility Vehicles, 25x Mercedes-Benz G-Wagon 6x6s, 10x RMMV HX77s | Darwin |  |
2nd Health Battalion
| 400x Regular Personnel, 10x Boxer Armoured Fighting Vehicles, 15x Bushmaster Protected Mobility Vehicles, 25x Mercedes-Benz G-Wagon 6x6s, 10x RMMV HX77s | Brisbane |  |
3rd Health Battalion
| 400x Regular Personnel, 10x Boxer Armoured Fighting Vehicles, 15x Bushmaster Protected Mobility Vehicles, 25x Mercedes-Benz G-Wagon 6x6s, 10x RMMV HX77s | Adelaide |  |
4th Health Battalion
| 400x Regular Personnel, 10x Boxer Armoured Fighting Vehicles, 15x Bushmaster Protected Mobility Vehicles, 25x Mercedes-Benz G-Wagon 6x6s, 10x RMMV HX77s | Townsville |  |
1st Psychology Unit
| 250x Regular Personnel, 20x Mercedes-Benz G-Wagon 6x6s | Sydney |  |
 |
| Allegiance: | HM Queen Elizabeth II |
| Headquarters: | Lavarack Barracks, Townsville |
| Commander: | Brigadier John Caligari |
| Motto: | "Duty First" |
| Patch: |  |
| Unit: | Size: | Base: | Patch: |
|---|---|---|---|
3rd/4th Cavalry Regiment ("Stingers")
| 1,000x Regular Personnel, 80x AS21 Redbacks | Townsville |  |
1st Battalion, Royal Australian Regiment (Amphibious) ("Big Blue One")
| 1,000x Regular Personnel, 100x Bushmaster Protected Mobility Vehicles | Townsville |  |
2nd Battalion, Royal Australian Regiment (Amphibious) ("Second to None")
| 1,000x Regular Personnel, 100x Bushmaster Protected Mobility Vehicles | Townsville |  |
3rd Battalion, Royal Australian Regiment (Airborne) ("Old Faithful")
| 1,000x Regular Personnel | Townsville |  |
4th Regiment, Royal Australian Artillery
| 250x Regular Personnel, 20x AS9 Huntsmans, 10x AS10 Armoured Ammunition Resupply Vehicles | Townsville |  |
3rd Combat Engineer Regiment
| 250x Regular Personnel, 10x M1150 Assault Breacher Vehicles, 20x Bushmaster Protected Mobility Vehicles, 30x RMMV HX40Ms, 10x RMMV HX77s | Townsville |  |
3rd Combat Signals Regiment
| 250x Regular Personnel, 20x Mercedes-Benz G-Wagon 6x6s, 30x RMMV HX40Ms | Townsville |  |
3rd Combat Service Support Battalion
| 250x Regular Personnel, 10x Mercedes-Benz G-Wagon 6x6s, 70x RMMV HX40Ms, 50x RMMV HX77s, 10x RMMV HX81s | Townsville |  |
 |
| Allegiance: | HM Queen Elizabeth II |
| Headquarters: | Victoria Barracks, Sydney |
| Commander: | Brigadier Greg Novak |
| Motto: | "Enable the Force, Disable the Foe" |
| Patch: |  |
| Unit: | Size: | Base: | Patch: |
|---|---|---|---|
1st Intelligence Battalion
| 450x Regular Personnel, 30x Mercedes-Benz G-Wagon 4x4s | Sydney |  |
1st Army Survey Regiment
| 250x Regular Personnel, 20x Mercedes-Benz G-Wagon 6x6s | 1st: Brisbane 2nd: Bendigo 7th: Darwin AMD: Bendigo DIOPS: Bendigo |  |
1st Military Police Battalion
| 750x Regular Personnel, 60x Police Cars, 20x Bushmaster Protected Mobility Vehicles | A: Sydney B: Darwin C: Townsville D: Brisbane E: Perth F: Adelaide G: Melbourne H: Seymour I: Wagga Wagga J: Bonegilla |  |
6th Engineer Support Regiment
| 450x Regular Personnel, 20x RMMV HX40Ms, 60x RMMV HX77s, 10x JCB HMEEs, 12x Husky VMMD Mark IIIs | Brisbane |  |
7th Signals Regiment (Electronic Warfare)
| 450x Regular Personnel, 50x Mercedes-Benz G-Wagon 6x6s | Cabarlah |  |
21st Construction Regiment
| 250x Regular Personnel, 20x RMMV HX40Ms, 30x RMMV HX77s | Sydney |  |
22nd Construction Regiment
| 250x Regular Personnel, 20x RMMV HX40Ms, 30x RMMV HX77s | Melbourne |  |
12th/19th Chief Engineer Works
| 150x Regular Personnel, 10x Mercedes-Benz G-Wagon 6x6s | Sydney |  |
2nd/30th Training Group
| 250x Regular Personnel, 10x Bushmaster Protected Mobility Vehicles, 10x Mercedes-Benz G-Wagon 4x4s | Singapore |  |
| Allegiance: | HM Queen Elizabeth II |
| Headquarters: | Gallipoli Barracks, Brisbane |
| Commander: | Brigadier Greg Bilton |
| Motto: | "Cede Nullis" |
| Patch: |  |
| Unit: | Size: | Base: | Patch: |
|---|---|---|---|
2nd/14th Light Horse Regiment (Queensland Mounted Infantry)
| 1,000x Regular Personnel, 80x Boxer Armoured Fighting Vehicles | Brisbane |  |
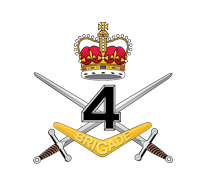
4th Battalion, Royal Australian Regiment ("The Fighting Fourth")
| 1,000x Regular Personnel, 100x Bushmaster Protected Mobility Vehicles | Brisbane |  |
6th Battalion, Royal Australian Regiment ("Bluedog")
| 1,000x Regular Personnel, 100x Bushmaster Protected Mobility Vehicles | Brisbane |  |
8th/9th Battalion, Royal Australian Regiment ("The Guards of Queensland")
| 1,000x Regular Personnel, 100x Bushmaster Protected Mobility Vehicles | Brisbane |  |
1st Regiment, Royal Australian Artillery
| 250x Regular Personnel, 20x AS9 Huntsmans, 10x AS10 Armoured Ammunition Resupply Vehicles | Brisbane |  |
2nd Combat Engineer Regiment
| 250x Regular Personnel, 10x M1150 Assault Breacher Vehicles, 20x Bushmaster Protected Mobility Vehicles, 30x RMMV HX40Ms, 10x RMMV HX77s | Brisbane |  |
7th Combat Signals Regiment
| 250x Regular Personnel, 20x Mercedes-Benz G-Wagon 6x6s, 30x RMMV HX40Ms | Brisbane |  |
7th Combat Service Support Battalion
| 250x Regular Personnel, 10x Mercedes-Benz G-Wagon 6x6s, 70x RMMV HX40Ms, 50x RMMV HX77s, 10x RMMV HX81s | Brisbane |  |
.png) . |
| Allegiance: | HM Queen Elizabeth II |
| Headquarters: | RAAF Base Edinburgh, Adelaide |
| Commander: | Brigadier Scott Winter |
| Motto: | "Ubique" |
| Patch: |  |
| Unit: | Size: | Base: | Patch: |
|---|---|---|---|
| 14th Missile Regiment, Royal Australian Artillery | 300x Regular Personnel, 42x M142 HIMARS, 80x RMMV HX40Ms | Adelaide | |
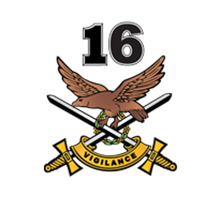
16th Air Land Regiment, Royal Australian Artillery
| 300x Regular Personnel, 6x NASAMS 2, 60x RMMV HX40Ms | Woodside |  |
106th Coast Regiment, Royal Australian Artillery
| 100x Regular Personnel, 20x RMMV HX40Ms | Sydney | |
109th Coast Regiment, Royal Australian Artillery
| 90x Regular Personnel, 20x RMMV HX40Ms | Perth | |
108th Coast Regiment, Royal Australian Artillery
| 50x Regular Personnel, 10x RMMV HX40Ms | Brisbane | |
111th Coast Regiment, Royal Australian Artillery
| 50x Regular Personnel, 10x RMMV HX40Ms | Portsea | |
112th Coast Regiment, Royal Australian Artillery
| 50x Regular Personnel, 10x RMMV HX40Ms | Thursday Island | |
113th Coast Regiment, Royal Australian Artillery
| 40x Regular Personnel, 10x RMMV HX40Ms | Darwin | |
115th Coast Regiment, Royal Australian Artillery
| 40x Regular Personnel, 10x RMMV HX40Ms | Newcastle | |
114th Coast Regiment, Royal Australian Artillery
| 40x Regular Personnel, 10x RMMV HX40Ms | Townsville | |
116th Coast Regiment, Royal Australian Artillery
| 30x Regular Personnel, 5x RMMV HX40Ms | Wollongong | |
107th Coast Regiment, Royal Australian Artillery
| 20x Regular Personnel, 5x RMMV HX40Ms | Hobart | |
118th Coast Regiment, Royal Australian Artillery
| 10x Regular Personnel, 4x RMMV HX40Ms | Cairns | |
110th Coast Regiment, Royal Australian Artillery
| 10x Regular Personnel, 4x RMMV HX40Ms | Adelaide | |
120th Coast Regiment, Royal Australian Artillery
| 10x Regular Personnel, 4x RMMV HX40Ms | Whyalla | |
117th Coast Regiment, Royal Australian Artillery
| 10x Regular Personnel, 4x RMMV HX40Ms | Albany | |
119th Coast Regiment, Royal Australian Artillery
| 10x Regular Personnel, 4x RMMV HX40Ms | Geraldton |
 |
| Allegiance: | HM Queen Elizabeth II |
| Headquarters: | Randwick Barracks, Sydney |
| Commander: | Brigadier David Mulhall |
| Motto: | "Unity, Strength, Commitment" |
| Patch: |  |
| Unit: | Size: | Base: | Patch: |
|---|---|---|---|
2nd Force Support Battalion
| 700x Regular Personnel, 6x M1074 Joint Assault Bridge Systems, 100x RMMV HX40Ms, 170x RMMV HX77s, 25x RMMV HX81s | Hobart 15th: Horsham |  |
9th Force Support Battalion
| 700x Regular Personnel, 6x M1074 Joint Assault Bridge Systems, 100x RMMV HX40Ms, 170x RMMV HX77s, 25x RMMV HX81s | Brisbane 176th: RAAF Base Richmond |  |
10th Force Support Battalion
| 700x Regular Personnel, 6x M1074 Joint Assault Bridge Systems, 100x RMMV HX40Ms, 170x RMMV HX77s, 15x LCM-8 Landing Craft Mechanised, 15x LARC-Vs | Townsville |  |
| Allegiance: | HM Queen Elizabeth II |
| Headquarters: | Randwick Barracks, Sydney |
| Commander: | Major General Kathryn Campbell |
| Patch: |  |
| Unit: | Size: | Base: | Patch: |
|---|---|---|---|
Headquarters, 2nd (Australian) Division and 2nd Signals Regiment
| 250x Regular Personnel, 10x Boxer Armoured Fighting Vehicles, 10x Mercedes-Benz G-Wagon 4x4s, 10x Mercedes-Benz G-Wagon 6x6s | Sydney |  |
 |
| Allegiance: | HM Queen Elizabeth II |
| Headquarters: | Larrakeyah Barracks, Darwin |
| Commander: | Colonel John Papalitsas |
| Motto: | "Ever Vigilant" |
| Unit: | Size: | Base: | Patch: |
|---|---|---|---|
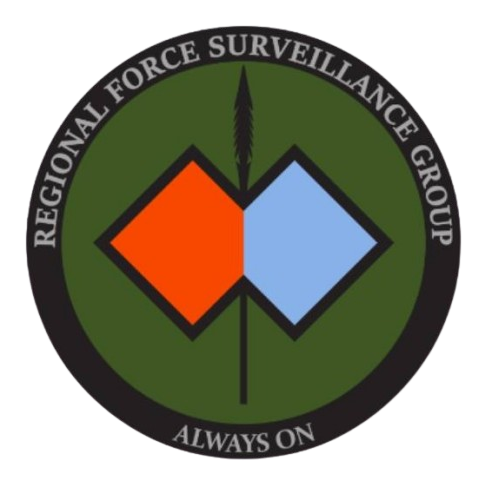
North-West Mobile Force (NORFORCE)
| 500x Regular Personnel, 30x Bushmaster Protected Mobility Vehicles, 30x Mercedes-Benz G-Wagon 6x6s | Darwin Arnhem: Nhulunbuy Centre: Alice Springs Kimberley: Broome |  |
Pilbara Regiment
| 500x Regular Personnel, 30x Bushmaster Protected Mobility Vehicles, 30x Mercedes-Benz G-Wagon 6x6s | 1st: Karratha 2nd: Port Hedland 3rd: Tom Price 4th: Newman |  |
51st Battalion, Far North Queensland Regiment
| 500x Regular Personnel, 30x Bushmaster Protected Mobility Vehicles, 30x Mercedes-Benz G-Wagon 6x6s | A: Cairns B: Weipa C: Thursday Island D: Mount Isa |  |
 |
| Allegiance: | HM Queen Elizabeth II |
| Headquarters: | Simpson Barracks, Melbourne |
| Commander: | Brigadier Michelle Campbell |
| Patch: |  |
| Unit: | Size: | Base: | Patch: |
|---|---|---|---|
4th/19th Prince of Wales' Light Horse Regiment (Victorian Mounted Rifles)
| 1,000x Reserve Personnel, 80x AS21 Redbacks | Melbourne B: Geelong D: Sale |  |
5th/6th Battalion, Royal Victoria Regiment (Royal Melbourne Regiment)
| 1,000x Reserve Personnel, 80x Mercedes-Benz G-Wagon 4x4s | Melbourne |  |
7th/8th Battalion, Royal Victoria Regiment (Victorian Scottish Regiment)
| 1,000x Reserve Personnel, 80x Mercedes-Benz G-Wagon 4x4s | A: Ballarat B: Warrnambool C: Horsham D: Colac |  |
38th/59th Battalion, Royal Victoria Regiment (Northern Victorian Regiment)
| 1,000x Reserve Personnel, 80x Mercedes-Benz G-Wagon 4x4s | Bendigo D: Kyneton |  |
2nd/10th Regiment, Royal Australian Artillery (Hume Regiment)
| 250x Reserve Personnel, 20x M777 Howitzers, 40x RMMV HX40Ms | Shepparton 133: Melbourne 134: Stawell |  |
4th Combat Engineer Regiment (Melbourne Rifles)
| 250x Reserve Personnel, 10x Bushmaster Protected Mobility Vehicles, 30x RMMV HX40Ms, 10x RMMV HX77s | Melbourne 11th: Moe 12th: Bairnsdale |  |
4th Combat Signals Regiment (North Western Victorian Regiment)
| 250x Reserve Personnel, 20x Mercedes-Benz G-Wagon 6x6s, 30x RMMV HX40Ms | 107th: Mildura 108th: Swan Hill |  |
4th Combat Service Support Battalion
| 250x Reserve Personnel, 10x Mercedes-Benz G-Wagon 6x6s, 70x RMMV HX40Ms, 50x RMMV HX77s, 10x RMMV HX81s | Melbourne |  |
 |
| Allegiance: | HM Queen Elizabeth II |
| Headquarters: | Timor Barracks, Sydney |
| Commander: | Brigadier Michael Garraway |
| Patch: |  |
| Unit: | Size: | Base: | Patch: |
|---|---|---|---|
1st/15th Royal New South Wales Lancers
| 1,000x Reserve Personnel, 80x AS21 Redbacks | Sydney |  |
1st/19th Battalion, Royal New South Wales Regiment (Riverina Regiment)
| 1,000x Reserve Personnel, 80x Mercedes-Benz G-Wagon 4x4s | Wagga Wagga C: Canberra |  |
3rd/4th Battalion, Royal New South Wales Regiment (City of Sydney's Own Regiment)
| 1,000x Reserve Personnel, 80x Mercedes-Benz G-Wagon 4x4s | Sydney |  |
34th Battalion, Royal New South Wales Regiment (Illawarra Regiment)
| 1,000x Reserve Personnel, 80x Mercedes-Benz G-Wagon 4x4s | Wollongong |  |
23rd Regiment, Royal Australian Artillery (New South Wales Scottish Regiment)
| 250x Reserve Personnel, 20x M777 Howitzers, 40x RMMV HX40Ms | Orange 137: Bathurst |  |
5th Combat Engineer Regiment (St. George Regiment)
| 250x Reserve Personnel, 10x Bushmaster Protected Mobility Vehicles, 30x RMMV HX40Ms, 10x RMMV HX77s | Sydney 13: Canberra |  |
5th Combat Signals Regiment (North Shore Regiment)
| 250x Reserve Personnel, 20x Mercedes-Benz G-Wagon 6x6s, 30x RMMV HX40Ms | Sydney |  |
5th Combat Service Support Battalion
| 250x Reserve Personnel, 10x Mercedes-Benz G-Wagon 6x6s, 70x RMMV HX40Ms, 50x RMMV HX77s, 10x RMMV HX81s | Sydney |  |
 |
| Allegiance: | HM Queen Elizabeth II |
| Headquarters: | Bullecourt Barracks, Newcastle |
| Commander: | Brigadier Bill Cowham |
| Patch: |  |
| Unit: | Size: | Base: | Patch: |
|---|---|---|---|
12th/16th Hunter River Lancers
| 1,000x Reserve Personnel, 80x AS21 Redbacks | Newcastle C: Muswellbrook |  |
2nd Battalion, Royal New South Wales Regiment (City of Newcastle Regiment)
| 1,000x Reserve Personnel, 80x Mercedes-Benz G-Wagon 4x4s | Newcastle C: Central Coast |  |
17th Battalion, Royal New South Wales Regiment (Macquarie Regiment)
| 1,000x Reserve Personnel, 80x Mercedes-Benz G-Wagon 4x4s | A: Port Macquarie B: Kempsey C: Coffs Harbour D: Taree |  |
41st Battalion, Royal New South Wales Regiment (Byron Scottish Regiment)
| 1,000x Reserve Personnel, 80x Mercedes-Benz G-Wagon 4x4s | Lismore C: Tweed Heads D: Grafton |  |
7th Regiment, Royal Australian Artillery (New England Regiment)
| 250x Reserve Personnel, 20x M777 Howitzers, 40x RMMV HX40Ms | Tamworth 141: Armidale |  |
8th Combat Engineer Regiment (Australian Rifles)
| 250x Reserve Personnel, 10x Bushmaster Protected Mobility Vehicles, 30x RMMV HX40Ms, 10x RMMV HX77s | Dubbo |  |
8th Combat Signals Regiment (Maitland Regiment)
| 250x Reserve Personnel, 20x Mercedes-Benz G-Wagon 6x6s, 30x RMMV HX40Ms | Maitland |  |
8th Combat Service Support Battalion
| 250x Reserve Personnel, 10x Mercedes-Benz G-Wagon 6x6s, 70x RMMV HX40Ms, 50x RMMV HX77s, 10x RMMV HX81s | Newcastle |  |
 |
| Allegiance: | HM Queen Elizabeth II |
| Headquarters: | Keswick Barracks, Adelaide |
| Commander: | Brigadier Steven Smith |
| Patch: |  |
| Unit: | Size: | Base: | Patch: |
|---|---|---|---|
3rd/9th Light Horse Regiment (South Australian Mounted Rifles)
| 1,000x Reserve Personnel, 80x AS21 Redbacks | Adelaide |  |
10th Battalion, Royal South Australia Regiment (Adelaide Rifles)
| 1,000x Reserve Personnel, 80x Mercedes-Benz G-Wagon 4x4s | Adelaide C: Port Pirie D: Port Lincoln |  |
27th Battalion, Royal South Australia Regiment (South Australia Scottish Regiment)
| 1,000x Reserve Personnel, 80x Mercedes-Benz G-Wagon 4x4s | Mount Gambier B: Berri |  |
12th/40th Battalion, Royal Tasmania Regiment (Derwent Regiment)
| 1,000x Reserve Personnel, 80x Mercedes-Benz G-Wagon 4x4s | Hobart C: Burnie D: Launceston |  |
16th Field Battery, Royal Australian Artillery (Launceston Regiment)
| 125x Reserve Personnel, 10x M777 Howitzers, 20x RMMV HX40Ms | Launceston |  |
48th Field Battery, Royal Australian Artillery (Hindmarsh Regiment)
| 125x Reserve Personnel, 10x M777 Howitzers, 20x RMMV HX40Ms | Whyalla |  |
9th Combat Engineer Regiment (Tasmanian Rangers)
| 250x Reserve Personnel, 10x Bushmaster Protected Mobility Vehicles, 30x RMMV HX40Ms, 10x RMMV HX77s | Devonport |  |
9th Combat Signals Regiment (Torrens Regiment)
| 250x Reserve Personnel, 20x Mercedes-Benz G-Wagon 6x6s, 30x RMMV HX40Ms | Adelaide |  |
9th Combat Service Support Battalion
| 250x Reserve Personnel, 10x Mercedes-Benz G-Wagon 6x6s, 70x RMMV HX40Ms, 50x RMMV HX77s, 10x RMMV HX81s | Adelaide LSE Tasmania: Hobart |  |
 |
| Allegiance: | HM Queen Elizabeth II |
| Headquarters: | Lavarack Barracks, Townsville |
| Commander: | Brigadier Bill Date |
| Patch: |  |
| Unit: | Size: | Base: | Patch: |
|---|---|---|---|
9th Battalion, Royal Queensland Regiment (Moreton Regiment)
| 1,000x Reserve Personnel, 80x Mercedes-Benz G-Wagon 4x4s | Brisbane |  |
25th/49th Battalion, Royal Queensland Regiment (Darling Downs Regiment)
| 1,000x Reserve Personnel, 80x Mercedes-Benz G-Wagon 4x4s | A: Toowoomba B: Dalby C: Roma D: Warwick |  |
31st Battalion, Royal Queensland Regiment (Kennedy Regiment)
| 1,000x Reserve Personnel, 80x Mercedes-Benz G-Wagon 4x4s | Townsville D: Cairns |  |
42nd Battalion, Royal Queensland Regiment (Capricornia Regiment)
| 1,000x Reserve Personnel, 80x Mercedes-Benz G-Wagon 4x4s | Rockhampton B: Gladstone |  |
5th/11th Regiment, Royal Australian Artillery (Wide Bay Regiment)
| 250x Reserve Personnel, 20x M777 Howitzers, 40x RMMV HX40Ms | Bundaberg 148: Maryborough 150: Gympie |  |
11th Combat Engineer Regiment (Oxley Regiment)
| 250x Reserve Personnel, 10x Bushmaster Protected Mobility Vehicles, 30x RMMV HX40Ms, 10x RMMV HX77s | Gold Coast 31: Stanthorpe 32: Gatton |  |
11th Combat Signals Regiment (Stanley Regiment)
| 250x Reserve Personnel, 20x Mercedes-Benz G-Wagon 6x6s, 30x RMMV HX40Ms | 106: Sunshine Coast 141: Wondai |  |
11th Combat Service Support Battalion
| 250x Reserve Personnel, 10x Mercedes-Benz G-Wagon 6x6s, 70x RMMV HX40Ms, 50x RMMV HX77s, 10x RMMV HX81s | Townsville |  |
| Allegiance: | HM Queen Elizabeth II |
| Headquarters: | Irwin Barracks, Perth |
| Commander: | Brigadier Brett Chaloner |
| Patch: |  |
| Unit: | Size: | Base: | Patch: |
|---|---|---|---|
10th Light Horse Regiment (Western Australian Mounted Infantry)
| 1,000x Reserve Personnel, 80x AS21 Redbacks | Perth C: Northam |  |
11th Battalion, Royal Western Australia Regiment (City of Perth Regiment)
| 1,000x Reserve Personnel, 80x Mercedes-Benz G-Wagon 4x4s | Perth |  |
16th Battalion, Royal Western Australia Regiment (Cameron Highlanders of Western Australia)
| 1,000x Reserve Personnel, 80x Mercedes-Benz G-Wagon 4x4s | Geraldton C: Carnarvon |  |
28th Battalion, Royal Western Australia Regiment (Western Australian Rifles)
| 1,000x Reserve Personnel, 80x Mercedes-Benz G-Wagon 4x4s | Albany A: Katanning B: Bunbury |  |
3rd Regiment, Royal Australian Artillery (Fremantle Regiment)
| 250x Reserve Personnel, 20x M777 Howitzers, 40x RMMV HX40Ms | Perth |  |
13th Combat Engineer Regiment (Goldfields Regiment)
| 250x Reserve Personnel, 10x Bushmaster Protected Mobility Vehicles, 30x RMMV HX40Ms, 10x RMMV HX77s | Kalgoorlie |  |
13th Combat Signals Regiment (Swan Regiment)
| 250x Reserve Personnel, 20x Mercedes-Benz G-Wagon 6x6s, 30x RMMV HX40Ms | Perth |  |
13th Combat Service Support Battalion
| 250x Reserve Personnel, 10x Mercedes-Benz G-Wagon 6x6s, 70x RMMV HX40Ms, 50x RMMV HX77s, 10x RMMV HX81s | Perth |  |
 |
| Allegiance: | HM Queen Elizabeth II |
| Headquarters: | Victoria Barracks, Melbourne |
| Commander: | Major General Simon Stuart |
| Patch: |  |
 |
| Allegiance: | HM Queen Elizabeth II |
| Headquarters: | Royal Military College, Duntroon |
| Commander: | Brigadier Andrew Moss |
| Unit: | Size: | Base: | Crest: |
|---|---|---|---|
Army Recruit Training Centre
| 200x Regular Personnel | Wagga Wagga |  |
 |
| Allegiance: | HM Queen Elizabeth II |
| Headquarters: | Royal Military College, Duntroon |
| Commander: | Brigadier Mark Bornholt |
| Motto: | "Doctrina vim promovet" |
| Patch: |  |
| Unit: | Size: | Base: | Patch: |
|---|---|---|---|
Corps of Staff Cadets
| 150x Regular Personnel | Canberra | |
Melbourne University Regiment
| 50x Regular Personnel | Melbourne |  |
| Monash University Regiment | 50x Regular Personnel | Melbourne |  |
Queensland University Regiment
| 50x Regular Personnel | Brisbane |  |
| University of New South Wales Regiment | 50x Regular Personnel | Sydney |  |
Sydney University Regiment
| 50x Regular Personnel | Sydney |  |
Adelaide Universities Regiment
| 50x Regular Personnel | Adelaide |  |
| Western Australia University Regiment | 50x Regular Personnel | Perth |  |
 |
| Allegiance: | HM Queen Elizabeth II |
| Headquarters: | Tobruk Barracks, Seymour |
| Commander: | Colonel Patrick Davison |
| Motto: | "To Lead, To Train, To Win" |
| Unit: | Size: | Base: |
|---|---|---|
| School of Infantry | 150x Regular Personnel | Seymour |
| School of Armour | 150x Regular Personnel | Seymour |
| School of Artillery | 150x Regular Personnel | Seymour |
| School of Military Engineering | 150x Regular Personnel | Sydney |
 |
| Allegiance: | HM Queen Elizabeth II |
| Headquarters: | Kokoda Barracks, Canungra |
| Commander: | Colonel Alex MacDonald |
| Motto: | "Know yourself, know your enemy, know your environment" |
| Patch: |  |
| Unit: | Size: | Base: |
|---|---|---|
| New South Wales Regional Wing | 50x Regular Personnel | Sydney |
| Victorian Regional Wing | 50x Regular Personnel | Melbourne |
| South Queensland Regional Wing | 50x Regular Personnel | Canungra |
| North Queensland Regional Wing | 50x Regular Personnel | Townsville |
| Western Australian Regional Wing | 50x Regular Personnel | Perth |
| South Australian Regional Wing | 50x Regular Personnel | Adelaide |
| Tasmanian Regional Wing | 50x Regular Personnel | Hobart |
| Northern Territory Regional Wing | 50x Regular Personnel | Darwin |
 |
| Allegiance: | HM Queen Elizabeth II |
| Headquarters: | Latchford Barracks, Bonegilla |
| Commander: | Colonel Jim Matchett |
| Motto: | "Excel with Honour" |
| Unit: | Size: | Base: |
|---|---|---|
| School of Electrical and Mechanical Engineering | 100x Regular Personnel | Bandiana |
| School of Ordnance | 100x Regular Personnel | Bandiana |
| School of Catering | 100x Regular Personnel | Bandiana |
| School of Transport | 100x Regular Personnel | Bonegilla |
| School of Army Health | 100x Regular Personnel | Portsea |
School of Signals
| 100x Regular Personnel | Melbourne EWW: Cabarlah |
| School of Military Intelligence | 50x Regular Personnel | Canungra |
| School of Military Survey | 50x Regular Personnel | Mount Martha |
| School of Music | 50x Regular Personnel | Melbourne |
 |
| Allegiance: | HM Queen Elizabeth II |
| Headquarters: | Lone Pine Barracks, Singleton |
| Commander: | Colonel Sean Parkes |
| Motto: | "Knowledge Dispels Fear" |
| Unit: | Size: | Base: | Crest: | Patch: |
|---|---|---|---|---|
| Australian Defence Force School of Special Operations | 150x Special Forces | Singleton |  |  |
Australian Defence Force Parachuting School
| 50x Special Forces, 2x CASA C-212 Aviocars | HMAS Albatross |  |
 |
| Allegiance: | HM Queen Elizabeth II |
| Headquarters: | Lavarack Barracks, Townsville |
| Commander: | Colonel Benjamin McLennan |
| Motto: | "Know yourself, know your enemy, know your environment" |
| Unit: | Size: | Base: |
|---|---|---|
| Combat Training Centre - Live | 50x Regular Personnel | Townsville |
| Combat Training Centre - Battle Command | 50x Regular Personnel | Townsville |
| Combat Training Centre - Jungle Training Wing | 40x Regular Personnel | Tully |
 |
| Allegiance: | HM Queen Elizabeth II |
| Headquarters: | Oakey Army Aviation Centre, Oakey |
| Commander: | Major General David Hafner |
| Roundel: |  |
| Unit: | Size: | Base: | Crest: |
|---|---|---|---|
| Army Aviation Training Centre | 150x Regular Personnel | Oakey Army Aviation Centre |  |
20th Surveillance and Target Acquisition Regiment, Royal Australian Artillery
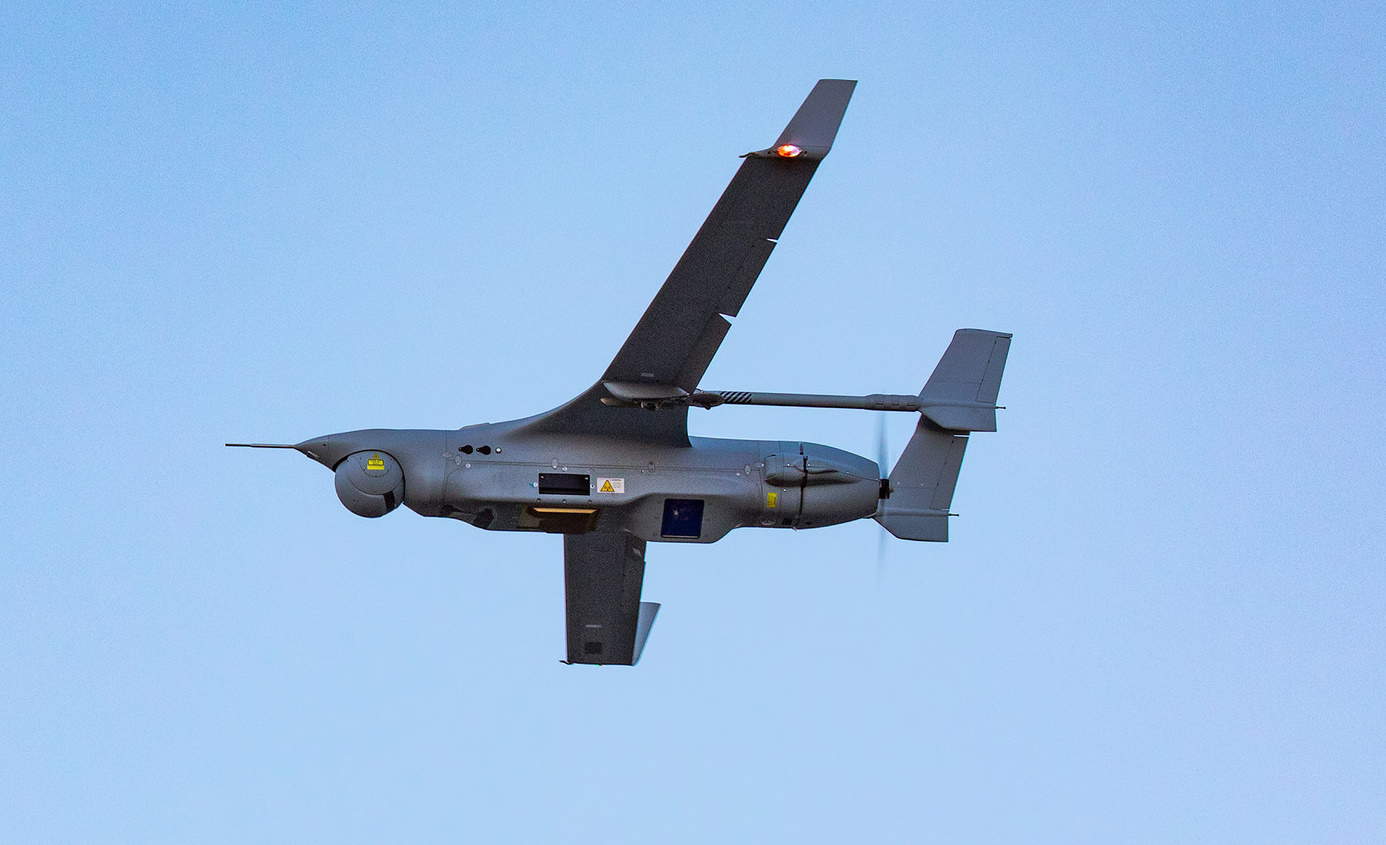
| 250x Regular Personnel, 24x Boeing Insitu RQ-21 Blackjacks, 40x RMMV HX40Ms | Brisbane |  |
 |
| Allegiance: | HM Queen Elizabeth II |
| Headquarters: | Gallipoli Barracks, Brisbane |
| Commander: | Brigadier Fern Thompson |
| Motto: | "Vigilance" |
| Patch: | |
 |
| Allegiance: | HM Queen Elizabeth II |
| Headquarters: | Robertson Barracks, Darwin |
| Commander: | Lieutenant Colonel Dean Thompson |
| Motto: | "Alert" |
| Patch: |  |
| Unit: | Size: | Base: |
|---|---|---|
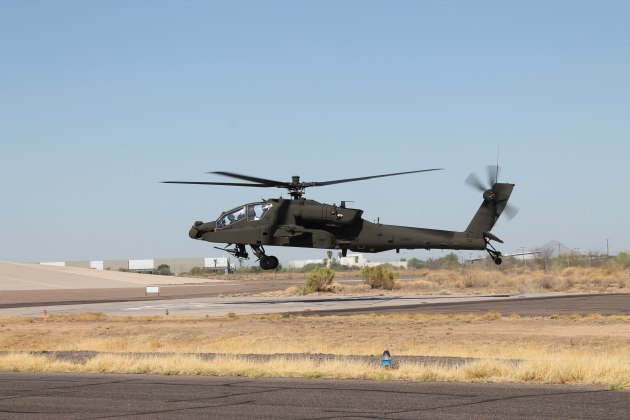
161st Reconnaissance Squadron
| 150x Regular Personnel, 15x Boeing AH-64E Apache Guardians | Darwin |
162nd Reconnaissance Squadron
| 150x Regular Personnel, 15x Boeing AH-64E Apache Guardians | Darwin |
173rd Surveillance Squadron
| 150x Regular Personnel, 24x GAF Nomad N24As | RAAF Base Darwin |
| Technical Support Squadron | 100x Regular Personnel | Darwin |
| Logistic Support Squadron | 100x Regular Personnel, 5x RMMV HX81s, 30x RMMV HX40Ms | Darwin |
 |
| Allegiance: | HM Queen Elizabeth II |
| Headquarters: | RAAF Base Townsville, Townsville |
| Commander: | Lieutenant Colonel Kim Gilfillan |
| Motto: | "Bold" |
| Patch: |  |
| Unit: | Size: | Base: |
|---|---|---|
A Squadron
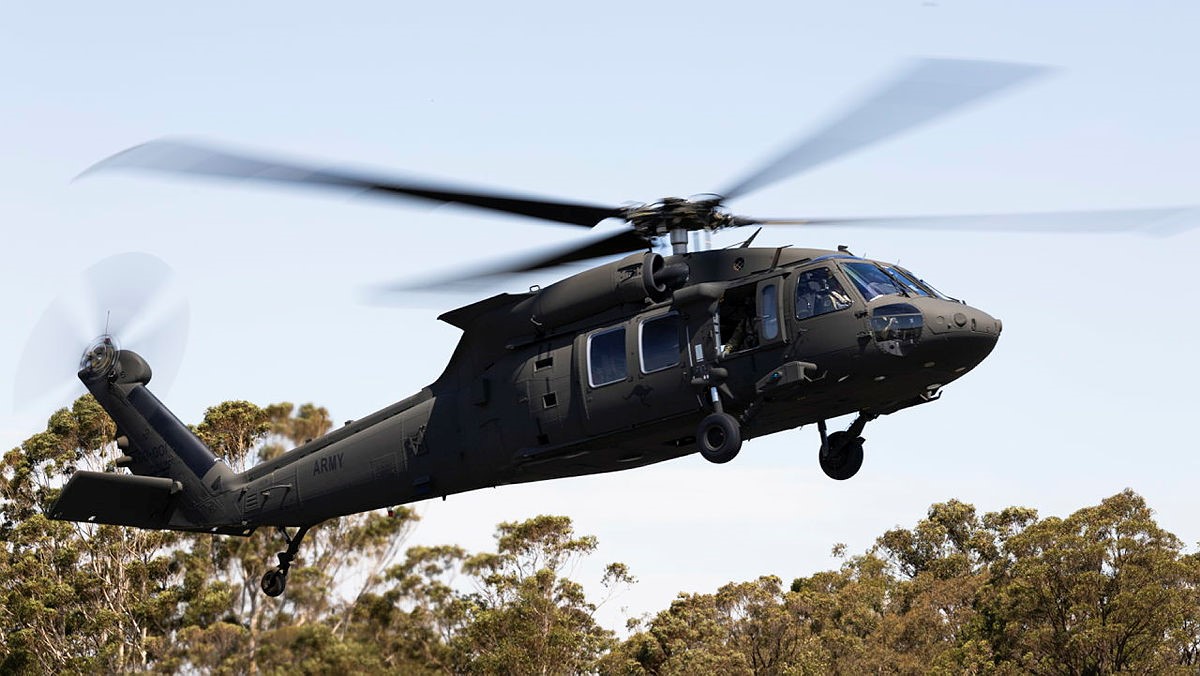
| 100x Regular Personnel, 10x Sikorsky UH-60M Black Hawks | RAAF Base Townsville |
B Squadron
| 100x Regular Personnel, 10x Sikorsky UH-60M Black Hawks | RAAF Base Townsville |
C Squadron
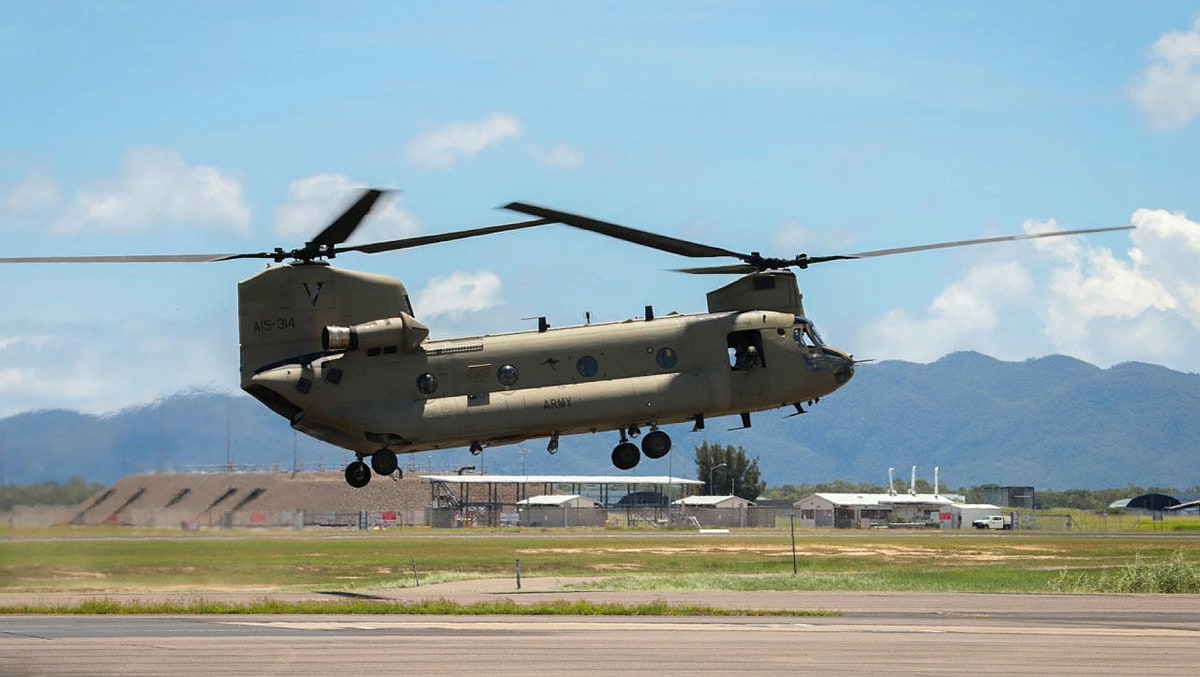
| 150x Regular Personnel, 14x Boeing CH-47F Chinooks | RAAF Base Townsville |
| Technical Support Squadron | 100x Regular Personnel | RAAF Base Townsville |
| Logistic Support Squadron | 100x Regular Personnel, 5x RMMV HX81s, 30x RMMV HX40Ms | RAAF Base Townsville |
 |
| Allegiance: | HM Queen Elizabeth II |
| Headquarters: | Holsworthy Barracks, Sydney |
| Commander: | Lieutenant Colonel Stephen Jobson |
| Motto: | "Valour" |
| Patch: |  |
| Unit: | Size: | Base: |
|---|---|---|
| 171st Special Operations Aviation Squadron | 100x Regular Personnel, 10x Sikorsky UH-60M Black Hawks | Sydney |
| 172nd Special Operations Aviation Squadron | 100x Regular Personnel, 10x Sikorsky UH-60M Black Hawks | Sydney |
| Support Squadron | 50x Regular Personnel, 20x RMMV HX40Ms | Sydney |
| Allegiance: | HM Queen Elizabeth II |
| Headquarters: | General John Baker Complex, Bungendore |
| Commander: | Major General Gus Gilmore |
| Motto: | "Acies Acuta" |
| Patch: |  |
| Allegiance: | HM Queen Elizabeth II |
| Headquarters: | Holsworthy Barracks, Sydney |
| Commander: | Brigadier Craig Shortt |
| Motto: | "Silent Warrior" |
| Unit: | Size (CLASSIFIED): | Base: | Crest: | Patch: |
|---|---|---|---|---|
Special Operations Engineer Regiment
| 250x Special Forces, 10x Mercedes-Benz G-Wagon 6x6s, 10x RMMV HX77s, 10x RMMV HX40Ms | Sydney | 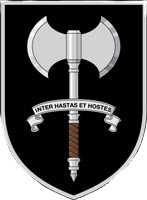 |  |
Special Operations Logistics Squadron
| 150x Special Forces, 20x RMMV HX77s, 20x RMMV HX40Ms | Sydney |  |
 |
| Allegiance: | HM Queen Elizabeth II |
| Headquarters: | Campbell Barracks, Perth |
| Commander: | Colonel Jeff Sengelman |
| Motto: | "Who Dares Wins" |
| Patch: |  |
| Unit: | Size (CLASSIFIED): | Base: |
|---|---|---|
1st Squadron (Counter-Terrorism/Special Recovery)
| 150x Special Forces, 10x HMT Extendas | Perth |
2nd Squadron (Warfighting/Reconnaissance)
| 150x Special Forces, 10x HMT Extendas | Perth |
3rd Squadron (Warfighting/Reconnaissance)
| 150x Special Forces, 10x HMT Extendas | Perth |
4th Squadron (Special Reconnaissance)
| 150x Special Forces, 10x HMT Extendas | Perth |
152nd Signals Squadron
| 100x Special Forces, 20x Mercedes-Benz G-Wagon 6x6s | Perth |
| Specialist Support Squadron | 50x Special Forces | Perth |
| Operational Support Squadron | 50x Special Forces | Perth |
 |
| Allegiance: | HM Queen Elizabeth II |
| Headquarters: | Fort Gellibrand, Melbourne |
| Commander: | Colonel Garth Gould |
| Motto: | "Strike Swiftly" |
| Patch: |  |
| Unit: | Size (CLASSIFIED): | Base: |
|---|---|---|
1st Commando Company
| 250x Special Forces, 30x Mercedes-Benz G-Wagon 6x6s | Canberra |
2nd Commando Company
| 250x Special Forces, 30x Mercedes-Benz G-Wagon 6x6s | Melbourne |
301st Signals Squadron
| 100x Special Forces, 10x Mercedes-Benz G-Wagon 6x6s | Melbourne |
 |
| Allegiance: | HM Queen Elizabeth II |
| Headquarters: | Holsworthy Barracks, Sydney |
| Commander: | Colonel Ian Langford |
| Motto: | "Foras Admonitio" |
| Patch: |  |
| Unit: | Size (CLASSIFIED): | Base: |
|---|---|---|
A Company
| 200x Special Forces, 20x HMT Extendas | Sydney |
B Company
| 200x Special Forces, 20x HMT Extendas | Sydney |
C Company
| 200x Special Forces, 20x HMT Extendas | Sydney |
D Company
| 200x Special Forces, 20x HMT Extendas | Sydney |
126th Signals Squadron
| 100x Special Forces, 20x Mercedes-Benz G-Wagon 6x6s | Sydney |
| Operations Support Company | 50x Special Forces | Sydney |
| Logistics Support Company | 50x Special Forces, 10x RMMV HX77s, 10x RMMV HX40Ms | Sydney |
 |
| Unit: | Description: |
|---|---|
| Special Operations Modernisation Branch | The Australian Defence Force’s (ADF) Special Operations (SO) capability expands military options for Government by generating understanding and insight, influencing and disrupting adversaries, and supporting decisive action. The Special Operations Modernisation (SOMOD) branch are responsible for facilitating delivery of a world-class ADF SO capability that is future ready. To meet this challenge, SOMOD must simultaneously set conditions for future force development, deliver the approved objective force, and maintain the force in being. The modernisation effort is coordinated across three directorates: SO Operations Program Directorate, Directorate of Future Concepts and Experimentation, SO Modernisation, Integration and Innovation; and coordinated with Land and Joint Force capability systems. This ensures SO Command is positioned to take advantage of advances in technology and continuously improve, ahead of our adversaries. |
| Unit: | Description: |
|---|---|
| Land Force Design | Land Force Design (LFD) design the future Land Force in accordance with Joint Force requirements to meet Strategic Defence Objectives. LFD supports Army’s transformation from the Force-in-Being to the Objective Integrated Force through input to the Army Plan. It applies sophisticated conceptual logic to support decision-making in Army Headquarters, and provides Land Domain input to Military Strategic Plans. It also leads Army engagement with Integrated Force Design through the Integrated Capability Assessment process. |
| Australian Army Research Centre | The Australian Army Research Centre (AARC) coordinates research efforts in order to advance the understanding of land power in peace and war. The AARC conducts strategic studies, research and analysis, fosters debate, and advocates the value of the Joint Land Force to Government, academia, and the public. AARC is an advocate for the role of land power, leading research to inform Army’s contribution to Defence and Joint strategy, mentoring Army’s next generation of intellectual talent, and connecting Army with stakeholders and specialists to diversify thinking. |
| Australian Army History Unit | The Australian Army History Unit (AAHU) is tasked with promoting Army’s history and protecting Army’s heritage. AAHU supports Army in meeting command, statutory, and policy responsibilities in history and heritage matters, including the collection, preservation, presentation, and interpretation of Army’s history and cultural heritage as an integral part of the nation’s story. |
| Robotic and Autonomous Systems Implementation and Coordination Office | The Robotic and Autonomous Systems Implementation & Coordination Office (RICO), within the Future Land Warfare Branch, explores advantages available through the application of emerging and disruptive technology. This includes the implementation of Army’s Robotic and Autonomous Systems (RAS) Strategy, the Army Quantum Technology Roadmap, and the Army Power and Energy Paper. The use of technologies on the battlefield is increasing and warfare is evolving in both the physical and virtual sense. To ensure Army and the Force maintain an advantage and can meet future threats, RICO lead the technologically-led conceptual thinking on how Army can operate alongside machines and generate advantage through the application of emerging technology. RICO leverages a connected Army innovation system, responsibly uses emerging and disruptive technology to ensure that Army remain technologically relevant but also gains advantage through the application of advanced techniques. RICO collaborate with a diverse network of academia and industry to advance Army’s thinking and application in artificial intelligence, quantum technology, robotics, autonomous systems, and advanced power and energy solutions. |
| Unit: | Description: |
|---|---|
| Dismounted Combat Program | The Dismounted Combat Program (DCP) is tasked with supporting the development of a credible close combat system as part of the Joint Force. This includes Army, Navy and Air Force. The platform for the Dismounted Combat Program is the dismounted combatant. The program equips the individual with lethality, survivability and situational awareness Capability Elements that are worn or carried by the dismounted combatant. |
| Land Mobility and Support Program | The ability to rapidly move forces and sustain operational efforts are critical to the development of a credible close combat system and the ongoing success of Army operations. The Land Mobility & Support Program (LM&SP) enables the Objective Land Force to move Force Elements and materiel in combat, combat support, and combat service support roles, in accordance with Joint Land Force objectives. LM&SP is responsible for the acquisition and delivery of protected and unprotected landbased mobility fleets and land-based logistics capabilities including Deployable Health, Infrastructure, and Fuel capabilities. |
| Land Training Capability | Simulation based training is vital to ensure Army maintains a credible close combat system. The Directorate of Land Training Capability (DLTC) is responsible for delivering a coherent and effective simulation capability able to support Army. DLTC develops training capability to ensure Army people and teams are connected, protected, lethal, and enabled. DLTC is also responsible for providing advice to other Land projects regarding the design and development of training, simulation, and learning solutions to support their respective capabilities. |
| Land Combat Vehicles Program | The Land Combat Vehicles Program (LCVP) supports the Chief of Army in delivering on Government direction in the context of National Defence, Defence Strategic Review (DSR). Government directed Army "to be optimised for littoral operations in our northern land and maritime spaces and provide a long-range strike capability." |
| Littoral Manoeuvre Program | Government has directed Army be transformed and optimised for littoral operations by sea, land and air from Australia, with enhanced long range fires. Key to this is acceleration and expansion of Army’s littoral manoeuvre vessels, Landing Craft Medium and Heavy which will be synchronised with the delivery of long range fire (land and maritime strike) and infantry fighting vehicles, enabling Army to contribute to the national strategy of denial. The Littoral Manoeuvre Program (LitMP) has been established as a direct response to the Defence Strategic Review and is responsible for delivering Landing Craft Medium, Landing Craft Heavy. The Littoral Manoeuvre Program represents the most significant increase to Army’s littoral capability since World War Two. The expanded Army littoral manoeuvre capability will enable Army to deploy and sustain forces in our region to help deter potential threats. It will also enhance Australia’s capacity to conduct regional partner engagement and humanitarian and disaster relief operations. |
| Unit: | Description: |
|---|---|
| Land Command, Control, Communications, and Computing Program | The Land Command, Control, Communications, and Computing (Land C4) Program is responsible for delivering adaptable, secure, and resilient data and information management systems to enable decision making from domestic tasks through to high-end warfighting in contested environments. The communications capability connects sensors, deciders, and effectors, shares and processes information across systems, and enables battlespace management and awareness to deliver an information advantage to the Integrated Force. The Land C4 Program delivers outcomes through a continuous modernisation methodology that responds to warfighter needs, emerging threats, and technology opportunities. |
| Land Intelligence, Surveillance, Reconnaissance, and Electronic Warfare Program | The Land Intelligence, Surveillance, Reconnaissance, and Electronic Warfare (LISREW) program modernises and sustains capabilities that help create decision advantage or provide electronic protection for the Joint Force in all phases of war. Land ISREW capabilities typically, though not exclusively, focus on supporting deployed forces at the tactical level of war, in the Land Domain. They can be flexibly employed in all types of operation, whether in-garrison or deployed, and can support or contribute to joint, combined or inter-agency operations. |
| Land Combat Support Program | The Land Combat Support Program (LCSP) enhances the Land Force’s ability to fight and manoeuvre, and protects and enables the Combined Arms Fighting System to live, move, and fight as part of the Joint Force. Keeping Army’s people at the centre of program efforts, LCSP delivers capability upgrades across the spectrum of offensive, protective, and defensive elements to ensure Army is prepared, ready, and deployable in a range of operating environments. LCSP manages effects generated across Protected Mobile Fires, Long Range Fires, the inner-tier of Integrated Air & Missile Defence, Military Engineering, and Chemical, Biological, Radiological, and Nuclear Defence (CBRND) capabilities. |
| Directorate of Business ICT Development | The Directorate of Business ICT Development (DBUSICT) provides a range of products and services focused on the current & future requirements of Army’s Digital Capability. This culminates in an improvement in our Digital Governance, Information Management and Business Systems. We support people, preparedness and Land capability systems to be Ready Now, whilst improving Army’s competitive advantage. DBUSICT is currently undergoing necessary enhancements to build Army’s Digital Capability and better support Army in becoming a digitally enabled organisation, effectively balancing capability (Land, People, and Preparedness), risk and costs, to deliver outcomes through the improved utilisation of technology, processes and data. |
| Land Network Integration Centre | Ever evolving, increasingly sophisticated threats and technology advances highlights Army’s critical dependence on integrating the Land Combat System (LCS) to maximise the agility, lethality, and potency of multi-domain military operations. The Land Network Integration Centre (LNIC) supports Land Capability Division (LCD) programs’ digital integration and assures Land Capabilities are integrated by design and optimised into the Joint Force and Coalition partners. Technological complexity across the LCS has increased the need for Army to transition to open architectures and to take a holistic system of systems capability approach. LNIC develops and maintains the Army’s LCS Digital Design, Open Standards and Battle Lab to support LCD’s capability acquisition and sustainment. |
| Army Minors Capability Acquisition Program | The Army Minors Capability Acquisition Program (AMCAP) is one of the primary means for Army to enhance current capability or introduce new capability outside of an IIP program. The AMCAP represents substantial investment by Army in capability development and provides a source from which Army can pursue relatively rapid capability development and enhancement that does not meet the threshold of major capability acquisition. AMCAP also supports Army Innovation Day (AID) and fund selected project proposals for further development. |
Last edited: