

- Jul 2, 2018
- 3,682
 |  |  |
NOTE: New South Wales provides fire and volunteer rescue services to Norfolk Island and the Jervis Bay Territory. New South Wales additionally provides emergency ambulance services to the Jervis Bay Territory. |
 |
| Type: | Amount: | Image: |
|---|---|---|
| Police Officers | 24,000 |  |
| Police Rescue Officers | 110 | 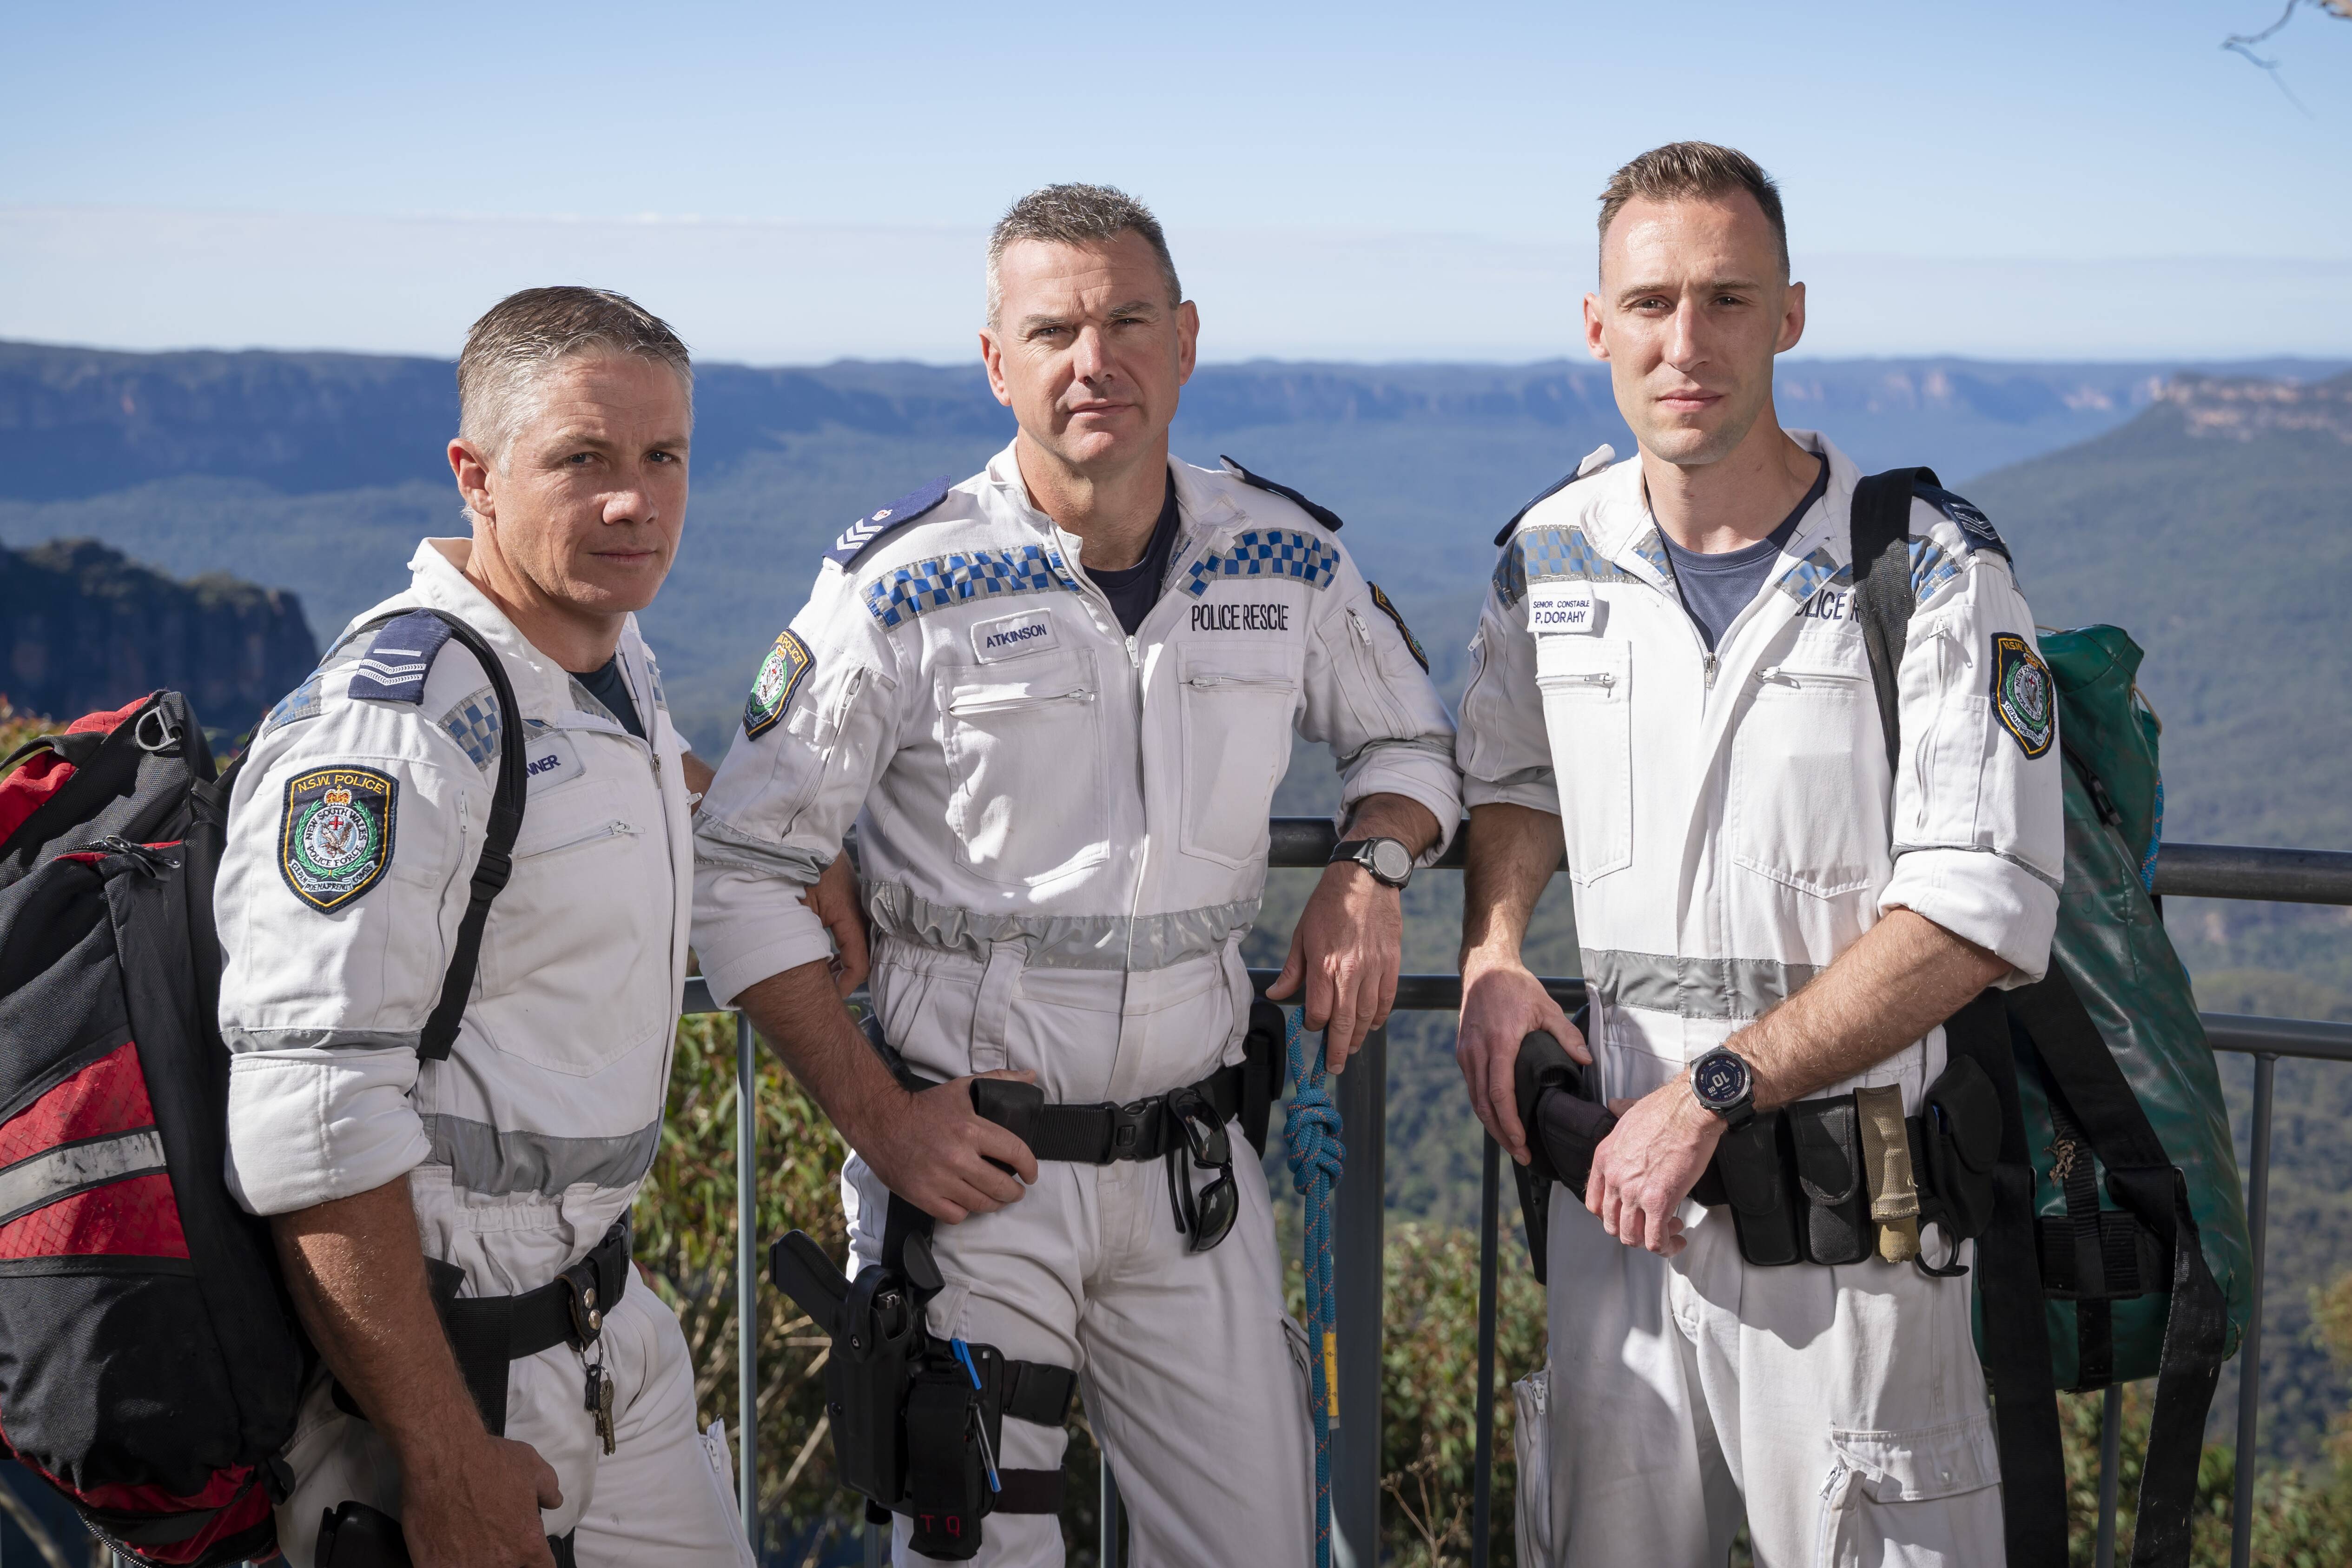 |
| Riot Police Officers | 100 |  |
| Tactical Police Officers | 75 |  |
| Type: | Amount: | Image: |
|---|---|---|
| Police Cars | 3,950 |  |
| Highway Patrol Cars | 700 | 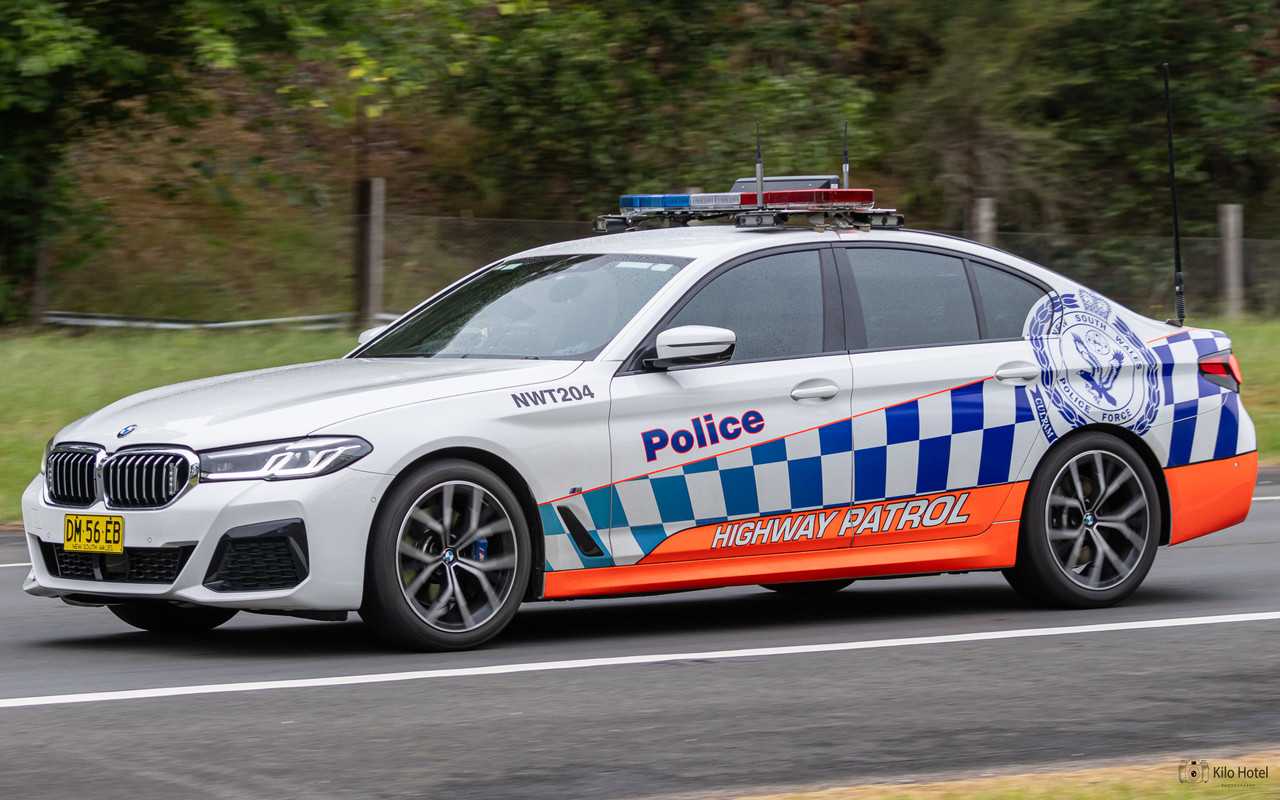 |
| Police Boats | 41 | 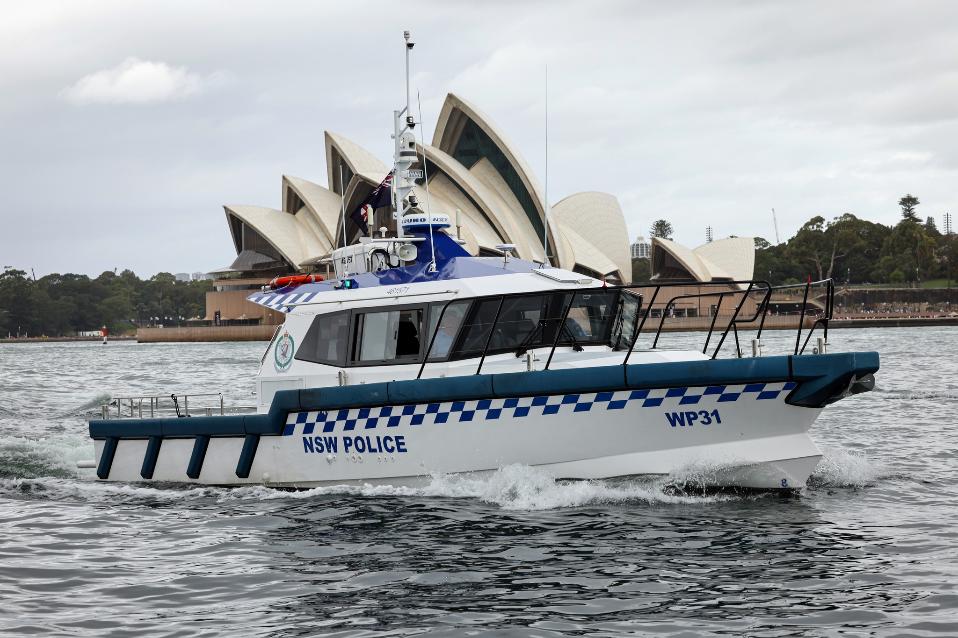 |
| Seagoing Police Boats | 10 |  |
| OPV Nemesis | 1 |  |
| Bell 412 | 3 |  |
| Bell 429 | 3 |  |
| Cessna 208 Caravan | 3 |  |
| Cessna 206 | 1 |  |
| Cessna Citation I | 1 |  |
| Lenco BearCat | 6 |  |
| Emergency Response Vehicles | 30 |  |
| Rescue Trucks | 11 |  |
| Rescue Vans | 2 |  |
| Rescue Vehicles | 22 |  |
| Rapid Public Order Response Vehicles | 15 |  |
| Public Order Response Vans | 5 |  |
| Public Order Water Cannon Vehicle | 1 |  |
| Mobile Command Vehicle | 57 |  |
| Mobile Command Centre | 3 |  |
 |
| Unit: | Size: | Base: | Crest: |
|---|---|---|---|
| New South Wales Police Band | 35x Police Officers | Police Headquarters, Parramatta |  |
| New South Wales Police Pipe Band | 25x Police Officers | Police Headquarters, Parramatta |  |
| New South Wales Police Chaplaincy Branch | 15x Police Officers | Police Headquarters, Parramatta |  |
| Station: | Size: | Location: |
|---|---|---|
| Day Street Police Station | 150x Police Officers, 30x Police Cars, 1x Mobile Command Vehicle | Sydney CBD |
| The Rocks Police Station | 150x Police Officers, 30x Police Cars | The Rocks |
| Station: | Size: | Location: |
|---|---|---|
| Kings Cross Police Station | 150x Police Officers, 30x Police Cars, 1x Mobile Command Vehicle | Elizabeth Bay |
| Woolloomooloo Police Station | 150x Police Officers, 30x Police Cars | Woolloomooloo |
| Station: | Size: | Location: |
|---|---|---|
| Surry Hills Police Station | 150x Police Officers, 30x Police Cars, 1x Mobile Command Vehicle | Surry Hills |
| Station: | Size: | Location: |
|---|---|---|
| Paddington Police Station | 150x Police Officers, 30x Police Cars, 1x Mobile Command Vehicle | Paddington |
| Bondi Police Station | 100x Police Officers, 20x Police Cars | Bondi Beach |
| Rose Bay Police Station | 100x Police Officers, 20x Police Cars | Point Piper |
| Waverley Police Station | 100x Police Officers, 20x Police Cars | Waverley |
| Station: | Size: | Location: |
|---|---|---|
| Maroubra Police Station | 150x Police Officers, 30x Police Cars, 1x Mobile Command Vehicle | Maroubra |
| Randwick Police Station | 150x Police Officers, 30x Police Cars | Randwick |
| Station: | Size: | Location: | Crest: |
|---|---|---|---|
| Airport Police Station | 100x Police Officers, 20x Police Cars | Mascot (Sydney Airport) |  |
| Station: | Size: | Location: |
|---|---|---|
| Redfern Police Station | 150x Police Officers, 30x Police Cars, 1x Mobile Command Vehicle | Redfern |
| Mascot Police Station | 150x Police Officers, 30x Police Cars | Mascot |
| Station: | Size: | Location: |
|---|---|---|
| Newtown Police Station | 150x Police Officers, 30x Police Cars, 1x Mobile Command Vehicle | Newtown |
| Marrickville Police Station | 150x Police Officers, 30x Police Cars | Marrickville |
| Station: | Size: | Location: |
|---|---|---|
| Balmain Police Station | 150x Police Officers, 30x Police Cars, 1x Mobile Command Vehicle | Balmain |
| Glebe Police Station | 150x Police Officers, 30x Police Cars | Glebe |
| Station: | Size: | Location: |
|---|---|---|
| Cronulla Police Station | 150x Police Officers, 30x Police Cars, 1x Mobile Command Vehicle | Cronulla |
| Sutherland Police Station | 150x Police Officers, 30x Police Cars | Sutherland |
| Miranda Police Station | 150x Police Officers, 30x Police Cars | Miranda |
| Station: | Size: | Location: |
|---|---|---|
| St George Police Station | 150x Police Officers, 30x Police Cars, 1x Mobile Command Vehicle | Kogarah |
| Hurstville Police Station | 150x Police Officers, 30x Police Cars | Hurtsville |
| Riverwood Police Station | 150x Police Officers, 30x Police Cars | Riverwood |
| Station: | Size: | Location: |
|---|---|---|
| Parramatta Police Station | 150x Police Officers, 30x Police Cars, 1x Mobile Command Vehicle | Parramatta |
| Wentworthville Police Station | 150x Police Officers, 30x Police Cars | Wentworthville |
| Station: | Size: | Location: |
|---|---|---|
| Blacktown Police Station | 150x Police Officers, 30x Police Cars, 1x Mobile Command Vehicle | Blacktown |
| Station: | Size: | Location: |
|---|---|---|
| Ryde Police Station | 150x Police Officers, 30x Police Cars, 1x Mobile Command Vehicle | Ryde |
| Eastwood Police Station | 150x Police Officers, 30x Police Cars | Eastwood |
| Gladesville Police Station | 150x Police Officers, 30x Police Cars | Gladesville |
| Station: | Size: | Location: | Crest: |
|---|---|---|---|
| Manly Police Station | 100x Police Officers, 20x Police Cars | Manly |  |
| Station: | Size: | Location: |
|---|---|---|
| Dee Why Police Station | 150x Police Officers, 30x Police Cars, 1x Mobile Command Vehicle | Dee Why |
| Mona Vale Police Station | 100x Police Officers, 20x Police Cars | Mona Vale |
| Frenchs Forest Police Station | 100x Police Officers, 20x Police Cars | Frenchs Forest |
| Station: | Size: | Location: |
|---|---|---|
| North Sydney Police Station | 150x Police Officers, 30x Police Cars, 1x Mobile Command Vehicle | Crows Nest |
| Mosman Police Station | 150x Police Officers, 30x Police Cars | Mosman |
| Chatswood Police Station | 150x Police Officers, 30x Police Cars | Chatswood |
| Station: | Size: | Location: |
|---|---|---|
| Windsor Police Station | 150x Police Officers, 30x Police Cars, 1x Mobile Command Vehicle | Windsor |
| Wisemans Ferry Police Station | 10x Police Officers, 2x Police Cars | Wisemans Ferry |
| Station: | Size: | Location: |
|---|---|---|
| Penrith Police Station | 150x Police Officers, 30x Police Cars, 1x Mobile Command Vehicle | Penrith |
| St Marys Police Station | 150x Police Officers, 30x Police Cars | St Marys |
| Warragamba Police Station | 15x Police Officers, 3x Police Cars | Warragamba |
| Station: | Size: | Location: |
|---|---|---|
| Hornsby Police Station | 150x Police Officers, 30x Police Cars, 1x Mobile Command Vehicle | Hornsby |
| Gordon Police Station | 150x Police Officers, 30x Police Cars | Gordon |
| Station: | Size: | Location: |
|---|---|---|
| Riverstone Police Station | 150x Police Officers, 30x Police Cars, 1x Mobile Command Vehicle | Riverstone |
| Station: | Size: | Location: |
|---|---|---|
| Mount Druitt Police Station | 150x Police Officers, 30x Police Cars, 1x Mobile Command Vehicle | Mount Druitt |
| Station: | Size: | Location: |
|---|---|---|
| Castle Hill Police Station | 150x Police Officers, 30x Police Cars, 1x Mobile Command Vehicle | Castle Hill |
| Station: | Size: | Location: |
|---|---|---|
| Katoomba Police Station | 20x Police Officers, 4x Police Cars, 1x Mobile Command Vehicle | Katoomba |
| Mount Victoria Police Station | 20x Police Officers, 4x Police Cars | Mount Victoria |
| Blackheath Police Station | 20x Police Officers, 4x Police Cars | Blackheath |
| Springwood Police Station | 20x Police Officers, 4x Police Cars | Springwood |
| Lawson Police Station | 20x Police Officers, 4x Police Cars | Lawson |
| Station: | Size: | Location: |
|---|---|---|
| Bankstown Police Station | 150x Police Officers, 30x Police Cars, 1x Mobile Command Vehicle | Bankstown |
| Revesby Police Station | 150x Police Officers, 30x Police Cars | Revesby |
| Bass Hill Police Station | 150x Police Officers, 30x Police Cars | Bass Hill |
| Station: | Size: | Location: |
|---|---|---|
| Liverpool Police Station | 150x Police Officers, 30x Police Cars, 1x Mobile Command Vehicle | Liverpool |
| Green Valley Police Station | 150x Police Officers, 30x Police Cars | Green Valley |
| Station: | Size: | Location: |
|---|---|---|
| Campbelltown Police Station | 150x Police Officers, 30x Police Cars, 1x Mobile Command Vehicle | Campbelltown |
| Macquarie Fields Police Station | 150x Police Officers, 30x Police Cars | Macquarie Fields |
| Station: | Size: | Location: |
|---|---|---|
| Narellan Police Station | 150x Police Officers, 30x Police Cars, 1x Mobile Command Vehicle | Narellan |
| Picton Police Station | 20x Police Officers, 4x Police Cars | Picton |
| The Oaks Police Station | 10x Police Officers, 2x Police Cars | The Oaks |
| Station: | Size: | Location: |
|---|---|---|
| Auburn Police Station | 150x Police Officers, 30x Police Cars, 1x Mobile Command Vehicle | Auburn |
| Station: | Size: | Location: |
|---|---|---|
| Granville Police Station | 150x Police Officers, 30x Police Cars, 1x Mobile Command Vehicle | Granville |
| Merrylands Police Station | 150x Police Officers, 30x Police Cars | Merrylands |
| Station: | Size: | Location: |
|---|---|---|
| Fairfield Police Station | 150x Police Officers, 30x Police Cars, 1x Mobile Command Vehicle | Fairfield |
| Cabramatta Police Station | 150x Police Officers, 30x Police Cars | Cabramatta |
| Wetherill Park Police Station | 150x Police Officers, 30x Police Cars | Prairiewood |
| Station: | Size: | Location: |
|---|---|---|
| Campsie Police Station | 150x Police Officers, 30x Police Cars, 1x Mobile Command Vehicle | Campsie |
| Station: | Size: | Location: |
|---|---|---|
| Burwood Police Station | 150x Police Officers, 30x Police Cars, 1x Mobile Command Vehicle | Burwood |
| Ashfield Police Station | 150x Police Officers, 30x Police Cars | Ashfield |
| Five Dock Police Station | 150x Police Officers, 30x Police Cars | Five Dock |
| Station: | Size: | Location: |
|---|---|---|
| Newcastle Police Station | 150x Police Officers, 30x Police Cars, 1x Mobile Command Vehicle | Newcastle CBD |
| Stockton Police Station | 150x Police Officers, 30x Police Cars | Stockton |
| Waratah Police Station | 150x Police Officers, 30x Police Cars | Waratah |
| Station: | Size: | Location: |
|---|---|---|
| Belmont Police Station | 150x Police Officers, 30x Police Cars, 1x Mobile Command Vehicle | Belmont |
| Toronto Police Station | 150x Police Officers, 30x Police Cars | Toronto |
| Charlestown Police Station | 150x Police Officers, 30x Police Cars | Charlestown |
| Morisset Police Station | 60x Police Officers, 12x Police Cars | Morisset |
| Station: | Size: | Location: |
|---|---|---|
| Gosford Police Station | 150x Police Officers, 30x Police Cars, 1x Mobile Command Vehicle | Gosford |
| Terrigal Police Station | 150x Police Officers, 30x Police Cars | Terrigal |
| Woy Woy Police Station | 150x Police Officers, 30x Police Cars | Woy Woy |
| Station: | Size: | Location: |
|---|---|---|
| Wyong Police Station | 150x Police Officers, 30x Police Cars, 1x Mobile Command Vehicle | Wyong |
| The Entrance Police Station | 150x Police Officers, 30x Police Cars | The Entrance |
| Toukley Police Station | 150x Police Officers, 30x Police Cars | Toukley |
Maitland Area |
| Station: | Size: | Location: |
|---|---|---|
| Maitland Police Station | 125x Police Officers, 25x Police Cars, 1x Mobile Command Vehicle | Maitland |
| Morpeth Police Station | 125x Police Officers, 25x Police Cars | Morpeth |
Other Stations |
| Station: | Size: | Location: |
|---|---|---|
| Nelson Bay Police Station | 50x Police Officers, 10x Police Cars | Nelson Bay |
| Raymond Terrace Police Station | 45x Police Officers, 9x Police Cars | Raymond Terrace |
| Lemon Tree Passage Police Station | 30x Police Officers, 6x Police Cars | Lemon Tree Passage |
| Dungog Police Station | 10x Police Officers, 2x Police Cars | Dungog |
| Paterson Police Station | 10x Police Officers, 2x Police Cars | Paterson |
| Beresfield Police Station | 10x Police Officers, 2x Police Cars | Beresfield |
| East Gresford Police Station | 10x Police Officers, 2x Police Cars | East Gresford |
| Karuah Police Station | 10x Police Officers, 2x Police Cars | Karuah |
| Stroud Police Station | 10x Police Officers, 2x Police Cars | Stroud |
| Tea Gardens Police Station | 10x Police Officers, 2x Police Cars | Tea Gardens |
| Station: | Size: | Location: |
|---|---|---|
| Cessnock Police Station | 60x Police Officers, 12x Police Cars, 1x Mobile Command Vehicle | Cessnock |
| Kurri Kurri Police Station | 50x Police Officers, 10x Police Cars | Kurri Kurri |
| Singleton Police Station | 40x Police Officers, 8x Police Cars | Singleton |
| Muswellbrook Police Station | 30x Police Officers, 6x Police Cars | Muswellbrook |
| Scone Police Station | 15x Police Officers, 3x Police Cars | Scone |
| Denman Police Station | 10x Police Officers, 2x Police Cars | Denman |
| Branxton Police Station | 10x Police Officers, 2x Police Cars | Branxton |
| Bulga Police Station | 10x Police Officers, 2x Police Cars | Bulga |
| Cassilis Police Station | 10x Police Officers, 2x Police Cars | Cassilis |
| Jerrys Plains Police Station | 10x Police Officers, 2x Police Cars | Jerrys Plains |
| Merriwa Police Station | 10x Police Officers, 2x Police Cars | Merriwa |
| Moonan Flat Police Station | 10x Police Officers, 2x Police Cars | Moonan Flat |
| Murrurundi Police Station | 10x Police Officers, 2x Police Cars | Murrurundi |
| Wollombi Police Station | 10x Police Officers, 2x Police Cars | Wollombi |
| Station: | Size: | Location: |
|---|---|---|
| Lismore Police Station | 75x Police Officers, 15x Police Cars, 1x Mobile Command Vehicle | Lismore |
| Ballina Police Station | 70x Police Officers, 14x Police Cars | Ballina |
| Casino Police Station | 25x Police Officers, 5x Police Cars | Casino |
| Alstonville Police Station | 15x Police Officers, 3x Police Cars | Alstonville |
| Kyogle Police Station | 10x Police Officers, 2x Police Cars | Kyogle |
| Nimbin Police Station | 10x Police Officers, 2x Police Cars | Nimbin |
| Bonalbo Police Station | 10x Police Officers, 2x Police Cars | Bonalbo |
| Coraki Police Station | 10x Police Officers, 2x Police Cars | Coraki |
| Evans Head Police Station | 10x Police Officers, 2x Police Cars | Evans Head |
| Tabulam Police Station | 10x Police Officers, 2x Police Cars | Tabulam |
| Wardell Police Station | 10x Police Officers, 2x Police Cars | Wardell |
| Woodburn Police Station | 10x Police Officers, 2x Police Cars | Woodburn |
| Woodenbong Police Station | 10x Police Officers, 2x Police Cars | Woodenbong |
| Station: | Size: | Location: |
|---|---|---|
| Coffs Harbour Police Station | 130x Police Officers, 26x Police Cars, 1x Mobile Command Vehicle | Coffs Harbour |
| Grafton Police Station | 45x Police Officers, 9x Police Cars | Grafton |
| Yamba Police Station | 20x Police Officers, 4x Police Cars | Yamba |
| Woolgoolga Police Station | 15x Police Officers, 3x Police Cars | Woolgoolga |
| Bellingen Police Station | 10x Police Officers, 2x Police Cars | Bellingen |
| Copmanhurst Police Station | 10x Police Officers, 2x Police Cars | Copmanhurst |
| Coramba Police Station | 10x Police Officers, 2x Police Cars | Coramba |
| Dorrigo Police Station | 10x Police Officers, 2x Police Cars | Dorrigo |
| Glenreagh Police Station | 10x Police Officers, 2x Police Cars | Glenreagh |
| Iluka Police Station | 10x Police Officers, 2x Police Cars | Iluka |
| Lawrence Police Station | 10x Police Officers, 2x Police Cars | Lawrence |
| Maclean Police Station | 10x Police Officers, 2x Police Cars | Maclean |
| Nymboida Police Station | 10x Police Officers, 2x Police Cars | Nymboida |
| Sawtell Police Station | 10x Police Officers, 2x Police Cars | Sawtell |
| Ulmarra Police Station | 10x Police Officers, 2x Police Cars | Ulmarra |
| Urunga Police Station | 10x Police Officers, 2x Police Cars | Urunga |
| Wooli Police Station | 10x Police Officers, 2x Police Cars | Wooli |
| Station: | Size: | Location: |
|---|---|---|
| Forster Police Station | 50x Police Officers, 10x Police Cars, 1x Mobile Command Vehicle | Forster |
| Taree Police Station | 50x Police Officers, 10x Police Cars | Taree |
| Gloucester Police Station | 10x Police Officers, 2x Police Cars | Gloucester |
| Bulahdelah Police Station | 10x Police Officers, 2x Police Cars | Bulahdelah |
| Nabiac Police Station | 10x Police Officers, 2x Police Cars | Nabiac |
| Wingham Police Station | 10x Police Officers, 2x Police Cars | Wingham |
| Station: | Size: | Location: |
|---|---|---|
| Port Macquarie Police Station | 130x Police Officers, 26x Police Cars, 1x Mobile Command Vehicle | Port Macquarie |
| Kempsey Police Station | 30x Police Officers, 6x Police Cars | West Kempsey |
| Nambucca Heads Police Station | 20x Police Officers, 4x Police Cars | Nambucca Heads |
| Laurieton Police Station | 20x Police Officers, 4x Police Cars | Laurieton |
| Wauchope Police Station | 20x Police Officers, 4x Police Cars | Wauchope |
| South West Rocks Police Station | 15x Police Officers, 3x Police Cars | South West Rocks |
| Gladstone Police Station | 10x Police Officers, 2x Police Cars | Gladstone |
| Bellbrook Police Station | 10x Police Officers, 2x Police Cars | Bellbrook |
| Bowraville Police Station | 10x Police Officers, 2x Police Cars | Bowraville |
| Comboyne Police Station | 10x Police Officers, 2x Police Cars | Comboyne |
| Macksville Police Station | 10x Police Officers, 2x Police Cars | Macksville |
| Lord Howe Island Police Station | 10x Police Officers, 2x Police Cars | Lord Howe Island |
Tweed Heads Area |
| Station: | Size: | Location: |
|---|---|---|
| Tweed Heads Police Station | 100x Police Officers, 20x Police Cars, 1x Mobile Command Vehicle | Tweed Heads |
| Kingscliff Police Station | 65x Police Officers, 13x Police Cars | Kingscliff |
Other Stations |
| Station: | Size: | Location: |
|---|---|---|
| Byron Bay Police Station | 30x Police Officers, 6x Police Cars | Byron Park |
| Murwillumbah Police Station | 25x Police Officers, 5x Police Cars | Murwillumbah |
| Mullumbimby Police Station | 10x Police Officers, 2x Police Cars | Mullumbimby |
| Brunswick Heads Police Station | 10x Police Officers, 2x Police Cars | Brunswick Heads |
| Bangalow Police Station | 10x Police Officers, 2x Police Cars | Bangalow |
| Station: | Size: | Location: |
|---|---|---|
| Wollongong Police Station | 150x Police Officers, 30x Police Cars, 1x Mobile Command Vehicle | Wollongong |
| Corrimal Police Station | 150x Police Officers, 30x Police Cars | Corrimal |
| Helensburgh Police Station | 20x Police Officers, 4x Police Cars | Helensburgh |
| Station: | Size: | Location: |
|---|---|---|
| Lake Illawarra Police Station | 150x Police Officers, 30x Police Cars, 1x Mobile Command Vehicle | Oak Flats |
| Dapto Police Station | 150x Police Officers, 30x Police Cars | Dapto |
| Port Kembla Police Station | 150x Police Officers, 30x Police Cars | Port Kembla |
| Kiama Police Station | 40x Police Officers, 8x Police Cars | Kiama |
| Station: | Size: | Location: | Crest: |
|---|---|---|---|
| Eden Police Station | 10x Police Officers, 2x Police Cars | Eden |  |
| Station: | Size: | Location: |
|---|---|---|
| Nowra Police Station | 100x Police Officers, 20x Police Cars, 1x Mobile Command Vehicle | Nowra |
| Ulladulla Police Station | 40x Police Officers, 8x Police Cars | Ulladulla |
| Bay and Basin Police Station | 30x Police Officers, 6x Police Cars | Sanctuary Point |
| Batemans Bay Police Station | 30x Police Officers, 6x Police Cars | Batemans Bay |
| Merimbula Police Station | 20x Police Officers, 4x Police Cars | Merimbula |
| Bega Police Station | 10x Police Officers, 2x Police Cars | Bega |
| Tathra Police Station | 10x Police Officers, 2x Police Cars | Tathra |
| Moruya Police Station | 10x Police Officers, 2x Police Cars | Moruya |
| Bemboka Police Station | 10x Police Officers, 2x Police Cars | Bemboka |
| Bermagui Police Station | 10x Police Officers, 2x Police Cars | Bermagui |
| Berry Police Station | 10x Police Officers, 2x Police Cars | Berry |
| Bodalla Police Station | 10x Police Officers, 2x Police Cars | Bodalla |
| Candelo Police Station | 10x Police Officers, 2x Police Cars | Candelo |
| Cobargo Police Station | 10x Police Officers, 2x Police Cars | Cobargo |
| Culburra Police Station | 10x Police Officers, 2x Police Cars | Culburra Beach |
| Kangaroo Valley Police Station | 10x Police Officers, 2x Police Cars | Kangaroo Valley |
| Narooma Police Station | 10x Police Officers, 2x Police Cars | Narooma |
| Sussex Inlet Police Station | 10x Police Officers, 2x Police Cars | Sussex Inlet |
| Station: | Size: | Location: |
|---|---|---|
| Queanbeyan Police Station | 100x Police Officers, 20x Police Cars, 1x Mobile Command Vehicle | Queanbeyan |
| Cooma Police Station | 20x Police Officers, 4x Police Cars | Cooma |
| Jindabyne Police Station | 10x Police Officers, 2x Police Cars | Jindabyne |
| Perisher Valley Police Station | 10x Police Officers, 2x Police Cars | Perisher Valley |
| Adaminaby Police Station | 10x Police Officers, 2x Police Cars | Adaminaby |
| Berridale Police Station | 10x Police Officers, 2x Police Cars | Berridale |
| Bombala Police Station | 10x Police Officers, 2x Police Cars | Bombala |
| Braidwood Police Station | 10x Police Officers, 2x Police Cars | Braidwood |
| Bungendore Police Station | 10x Police Officers, 2x Police Cars | Bungendore |
| Captains Flat Police Station | 10x Police Officers, 2x Police Cars | Captains Flat |
| Delegate Police Station | 10x Police Officers, 2x Police Cars | Delegate |
| Koorawatha Police Station | 10x Police Officers, 2x Police Cars | Koorawatha |
| Michelago Police Station | 10x Police Officers, 2x Police Cars | Michelago |
| Nimmitabel Police Station | 10x Police Officers, 2x Police Cars | Nimmitabel |
| Station: | Size: | Location: |
|---|---|---|
| Southern Highlands Police Station | 90x Police Officers, 18x Police Cars, 1x Mobile Command Vehicle | Moss Vale |
| Goulburn Police Station | 65x Police Officers, 13x Police Cars | Goulburn |
| Young Police Station | 20x Police Officers, 4x Police Cars | Young |
| Yass Police Station | 15x Police Officers, 3x Police Cars | Yass |
| Tarago Police Station | 10x Police Officers, 2x Police Cars | Tarago |
| Bigga Police Station | 10x Police Officers, 2x Police Cars | Bigga |
| Binalong Police Station | 10x Police Officers, 2x Police Cars | Binalong |
| Boorowa Police Station | 10x Police Officers, 2x Police Cars | Boorowa |
| Bundanoon Police Station | 10x Police Officers, 2x Police Cars | Bundanoon |
| Caragabal Police Station | 10x Police Officers, 2x Police Cars | Caragabal |
| Collector Police Station | 10x Police Officers, 2x Police Cars | Collector |
| Crookwell Police Station | 10x Police Officers, 2x Police Cars | Crookwell |
| Greenethorpe Police Station | 10x Police Officers, 2x Police Cars | Greenethorpe |
| Grenfell Police Station | 10x Police Officers, 2x Police Cars | Grenfell |
| Gunning Police Station | 10x Police Officers, 2x Police Cars | Gunning |
| Harden Police Station | 10x Police Officers, 2x Police Cars | Harden |
| Jugiong Police Station | 10x Police Officers, 2x Police Cars | Jugiong |
| Marulan Police Station | 10x Police Officers, 2x Police Cars | Marulan |
| Robertson Police Station | 10x Police Officers, 2x Police Cars | Robertson |
| Taralga Police Station | 10x Police Officers, 2x Police Cars | Taralga |
| Tuena Police Station | 10x Police Officers, 2x Police Cars | Tuena |
| Station: | Size: | Location: |
|---|---|---|
| Wagga Wagga Police Station | 130x Police Officers, 26x Police Cars, 1x Mobile Command Vehicle | Wagga Wagga |
| Tumut Police Station | 20x Police Officers, 4x Police Cars | Tumut |
| Cootamundra Police Station | 15x Police Officers, 3x Police Cars | Cootamundra |
| Gundagai Police Station | 10x Police Officers, 2x Police Cars | Gundagai |
| Temora Police Station | 10x Police Officers, 2x Police Cars | Temora |
| Khancoban Police Station | 10x Police Officers, 2x Police Cars | Khancoban |
| Adelong Police Station | 10x Police Officers, 2x Police Cars | Adelong |
| Ardlethan Police Station | 10x Police Officers, 2x Police Cars | Ardlethan |
| Ariah Park Police Station | 10x Police Officers, 2x Police Cars | Ariah Park |
| Batlow Police Station | 10x Police Officers, 2x Police Cars | Batlow |
| Coolamon Police Station | 10x Police Officers, 2x Police Cars | Coolamon |
| Ganmain Police Station | 10x Police Officers, 2x Police Cars | Ganmain |
| Junee Police Station | 10x Police Officers, 2x Police Cars | Junee |
| Lockhart Police Station | 10x Police Officers, 2x Police Cars | Lockhart |
| Stockinbingal Police Station | 10x Police Officers, 2x Police Cars | Stockinbingal |
| Tarcutta Police Station | 10x Police Officers, 2x Police Cars | Tarcutta |
| Talbingo Police Station | 10x Police Officers, 2x Police Cars | Talbingo |
| The Rock Police Station | 10x Police Officers, 2x Police Cars | The Rock |
| Tumbarumba Police Station | 10x Police Officers, 2x Police Cars | Tumbarumba |
| Wallendbeen Police Station | 10x Police Officers, 2x Police Cars | Wallendbeen |
| Station: | Size: | Location: |
|---|---|---|
| Griffith Police Station | 50x Police Officers, 10x Police Cars, 1x Mobile Command Vehicle | Griffith |
| Leeton Police Station | 20x Police Officers, 4x Police Cars | Leeton |
| Narrandera Police Station | 10x Police Officers, 2x Police Cars | Narrandera |
| West Wyalong Police Station | 10x Police Officers, 2x Police Cars | West Wyalong |
| Hay Police Station | 10x Police Officers, 2x Police Cars | Hay |
| Barellan Police Station | 10x Police Officers, 2x Police Cars | Barellan |
| Barmedman Police Station | 10x Police Officers, 2x Police Cars | Barmedman |
| Coleambally Police Station | 10x Police Officers, 2x Police Cars | Coleambally |
| Darlington Point Police Station | 10x Police Officers, 2x Police Cars | Darlington Point |
| Goolgowi Police Station | 10x Police Officers, 2x Police Cars | Goolgowi |
| Hillston Police Station | 10x Police Officers, 2x Police Cars | Hillston |
| Rankins Springs Police Station | 10x Police Officers, 2x Police Cars | Rankins Springs |
| Tallimba Police Station | 10x Police Officers, 2x Police Cars | Tallimba |
| Ungarie Police Station | 10x Police Officers, 2x Police Cars | Ungarie |
| Station: | Size: | Location: |
|---|---|---|
| Albury Police Station | 130x Police Officers, 26x Police Cars, 1x Mobile Command Vehicle | Albury |
| Deniliquin Police Station | 20x Police Officers, 4x Police Cars | Deniliquin |
| Moama Police Station | 20x Police Officers, 4x Police Cars | Moama |
| Tocumwal Police Station | 10x Police Officers, 2x Police Cars | Tocumwal |
| Barham Police Station | 10x Police Officers, 2x Police Cars | Barham |
| Barooga Police Station | 10x Police Officers, 2x Police Cars | Barooga |
| Berrigan Police Station | 10x Police Officers, 2x Police Cars | Berrigan |
| Corowa Police Station | 10x Police Officers, 2x Police Cars | Corowa |
| Culcairn Police Station | 10x Police Officers, 2x Police Cars | Culcairn |
| Finley Police Station | 10x Police Officers, 2x Police Cars | Finley |
| Henty Police Station | 10x Police Officers, 2x Police Cars | Henty |
| Holbrook Police Station | 10x Police Officers, 2x Police Cars | Holbrook |
| Howlong Police Station | 10x Police Officers, 2x Police Cars | Howlong |
| Jerilderie Police Station | 10x Police Officers, 2x Police Cars | Jerilderie |
| Mathoura Police Station | 10x Police Officers, 2x Police Cars | Mathoura |
| Moulamein Police Station | 10x Police Officers, 2x Police Cars | Moulamein |
| Mulwala Police Station | 10x Police Officers, 2x Police Cars | Mulwala |
| Oaklands Police Station | 10x Police Officers, 2x Police Cars | Oaklands |
| Urana Police Station | 10x Police Officers, 2x Police Cars | Urana |
| Walla Walla Police Station | 10x Police Officers, 2x Police Cars | Walla Walla |
| Station: | Size: | Location: |
|---|---|---|
| Orange Police Station | 100x Police Officers, 20x Police Cars, 1x Mobile Command Vehicle | Orange |
| Parkes Police Station | 25x Police Officers, 5x Police Cars | Parkes |
| Forbes Police Station | 20x Police Officers, 4x Police Cars | Forbes |
| Condobolin Police Station | 10x Police Officers, 2x Police Cars | Condobolin |
| Lake Cargelligo Police Station | 10x Police Officers, 2x Police Cars | Lake Cargelligo |
| Cudal Police Station | 10x Police Officers, 2x Police Cars | Cudal |
| Cumnock Police Station | 10x Police Officers, 2x Police Cars | Cumnock |
| Eugowra Police Station | 10x Police Officers, 2x Police Cars | Eugowra |
| Manildra Police Station | 10x Police Officers, 2x Police Cars | Manildra |
| Molong Police Station | 10x Police Officers, 2x Police Cars | Molong |
| Peak Hill Police Station | 10x Police Officers, 2x Police Cars | Peak Hill |
| Tottenham Police Station | 10x Police Officers, 2x Police Cars | Tottenham |
| Trundle Police Station | 10x Police Officers, 2x Police Cars | Trundle |
| Tullamore Police Station | 10x Police Officers, 2x Police Cars | Tullamore |
| Station: | Size: | Location: |
|---|---|---|
| Dubbo Police Station | 100x Police Officers, 20x Police Cars, 1x Mobile Command Vehicle | Dubbo |
| Mudgee Police Station | 30x Police Officers, 6x Police Cars | Mudgee |
| Coonabarabran Police Station | 10x Police Officers, 2x Police Cars | Coonabarabran |
| Narromine Police Station | 10x Police Officers, 2x Police Cars | Narromine |
| Gilgandra Police Station | 10x Police Officers, 2x Police Cars | Gilgandra |
| Wellington Police Station | 10x Police Officers, 2x Police Cars | Wellington |
| Baradine Police Station | 10x Police Officers, 2x Police Cars | Baradine |
| Binnaway Police Station | 10x Police Officers, 2x Police Cars | Binnaway |
| Coolah Police Station | 10x Police Officers, 2x Police Cars | Coolah |
| Coonamble Police Station | 10x Police Officers, 2x Police Cars | Coonamble |
| Dunedoo Police Station | 10x Police Officers, 2x Police Cars | Dunedoo |
| Gulargambone Police Station | 10x Police Officers, 2x Police Cars | Gulargambone |
| Gulgong Police Station | 10x Police Officers, 2x Police Cars | Gulgong |
| Kandos Police Station | 10x Police Officers, 2x Police Cars | Kandos |
| Mendooran Police Station | 10x Police Officers, 2x Police Cars | Mendooran |
| Rylstone Police Station | 10x Police Officers, 2x Police Cars | Rylstone |
| Stuart Town Police Station | 10x Police Officers, 2x Police Cars | Stuart Town |
| Tooraweenah Police Station | 10x Police Officers, 2x Police Cars | Tooraweenah |
| Trangie Police Station | 10x Police Officers, 2x Police Cars | Trangie |
| Warren Police Station | 10x Police Officers, 2x Police Cars | Warren |
| Yeoval Police Station | 10x Police Officers, 2x Police Cars | Yeoval |
| Station: | Size: | Location: |
|---|---|---|
| Armidale Police Station | 60x Police Officers, 12x Police Cars, 1x Mobile Command Vehicle | Armidale |
| Inverell Police Station | 25x Police Officers, 5x Police Cars | Inverell |
| Moree Police Station | 20x Police Officers, 4x Police Cars | Moree |
| Glen Innes Police Station | 15x Police Officers, 3x Police Cars | Glen Innes |
| Tenterfield Police Station | 10x Police Officers, 2x Police Cars | Tenterfield |
| Ashford Police Station | 10x Police Officers, 2x Police Cars | Ashford |
| Bingara Police Station | 10x Police Officers, 2x Police Cars | Bingara |
| Boggabilla Police Station | 10x Police Officers, 2x Police Cars | Boggabilla |
| Boomi Police Station | 10x Police Officers, 2x Police Cars | Boomi |
| Bundarra Police Station | 10x Police Officers, 2x Police Cars | Bundarra |
| Deepwater Police Station | 10x Police Officers, 2x Police Cars | Deepwater |
| Delungra Police Station | 10x Police Officers, 2x Police Cars | Delungra |
| Emmaville Police Station | 10x Police Officers, 2x Police Cars | Emmaville |
| Garah Police Station | 10x Police Officers, 2x Police Cars | Garah |
| Gravesend Police Station | 10x Police Officers, 2x Police Cars | Gravesend |
| Guyra Police Station | 10x Police Officers, 2x Police Cars | Guyra |
| Mungindi Police Station | 10x Police Officers, 2x Police Cars | Mungindi |
| Pallamallawa Police Station | 10x Police Officers, 2x Police Cars | Pallamallawa |
| Tingha Police Station | 10x Police Officers, 2x Police Cars | Tingha |
| Uralla Police Station | 10x Police Officers, 2x Police Cars | Uralla |
| Warialda Police Station | 10x Police Officers, 2x Police Cars | Warialda |
| Yetman Police Station | 10x Police Officers, 2x Police Cars | Yetman |
| Station: | Size: | Location: |
|---|---|---|
| Bourke Police Station | 10x Police Officers, 2x Police Cars, 1x Mobile Command Vehicle | Bourke |
| Cobar Police Station | 10x Police Officers, 2x Police Cars | Cobar |
| Nyngan Police Station | 10x Police Officers, 2x Police Cars | Nyngan |
| Walgett Police Station | 10x Police Officers, 2x Police Cars | Walgett |
| Carinda Police Station | 10x Police Officers, 2x Police Cars | Carinda |
| Brewarrina Police Station | 10x Police Officers, 2x Police Cars | Brewarrina |
| Burren Junction Police Station | 10x Police Officers, 2x Police Cars | Burren Junction |
| Collarenebri Police Station | 10x Police Officers, 2x Police Cars | Collarenebri |
| Enngonia Police Station | 10x Police Officers, 2x Police Cars | Enngonia |
| Goodooga Police Station | 10x Police Officers, 2x Police Cars | Goodooga |
| Lightning Ridge Police Station | 10x Police Officers, 2x Police Cars | Lightning Ridge |
| Nymagee Police Station | 10x Police Officers, 2x Police Cars | Nymagee |
| Wanaaring Police Station | 10x Police Officers, 2x Police Cars | Wanaaring |
| Station: | Size: | Location: |
|---|---|---|
| Bathurst Police Station | 100x Police Officers, 20x Police Cars, 1x Mobile Command Vehicle | Bathurst |
| Lithgow Police Station | 30x Police Officers, 6x Police Cars | Lithgow |
| Cowra Police Station | 20x Police Officers, 4x Police Cars | Cowra |
| Oberon Police Station | 10x Police Officers, 2x Police Cars | Oberon |
| Blayney Police Station | 10x Police Officers, 2x Police Cars | Blayney |
| Woodstock Police Station | 10x Police Officers, 2x Police Cars | Woodstock |
| Canowindra Police Station | 10x Police Officers, 2x Police Cars | Canowindra |
| Capertee Police Station | 10x Police Officers, 2x Police Cars | Capertee |
| Carcoar Police Station | 10x Police Officers, 2x Police Cars | Carcoar |
| Gooloogong Police Station | 10x Police Officers, 2x Police Cars | Gooloogong |
| Hill End Police Station | 10x Police Officers, 2x Police Cars | Hill End |
| Mandurama Police Station | 10x Police Officers, 2x Police Cars | Mandurama |
| Milthorpe Police Station | 10x Police Officers, 2x Police Cars | Milthorpe |
| Portland Police Station | 10x Police Officers, 2x Police Cars | Portland |
| Rockley Police Station | 10x Police Officers, 2x Police Cars | Rockley |
| Trunkey Police Station | 10x Police Officers, 2x Police Cars | Trunkey Creek |
| Wallerawang Police Station | 10x Police Officers, 2x Police Cars | Wallerawang |
| Station: | Size: | Location: |
|---|---|---|
| Tamworth Police Station | 100x Police Officers, 20x Police Cars, 1x Mobile Command Vehicle | Tamworth |
| Gunnedah Police Station | 20x Police Officers, 4x Police Cars | Gunnedah |
| Narrabri Police Station | 15x Police Officers, 3x Police Cars | Narrabri |
| Walcha Police Station | 10x Police Officers, 2x Police Cars | Walcha |
| Barraba Police Station | 10x Police Officers, 2x Police Cars | Barraba |
| Bellata Police Station | 10x Police Officers, 2x Police Cars | Bellata |
| Bendemeer Police Station | 10x Police Officers, 2x Police Cars | Bendemeer |
| Boggabri Police Station | 10x Police Officers, 2x Police Cars | Boggabri |
| Curlewis Police Station | 10x Police Officers, 2x Police Cars | Curlewis |
| Gwabegar Police Station | 10x Police Officers, 2x Police Cars | Gwabegar |
| Kootingal Police Station | 10x Police Officers, 2x Police Cars | Kootingal |
| Manilla Police Station | 10x Police Officers, 2x Police Cars | Manilla |
| Nowendoc Police Station | 10x Police Officers, 2x Police Cars | Nowendoc |
| Nundle Police Station | 10x Police Officers, 2x Police Cars | Nundle |
| Pilliga Police Station | 10x Police Officers, 2x Police Cars | Pilliga |
| Quirindi Police Station | 10x Police Officers, 2x Police Cars | Quirindi |
| Somerton Police Station | 10x Police Officers, 2x Police Cars | Somerton |
| Tambar Springs Police Station | 10x Police Officers, 2x Police Cars | Tambar Springs |
| Walcha Road Police Station | 10x Police Officers, 2x Police Cars | Walcha Road |
| Wee Waa Police Station | 10x Police Officers, 2x Police Cars | Wee Waa |
| Werris Creek Police Station | 10x Police Officers, 2x Police Cars | Werris Creek |
| Station: | Size: | Location: |
|---|---|---|
| Broken Hill Police Station | 50x Police Officers, 10x Police Cars, 1x Mobile Command Vehicle | Broken Hill |
| Balranald Police Station | 10x Police Officers, 2x Police Cars | Balranald |
| Wentworth Police Station | 10x Police Officers, 2x Police Cars | Wentworth |
| Wilcannia Police Station | 10x Police Officers, 2x Police Cars | Wilcannia |
| Tibooburra Police Station | 10x Police Officers, 2x Police Cars | Tibooburra |
| Euston Police Station | 10x Police Officers, 2x Police Cars | Euston |
| Buronga Police Station | 10x Police Officers, 2x Police Cars | Buronga |
| Dareton Police Station | 10x Police Officers, 2x Police Cars | Dareton |
| Ivanhoe Police Station | 10x Police Officers, 2x Police Cars | Ivanhoe |
| Menindee Police Station | 10x Police Officers, 2x Police Cars | Menindee |
 |
| Unit: | Size: | Base: | Crest: |
|---|---|---|---|
| Tactical Response Group | 75x Tactical Police Officers, 3x Lenco BearCats, 15x Emergency Response Vehicles | Sydney Police Centre, Surry Hills |  |
| Hostage Response Group (Negotiators) | 20x Police Officers, 4x Police Cars | Sydney Police Centre, Surry Hills |  |
| Intelligence Unit | 20x Police Officers, 4x Police Cars | Sydney Police Centre, Surry Hills |  |
 |
| Unit: | Size: | Base: |
|---|---|---|
| State Protection Support Unit - Northern Region | 60x Police Officers, 12x Police Cars, 1x Lenco BearCat, 5x Emergency Response Vehicles | Coffs Harbour Police Station |
| State Protection Support Unit - Southern Region | 60x Police Officers, 12x Police Cars, 1x Lenco BearCat, 5x Emergency Response Vehicles | Wagga Wagga Police Station |
| State Protection Support Unit - Western Region | 60x Police Officers, 12x Police Cars, 1x Lenco BearCat, 5x Emergency Response Vehicles | Dubbo Police Station |
 |
| Unit: | Size: | Base: | Crest: |
|---|---|---|---|
| Police Rescue and Bomb Disposal Unit - Primary Squad | 40x Police Rescue Officers, 4x Rescue Trucks, 2x Rescue Vans, 8x Rescue Vehicles | Zetland Police Complex |  |
| Police Rescue and Bomb Disposal Unit - Blue Mountains Squad | 10x Police Rescue Officers, 1x Rescue Truck, 2x Rescue Vehicles | Springwood Police Station |  |
| Police Rescue and Bomb Disposal Unit - Newcastle Squad | 10x Police Rescue Officers, 1x Rescue Truck, 2x Rescue Vehicles | Stockton Police Station |  |
| Police Rescue and Bomb Disposal Unit - Goulburn Squad | 10x Police Rescue Officers, 1x Rescue Truck, 2x Rescue Vehicles | Goulburn Police Station |  |
| Police Rescue and Bomb Disposal Unit - Illawarra Squad | 10x Police Rescue Officers, 1x Rescue Truck, 2x Rescue Vehicles | Lake Illawarra Police Station |  |
| Unit: | Size: | Base: |
|---|---|---|
| Police Rescue and Bomb Disposal Unit - Bathurst Squad | 10x Police Rescue Officers, 1x Rescue Truck, 2x Rescue Vehicles | Bathurst Police Station |
| Police Rescue and Bomb Disposal Unit - Lismore Squad | 10x Police Rescue Officers, 1x Rescue Truck, 2x Rescue Vehicles | Lismore Police Station |
| Police Rescue and Bomb Disposal Unit - Western Region Squad | 10x Police Rescue Officers, 1x Rescue Truck, 2x Rescue Vehicles | Armidale Police Station |
 |
| Unit: | Size: | Base: |
|---|---|---|
| Dog Unit - Primary Section | 70x Police Officers, 35x Police Cars Mixture of 70 German Shepherds, Labradors, Rottweilers, Malinois and English Springer Spaniels | Menai Police Complex |
| Dog Unit - Tweed Heads Section | 10x Police Officers, 5x Police Cars Mixture of 10 German Shepherds, Labradors and Rottweilers | Tweed Heads Police Station |
| Dog Unit - Dubbo Section | 10x Police Officers, 5x Police Cars Mixture of 10 German Shepherds, Labradors and Rottweilers | Dubbo Police Station |
| Dog Unit - Wagga Wagga Section | 10x Police Officers, 5x Police Cars Mixture of 10 German Shepherds, Labradors and Rottweilers | Wagga Wagga Police Station |
| Unit: | Size: | Base: | Crest: |
|---|---|---|---|
| Public Order and Riot Squad | 100x Riot Police Officers, 15x Rapid Public Order Response Vehicles, 5x Public Order Response Vans, 1x Public Order Water Cannon Vehicle | Sydney Police Centre, Surry Hills |  |
| Mounted Police Unit | 45x Police Officers, 20x Police Cars Mixture of 38 Thoroughbreds, Standardbreds, Clydesdales, Draft horses, Warm bloods and Stock horses | Mounted Police Headquarters, Redfern |  |
| Unit: | Size: | Base: |
|---|---|---|
| Public Order Operations Support Group - North West Metropolitan Region Enforcement Squad | 15x Police Officers, 5x Police Cars | Parramatta Police Station |
| Public Order Operations Support Group - South West Metropolitan Region Enforcement Squad | 15x Police Officers, 5x Police Cars | Liverpool Police Station |
| Public Order Operations Support Group - Central Metropolitan Region Enforcement Squad | 15x Police Officers, 5x Police Cars | Sydney Police Centre, Surry Hills |
| Public Order Operations Support Group - Western Region Enforcement Squad | 15x Police Officers, 5x Police Cars | Dubbo Police Station |
| Public Order Operations Support Group - Southern Region Enforcement Squad | 15x Police Officers, 5x Police Cars | Wagga Wagga Police Station |
| Public Order Operations Support Group - Northern Region Enforcement Squad | 15x Police Officers, 5x Police Cars | Tweed Heads Police Station |
| Community Contact Unit | 15x Police Officers, 3x Police Cars | Sydney Police Centre, Surry Hills |
| Education and Training Unit | 15x Police Officers, 3x Police Cars | Sydney Police Centre, Surry Hills |
| Strategy Unit | 15x Police Officers, 3x Police Cars | Sydney Police Centre, Surry Hills |
| Unit: | Size: | Base: |
|---|---|---|
| Terrorism Intelligence Unit | 50x Police Officers, 10x Police Cars | Police Headquarters, Parramatta |
| Terrorism Investigations Squad | 50x Police Officers, 10x Police Cars | Police Headquarters, Parramatta |
| Protection Operations Unit | 50x Police Officers, 10x Police Cars | Police Headquarters, Parramatta |
| Witness Security Unit | 50x Police Officers, 10x Police Cars | Police Headquarters, Parramatta |
| Unit: | Size: | Base: |
|---|---|---|
| Counter Terrorism Response Unit | 20x Police Officers, 4x Police Cars | Police Headquarters, Parramatta |
| Protection Programs Unit | 20x Police Officers, 4x Police Cars | Police Headquarters, Parramatta |
| Critical Infrastructure Protection Unit | 20x Police Officers, 4x Police Cars | Police Headquarters, Parramatta |
| Business Contact Unit | 20x Police Officers, 4x Police Cars | Police Headquarters, Parramatta |
| Exercise Management Unit | 20x Police Officers, 4x Police Cars | Police Headquarters, Parramatta |
 |
| Unit: | Size: | Base: | Crest: |
|---|---|---|---|
| Police Diving Section | 15x Police Officers, 3x Police Cars | Balmain |  |
| Unit: | Size: | Base: |
|---|---|---|
| Sydney Harbour Marine Unit | 60x Police Officers, OPV Nemesis, 2x Seagoing Police Boats, 8x Police Boats | Balmain |
| Botany Bay Marine Unit | 30x Police Officers, 6x Police Cars, 1x Seagoing Police Boat, 5x Police Boats | Port Botany |
| Broken Bay Marine Unit | 30x Police Officers, 6x Police Cars, 1x Seagoing Police Boat, 5x Police Boats | Woy Woy |
| Port Kembla Marine Unit | 30x Police Officers, 6x Police Cars, 1x Seagoing Police Boat, 5x Police Boats | Port Kembla |
| Newcastle Marine Unit | 30x Police Officers, 6x Police Cars, 1x Seagoing Police Boat, 5x Police Boats | Carrington |
| Port Stephens Marine Unit | 25x Police Officers, 5x Police Cars, 1x Seagoing Police Boat, 4x Police Boats | Nelson Bay |
| Port Macquarie Marine Unit | 20x Police Officers, 4x Police Cars, 1x Seagoing Police Boat, 3x Police Boats | Port Macquarie |
| Coffs Harbour Marine Unit | 20x Police Officers, 4x Police Cars, 1x Seagoing Police Boat, 3x Police Boats | Coffs Harbour |
| Eden Marine Unit | 20x Police Officers, 4x Police Cars, 1x Seagoing Police Boat, 3x Police Boats | Eden |
| Marine Operations Support Team | 20x Police Officers, 4x Police Cars | Balmain |
| Marine Intelligence Unit | 15x Police Officers, 3x Police Cars | Balmain |
 |
| Unit: | Size: | Base: |
|---|---|---|
| Helicopter Support Branch | 20x Police Officers, 3x Bell 429s, 1x Bell 412s | Sydney-Bankstown Airport |
| Transport Branch | 15x Police Officers, 2x Cessna 208 Caravans, 1x Cessna Citation I | Sydney-Bankstown Airport |
| Search and Rescue Branch | 15x Police Officers, 2x Bell 412s, 1x Cessna 208 Caravan | Sydney-Bankstown Airport |
| Aviation Support Branch | 15x Police Officers, 3x Police Cars | Sydney-Bankstown Airport |
| Aerial Speed Enforcement Branch | 5x Police Oficers, 1x Cessna 206 | Sydney-Bankstown Airport |
 |
| Unit: | Size: | Base: | Crest: |
|---|---|---|---|
| Anti Graffiti Task Force | 10x Police Officers, 2x Police Cars | Central Railway Station, Sydney |  |
| Unit: | Size: | Base: |
|---|---|---|
| Bus, Train and Light Rail Unit - Central Metropolitan Region | 150x Police Officers, 30x Police Cars | Central Railway Station, Sydney |
| Bus, Train and Light Rail Unit - North West Metropolitan Region | 150x Police Officers, 30x Police Cars | Parramatta Railway Station |
| Bus, Train and Light Rail Unit - South West Metropolitan Region | 150x Police Officers, 30x Police Cars | Liverpool Railway Station |
| Bus, Train and Light Rail Unit - Newcastle | 50x Police Officers, 10x Police Cars | Newcastle Railway Station |
| Ferries Unit | 50x Police Officers, 10x Police Cars | Circular Quay, Sydney |
| Intercity Trains Unit | 50x Police Officers, 10x Police Cars | Central Railway Station, Sydney |
| Unit: | Size: | Base: | Crest: |
|---|---|---|---|
| Organised Crime Squad | 100x Police Officers, 20x Police Cars | Police Headquarters, Parramatta |  |
| Gaming Squad | 50x Police Officers, 10x Police Cars | Police Headquarters, Parramatta |  |
| Child Protection Unit | 50x Police Officers, 10x Police Cars | Police Headquarters, Parramatta |  |
| Kings Cross Unit | 20x Police Officers, 4x Police Cars | Kings Cross Police Station |  |
| Unit: | Size: | Base: |
|---|---|---|
| Firearms Squad | 100x Police Officers, 20x Police Cars | Police Headquarters, Parramatta |
| Criminal Groups Squad | 100x Police Officers, 20x Police Cars | Police Headquarters, Parramatta |
| Cybercrime Squad | 100x Police Officers, 20x Police Cars | Police Headquarters, Parramatta |
| Homicide Squad | 100x Police Officers, 20x Police Cars | Police Headquarters, Parramatta |
| Sex Crimes Squad | 100x Police Officers, 20x Police Cars | Police Headquarters, Parramatta |
| Financial Crimes Squad | 100x Police Officers, 20x Police Cars | Police Headquarters, Parramatta |
| Robbery and Serious Crime Squad | 100x Police Officers, 20x Police Cars | Police Headquarters, Parramatta |
 |
| Unit: | Size: | Base: | Crest: |
|---|---|---|---|
| Drug Squad | 100x Police Officers, 20x Police Cars | Police Headquarters, Parramatta | .png) |
| North Drug Unit | 30x Police Officers, 6x Police Cars | Gosford Police Station |  |
| Plantation Unit | 15x Police Officers, 3x Police Cars | Police Headquarters, Parramatta |  |
| Unit: | Size: | Base: | Crest: |
|---|---|---|---|
| Parking Patrol Unit | 70x Police Officers, 14x Police Cars | Sydney Police Centre, Surry Hills |  |
| Unit: | Size: | Base: |
|---|---|---|
| Traffic Management Centre | 15x Police Officers | Eveleigh |
 |
| Unit: | Size: | Base: |
|---|---|---|
| Central Metropolitan Region Highway Patrol | 300x Police Officers, 150x Highway Patrol Cars | Mascot Police Station |
| North West Metropolitan Region Highway Patrol | 300x Police Officers, 150x Highway Patrol Cars | Huntingwood Police Complex |
| South West Metropolitan Region Highway Patrol | 300x Police Officers, 150x Highway Patrol Cars | Campbelltown Police Station |
| Northern Region Highway Patrol | 150x Police Officers, 75x Highway Patrol Cars | Newcastle Police Station |
| Southern Region Highway Patrol | 150x Police Officers, 75x Highway Patrol Cars | Albury Police Station |
| Western Region Highway Patrol | 150x Police Officers, 75x Highway Patrol Cars | Orange Police Station |
| Unit: | Size: | Base: | Crest: |
|---|---|---|---|
| Metropolitan Crash Investigation Unit | 100x Police Officers, 20x Police Cars | Huntingwood Police Complex |  |
| Regional Crash Investigation Unit | 50x Police Officers, 10x Police Cars | Newcastle Police Station | |
| Long and Wide Loads (Heavy Vehicle) Task Force | 50x Police Officers, 25x Highway Patrol Cars | Huntingwood Police Complex |  |
| Unit: | Size: | Base: |
|---|---|---|
| Traffic Strike Force | 50x Police Officers, 25x Police Cars | Huntingwood Police Complex |
| Random Drug and Alcohol Testing Unit | 50x Police Officers, 20x Police Cars | Huntingwood Police Complex |
| Traffic Support Group (VIP Escort) | 30x Police Officers, 15x Police Cars | Huntingwood Police Complex |
Traffic Technology Section
| 20x Police Officers, 10x Police Cars | Huntingwood Police Complex |
 |
| Unit: | Size: | Base: |
|---|---|---|
| Intelligence Operations Unit | 100x Police Officers, 20x Police Cars | Police Headquarters, Parramatta |
| Covert Operations Unit | 65x Police Officers, 15x Police Cars | Police Headquarters, Parramatta |
| Strategic Intelligence and Capability Unit | 50x Police Officers, 10x Police Cars | Police Headquarters, Parramatta |
| Unit: | Size: | Base: | Crest: |
|---|---|---|---|
Fingerprint Bureau
| 100x Police Officers, 20x Police Cars | Police Headquarters, Parramatta |  |
Physical Evidence Section
| 100x Police Officers, 20x Police Cars | Police Headquarters, Parramatta |  |
| Unit: | Size: | Base: |
|---|---|---|
| Crime Scene Examination Unit | 100x Police Officers, 20x Police Cars | Police Headquarters, Parramatta |
| Engineering Investigation Unit | 100x Police Officers, 20x Police Cars | Police Headquarters, Parramatta |
| Forensic Intelligence Unit | 100x Police Officers, 20x Police Cars | Police Headquarters, Parramatta |
| Forensic Imaging Unit | 100x Police Officers, 20x Police Cars | Police Headquarters, Parramatta |
| CBRNE and Disaster Victim Identification Support Unit | 100x Police Officers, 20x Police Cars | Police Headquarters, Parramatta |
| Unit: | Size: | Base: |
|---|---|---|
| Radio Dispatch and Emergency Call Centre - Sydney | 50x Police Officers | Sydney Police Centre, Surry Hills |
| Radio Dispatch and Emergency Call Centre - Penrith | 50x Police Officers | Penrith Police Station |
| Radio Dispatch and Emergency Call Centre - Newcastle | 50x Police Officers | Newcastle Police Station |
| Radio Dispatch and Emergency Call Centre - Wollongong | 40x Police Officers | Wollongong Police Station |
| Radio Dispatch and Emergency Call Centre - Tamworth | 30x Police Officers | Tamworth Police Station |
| State Coordination Unit | 20x Police Officers, 3x Mobile Command Centres | Police Headquarters, Parramatta |
| Rescue Coordination Unit | 20x Police Officers | Police Headquarters, Parramatta |
| Public Information and Inquiry Service | 20x Police Officers | Police Headquarters, Parramatta |
 |
| Unit: | Size: | Base: |
|---|---|---|
| Wireless Technology Services | 50x Police Officers, 10x Police Cars | Police Headquarters, Parramatta |
| Metropolitan Wireless Network Services | 50x Police Officers, 10x Police Cars | Police Headquarters, Parramatta |
| Regional Wireless Network Services | 50x Police Officers, 10x Police Cars | Police Headquarters, Parramatta |
| Radio Site Management | 20x Police Officers, 4x Police Cars | Police Headquarters, Parramatta |
| Radio Engineering Services | 20x Police Officers, 4x Police Cars | Police Headquarters, Parramatta |
 |
| Unit: | Size: | Base: | Crest: |
|---|---|---|---|
| Government House Unit | 50x Police Officers, 10x Police Cars | Government House, Sydney |  |
| Video Operations Unit (CCTV and Electronic Access Point Monitoring) | 50x Police Officers | Police Headquarters, Parramatta |  |
| Unit: | Size: | Base: |
|---|---|---|
| Parliament House Unit | 100x Police Officers, 20x Police Cars | Parliament House, Sydney |
| Police Headquarters Unit | 20x Police Officers, 4x Police Cars | Police Headquarters, Parramatta |
| Mounted Police Headquarters Unit | 20x Police Officers, 4x Police Cars | Mounted Police Headquarters, Redfern |
| 52 Martin Place Unit | 20x Police Officers, 4x Police Cars | 52 Martin Place, Sydney |
 |
| Unit: | Size: | Base: | Crest: |
|---|---|---|---|
| New South Wales Police Force Academy | 50x Police Officers, 10x Police Cars | Police Academy, Goulburn |  |
| Driver Training Unit | 20x Police Officers, 4x Police Cars | Police Academy, Goulburn |  |
| Weapons Training Unit | 20x Police Officers, 4x Police Cars | Police Academy, Goulburn |  |
 |  |  |
New South Wales Police Aero Club | New South Wales Police Professional Fishing Club | New South Wales Police Amateur Fishing Club |
 |  |  |
New South Wales Police Pistol Club | New South Wales Police Council of Sport | New South Wales Police Volunteers in Policing Program |
 |  |  |
New South Wales Police Association | New South Wales Police Retired Police Association | New South Wales Police Surfing Association |
 |  |  |
New South Wales Police Rifle Team | New South Wales Police Tug of War Team | New South Wales Police Squash Team |
 |
| Type: | Amount: | Image: |
|---|---|---|
| Firefighters | 6,800 |  |
| Community Fire Unit Volunteers | 5,000 | 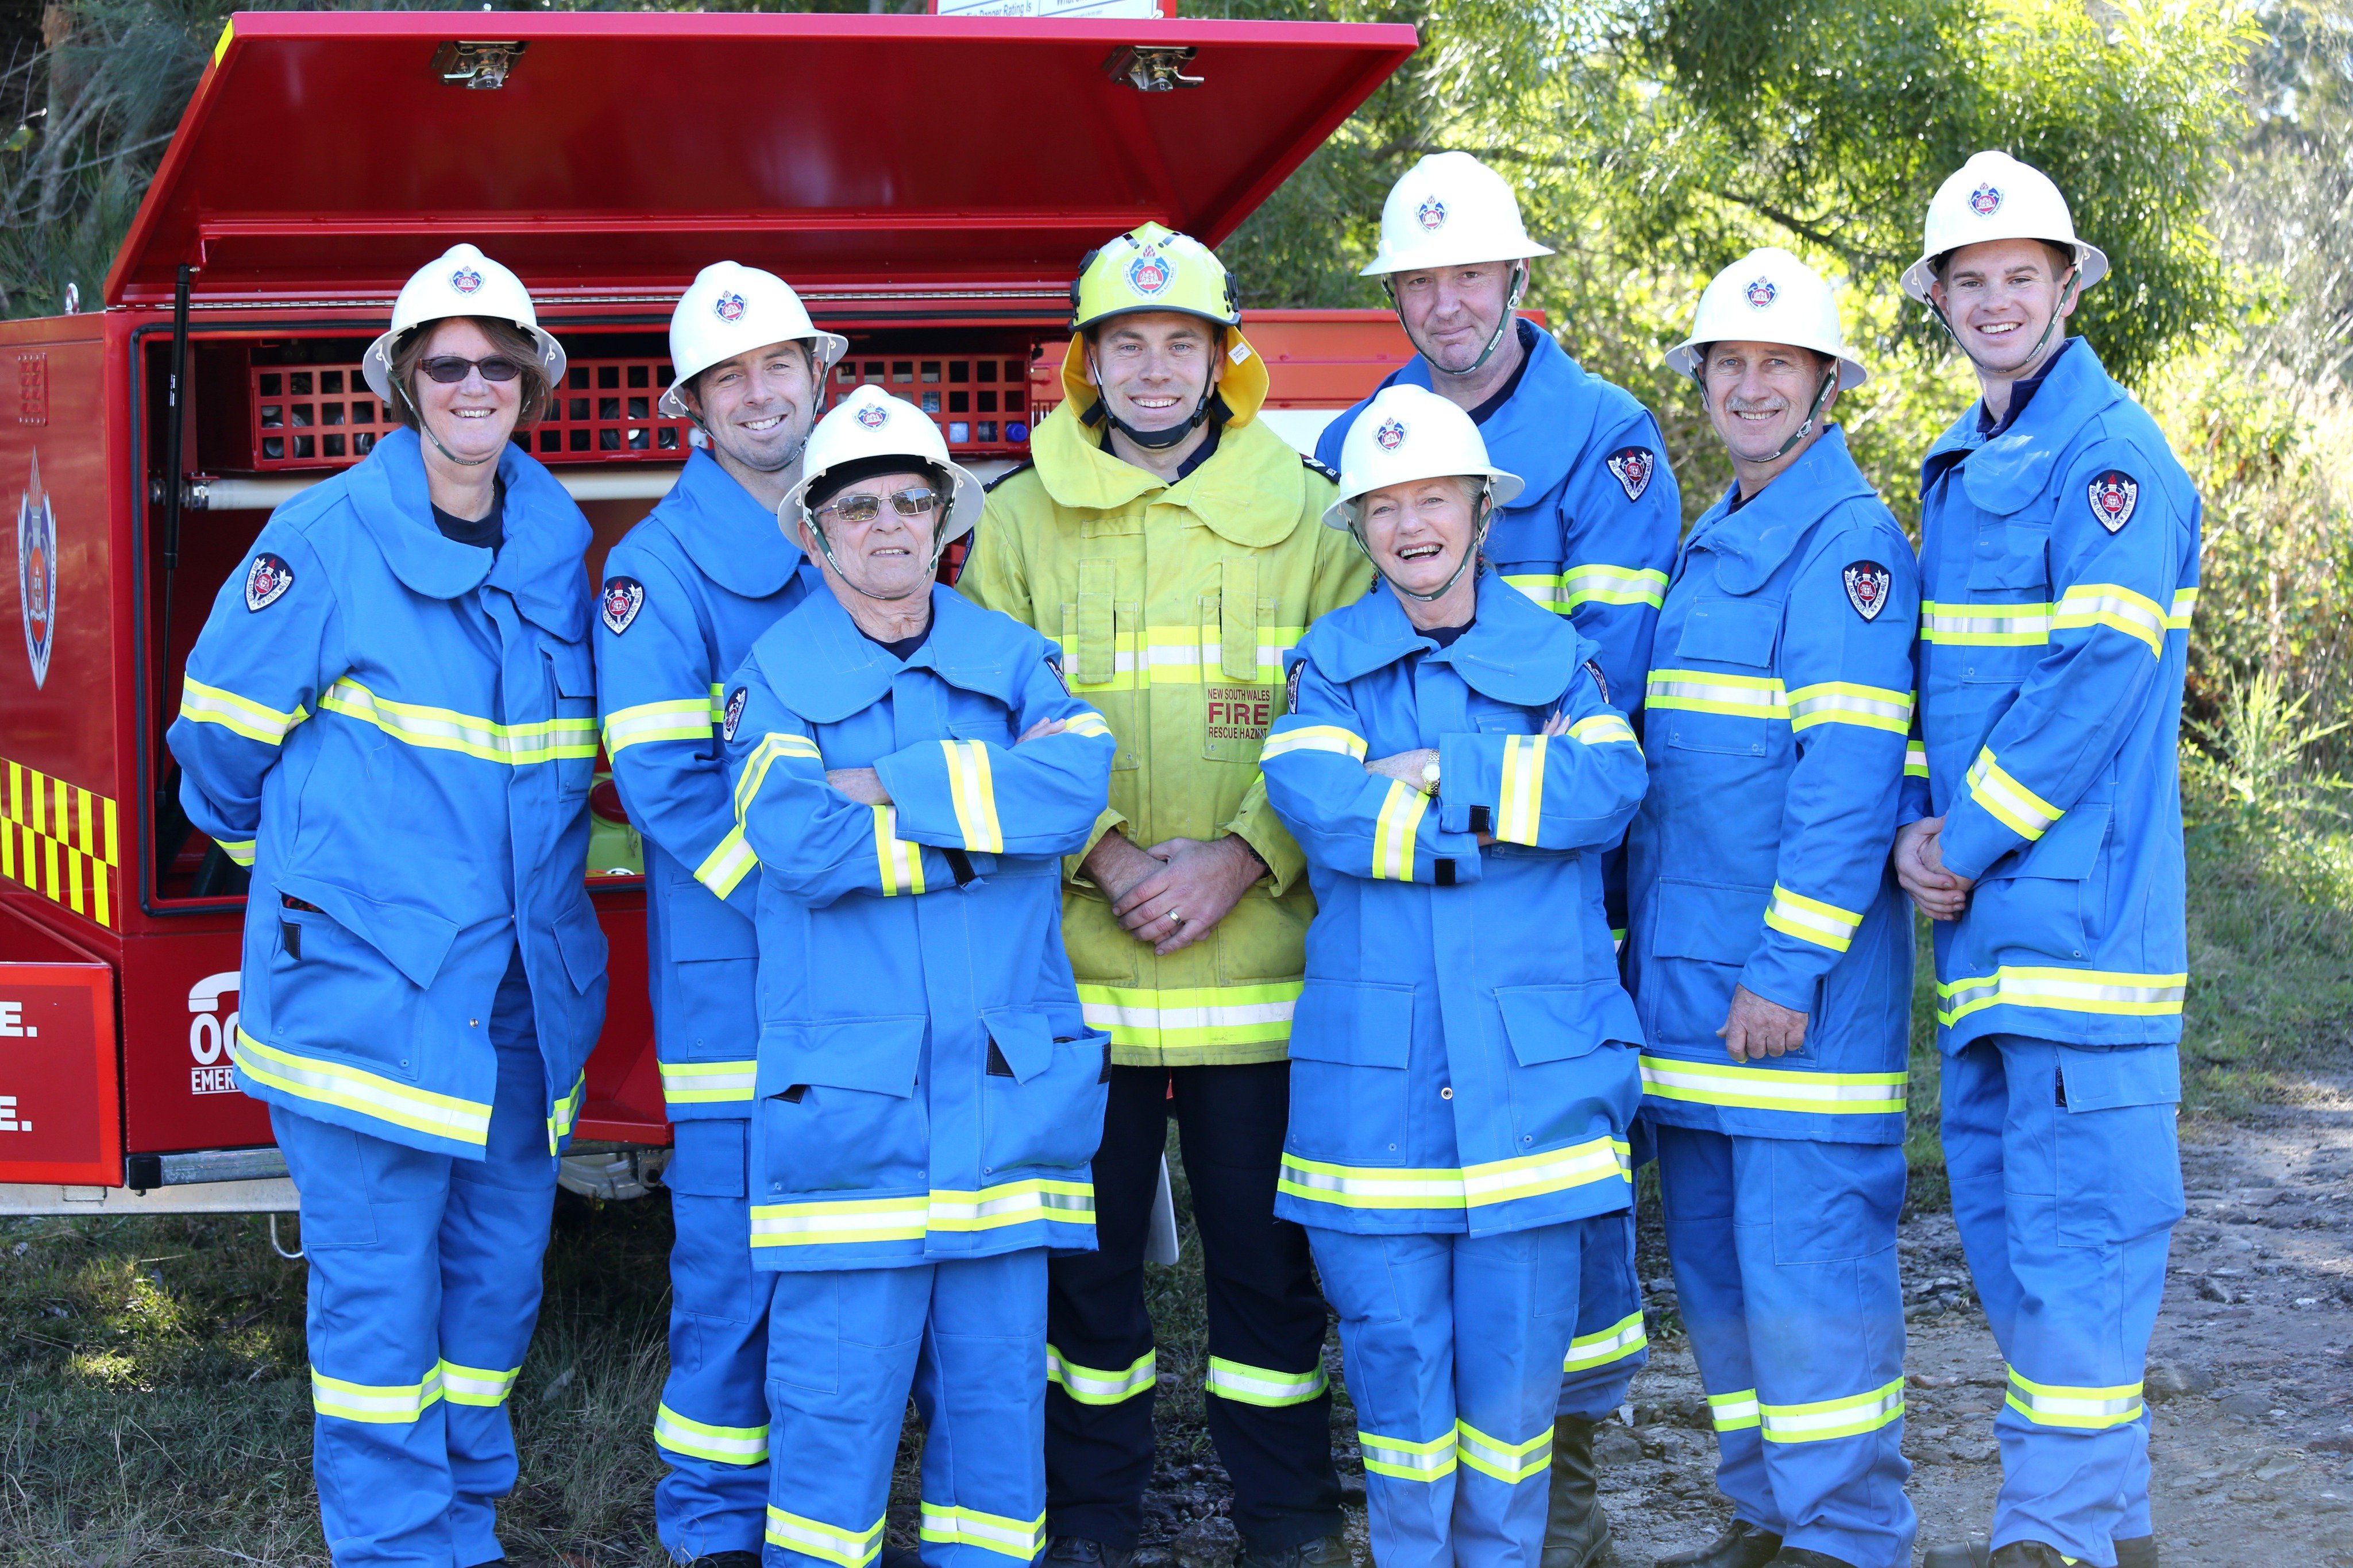 |
| Type: | Amount: | Image: |
|---|---|---|
| Heavy Pumper | 176 |  |
| Medium Pumper | 235 | 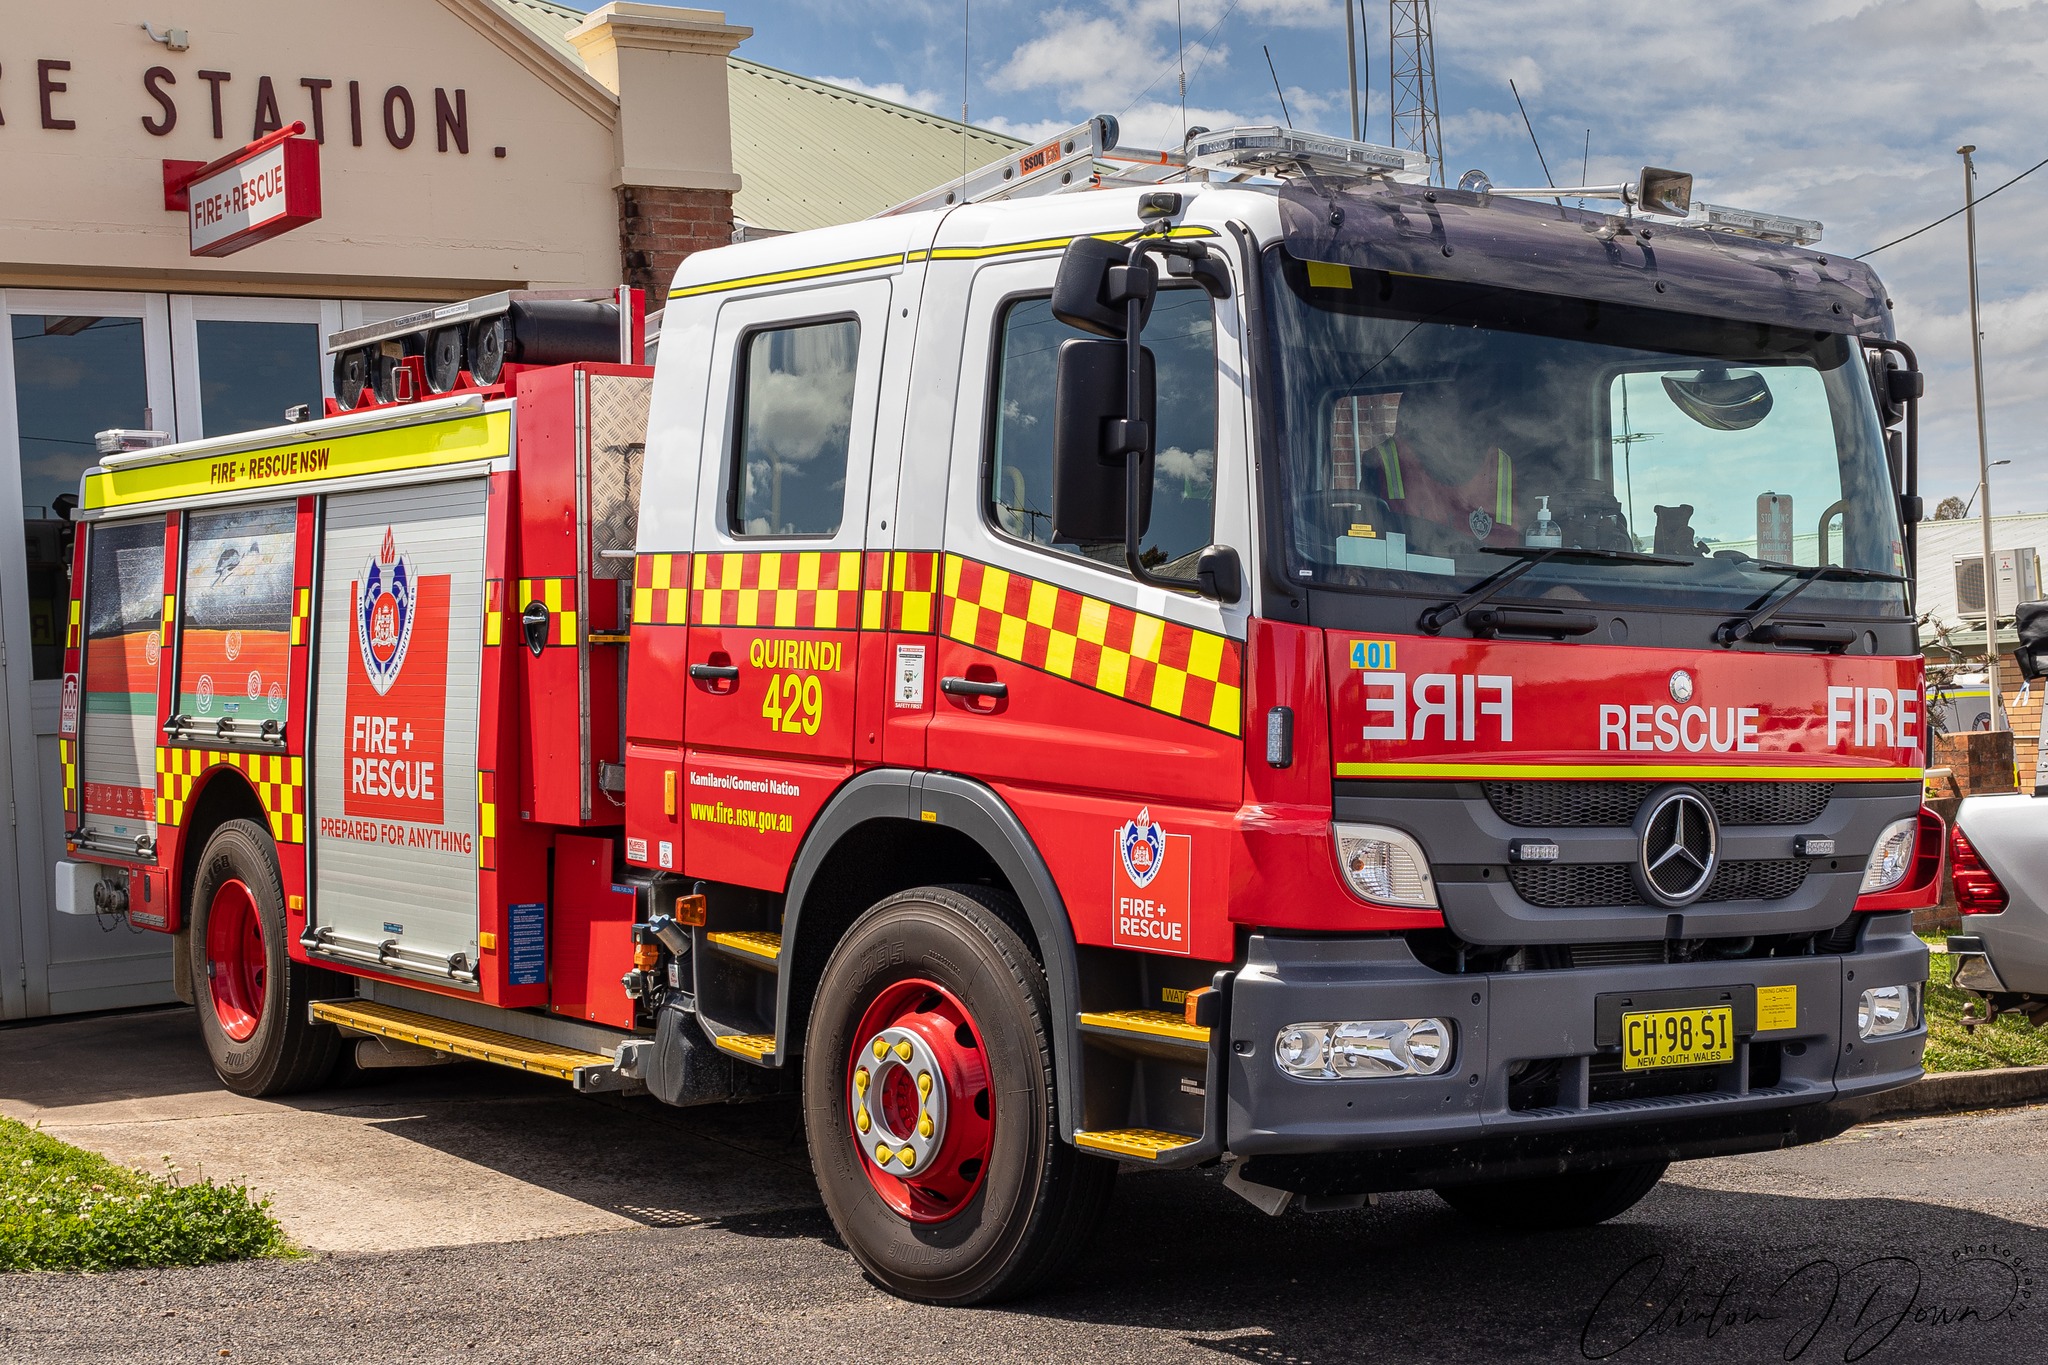 |
| Combined Aerial Pumper | 15 | 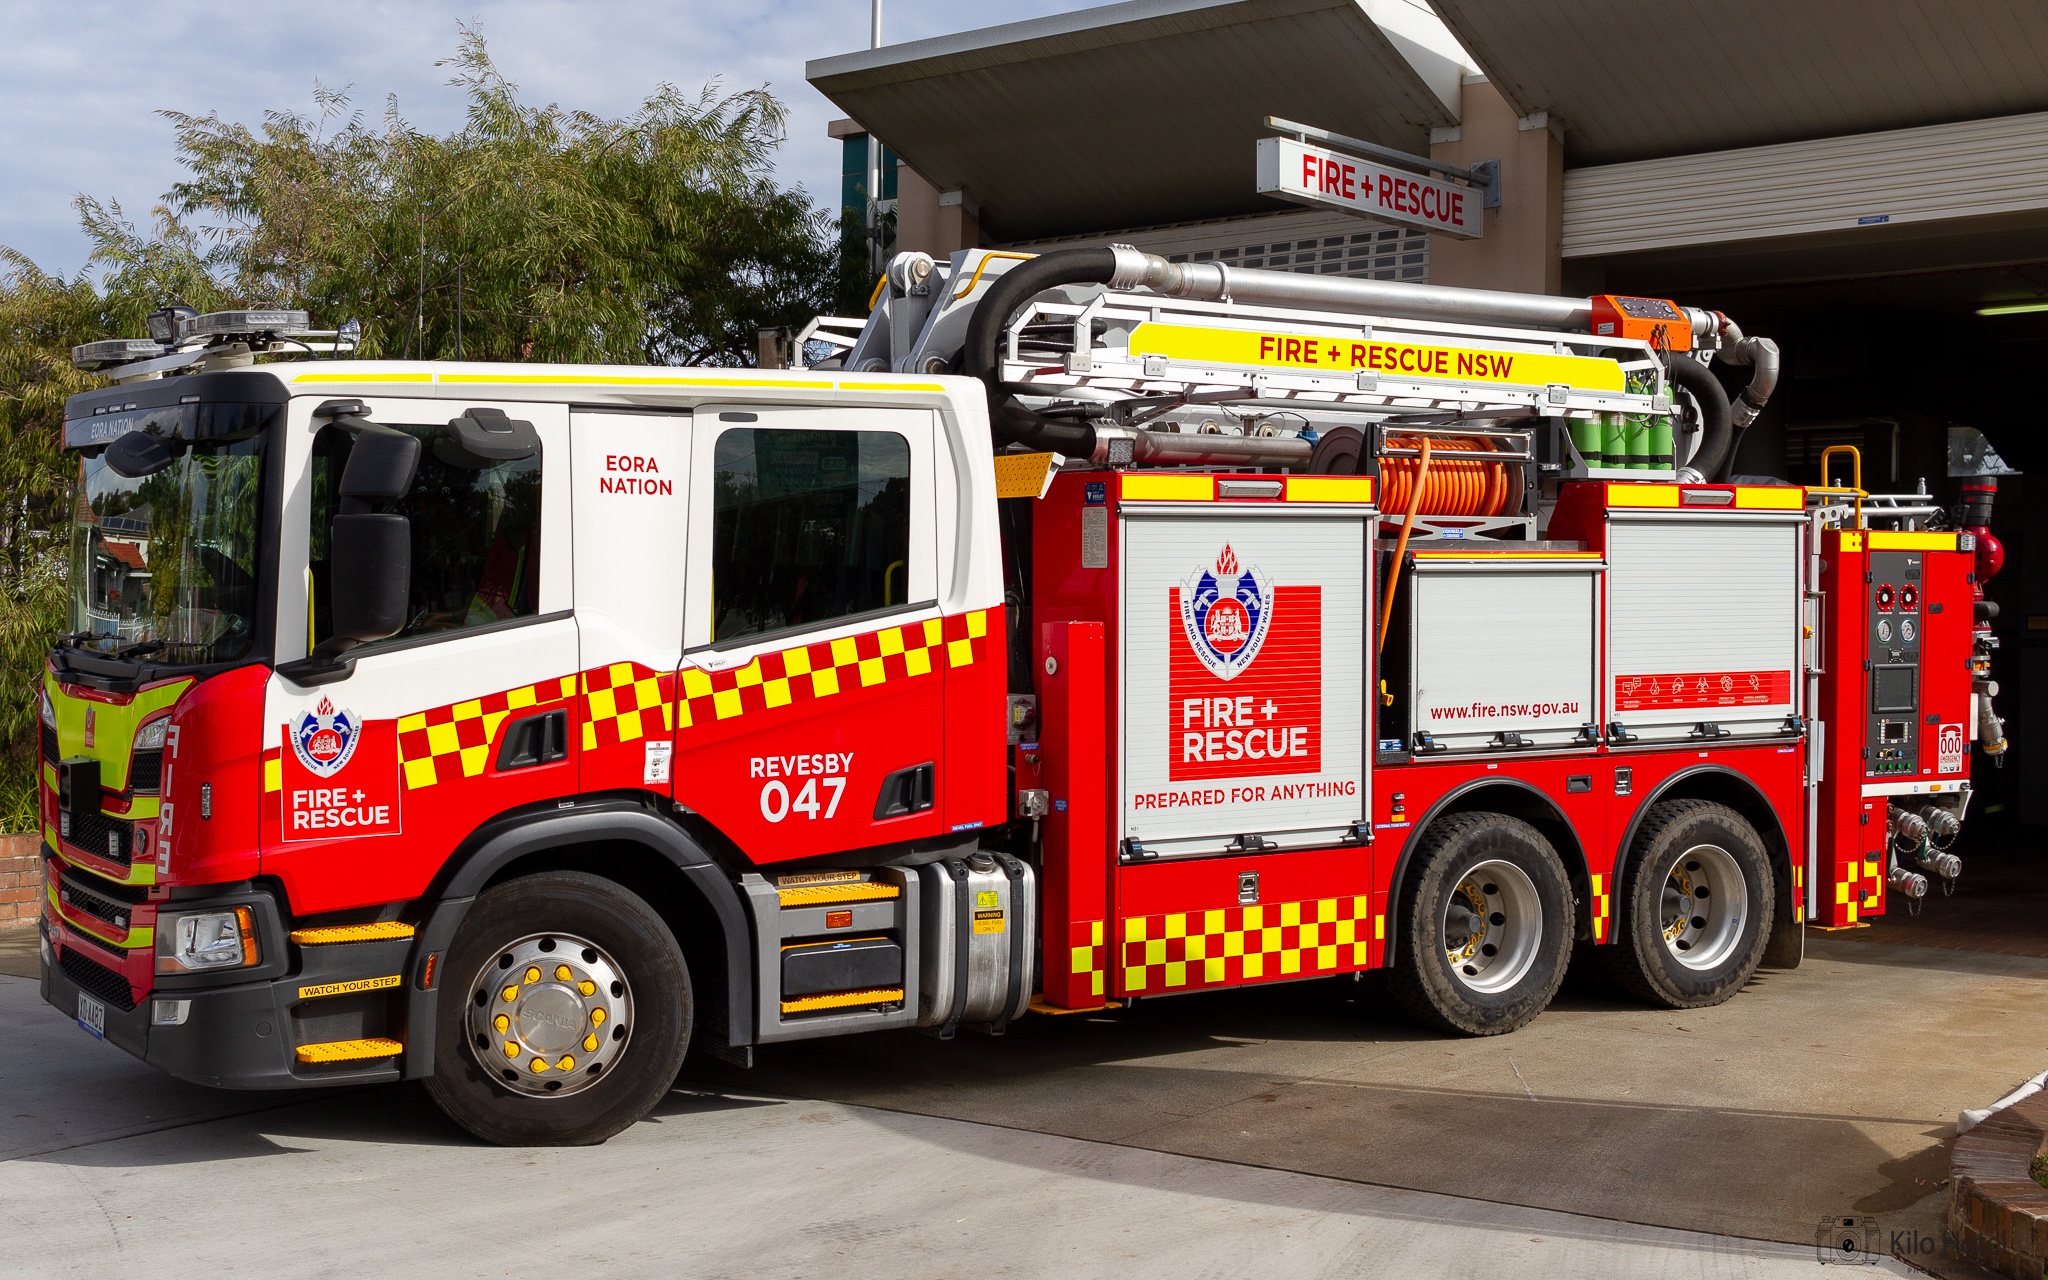 |
| Heavy Ladder | 15 | 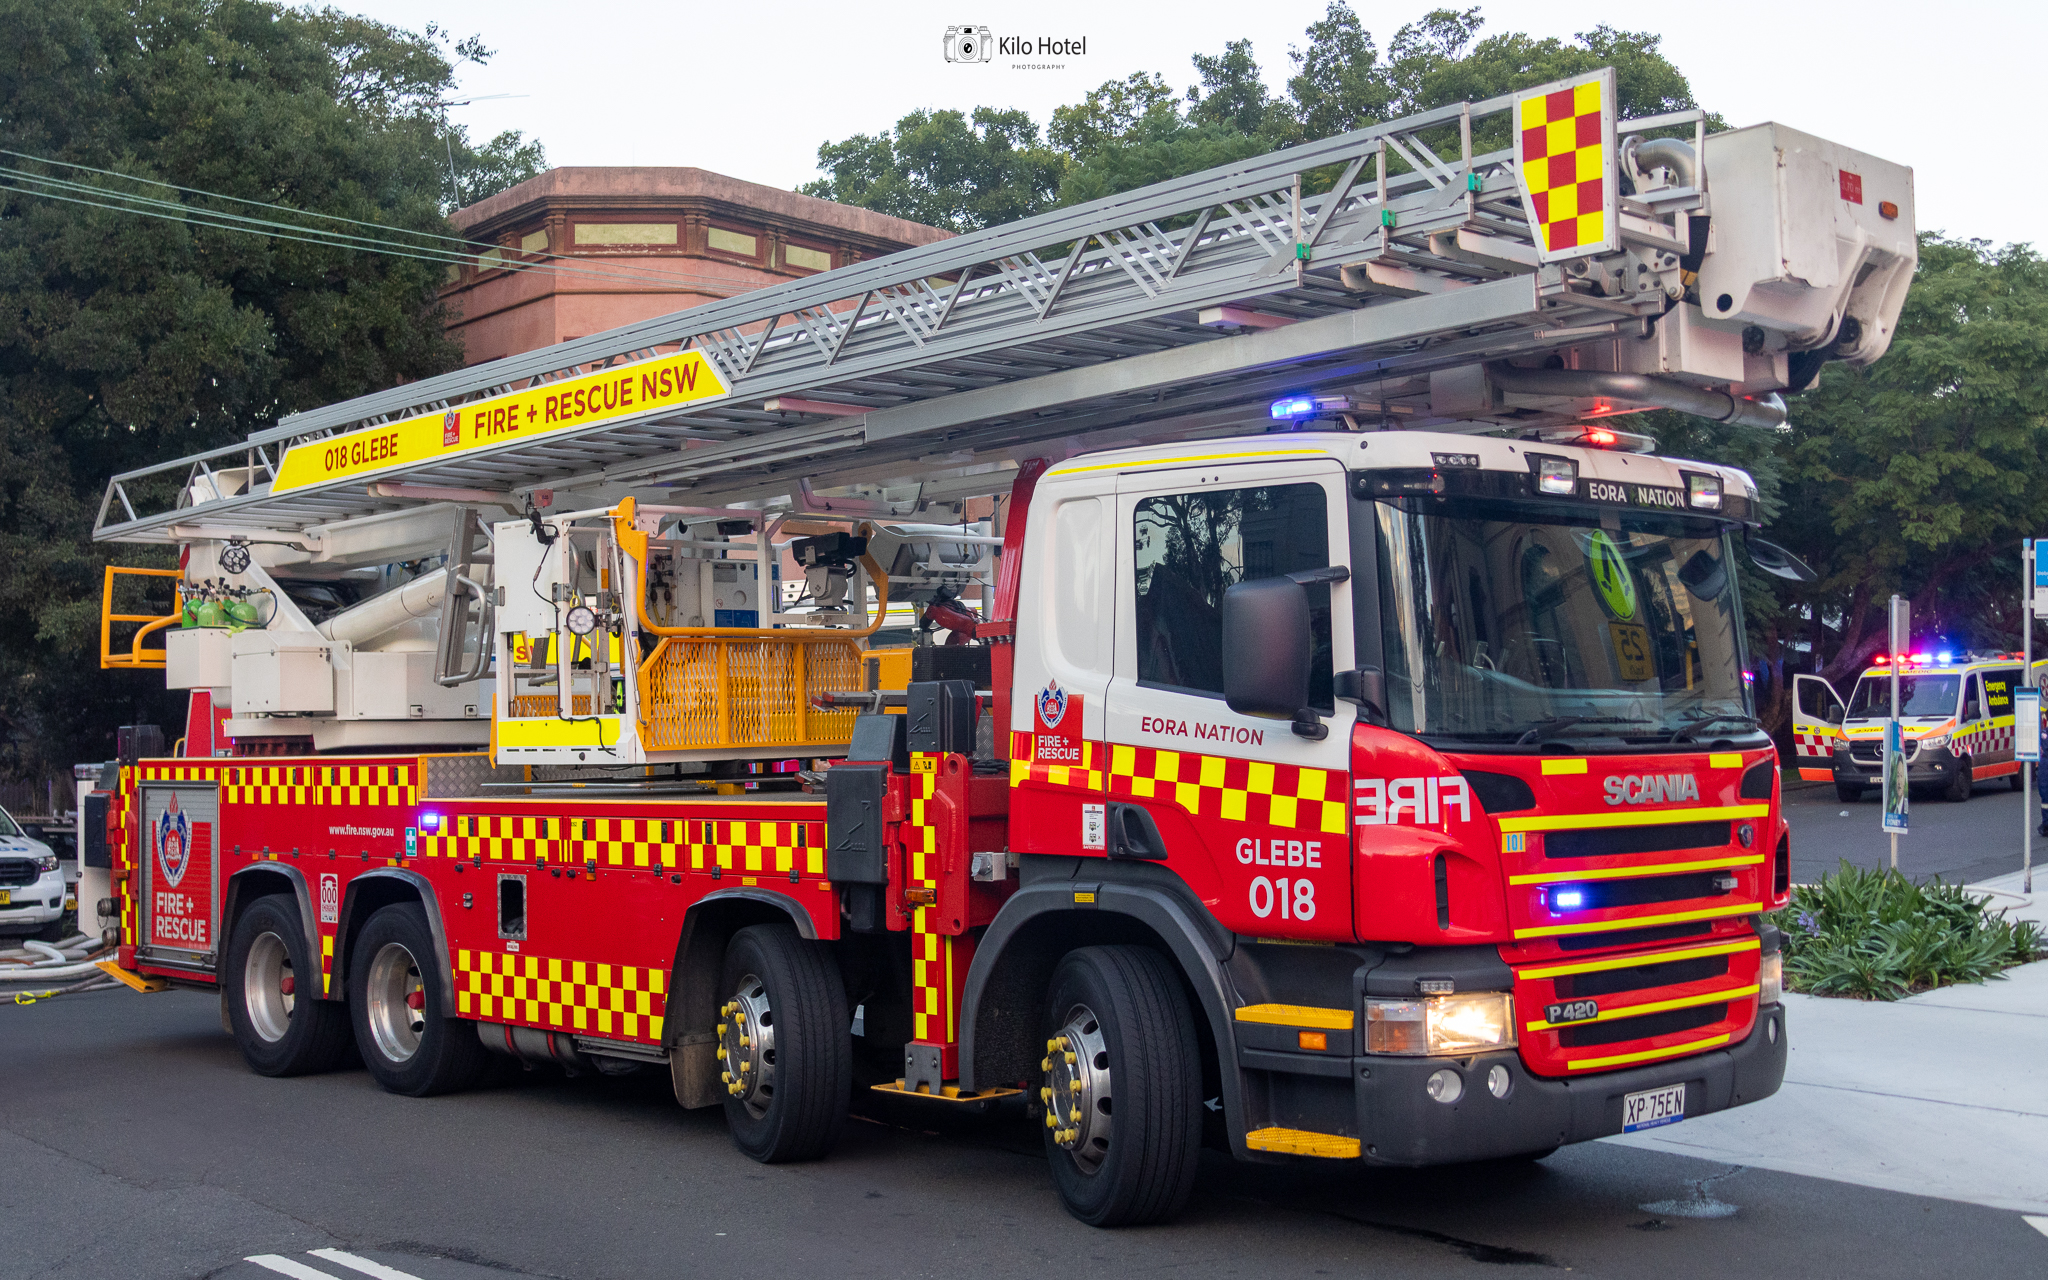 |
| Heavy Tanker | 115 |  |
| CAFS Tanker | 18 | 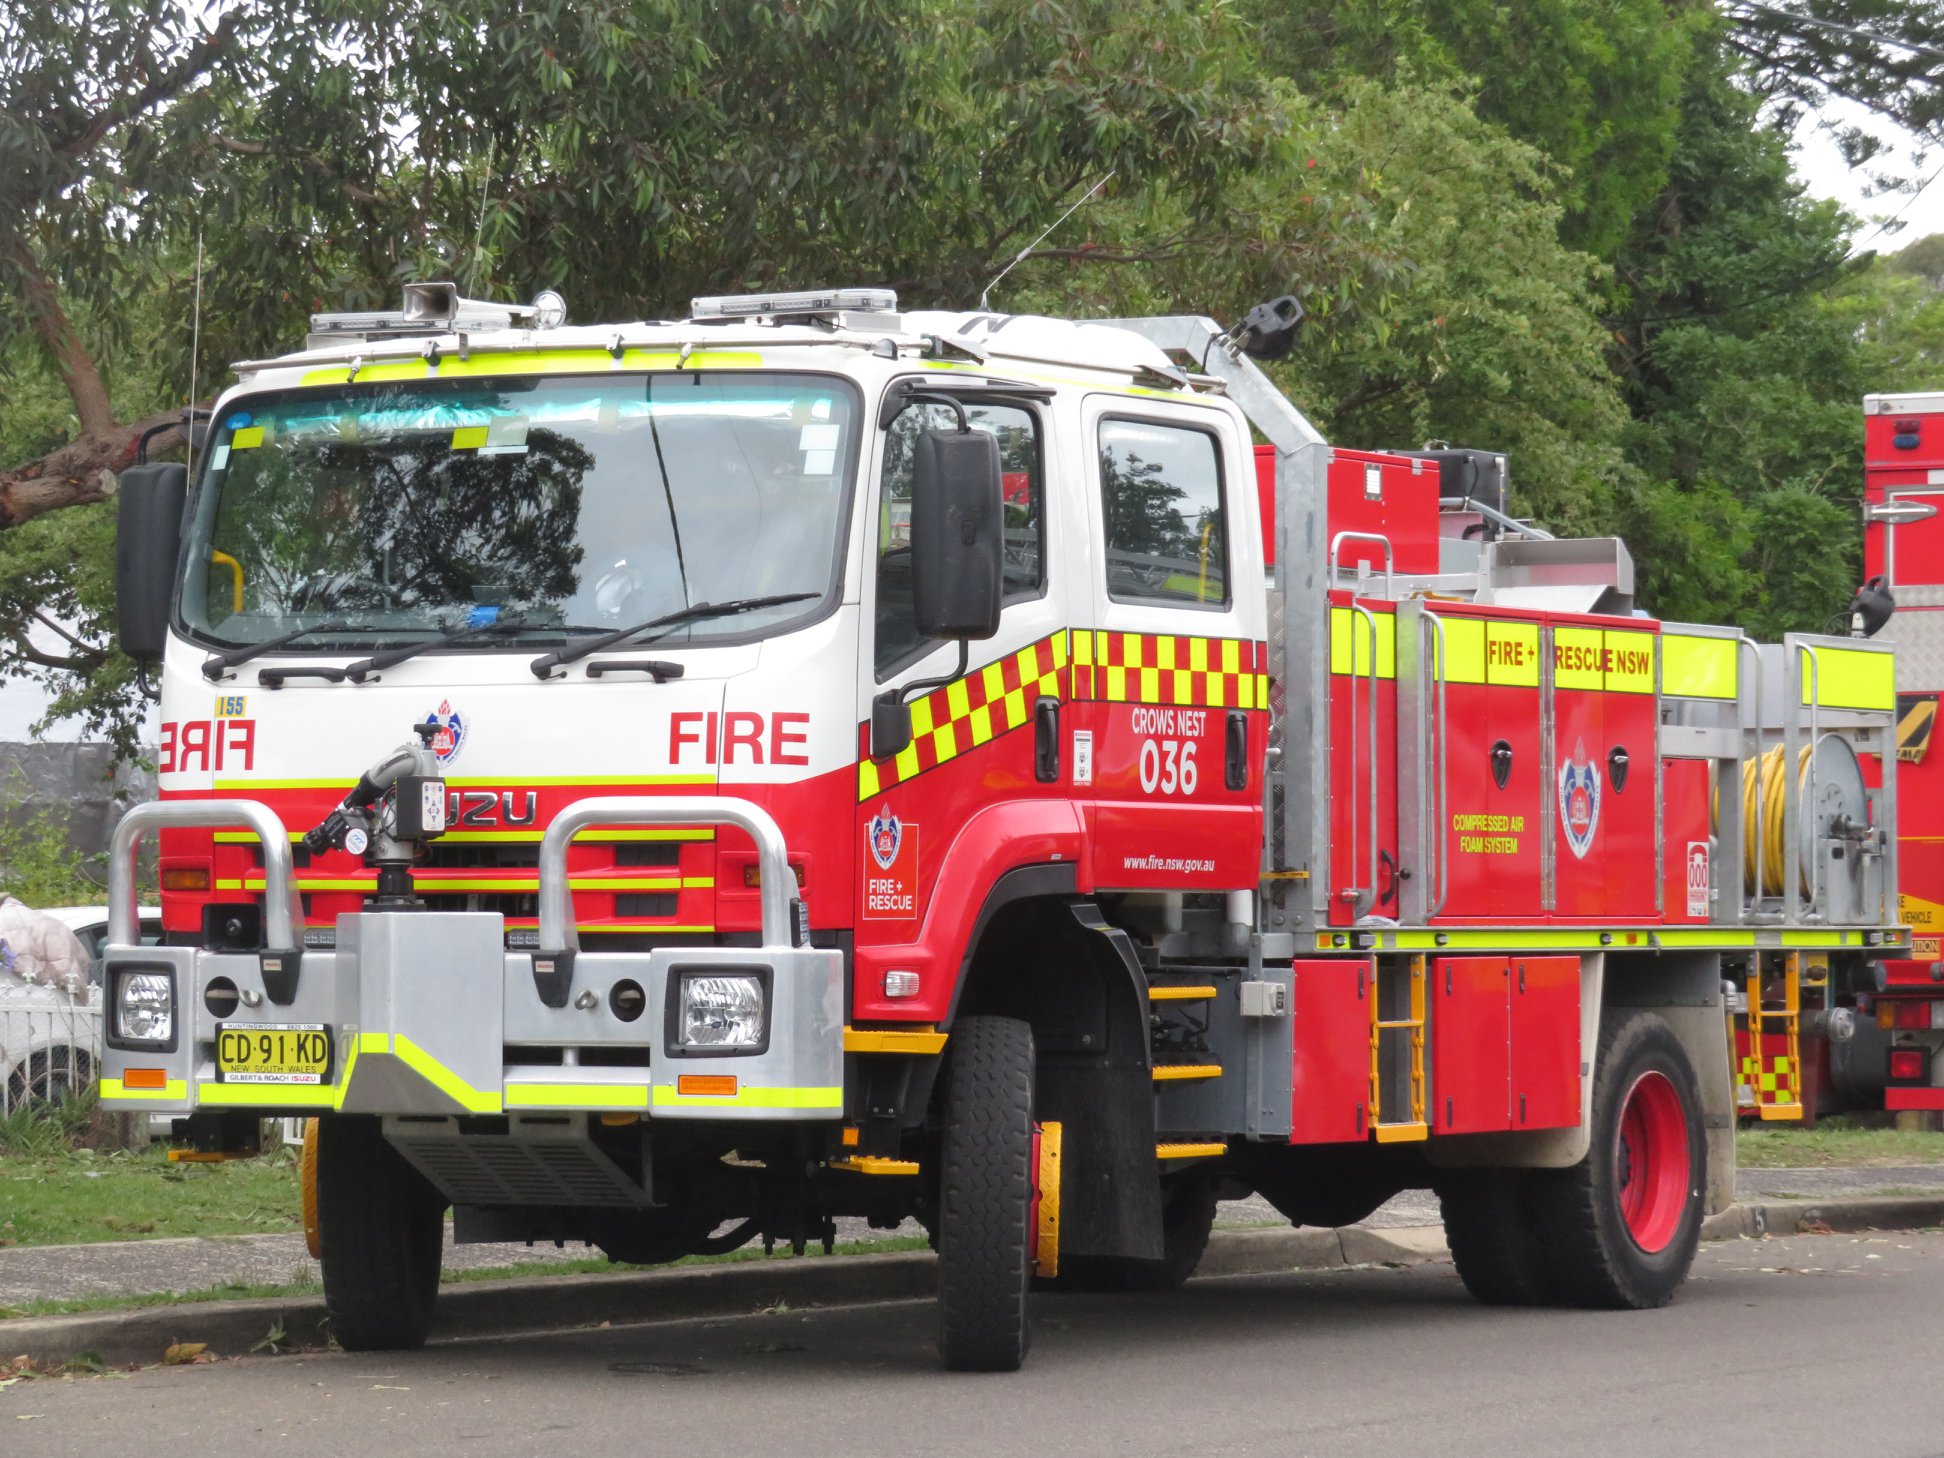 |
| Light Tanker | 9 |  |
| Heavy Rescue Truck | 12 | 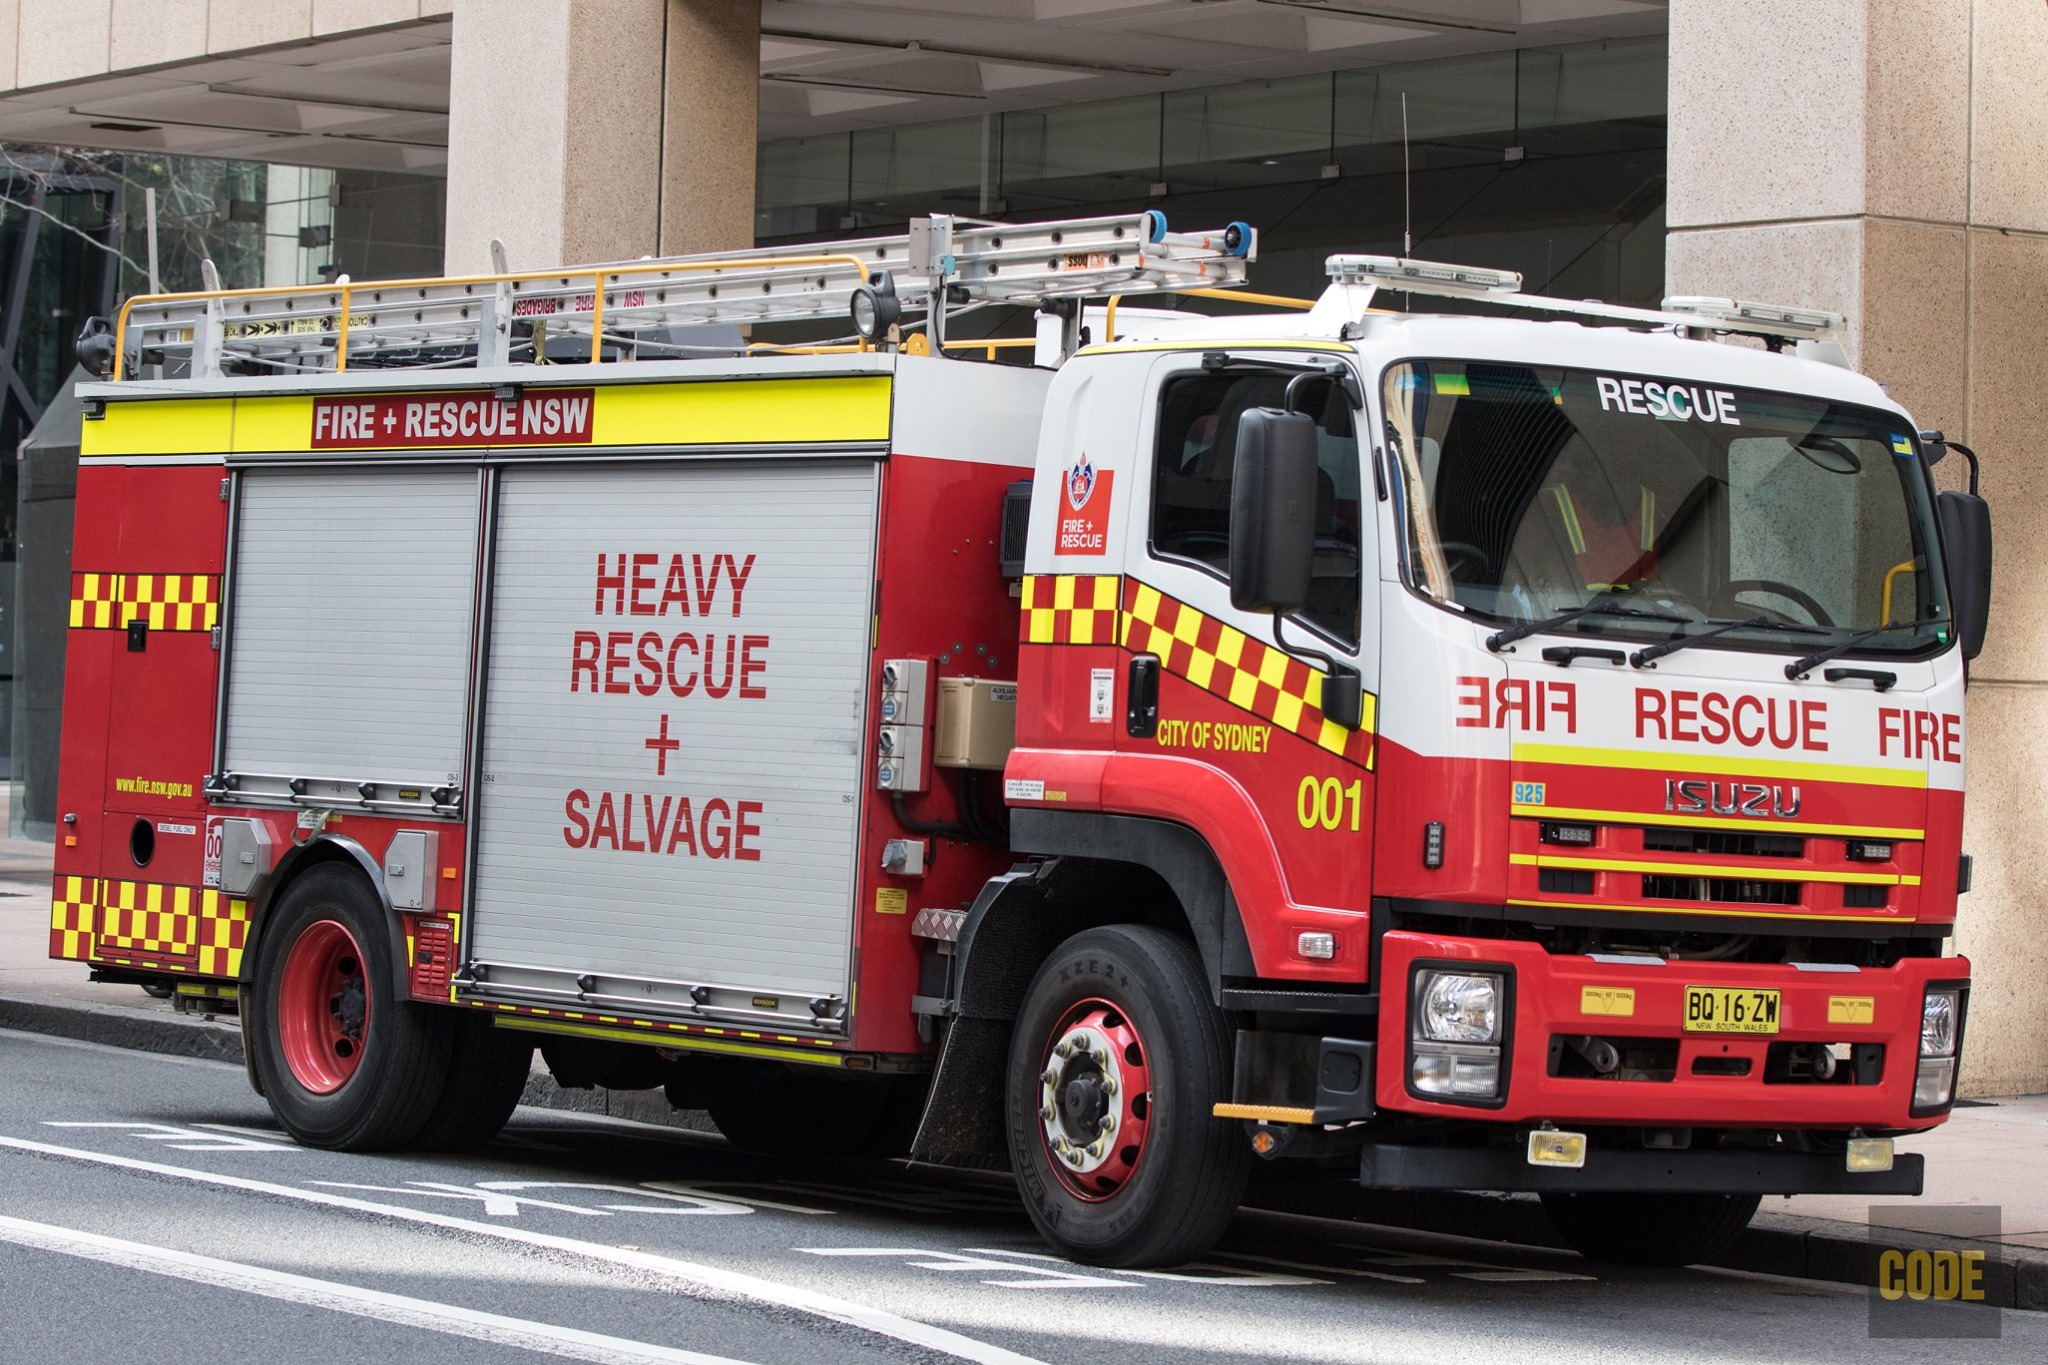 |
| Technical Rescue Truck | 4 | 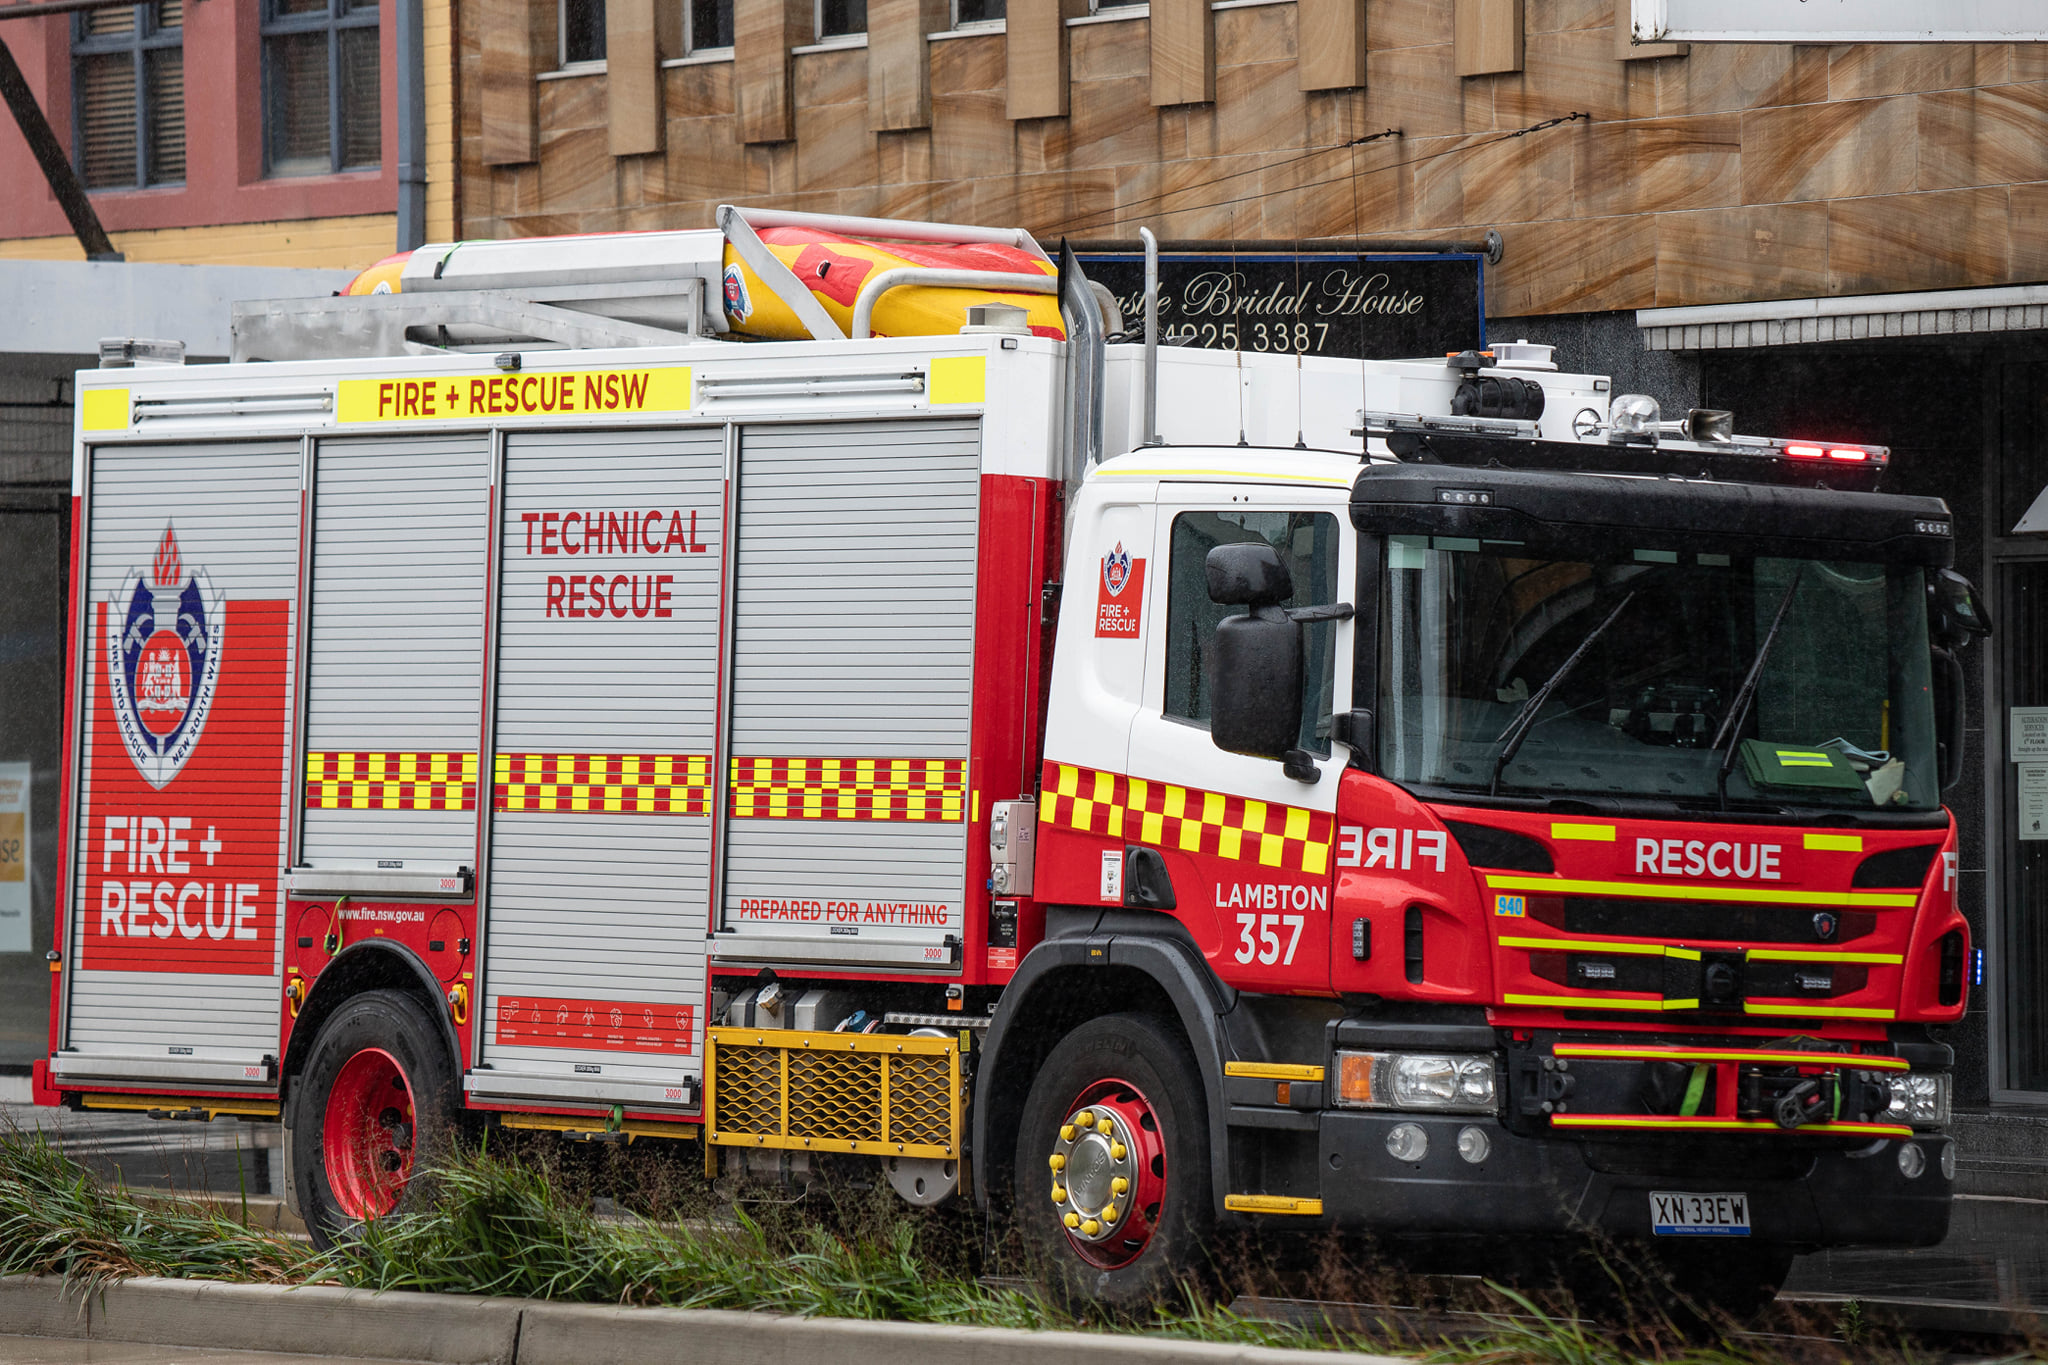 |
| Bulk Water Carrier | 6 | 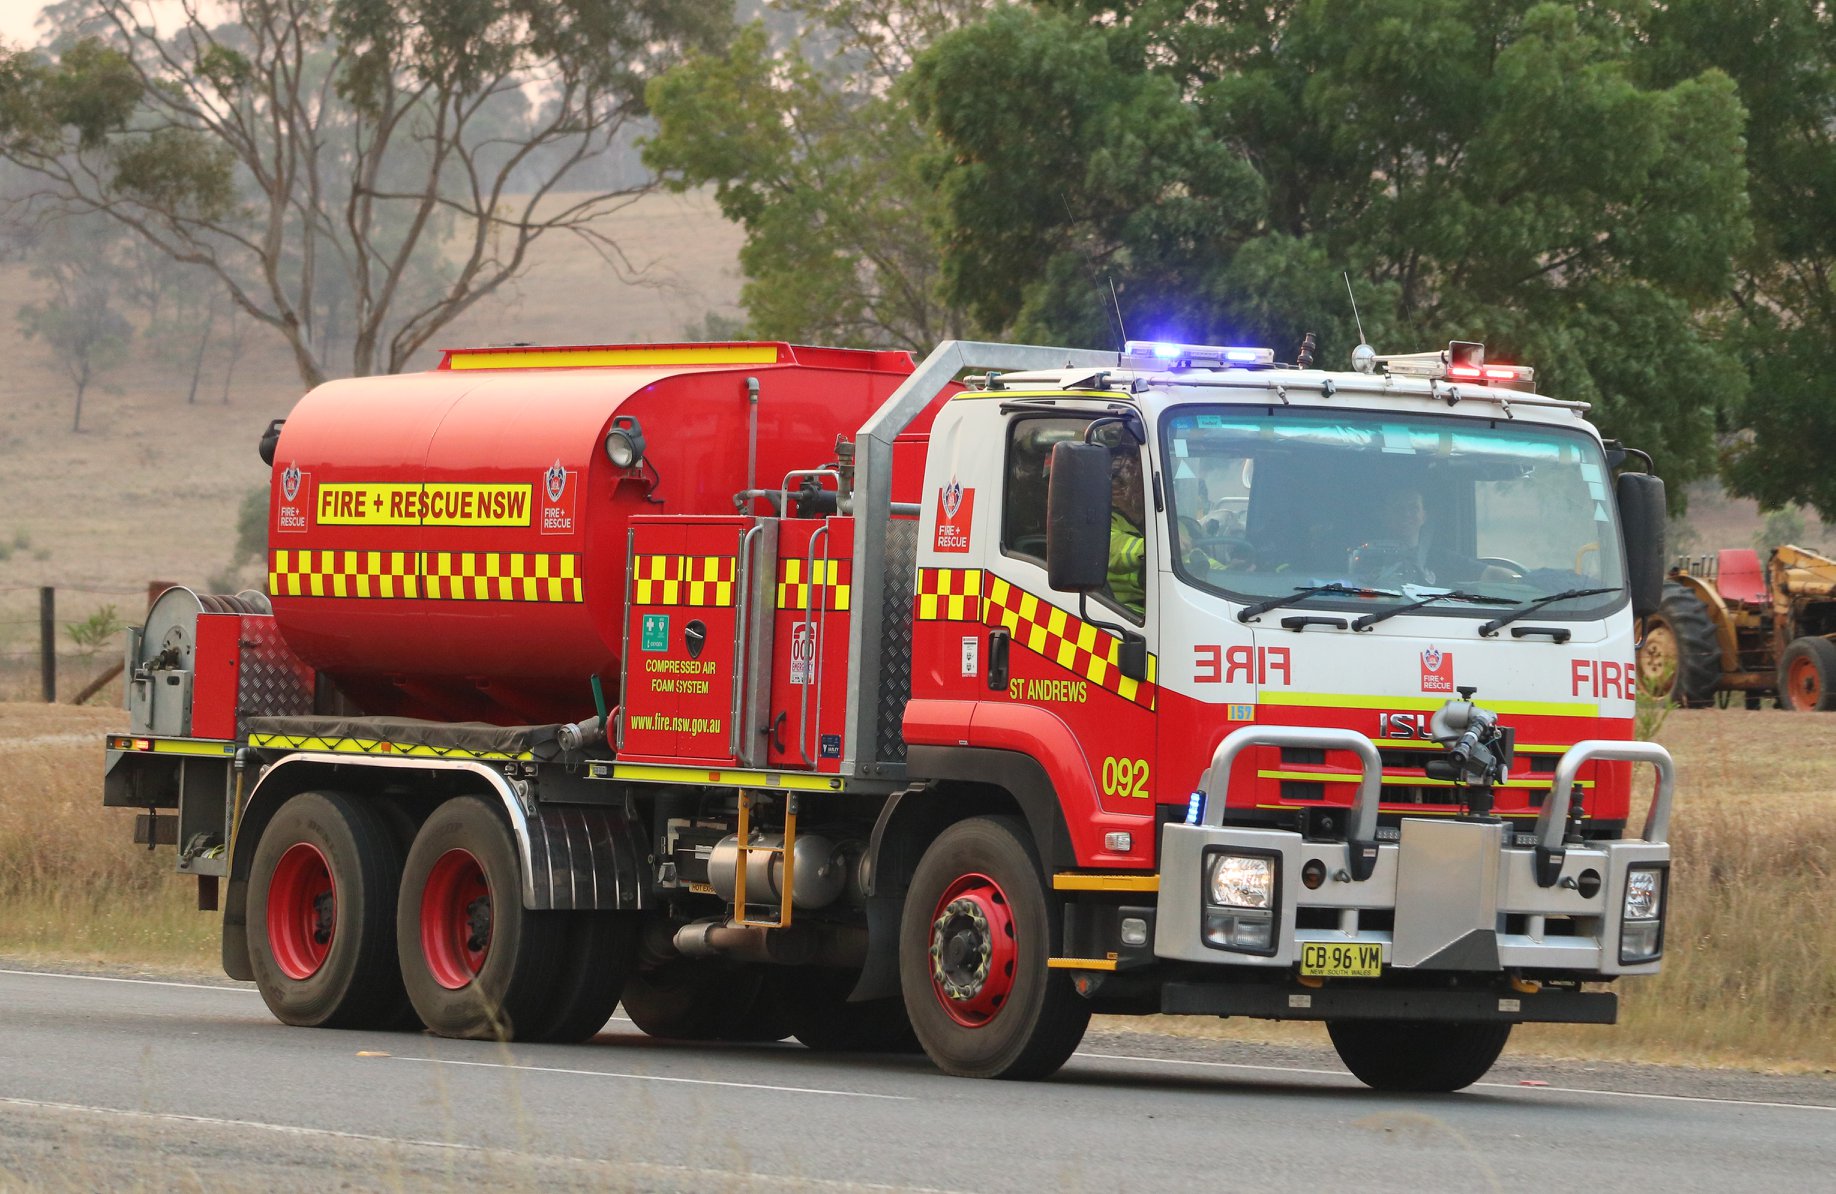 |
| Heavy Bulk Water Carrier | 2 | 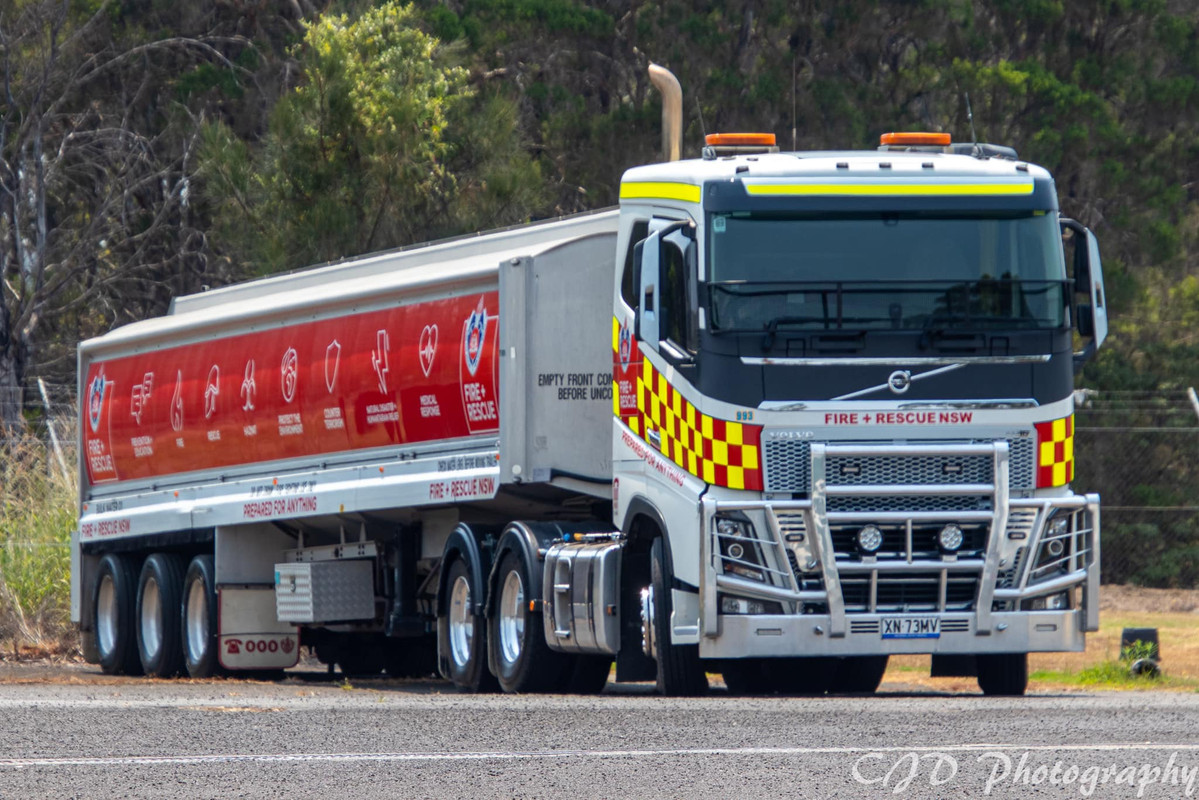 |
| Black Panther Bulk Water Carrier | 1 |  |
| Urban Search and Rescue Vehicle | 2 |  |
| Heavy Major Structural Collapse Truck | 1 | 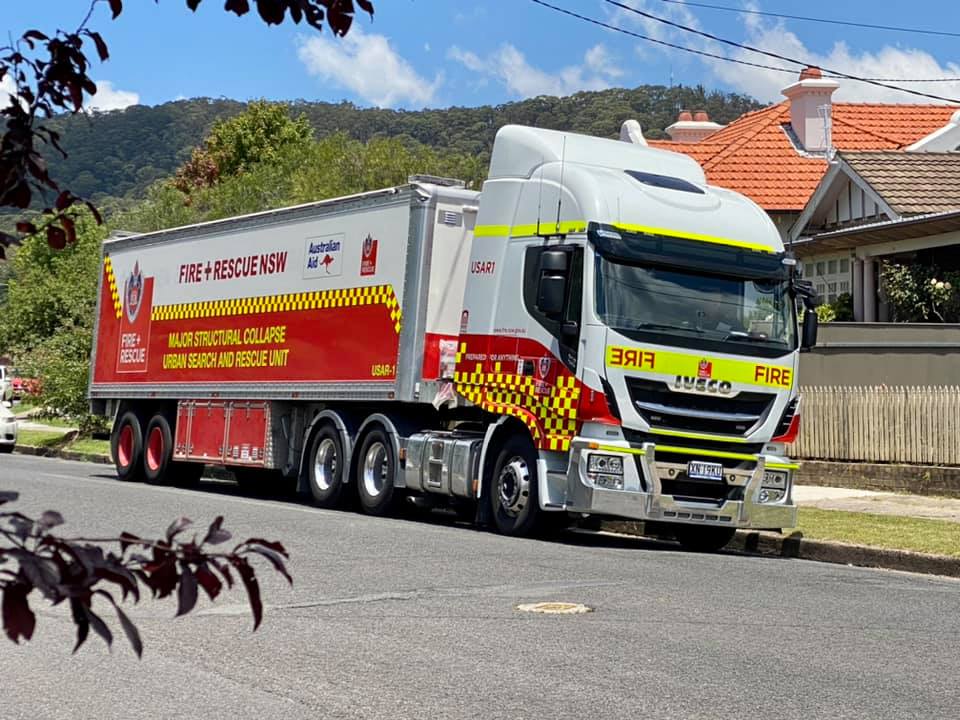 |
| Medium Major Structural Collapse Truck | 1 | |
| Heavy Breathing Apparatus and HAZMAT Response Trucks | 3 | 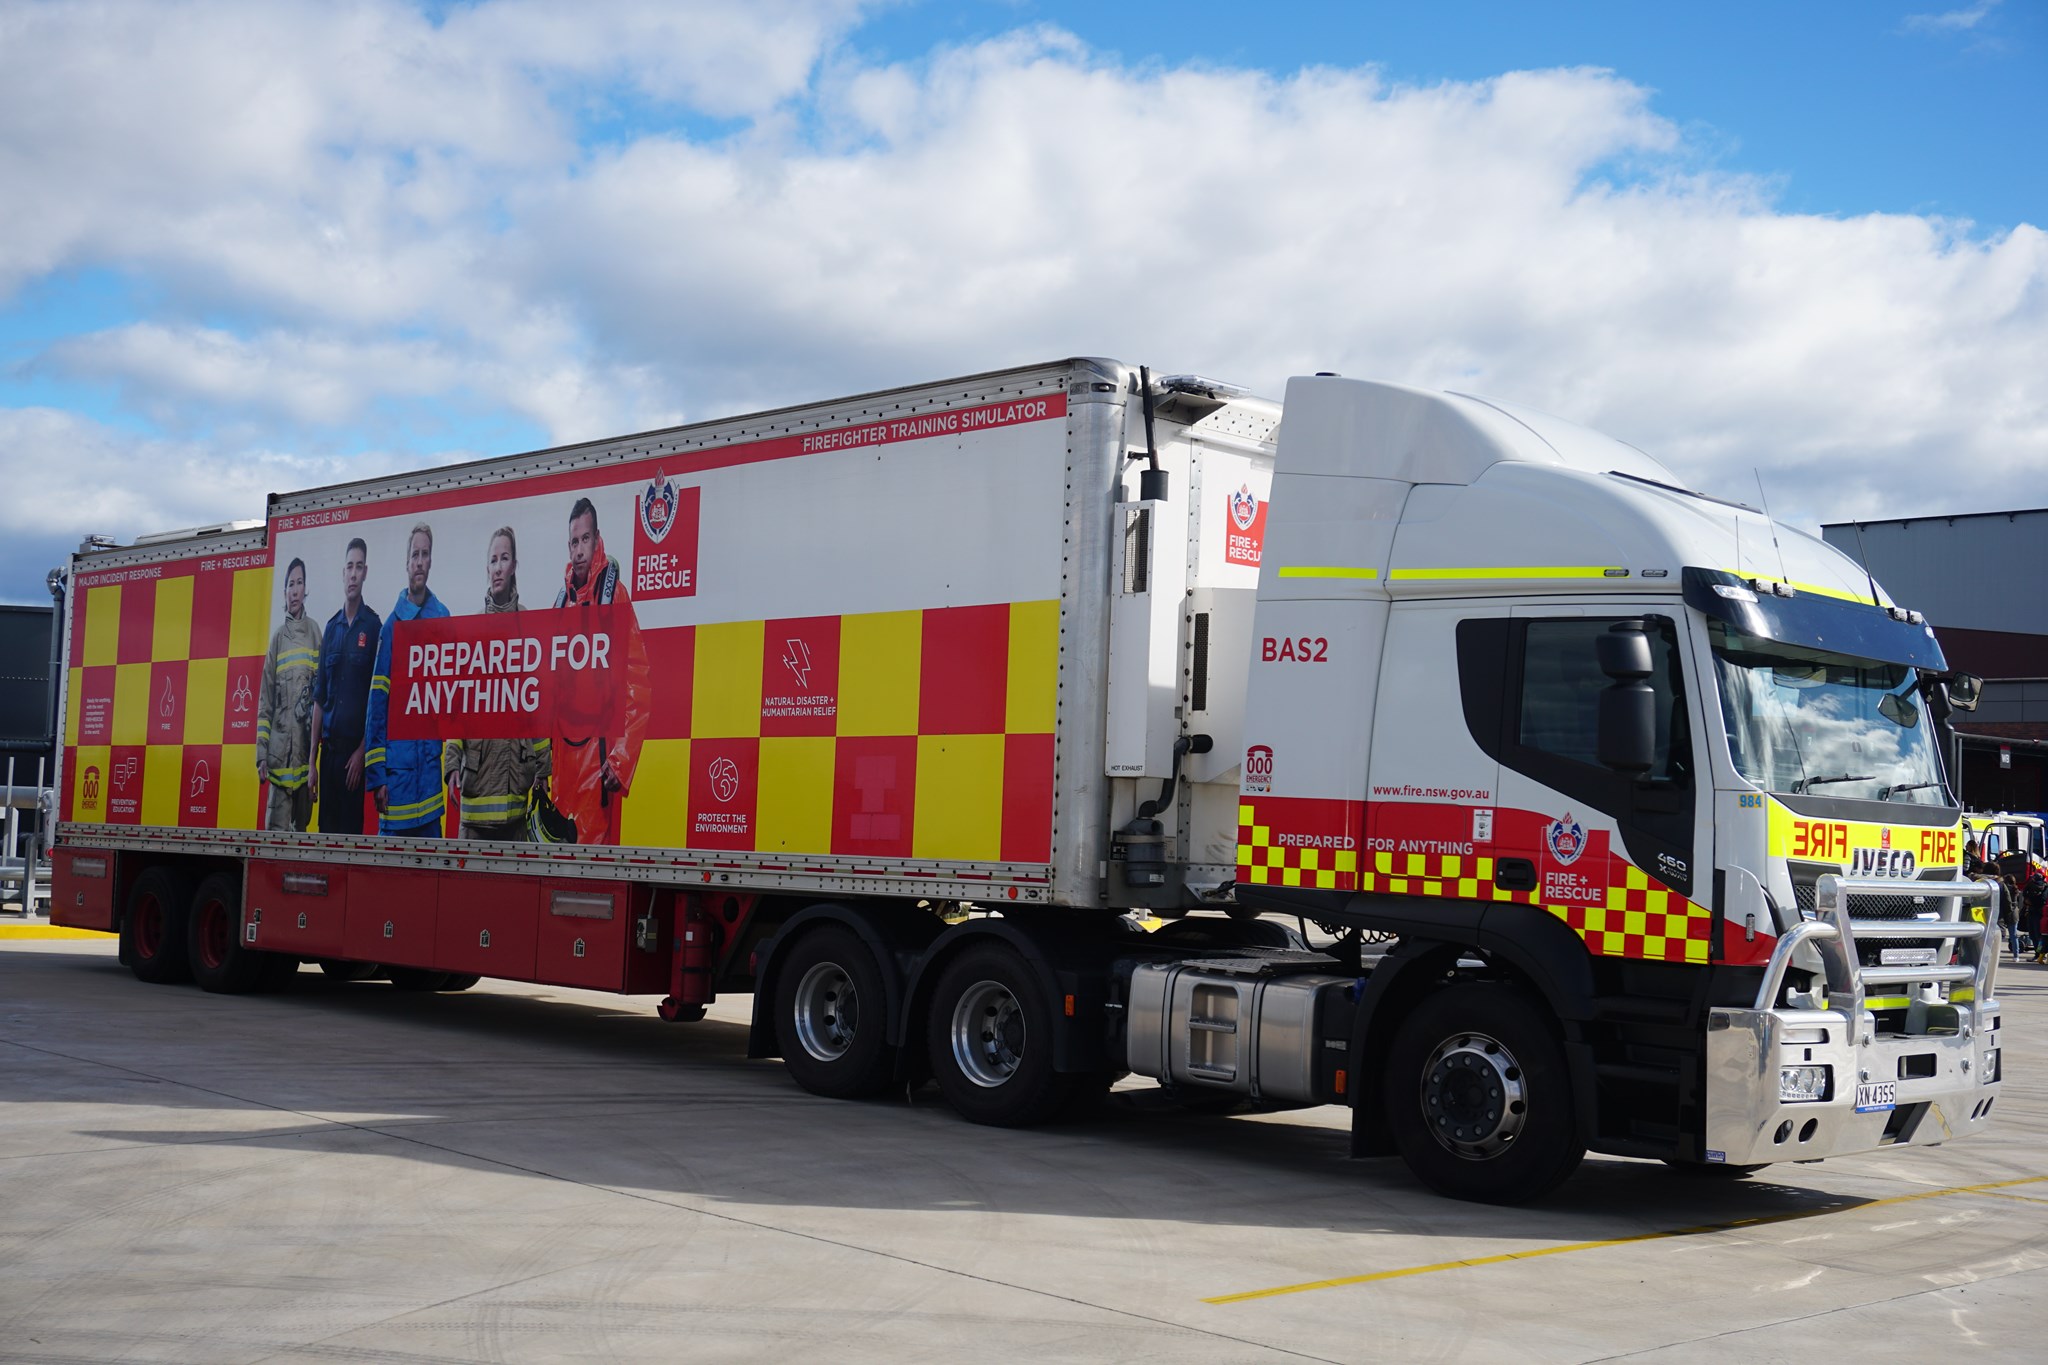 |
| HAZMAT Response Vans | 16 | 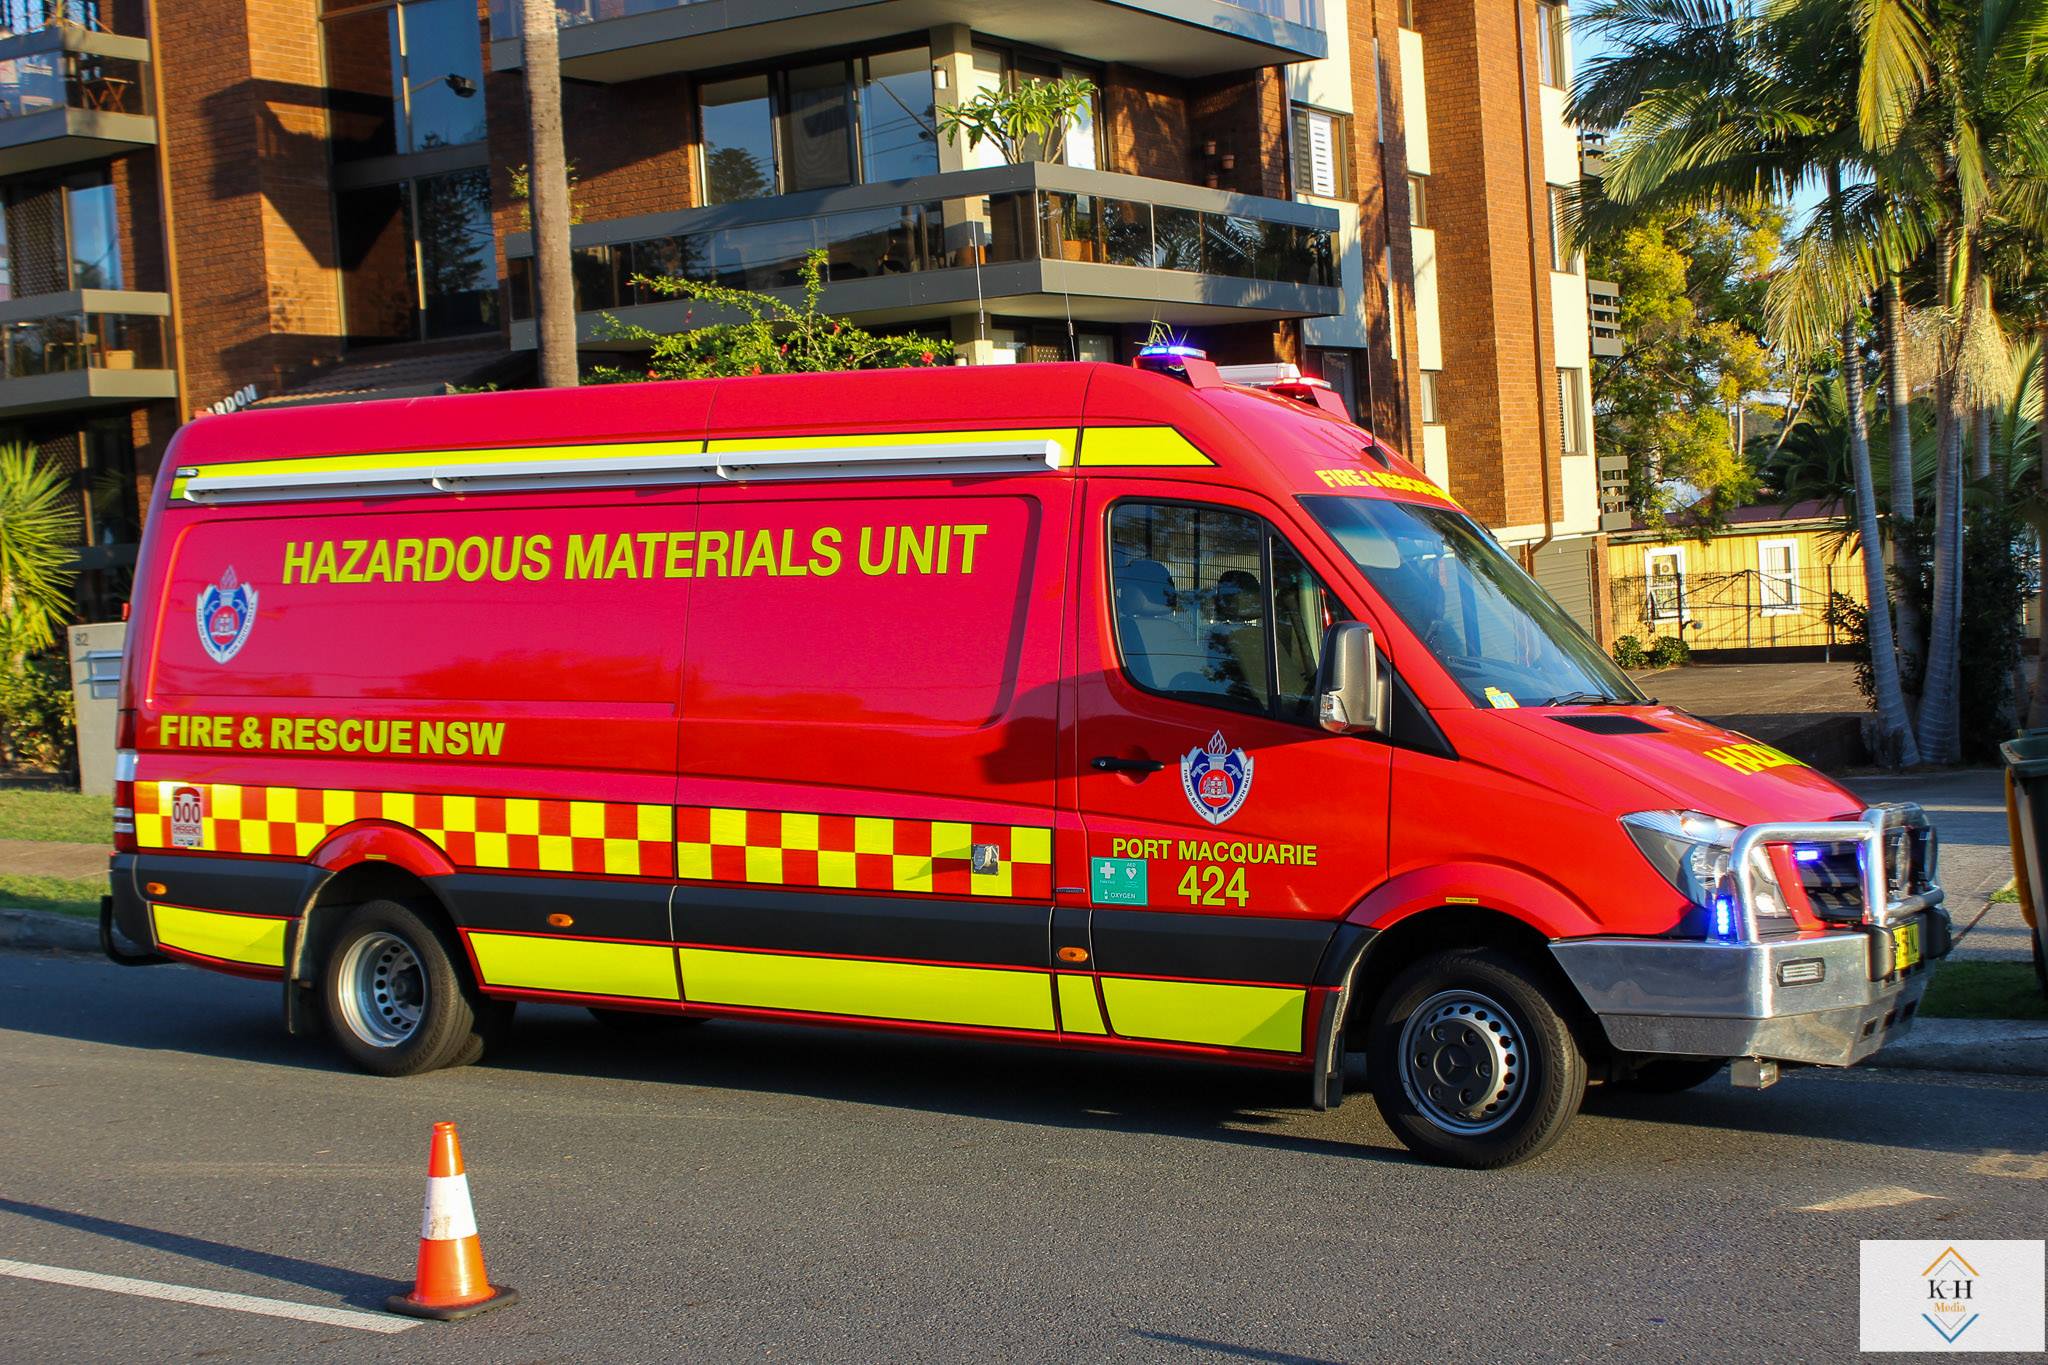 |
| HAZMAT Response Trucks | 9 | 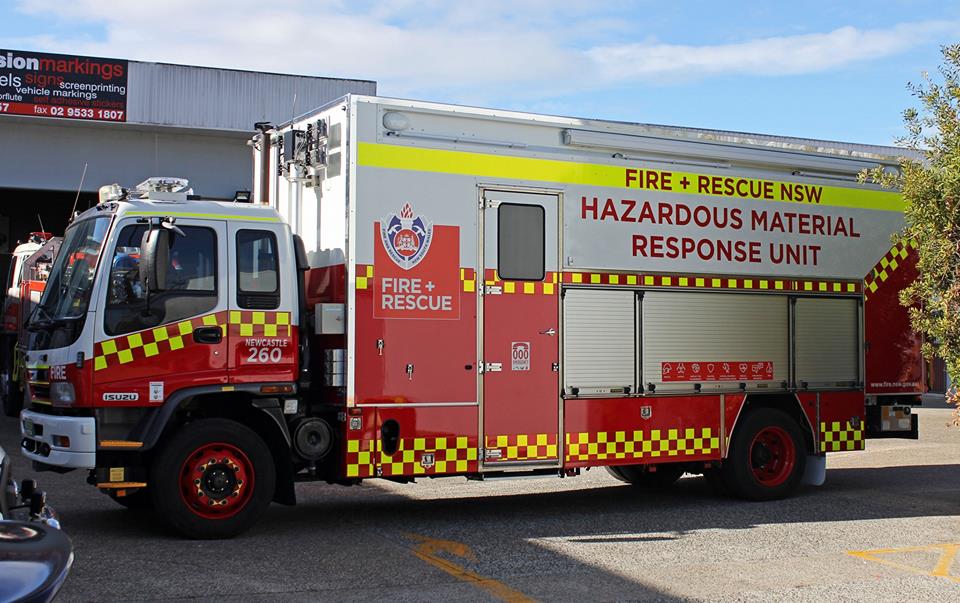 |
| HAZMAT Boat | 10 | 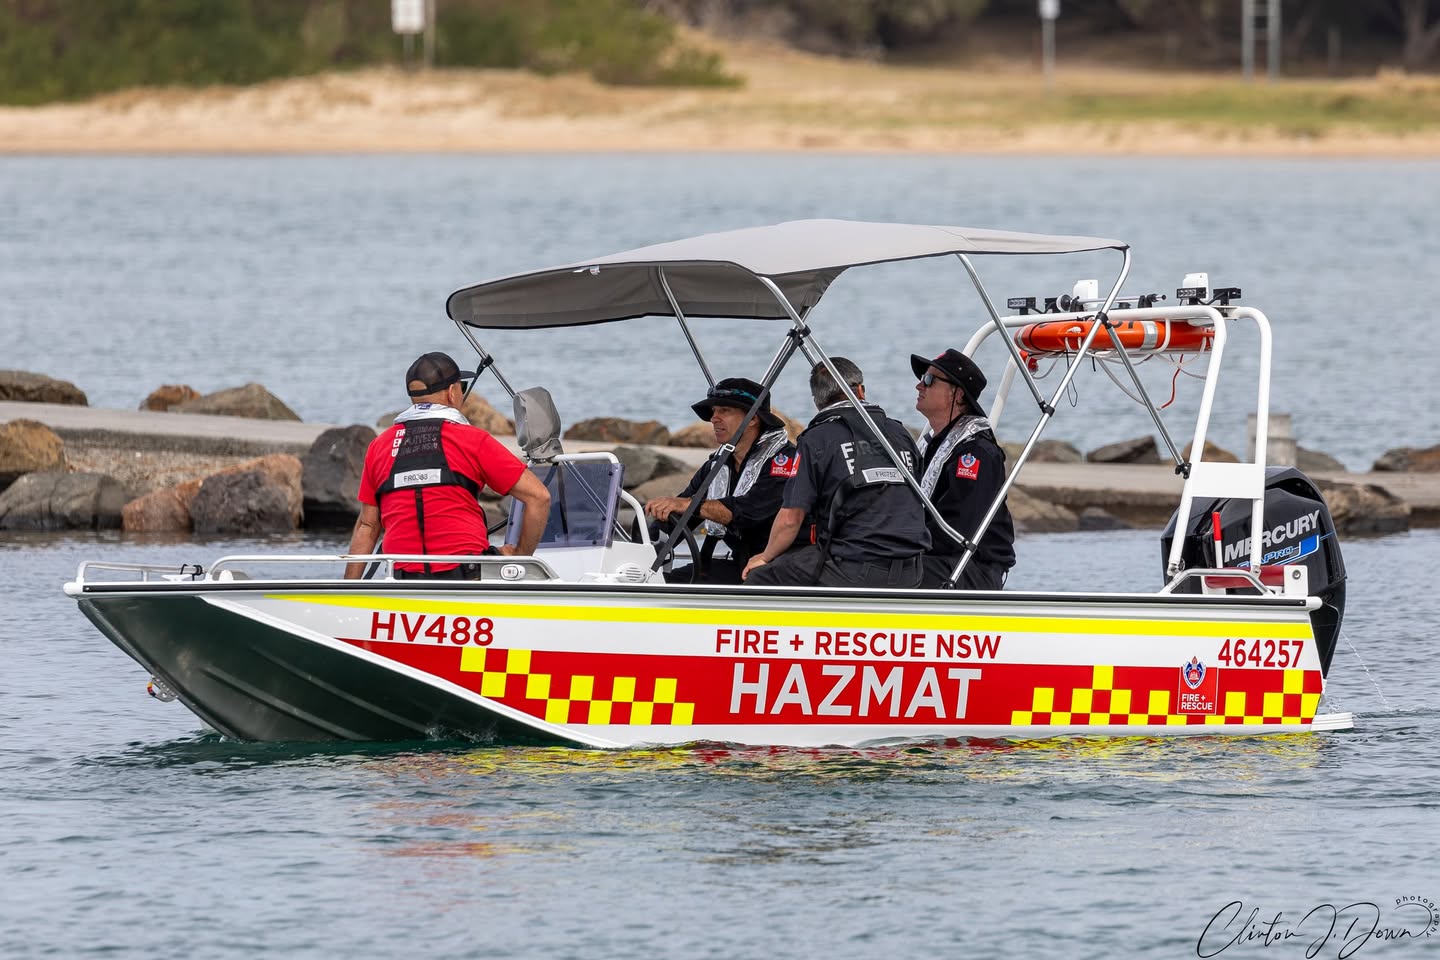 |
| Breathing Apparatus Support Vehicle | 2 | 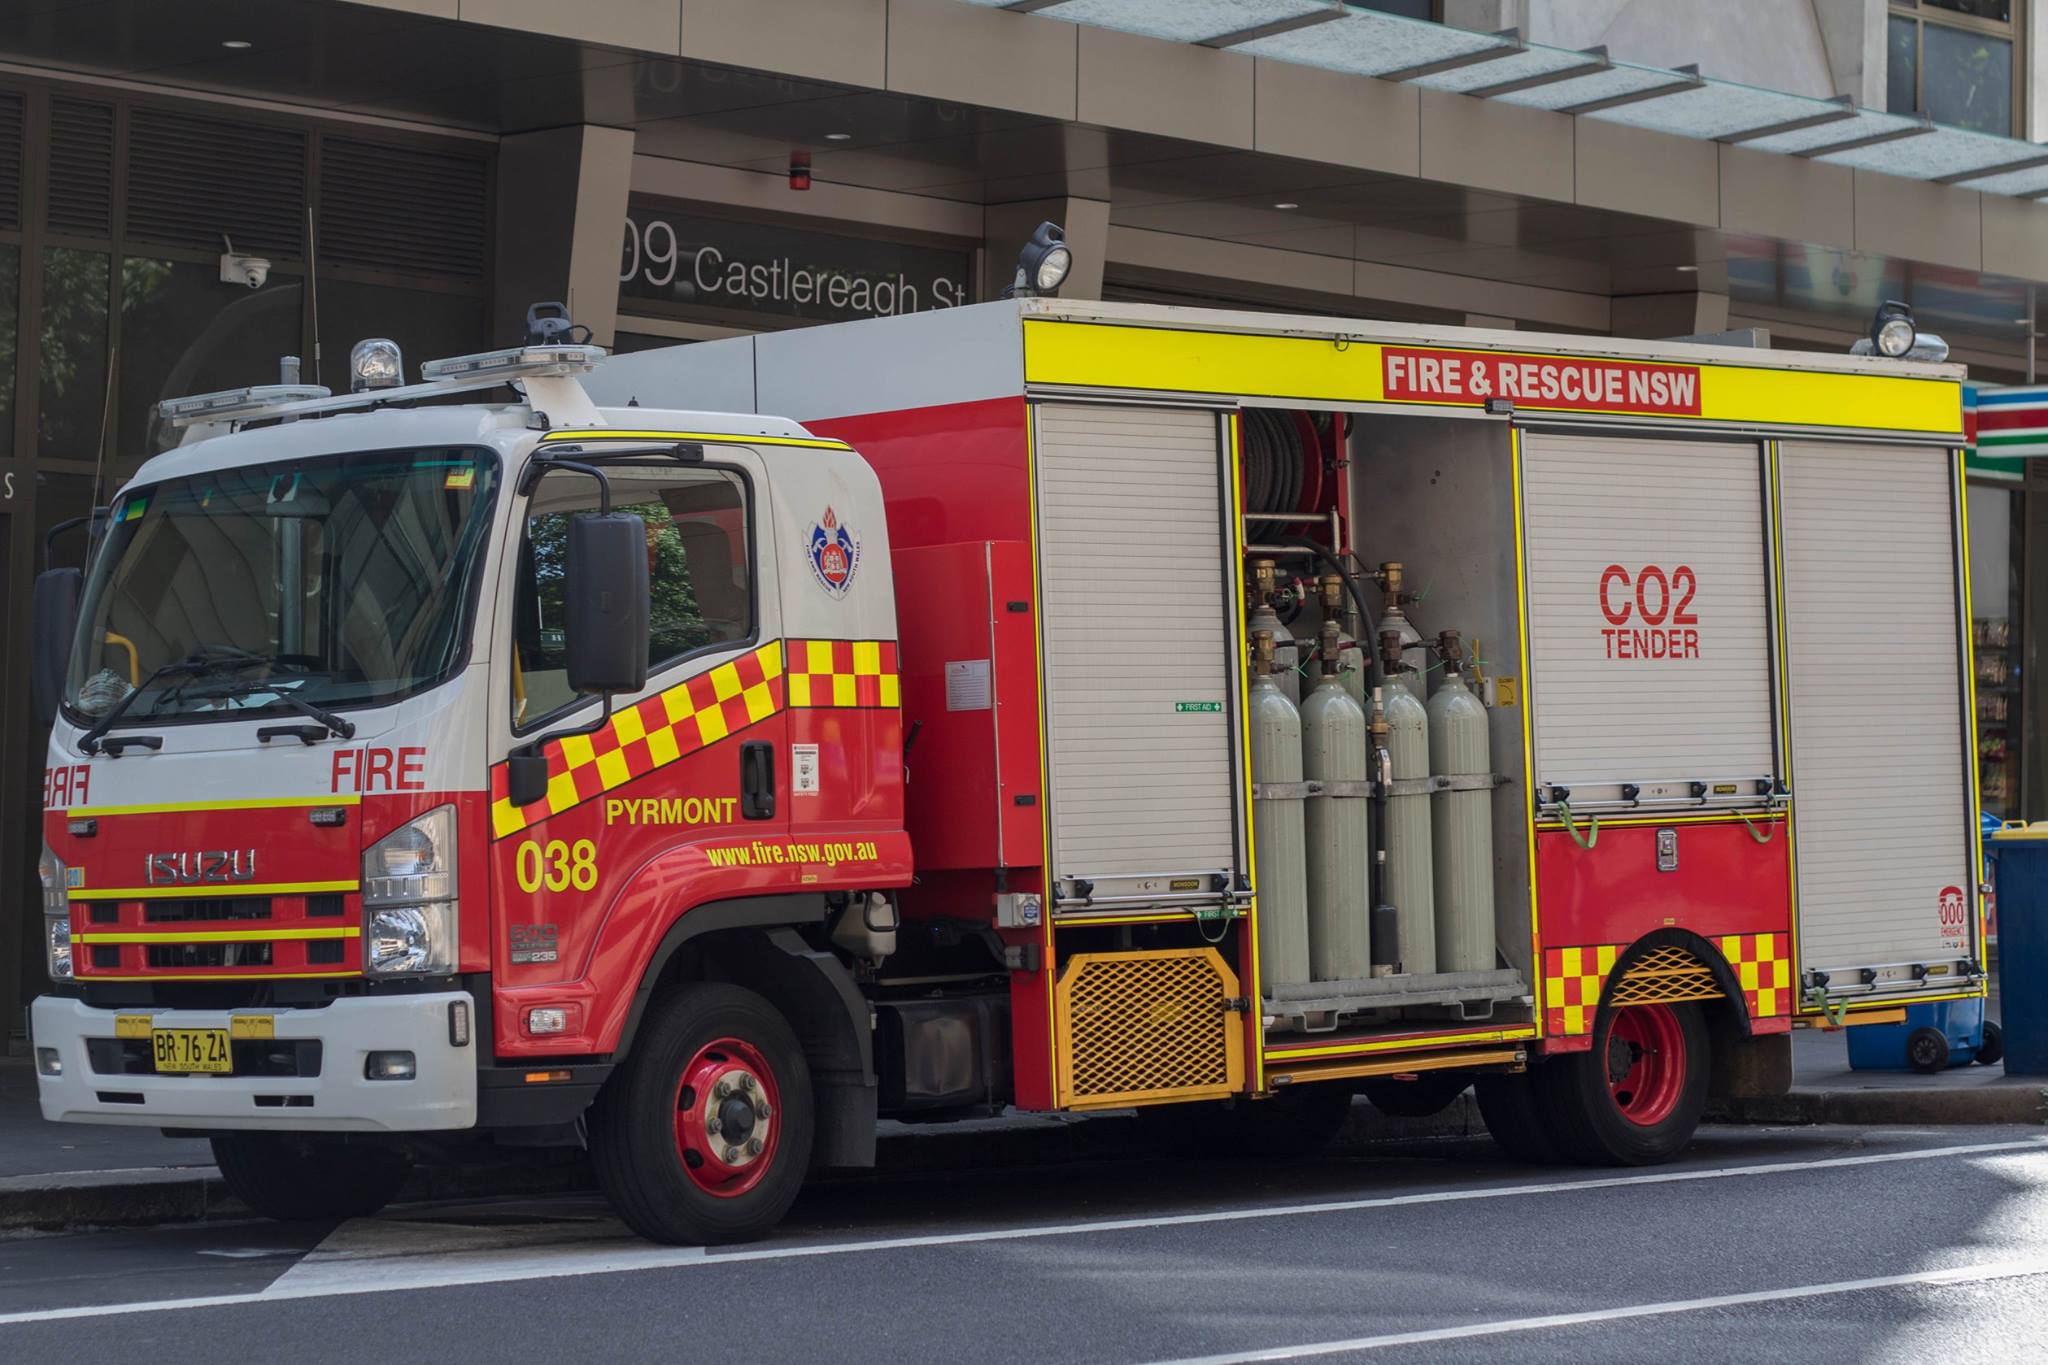 |
| Command Vehicle | 30 | 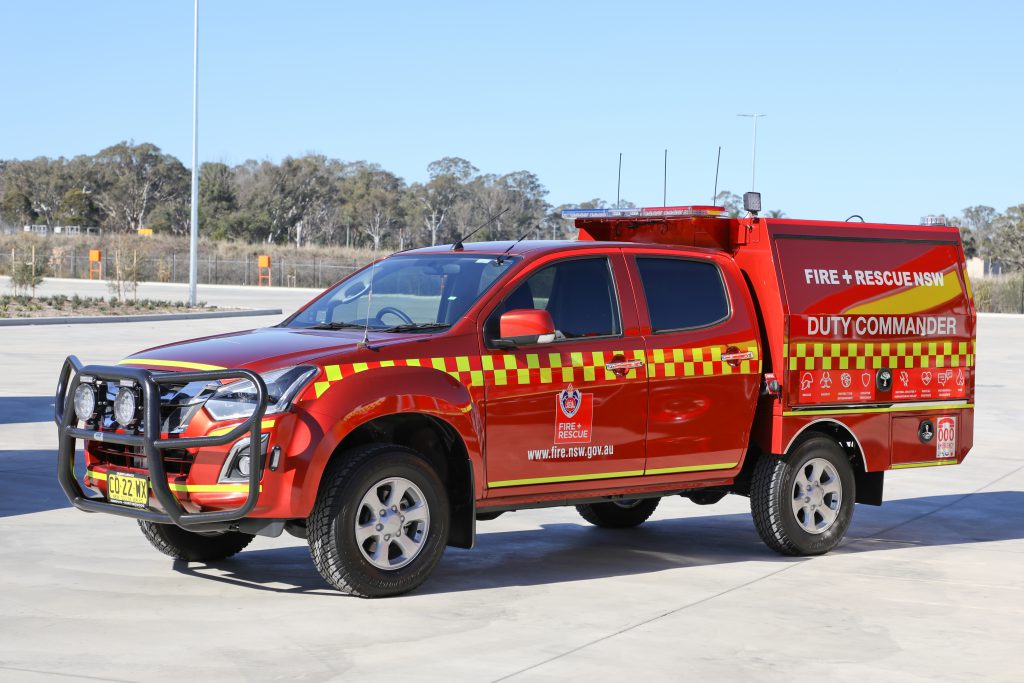 |
| Mobile Command Vehicle | 2 |  |
| Logistics Support Vehicle | 2 | 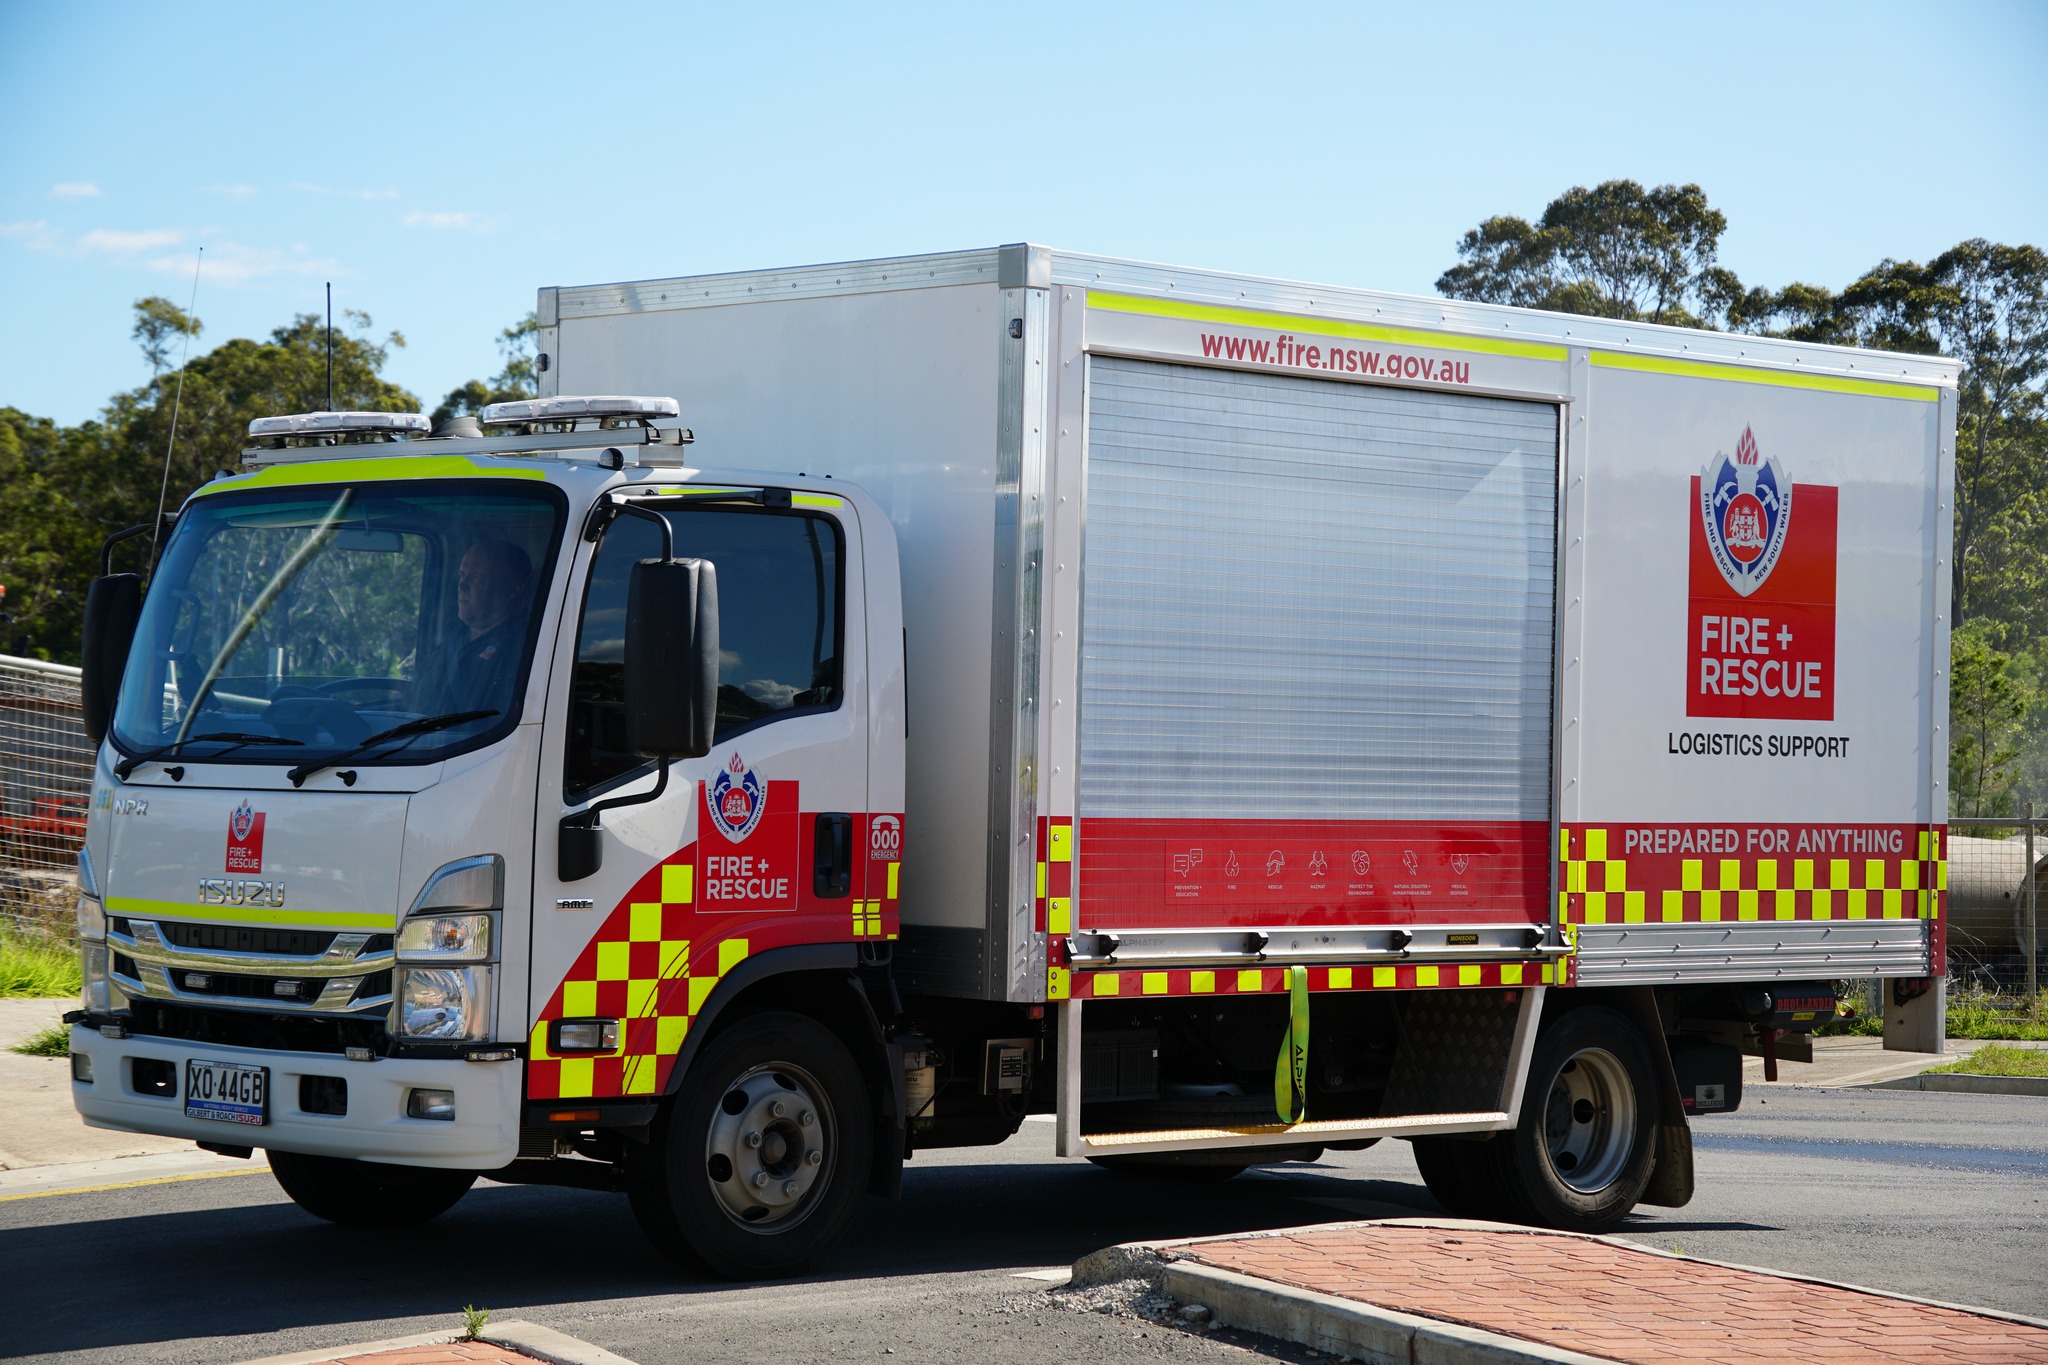 |
| Technical Support Vehicle | 5 | 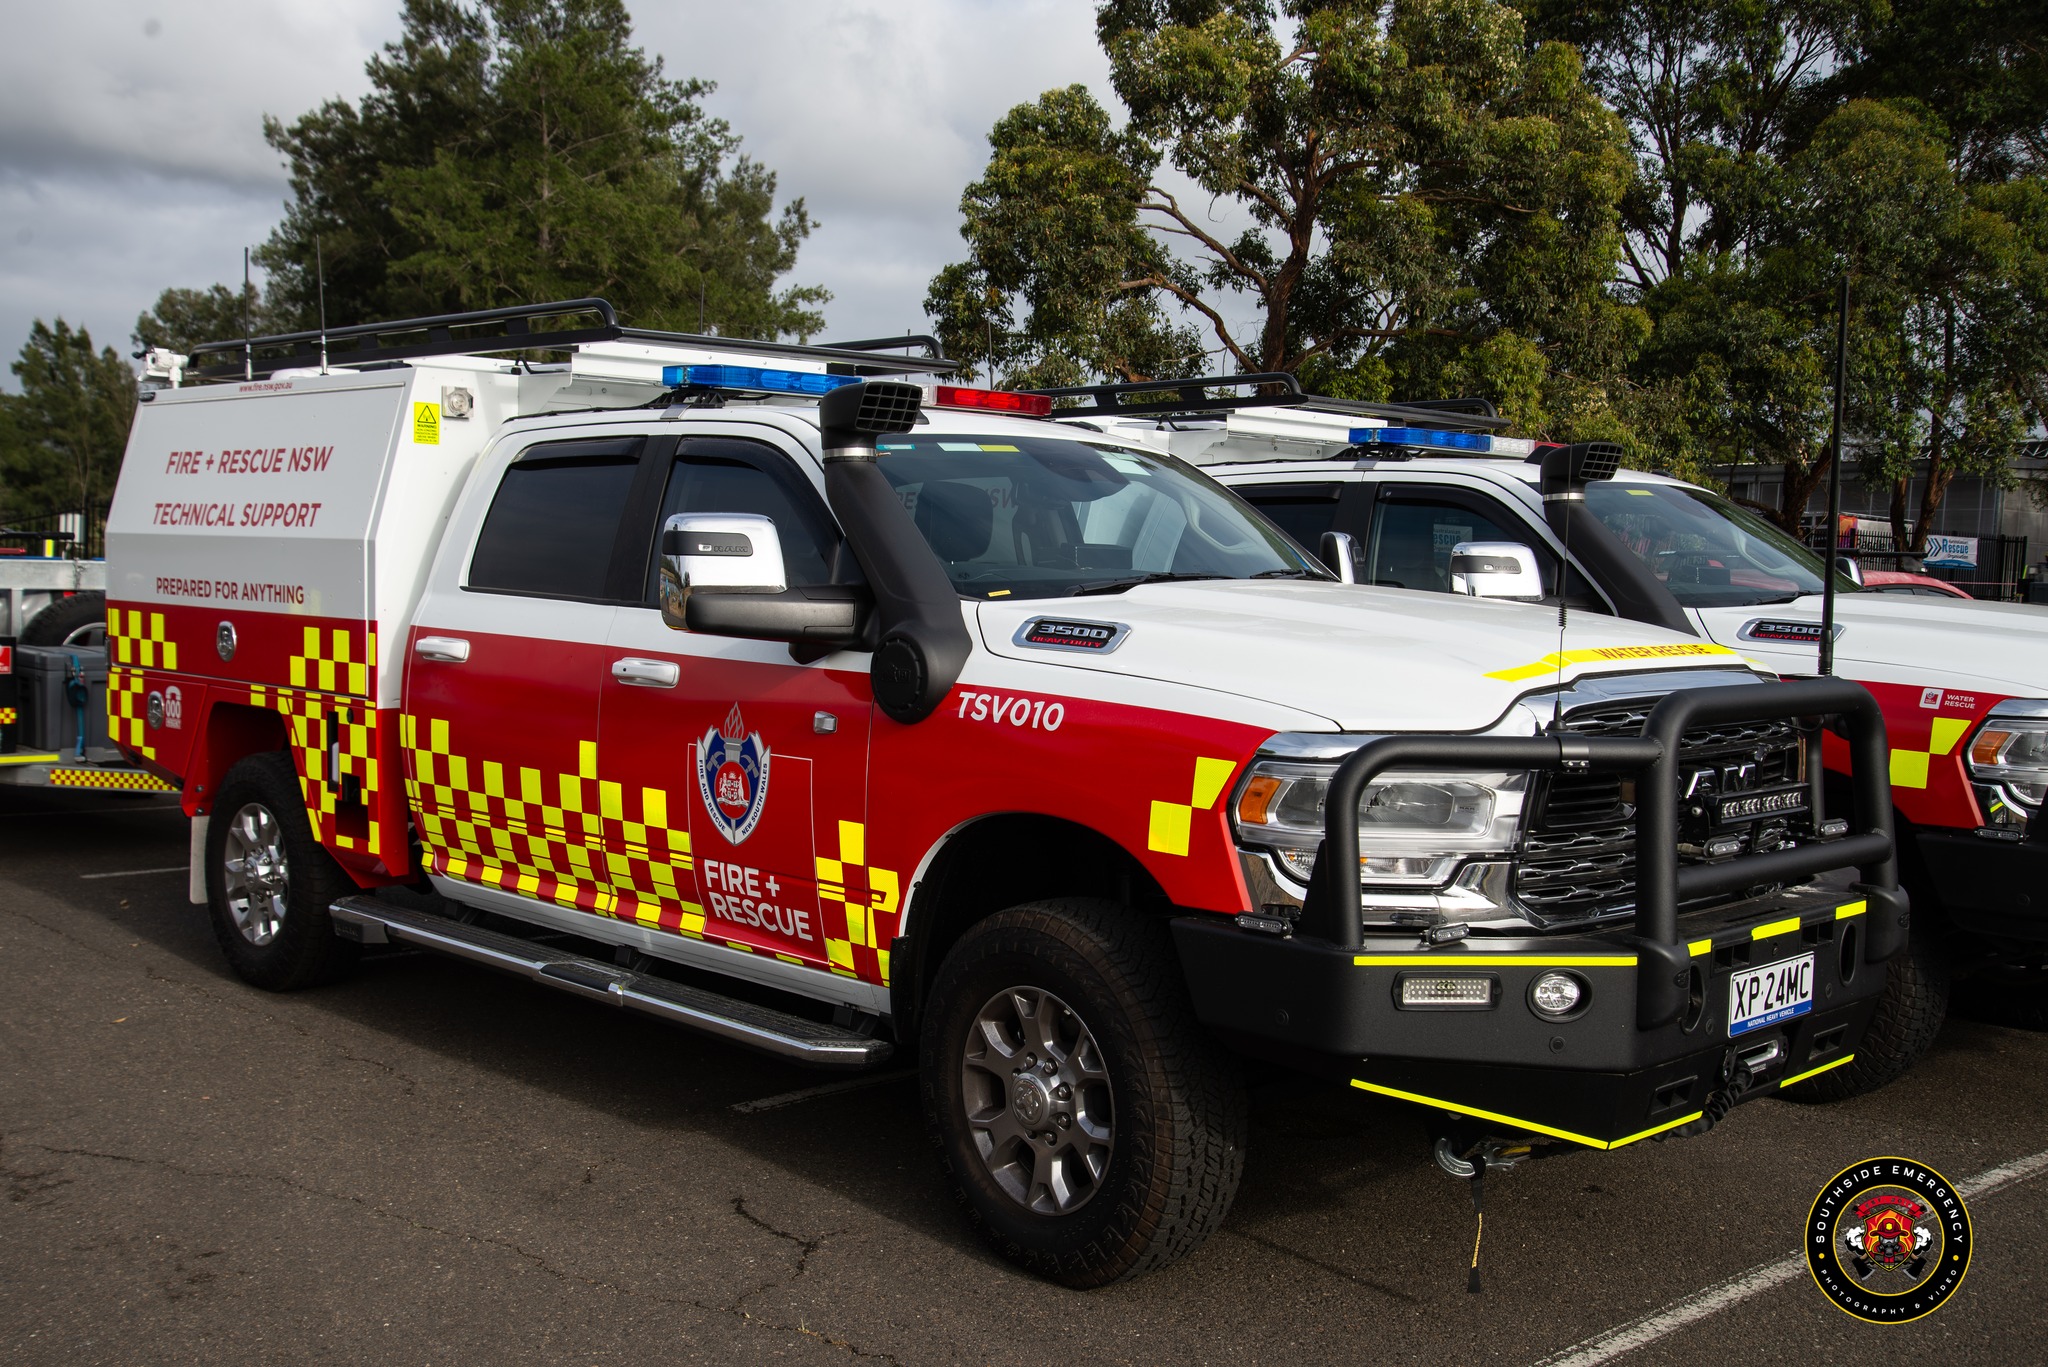 |
| Hook Lift Trucks | 2 |  |
| Rehabilitation Van | 8 |  |
| Lube Service Vehicle | 5 | 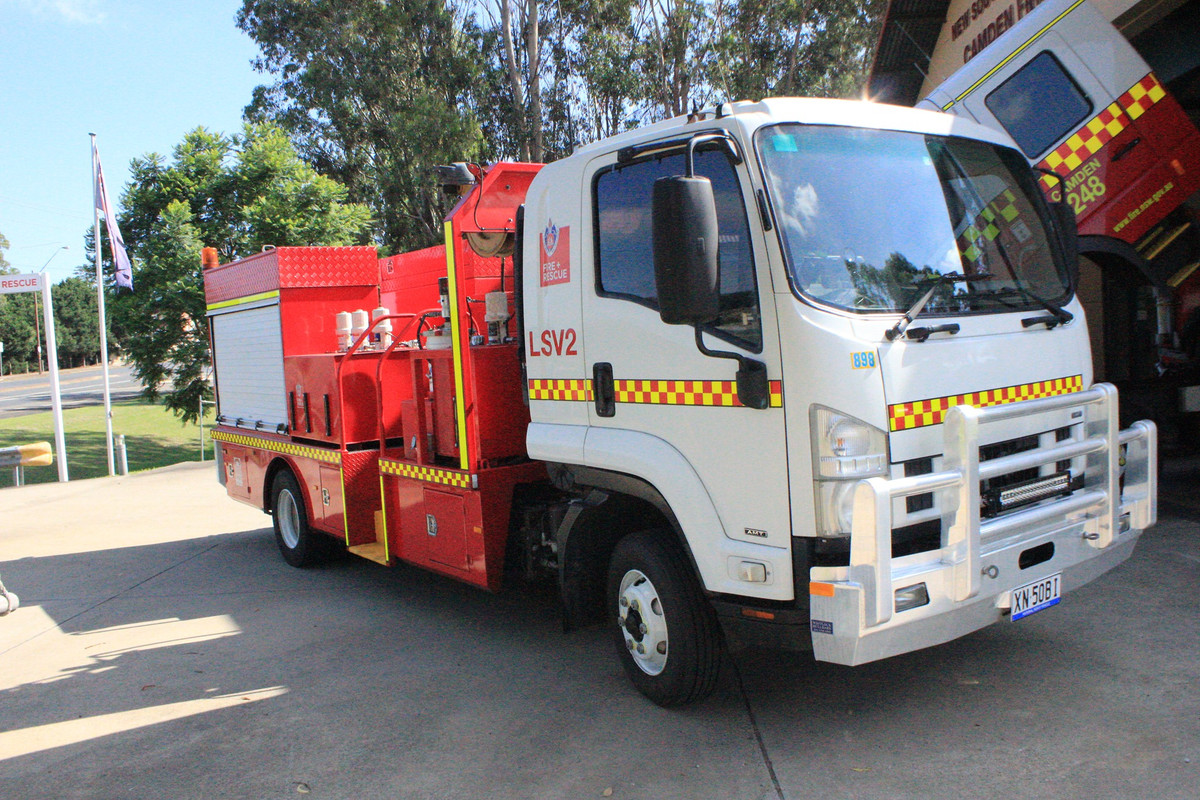 |
| Alpine Pumper | 2 |  |
| Snowmobile | 8 | 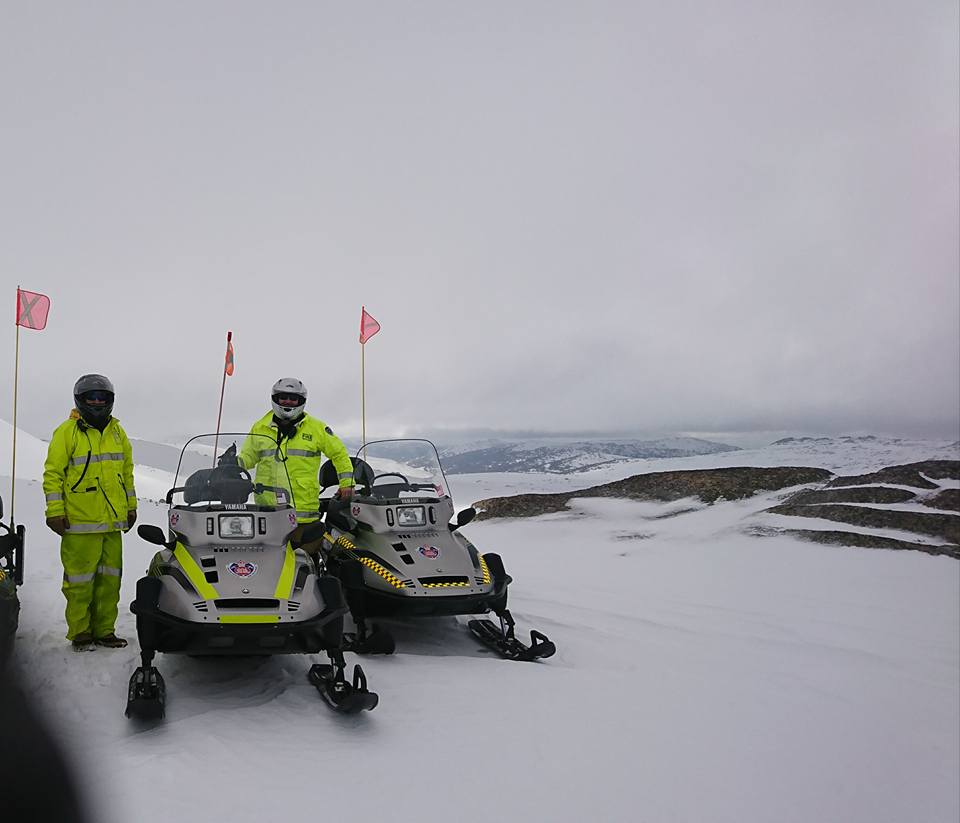 |
| All-Terrain Vehicle | 4 |  |
| Transport Bus | 1 | 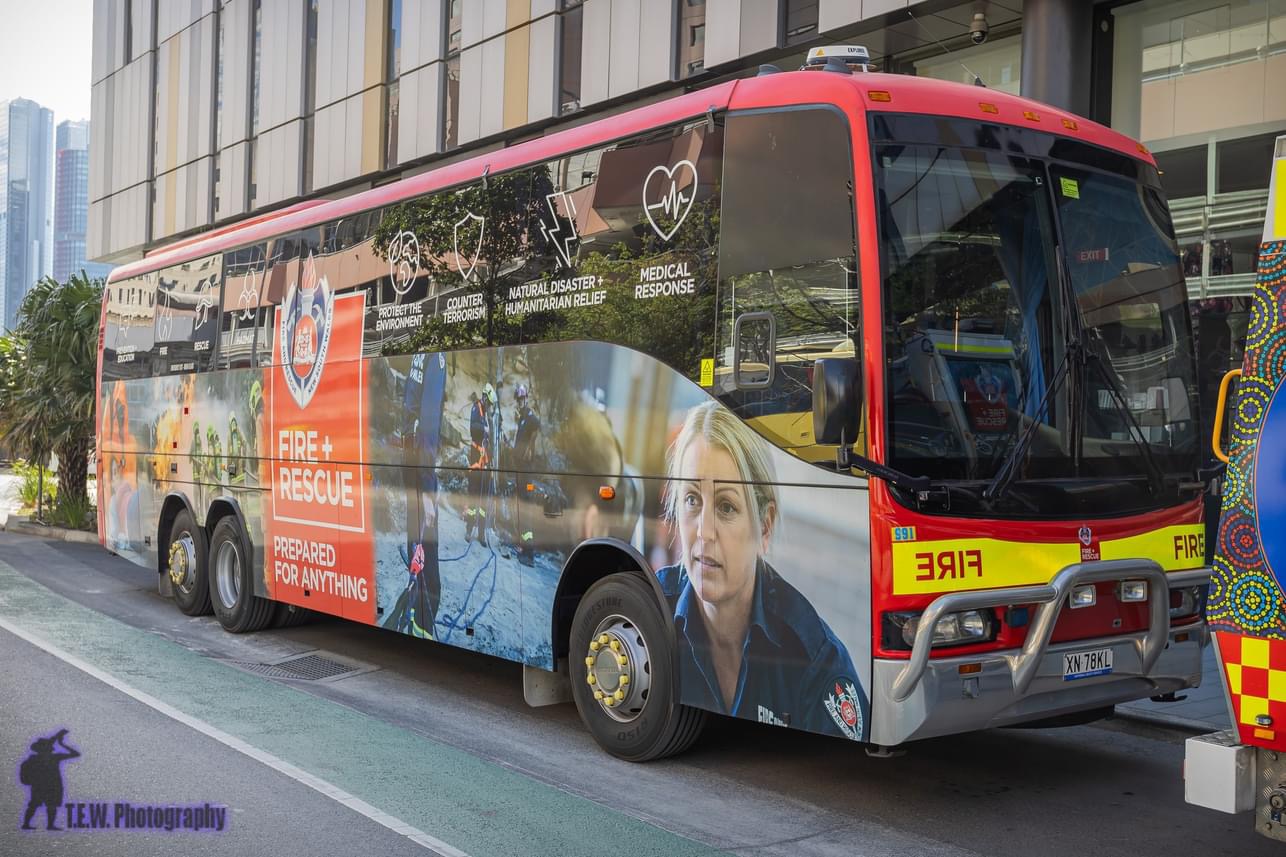 |
| Scientific Support Van | 2 | 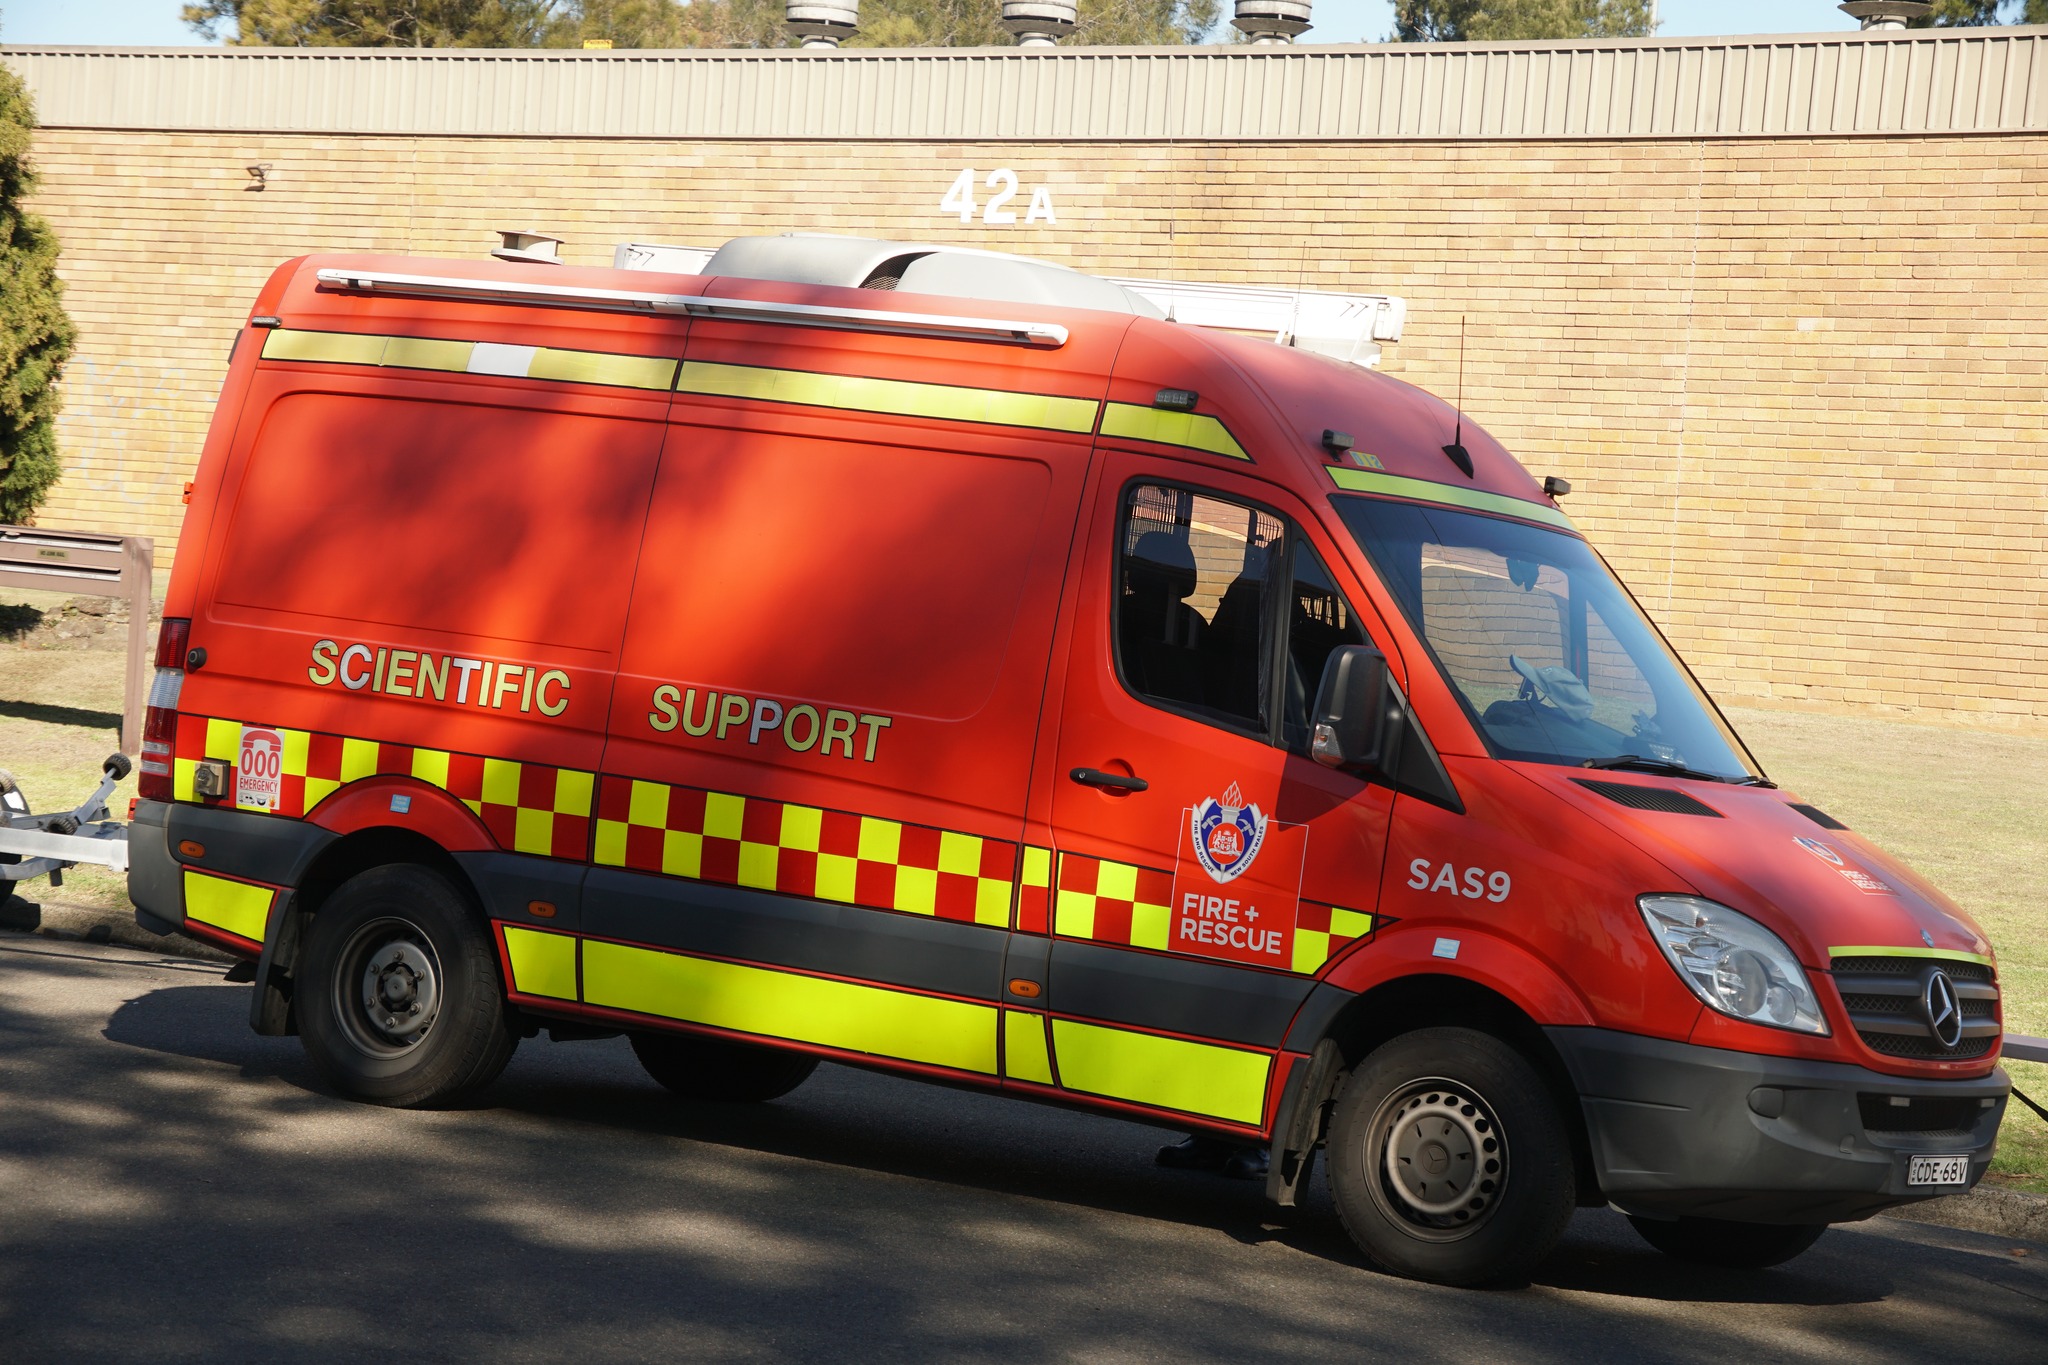 |
| Community Fire Unit Trailer | 500 | 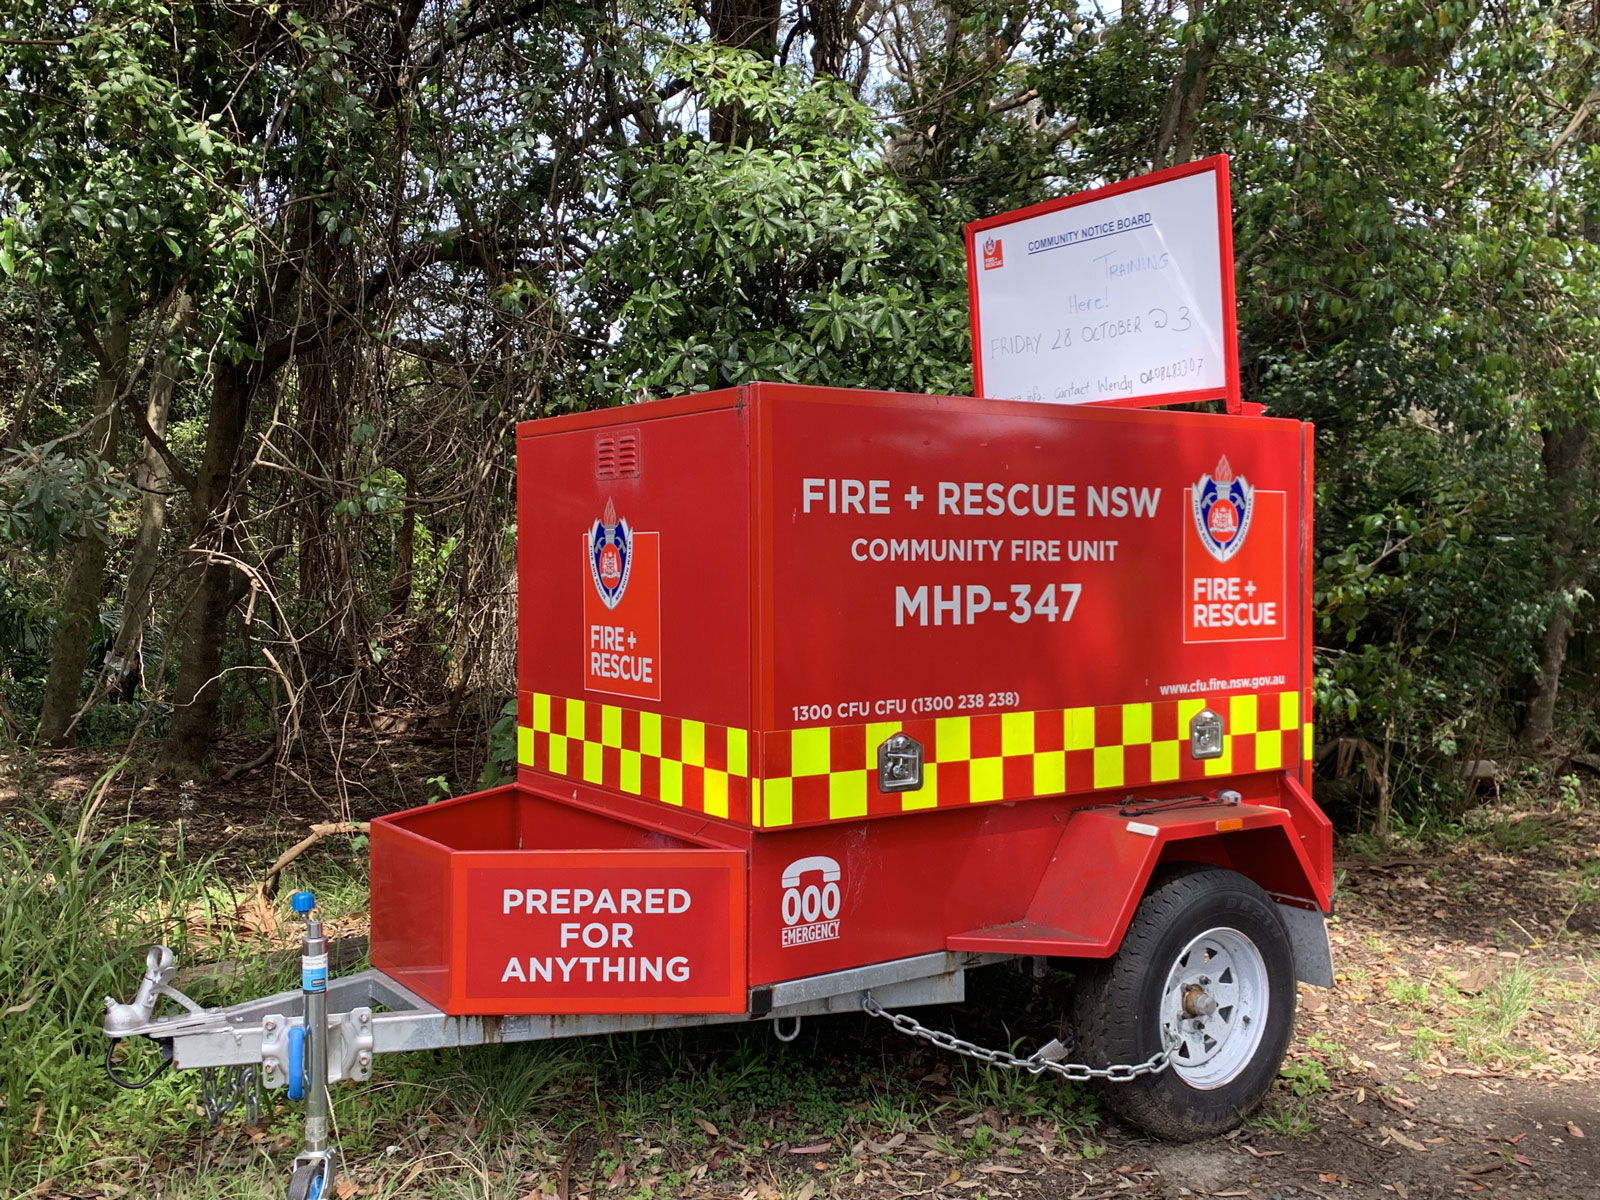 |
| Pods: |
|
| Unit: | Size: | Base: |
|---|---|---|
| Capability Management Section | 300x Firefighters, 40x Heavy Pumpers, 2x Combined Aerial Pumpers, 4x Heavy Ladders, 22x Medium Pumpers, 26x Heavy Tankers, 2x HAZMAT Response Trucks, 1x HAZMAT Response Van, 1x Breathing Apparatus Support Vehicle, 5x Heavy Rescue Trucks, 1x Bulk Water Carrier, 1x Transport Bus | Greenacre |
| Operational Communications Section - Southern NSW | 200x Firefighters | Alexandria |
| Operational Communications Section - Northern NSW | 150x Firefighters | Newcastle |
Specialised Operations Section
| 150x Firefighters, 1x Heavy Major Structural Collapse Truck, 1x Medium Major Structural Collapse Truck, 2x Urban Search and Rescue Vehicles, 4x All-Terrain Vehicles, 2x Command Vehicles (Bushfire Officer) | Orchard Hills |
| Logistics Section | 150x Firefighters, 2x Heavy Bulk Water Carriers, 2x Hook Lift Trucks, 5x Lube Service Vehicles Pods: Rehabilitation-A, Rehabilitation-B, High Volume Mobile Water Supply System, Fire Duty, K9-A, K9-B | Greenacre |
| Fire Investigation and Research Section | 130x Firefighters, 2x Scientific Support Vans, 5x Technical Support Vehicles | Greenacre |
| Emergency Services Academy | 100x Firefighters, 8x Heavy Pumpers, 1x Medium Pumper, 1x Combined Aerial Pumper | Orchard Hills |
| Station: | Size: | Location: |
|---|---|---|
| Alexandria Fire Station | 80x Firefighters, 1x Heavy Pumper, 3x Heavy Breathing Apparatus and HAZMAT Response Trucks, 1x HAZMAT Response Truck, 1x HAZMAT Response Van, 2x Mobile Command Vehicles | Alexandria |
| City of Sydney Fire Station | 60x Firefighters, 3x Heavy Pumpers, 1x Heavy Ladder, 1x Heavy Rescue Truck, 1x Command Vehicle | Sydney CBD |
| Woollahra Fire Station | 20x Firefighters, 1x Heavy Pumper, 1x Heavy Ladder | Woollahra |
| Glebe Fire Station | 20x Firefighters, 1x Heavy Pumper, 1x Heavy Ladder | Glebe |
| Darlinghurst Fire Station | 20x Firefighters, 1x Heavy Pumper, 1x Heavy Ladder | Darlinghurst |
| Pyrmont Fire Station | 20x Firefighters, 1x Heavy Pumper, 1x Breathing Apparatus Support Vehicle | Pyrmont |
| The Rocks Fire Station | 10x Firefighters, 1x Heavy Pumper | The Rocks |
| Bondi Fire Station | 10x Firefighters, 1x Heavy Pumper | Bondi |
| Redfern Fire Station | 10x Firefighters, 1x Heavy Pumper | Redfern |
North Sydney Council, Mosman Council, Northern Beaches Council, Ku-ring-gai Council, City of Willoughby, Lane Cove Council, Hornsby Shire, Hunters Hill Council |
| Station: | Size: | Location: |
|---|---|---|
| Crows Nest Fire Station | 40x Firefighters, 1x Heavy Pumper, 1x Heavy Ladder, 1x CAFS Tanker, 1x Command Vehicle | Crows Nest |
| Hornsby Fire Station | 30x Firefighters, 1x Combined Aerial Pumper, 1x Heavy Ladder, 1x Bulk Water Carrier | Hornsby |
| Manly Fire Station | 20x Firefighters, 1x Heavy Pumper, 1x Heavy Ladder | Fairlight |
| Berowra Fire Station | 20x Firefighters, 1x Heavy Pumper, 1x Heavy Rescue Truck | Berowra |
| Narrabeen Fire Station | 20x Firefighters, 1x Heavy Pumper, 1x Heavy Rescue Truck | Narrabeen |
| Mosman Fire Station | 10x Firefighters, 1x Heavy Pumper | Mosman |
| Dee Why Fire Station | 10x Firefighters, 1x Heavy Pumper | Dee Why |
| Willoughby Fire Station | 10x Firefighters, 1x Heavy Pumper | Willoughby |
| Lane Cove Fire Station | 10x Firefighters, 1x Heavy Pumper | Artarmon |
| Neutral Bay Fire Station | 10x Firefighters, 1x Heavy Pumper | Neutral Bay |
| Mona Vale Fire Station | 10x Firefighters, 1x Heavy Pumper | Mona Vale |
| Avalon Fire Station | 10x Firefighters, 1x Heavy Pumper | Avalon Beach |
| Beecroft Fire Station | 10x Firefighters, 1x Heavy Pumper | Beecroft |
| Forestville Fire Station | 10x Firefighters, 1x Heavy Pumper | Forestville |
| Gordon Fire Station | 10x Firefighters, 1x Heavy Pumper | Pymble |
| Station: | Size: | Location: |
|---|---|---|
| Chester Hill Fire Station | 20x Firefighters, 1x Heavy Pumper, 1x HAZMAT Response Truck | Chester Hill |
| Ashfield Fire Station | 20x Firefighters, 1x Heavy Pumper, 1x Command Vehicle | Ashfield |
| Balmain Fire Station | 10x Firefighters, 1x Heavy Pumper | Balmain |
| Newtown Fire Station | 10x Firefighters, 1x Heavy Pumper | Newtown |
| Marrickville Fire Station | 10x Firefighters, 1x Heavy Pumper | Marrickville |
| Bankstown Fire Station | 10x Firefighters, 1x Heavy Pumper | Bankstown |
| Campsie Fire Station | 10x Firefighters, 1x Heavy Pumper | Campsie |
| Drummoyne Fire Station | 10x Firefighters, 1x Heavy Pumper | Drummoyne |
| Lakemba Fire Station | 10x Firefighters, 1x Heavy Pumper | Lakemba |
| Leichhardt Fire Station | 10x Firefighters, 1x Heavy Pumper | Leichhardt |
| Rhodes Fire Station | 10x Firefighters, 1x Heavy Pumper | Rhodes |
| Burwood Fire Station | 10x Firefighters, 1x Heavy Pumper | Burwood |
| Concord Fire Station | 10x Firefighters, 1x Heavy Pumper | North Strathfield |
| Revesby Fire Station | 10x Firefighters, 1x Combined Aerial Pumper | Revesby |
| Station: | Size: | Location: |
|---|---|---|
| Blacktown Fire Station | 20x Firefighters, 1x Heavy Pumper, 1x Technical Rescue Truck | Woodcroft |
| Regentville Fire Station | 20x Firefighters, 1x Heavy Pumper, 1x Heavy Rescue Truck | Regentville |
| St. Marys Fire Station | 20x Firefighters, 1x Heavy Pumper, 1x HAZMAT Response Truck | St. Marys |
| Kellyville Fire Station | 20x Firefighters, 1x Heavy Pumper, 1x Heavy Tanker | Kellyville |
| Ropes Crossing Fire Station | 20x Firefighters, 1x Heavy Pumper, 1x Heavy Tanker | Tregear |
| Huntingwood Fire Station | 20x Firefighters, 1x Combined Aerial Pumper, 1x Command Vehicle | Huntingwood |
| Baulkham Hills Fire Station | 10x Firefighters, 1x Heavy Pumper | Baulkham Hills |
| Mount Druitt Fire Station | 10x Firefighters, 1x Heavy Pumper | Mount Druitt |
| Schofields Fire Station | 10x Firefighters, 1x Heavy Pumper | Schofields |
| Castle Hill Fire Station | 10x Firefighters, 1x Heavy Pumper | Castle Hill |
| Cranebrook Fire Station | 10x Firefighters, 1x Heavy Pumper | Cranebrook |
| Riverstone Fire Station | 10x Firefighters, 1x Heavy Pumper | Riverstone |
| Seven Hills Fire Station | 10x Firefighters, 1x Heavy Pumper | Seven Hills |
| Penrith Fire Station | 10x Firefighters, 1x Combined Aerial Pumper | Penrith |
| Station: | Size: | Location: |
|---|---|---|
| Parramatta Fire Station | 30x Firefighters, 1x Heavy Pumper, 1x Heavy Ladder, 1x Command Vehicle | Harris Park |
| Eastwood Fire Station | 20x Firefighters, 1x Heavy Pumper, 1x Heavy Rescue Truck | Eastwood |
| Cabramatta Fire Station | 10x Firefighters, 1x Heavy Pumper | Cabramatta |
| Lidcombe Fire Station | 10x Firefighters, 1x Heavy Pumper | Lidcombe |
| Ryde Fire Station | 10x Firefighters, 1x Heavy Pumper | North Ryde |
| Smithfield Fire Station | 10x Firefighters, 1x Heavy Pumper | Smithfield |
| Wentworthville Fire Station | 10x Firefighters, 1x Heavy Pumper | Wentworthville |
| Bonnyrigg Heights Fire Station | 10x Firefighters, 1x Heavy Pumper | Bonnyrigg Heights |
| Yennora Fire Station | 10x Firefighters, 1x Heavy Pumper | Yennora |
| Gladesville Fire Station | 10x Firefighters, 1x Heavy Pumper | Gladesville |
| Guildford Fire Station | 10x Firefighters, 1x Heavy Pumper | Guildford |
| Rydalmere Fire Station | 10x Firefighters, 1x Heavy Pumper | Ryde |
| Silverwater Fire Station | 10x Firefighters, 1x Heavy Pumper | Silverwater |
| Merrylands Fire Station | 10x Firefighters, 1x Medium Pumper | Merrylands |
| Station: | Size: | Location: |
|---|---|---|
| Katoomba Fire Station | 50x Firefighters, 1x Heavy Pumper, 1x Medium Pumper, 1x Heavy Tanker, 1x Bulk Water Carrier, 1x Command Vehicle | Katoomba |
| Springwood Fire Station | 30x Firefighters, 1x Heavy Pumper, 1x Medium Pumper, 1x Heavy Tanker | Springwood |
| Lithgow Fire Station | 30x Firefighters, 1x Heavy Pumper, 1x Heavy Tanker, 1x HAZMAT Response Van, 1x HAZMAT Boat | Lithgow |
| Richmond Fire Station | 20x Firefighters, 1x Heavy Pumper, 1x CAFS Tanker | Richmond |
| Blackheath Fire Station | 20x Firefighters, 1x Medium Pumper, 1x Heavy Tanker | Blackheath |
| Glenbrook Fire Station | 20x Firefighters, 1x Medium Pumper, 1x Heavy Tanker | Glenbrook |
| Lawson Fire Station | 20x Firefighters, 1x Medium Pumper, 1x Heavy Tanker | Lawson |
| Wentworth Falls Fire Station | 20x Firefighters, 1x Medium Pumper, 1x CAFS Tanker | Wentworth Falls |
| Windsor Fire Station | 20x Firefighters, 1x Medium Pumper, 1x Light Tanker | South Windsor |
| Lithgow West Fire Station | 10x Firefighters, 1x Medium Pumper | Littleton |
| Leura Fire Station | 10x Firefighters, 1x Medium Pumper | Leura |
| Mount Victoria Fire Station | 10x Firefighters, 1x Medium Pumper | Mount Victoria |
| Portland Fire Station | 10x Firefighters, 1x Medium Pumper | Portland |
| Wallerawang Fire Station | 10x Firefighters, 1x Medium Pumper | Wallerawang |
| Station: | Size: | Location: |
|---|---|---|
| Wollongong Fire Station | 50x Firefighters, 1x Heavy Pumper, 1x Heavy Ladder, 1x Technical Rescue Truck, 2x Command Vehicles | Wollongong |
| Shellharbour Fire Station | 40x Firefighters, 1x Heavy Pumper, 1x Heavy Tanker, 1x HAZMAT Response Truck, 1x HAZMAT Response Van, 1x HAZMAT Boat | Shellharbour |
| Albion Park Fire Station | 20x Firefighters, 1x Heavy Pumper, 1x Heavy Tanker | Albion Park |
| Kiama Fire Station | 20x Firefighters, 1x Medium Pumper, 1x Heavy Tanker | Kiama |
| Thirroul Fire Station | 20x Firefighters, 1x Medium Pumper, 1x Heavy Tanker | Thirroul |
| Dapto Fire Station | 10x Firefighters, 1x Heavy Pumper | Dapto |
| Bulli Fire Station | 10x Firefighters, 1x Heavy Pumper | Bulli |
| Warrawong Fire Station | 10x Firefighters, 1x Heavy Pumper | Warrawong |
| Unanderra Fire Station | 10x Firefighters, 1x Heavy Pumper | Unanderra |
| Scarborough Fire Station | 10x Firefighters, 1x Medium Pumper | Scarborough |
| Balgownie Fire Station | 10x Firefighters, 1x Medium Pumper | Balgownie |
| Coledale Fire Station | 10x Firefighters, 1x Medium Pumper | Coledale |
| Corrimal Fire Station | 10x Firefighters, 1x Medium Pumper | Corrimal |
| Helensburgh Fire Station | 10x Firefighters, 1x Medium Pumper | Helensburgh |
| Station: | Size: | Location: |
|---|---|---|
| Kogarah Fire Station | 40x Firefighters, 1x Heavy Pumper, 1x Heavy Ladder, 1x Command Vehicle, 1x Logistics Support Vehicle | Kogarah |
| Hurstville Fire Station | 20x Firefighters, 1x Heavy Pumper, 1x Heavy Rescue Truck | Hurstville |
| Menai Fire Station | 20x Firefighters, 1x Heavy Pumper, 1x CAFS Tanker | Menai |
| Miranda Fire Station | 20x Firefighters, 1x Combined Aerial Pumper, 1x Heavy Tanker | Miranda |
| Bundeena Fire Station | 20x Firefighters, 1x Medium Pumper, 1x Light Tanker | Bundeena |
| Cronulla Fire Station | 10x Firefighters, 1x Heavy Pumper | Cronulla |
| Botany Fire Station | 10x Firefighters, 1x Heavy Pumper | Botany |
| Maroubra Fire Station | 10x Firefighters, 1x Heavy Pumper | Maroubra |
| Mascot Fire Station | 10x Firefighters, 1x Heavy Pumper | Mascot |
| Randwick Fire Station | 10x Firefighters, 1x Heavy Pumper | Randwick |
| Sutherland Fire Station | 10x Firefighters, 1x Heavy Pumper | Sutherland |
| Arncliffe Fire Station | 10x Firefighters, 1x Heavy Pumper | Arncliffe |
| Engadine Fire Station | 10x Firefighters, 1x Heavy Pumper | Engadine |
| Matraville Fire Station | 10x Firefighters, 1x Heavy Pumper | Matraville |
| Riverwood Fire Station | 10x Firefighters, 1x Heavy Pumper | Riverwood |
| Mortdale Fire Station | 10x Firefighters, 1x Medium Pumper | Mortdale |
| Station: | Size: | Location: |
|---|---|---|
| St. Andrews Fire Station | 30x Firefighters, 1x Combined Aerial Pumper, 1x Bulk Water Carrier, 1x Command Vehicle | St. Andrews |
| Liverpool Fire Station | 20x Firefighters, 1x Heavy Pumper, 1x Technical Rescue Truck | Moorebank |
| Oran Park Fire Station | 20x Firefighters, 1x Heavy Pumper, 1x HAZMAT Response Truck | Oran Park |
| Campbelltown Fire Station | 20x Firefighters, 1x Heavy Pumper, 1x CAFS Tanker | Campbelltown |
| Warragamba Fire Station | 20x Firefighters, 1x Medium Pumper, 1x CAFS Tanker | Warragamba |
| Picton Fire Station | 20x Firefighters, 1x Medium Pumper, 1x Light Tanker | Picton |
| Busby Fire Station | 10x Firefighters, 1x Heavy Pumper | Busby |
| Horningsea Park Fire Station | 10x Firefighters, 1x Heavy Pumper | Horningsea Park |
| Macquarie Fields Fire Station | 10x Firefighters, 1x Heavy Pumper | Macquarie Fields |
| Narellan Fire Station | 10x Firefighters, 1x Heavy Pumper | Smeaton Grange |
| Rosemeadow Fire Station | 10x Firefighters, 1x Heavy Pumper | Rosemeadow |
| Camden Fire Station | 10x Firefighters, 1x Medium Pumper | Elderslie |
| Ingleburn Fire Station | 10x Firefighters, 1x Heavy Tanker | Ingleburn |
| Station: | Size: | Location: |
|---|---|---|
| Lambton Fire Station | 60x Firefighters, 1x Heavy Pumper, 2x Medium Pumpers, 1x Technical Rescue Truck, 1x Logistics Support Vehicle, 1x Command Vehicle | Lambton |
| Newcastle Fire Station | 40x Firefighters, 1x Heavy Pumper, 1x Heavy Ladder, 1x HAZMAT Response Truck, 1x HAZMAT Response Van, 1x HAZMAT Boat | Cooks Hill |
| Toronto Fire Station | 30x Firefighters, 1x Heavy Pumper, 1x Heavy Tanker, 1x Bulk Water Carrier | Toronto |
| Cardiff Fire Station | 20x Firefighters, 1x Heavy Pumper, 1x Heavy Tanker | Cardiff |
| Tingira Heights Fire Station | 20x Firefighters, 1x Heavy Pumper, 1x Heavy Tanker | Tingira Heights |
| Holmesville Fire Station | 20x Firefighters, 1x Heavy Pumper, 1x Heavy Tanker | Holmesville |
| Belmont Fire Station | 20x Firefighters, 1x Heavy Pumper, 1x CAFS Tanker | Belmont |
| Charlestown Fire Station | 20x Firefighters, 1x Heavy Pumper, 1x CAFS Tanker | Charlestown |
| Teralba Fire Station | 20x Firefighters, 1x Medium Pumper, 1x Heavy Tanker | Terralba |
| Wangi Wangi Fire Station | 20x Firefighters, 1x Medium Pumper, 1x Heavy Tanker | Arcadia Vale |
| Tarro Fire Station | 20x Firefighters, 1x Medium Pumper, 1x CAFS Tanker | Tarro |
| Minmi Fire Station | 20x Firefighters, 1x Medium Pumper, 1x Rehabilitation Van | Minmi |
| Mayfield West Fire Station | 10x Firefighters, 1x Combined Aerial Pumper | Mayfield West |
| Stockton Fire Station | 10x Firefighters, 1x Medium Pumper | Stockton |
| Merewether Fire Station | 10x Firefighters, 1x Medium Pumper | Merewether |
| Carrington Fire Station | 10x Firefighters, 1x Medium Pumper | Carrington |
| Morisset Fire Station | 10x Firefighters, 1x Medium Pumper | Morisset |
| Swansea Fire Station | 10x Firefighters, 1x Medium Pumper | Swansea |
| Wallsend Fire Station | 10x Firefighters, 1x Medium Pumper | Wallsend |
| Station: | Size: | Location: |
|---|---|---|
| Kariong Fire Station | 30x Firefighters, 1x Heavy Pumper, 1x Bulk Water Carrier, 1x Command Vehicle | Kariong |
| Umina Fire Station | 30x Firefighters, 1x Combined Aerial Pumper, 1x Medium Pumper, 1x Heavy Tanker | Umina |
| Gosford Fire Station | 20x Firefighters, 1x Heavy Pumper, 1x Heavy Rescue Truck | East Gosford |
| Berkeley Vale Fire Station | 20x Firefighters, 1x Heavy Pumper, 1x HAZMAT Response Truck | Berkeley Vale |
| Wyong Fire Station | 20x Firefighters, 1x Medium Pumper, 1x Heavy Tanker | Wyong |
| Budgewoi Fire Station | 20x Firefighters, 1x Medium Pumper, 1x Heavy Tanker | Budgewoi |
| Saratoga Fire Station | 20x Firefighters, 1x Medium Pumper, 1x Heavy Tanker | Saratoga |
| Wyoming Fire Station | 20x Firefighters, 1x Medium Pumper, 1x CAFS Tanker | Wyoming |
| Doyalson Fire Station | 10x Firefighters, 1x Heavy Pumper | Doyalson |
| Hamlyn Terrace Fire Station | 10x Firefighters, 1x Heavy Pumper | Hamlyn Terrace |
| Kincumber Fire Station | 10x Firefighters, 1x Heavy Pumper | Kincumber |
| Bateau Bay Fire Station | 10x Firefighters, 1x Combined Aerial Pumper | Bateau Bay |
| Terrigal Fire Station | 10x Firefighters, 1x Medium Pumper | Terrigal |
| The Entrance Fire Station | 10x Firefighters, 1x Medium Pumper | The Entrance |
| Toukley Fire Station | 10x Firefighters, 1x Medium Pumper | Toukley |
| Station: | Size: | Location: |
|---|---|---|
| Rutherford Fire Station | 40x Firefighters, 1x Heavy Pumper, 1x Heavy Tanker, 2x Command Vehicles | Rutherford |
| Cessnock Fire Station | 20x Firefighters, 1x Heavy Pumper, 1x Medium Pumper | Cessnock |
| Salamander Bay Fire Station | 20x Firefighters, 1x Heavy Pumper, 1x Medium Pumper | Salamander Bay |
| Maitland Fire Station | 20x Firefighters, 2x Medium Pumpers | Maitland |
| Abermain Fire Station | 20x Firefighters, 1x Medium Pumper, 1x Heavy Tanker | Abermain |
| Bellbird Fire Station | 20x Firefighters, 1x Medium Pumper, 1x Heavy Tanker | Bellbird |
| Kurri Kurri Fire Station | 20x Firefighters, 1x Medium Pumper, 1x CAFS Tanker | Kurri Kurri |
| Branxton-Greta Fire Station | 20x Firefighters, 1x Medium Pumper, 1x Light Tanker | Branxton |
| East Maitland Fire Station | 10x Firefighters, 1x Heavy Pumper | Metford |
| Raymond Terrace Fire Station | 10x Firefighters, 1x Medium Pumper | Raymond Terrace |
| Dungog Fire Station | 10x Firefighters, 1x Medium Pumper | Dungog |
| Kearsley Fire Station | 10x Firefighters, 1x Medium Pumper | Kearsley |
| Morpeth Fire Station | 10x Firefighters, 1x Medium Pumper | Morpeth |
| Paxton Fire Station | 10x Firefighters, 1x Medium Pumper | Paxton |
| Station: | Size: | Location: |
|---|---|---|
| Coffs Harbour Fire Station | 50x Firefighters, 1x Heavy Pumper, 1x Combined Aerial Pumper, 1x HAZMAT Response Van, 1x Rehabilitation Van, 1x Command Vehicle | Coffs Harbour |
| Port Macquarie Fire Station | 40x Firefighters, 1x Heavy Pumper, 1x Medium Pumper, 1x HAZMAT Response Van, 1x HAZMAT Boat, 1x Command Vehicle | Port Macquarie |
| Taree Fire Station | 20x Firefighters, 1x Heavy Pumper, 1x Heavy Tanker | Taree |
| Forster Fire Station | 20x Firefighters, 1x Medium Pumper, 1x Heavy Tanker | Forster |
| Kempsey Fire Station | 20x Firefighters, 1x Medium Pumper, 1x Heavy Tanker | Kempsey |
| Gloucester Fire Station | 20x Firefighters, 1x Medium Pumper, 1x Heavy Tanker | Gloucester |
| Laurieton Fire Station | 20x Firefighters, 1x Medium Pumper, 1x Heavy Tanker | Laurieton |
| Nambucca Heads Fire Station | 20x Firefighters, 1x Medium Pumper, 1x Heavy Tanker | Nambucca Heads |
| Sawtell Fire Station Fire Station | 20x Firefighters, 1x Medium Pumper, 1x Heavy Tanker | Toormina |
| Tea Gardens Fire Station | 20x Firefighters, 1x Medium Pumper, 1x Heavy Tanker | Tea Gardens |
| Wauchope Fire Station | 20x Firefighters, 1x Medium Pumper, 1x Heavy Tanker | Wauchope |
| Woolgoolga Fire Station | 20x Firefighters, 1x Medium Pumper, 1x Heavy Tanker | Woolgoolga |
| Bellingen Fire Station | 10x Firefighters, 1x Medium Pumper | Bellingen |
| Bowraville Fire Station | 10x Firefighters, 1x Medium Pumper | Bowraville |
| Dorrigo Fire Station | 10x Firefighters, 1x Medium Pumper | Dorrigo |
| Macksville Fire Station | 10x Firefighters, 1x Medium Pumper | Macksville |
| South West Rocks Fire Station | 10x Firefighters, 1x Medium Pumper | South West Rocks |
| Urunga Fire Station | 10x Firefighters, 1x Medium Pumper | Urunga |
| Wingham Fire Station | 10x Firefighters, 1x Medium Pumper | Wingham |
| Station: | Size: | Location: |
|---|---|---|
| Ballina Fire Station | 40x Firefighters, 1x Medium Pumper, 1x CAFS Tanker, 2x Command Vehicles | Ballina |
| Tweed Heads Fire Station | 30x Firefighters, 1x Heavy Pumper, 1x Medium Pumper, 1x HAZMAT Response Van, 1x HAZMAT Boat | Tweed Heads |
| Grafton Fire Station | 30x Firefighters, 2x Medium Pumpers, 1x Heavy Tanker | Grafton |
| Norfolk Island Fire Station | 30x Firefighters, 2x Heavy Tankers, 1x Command Vehicle | Burnt Pine |
| Lismore Fire Station | 20x Firefighters, 1x Heavy Pumper, 1x Medium Pumper | Lismore |
| Casino Fire Station | 20x Firefighters, 1x Medium Pumper, 1x Heavy Tanker | Casino |
| Brunswick Heads Fire Station | 20x Firefighters, 1x Medium Pumper, 1x Heavy Tanker | Brunswick Heads |
| Mullumbimby Fire Station | 20x Firefighters, 1x Medium Pumper, 1x Light Tanker | Mullumbimby |
| Goonellabah Fire Station | 20x Firefighters, 1x Medium Pumper, 1x HAZMAT Response Van, 1x HAZMAT Boat | Goonellabah |
| Byron Bay Fire Station | 10x Firefighters, 1x Medium Pumper | Byron Bay |
| Kyogle Fire Station | 10x Firefighters, 1x Medium Pumper | Kyogle |
| Murwillumbah Fire Station | 10x Firefighters, 1x Medium Pumper | Murwillumbah |
| South Grafton Fire Station | 10x Firefighters, 1x Medium Pumper | South Grafton |
| Alstonville Fire Station | 10x Firefighters, 1x Medium Pumper | Alstonville |
| Bangalow Fire Station | 10x Firefighters, 1x Medium Pumper | Bangalow |
| Coraki Fire Station | 10x Firefighters, 1x Medium Pumper | Coraki |
| Evans Head Fire Station | 10x Firefighters, 1x Medium Pumper | Evans Head |
| Kingscliff Fire Station | 10x Firefighters, 1x Medium Pumper | Kingscliff |
| Maclean Fire Station | 10x Firefighters, 1x Medium Pumper | Maclean |
| Banora Point Fire Station | 10x Firefighters, 1x Medium Pumper | Tweed Heads South |
| Yamba Fire Station | 10x Firefighters, 1x Medium Pumper | Yamba |
| Station: | Size: | Location: |
|---|---|---|
| South Tamworth Fire Station | 40x Firefighters, 1x Heavy Pumper, 1x Medium Pumper, 1x CAFS Tanker, 1x Rehabilitation Van | Hillvue |
| Tamworth Fire Station | 40x Firefighters, 2x Medium Pumpers, 1x HAZMAT Response Van, 1x Command Vehicle | East Tamworth |
| Narrabri Fire Station | 30x Firefighters, 1x Medium Pumper, 1x Heavy Tanker, 1x HAZMAT Response Van | Narrabri |
| Armidale Fire Station | 20x Firefighters, 1x Heavy Pumper, 1x Medium Pumper | Armidale |
| Coonabarabran Fire Station | 20x Firefighters, 1x Medium Pumper, 1x Heavy Tanker | Coonabarabran |
| Tenterfield Fire Station | 20x Firefighters, 1x Medium Pumper, 1x Heavy Tanker | Tenterfield |
| Glen Innes Fire Station | 20x Firefighters, 1x Medium Pumper, 1x Heavy Tanker | Glen Innes |
| Uralla Fire Station | 20x Firefighters, 1x Medium Pumper, 1x Heavy Tanker | Uralla |
| Inverell Fire Station | 20x Firefighters, 1x Medium Pumper, 1x CAFS Tanker | Inverell |
| Gunnedah Fire Station | 10x Firefighters, 1x Medium Pumper | Gunnedah |
| Barraba Fire Station | 10x Firefighters, 1x Medium Pumper | Barraba |
| Bingara Fire Station | 10x Firefighters, 1x Medium Pumper | Bingara |
| Boggabri Fire Station | 10x Firefighters, 1x Medium Pumper | Boggabri |
| Guyra Fire Station | 10x Firefighters, 1x Medium Pumper | Guyra |
| Manilla Fire Station | 10x Firefighters, 1x Medium Pumper | Manilla |
| Quirindi Fire Station | 10x Firefighters, 1x Medium Pumper | Quirindi |
| Walcha Fire Station | 10x Firefighters, 1x Medium Pumper | Walcha |
| Warialda Fire Station | 10x Firefighters, 1x Medium Pumper | Warialda |
| Wee Waa Fire Station | 10x Firefighters, 1x Medium Pumper | Wee Waa |
| Werris Creek Fire Station | 10x Firefighters, 1x Medium Pumper | Werris Creek |
| Moree Fire Station | 10x Firefighters, 1x Heavy Tanker | Moree |
| Station: | Size: | Location: |
|---|---|---|
| Batemans Bay Fire Station | 40x Firefighters, 1x Heavy Pumper, 1x Heavy Tanker, 1x HAZMAT Response Van, 1x Command Vehicle | Batemans Bay |
| Jindabyne Fire Station | 30x Firefighters, 1x Medium Pumper, 1x Heavy Tanker, 1x Light Tanker | Jindabyne |
| Perisher Valley Fire Station | 30x Firefighters, 2x Alpine Pumpers, 1x Heavy Tanker, 6x Snowmobiles | Perisher Valley |
| Queanbeyan Fire Station | 20x Firefighters, 1x Heavy Pumper, 1x Medium Pumper | Queanbeyan |
| Cooma Fire Station | 20x Firefighters, 1x Medium Pumper, 1x Heavy Tanker | Cooma |
| Merimbula Fire Station | 20x Firefighters, 1x Medium Pumper, 1x Heavy Tanker | Merimbula |
| Braidwood Fire Station | 20x Firefighters, 1x Medium Pumper, 1x Heavy Tanker | Braidwood |
| Narooma Fire Station | 20x Firefighters, 1x Medium Pumper, 1x Heavy Tanker | Naroomba |
| Ulladulla Fire Station | 20x Firefighters, 1x Medium Pumper, 1x Heavy Tanker | Ulladulla |
| Nowra Fire Station | 20x Firefighters, 1x Medium Pumper, 1x CAFS Tanker | Nowra |
| Moruya Fire Station | 20x Firefighters, 1x Medium Pumper, 1x Rehabilitation Van | Moruya |
| Shoalhaven Fire Station | 10x Firefighters, 1x Heavy Pumper | Nowra (South) |
| Eden Fire Station | 10x Firefighters, 1x Medium Pumper, 1x HAZMAT Boat | Eden |
| Bega Fire Station | 10x Firefighters, 1x Medium Pumper | Bega |
| Berry Fire Station | 10x Firefighters, 1x Medium Pumper | Berry |
| Bombala Fire Station | 10x Firefighters, 1x Medium Pumper | Bombala |
| Thredbo Fire Station | 10x Firefighters, 1x Heavy Tanker, 2x Snowmobiles | Thredbo Village |
| Station: | Size: | Location: |
|---|---|---|
| Goulburn Fire Station | 40x Firefighters, 1x Heavy Pumper, 1x Heavy Tanker, 2x Command Vehicles | Goulburn |
| Cootamundra Fire Station | 20x Firefighters, 1x Medium Pumper, 1x Heavy Tanker | Cootamundra |
| Gundagai Fire Station | 20x Firefighters, 1x Medium Pumper, 1x Heavy Tanker | Gundagai |
| Mittagong Fire Station | 20x Firefighters, 1x Medium Pumper, 1x Heavy Tanker | Mittagong |
| Crookwell Fire Station | 20x Firefighters, 1x Medium Pumper, 1x Heavy Tanker | Crookwell |
| Young Fire Station | 20x Firefighters, 1x Medium Pumper, 1x Heavy Tanker | Young |
| Yass Fire Station | 20x Firefighters, 1x Medium Pumper, 1x CAFS Tanker | Yass |
| Cowra Fire Station | 20x Firefighters, 1x Medium Pumper, 1x CAFS Tanker | Cowra |
| Harden Fire Station | 20x Firefighters, 1x Medium Pumper, 1x Rehabilitation Van | Harden |
| Forbes Fire Station | 10x Firefighters, 1x Medium Pumper | Forbes |
| Moss Vale Fire Station | 10x Firefighters, 1x Medium Pumper | Moss Vale |
| Batlow Fire Station | 10x Firefighters, 1x Medium Pumper | Batlow |
| Boorowa Fire Station | 10x Firefighters, 1x Medium Pumper | Booroowa |
| Bowral Fire Station | 10x Firefighters, 1x Medium Pumper | Bowral |
| Bundanoon Fire Station | 10x Firefighters, 1x Medium Pumper | Bundanoon |
| Grenfell Fire Station | 10x Firefighters, 1x Medium Pumper | Grenfell |
| Tumut Fire Station | 10x Firefighters, 1x Medium Pumper | Tumut |
| Station: | Size: | Location: |
|---|---|---|
| Turvey Park Fire Station | 30x Firefighters, 1x Combined Aerial Pumper, 1x Medium Pumper, 1x Heavy Tanker | Turvey Park |
| Wagga Wagga Fire Station | 30x Firefighters, 1x Medium Pumper, 1x HAZMAT Response Van, 1x HAZMAT Boat, 1x Command Vehicle | Wagga Wagga |
| Albury Civic Fire Station | 20x Firefighters, 1x Medium Pumper, 1x Heavy Tanker | Albury |
| Deniliquin Fire Station | 20x Firefighters, 1x Medium Pumper, 1x Heavy Tanker | Deniliquin |
| Corowa Fire Station | 20x Firefighters, 1x Medium Pumper, 1x Heavy Tanker | Corowa |
| Jerilderie Fire Station | 20x Firefighters, 1x Medium Pumper, 1x Heavy Tanker | Jerilderie |
| Mulwala Fire Station | 20x Firefighters, 1x Medium Pumper, 1x Heavy Tanker | Mulwala |
| Tumbarumba Fire Station | 20x Firefighters, 1x Medium Pumper, 1x Heavy Tanker | Tumbarumba |
| Albury North Fire Station | 20x Firefighters, 1x Medium Pumper, 1x CAFS Tanker | Lavington |
| Henty Fire Station | 20x Firefighters, 1x Medium Pumper, 1x Light Tanker | Henty |
| Culcairn Fire Station | 20x Firefighters, 1x Medium Pumper, 1x Rehabilitation Van | Culcairn |
| Albury Central Fire Station | 10x Firefighters, 1x Combined Aerial Pumper | Albury North |
| Berrigan Fire Station | 10x Firefighters, 1x Medium Pumper | Berrigan |
| Finley Fire Station | 10x Firefighters, 1x Medium Pumper | Finley |
| Holbrook Fire Station | 10x Firefighters, 1x Medium Pumper | Holbrook |
| Lockhart Fire Station | 10x Firefighters, 1x Medium Pumper | Lockhart |
| Moama Fire Station | 10x Firefighters, 1x Medium Pumper | Moama |
| Tocumwal Fire Station | 10x Firefighters, 1x Medium Pumper | Tocumwal |
| Barham Fire Station | 10x Firefighters, 1x Heavy Tanker | Barham |
| Station: | Size: | Location: |
|---|---|---|
| Dubbo Fire Station | 60x Firefighters, 1x Heavy Pumper, 1x Medium Pumper, 1x HAZMAT Response Van, 2x Command Vehicles, 1x Black Panther Bulk Water Carrier | Dubbo |
| Nyngan Fire Station | 20x Firefighters, 1x Medium Pumper, 1x Heavy Tanker | Nyngan |
| Brewarrina Fire Station | 20x Firefighters, 1x Medium Pumper, 1x Heavy Tanker | Brewarrina |
| Coonamble Fire Station | 20x Firefighters, 1x Medium Pumper, 1x Heavy Tanker | Coonamble |
| Gilgandra Fire Station | 20x Firefighters, 1x Medium Pumper, 1x Heavy Tanker | Gilgandra |
| Trangie Fire Station | 20x Firefighters, 1x Medium Pumper, 1x Heavy Tanker | Trangie |
| Bourke Fire Station | 10x Firefighters, 1x Medium Pumper | Bourke |
| Cobar Fire Station | 10x Firefighters, 1x Medium Pumper | Cobar |
| Narromine Fire Station | 10x Firefighters, 1x Medium Pumper | Narromine |
| Parkes Fire Station | 10x Firefighters, 1x Medium Pumper | Parkes |
| Walgett Fire Station | 10x Firefighters, 1x Medium Pumper | Walgett |
| Wellington Fire Station | 10x Firefighters, 1x Medium Pumper | Wellington |
| Coolah Fire Station | 10x Firefighters, 1x Medium Pumper | Coolah |
| Delroy Fire Station | 10x Firefighters, 1x Medium Pumper | Dubbo (West) |
| Dunedoo Fire Station | 10x Firefighters, 1x Medium Pumper | Dunedoo |
| Lightning Ridge Fire Station | 10x Firefighters, 1x Medium Pumper | Lightning Ridge |
| Warren Fire Station | 10x Firefighters, 1x Medium Pumper | Warren |
| Peak Hill Fire Station | 10x Firefighters, 1x Heavy Tanker | Peak Hill |
| Station: | Size: | Location: |
|---|---|---|
| Bathurst Fire Station | 40x Firefighters, 1x Heavy Pumper, 1x Medium Pumper, 1x HAZMAT Response Van, 1x HAZMAT Boat, 1x Command Vehicle | Bathurst |
| Orange Fire Station | 30x Firefighters, 1x Heavy Pumper, 1x Medium Pumper, 1x Heavy Tanker | Orange |
| Mudgee Fire Station | 20x Firefighters, 1x Medium Pumper, 1x Heavy Tanker | Mudgee |
| Singleton Fire Station | 20x Firefighters, 1x Medium Pumper, 1x Heavy Tanker | Singleton |
| Muswellbrook Fire Station | 20x Firefighters, 1x Medium Pumper, 1x Light Tanker | Muswellbrook |
| Murrurundi Fire Station | 20x Firefighters, 1x Medium Pumper, 1x Light Tanker | Murrurundi |
| Gulgong Fire Station | 20x Firefighters, 1x Medium Pumper, 1x Rehabilitation Van | Gulgong |
| Oberon Fire Station | 10x Firefighters, 1x Medium Pumper | Oberon |
| Aberdeen Fire Station | 10x Firefighters, 1x Medium Pumper | Aberdeen |
| Blayney Fire Station | 10x Firefighters, 1x Medium Pumper | Blayney |
| Canowindra Fire Station | 10x Firefighters, 1x Medium Pumper | Canowindra |
| Denman Fire Station | 10x Firefighters, 1x Medium Pumper | Denman |
| Kandos Fire Station | 10x Firefighters, 1x Medium Pumper | Kandos |
| Kelso Fire Station | 10x Firefighters, 1x Medium Pumper | Kelso |
| Merriwa Fire Station | 10x Firefighters, 1x Medium Pumper | Merriwa |
| Molong Fire Station | 10x Firefighters, 1x Medium Pumper | Molong |
| Scone Fire Station | 10x Firefighters, 1x Medium Pumper | Scone |
| Station: | Size: | Location: |
|---|---|---|
| Leeton Fire Station | 40x Firefighters, 1x Medium Pumper, 1x Heavy Tanker, 1x HAZMAT Response Van, 1x HAZMAT Boat, 1x Command Vehicle | Leeton |
| Broken Hill Fire Station | 20x Firefighters, 1x Heavy Pumper, 1x Heavy Tanker | Broken Hill |
| Broken Hill South Fire Station | 20x Firefighters, 1x Medium Pumper, 1x Heavy Tanker | Broken Hill (South) |
| Griffith Fire Station | 20x Firefighters, 1x Medium Pumper, 1x Heavy Tanker | Griffith |
| Narrandera Fire Station | 20x Firefighters, 1x Medium Pumper, 1x Heavy Tanker | Narrandera |
| Temora Fire Station | 20x Firefighters, 1x Medium Pumper, 1x Heavy Tanker | Temora |
| Wentworth Fire Station | 20x Firefighters, 1x Medium Pumper, 1x Heavy Tanker | Wentworth |
| Yenda Fire Station | 20x Firefighters, 1x Medium Pumper, 1x Rehabilitation Van | Yenda |
| Balranald Fire Station | 10x Firefighters, 1x Medium Pumper | Balranald |
| West Wyalong Fire Station | 10x Firefighters, 1x Medium Pumper | West Wyalong |
| Coolamon Fire Station | 10x Firefighters, 1x Medium Pumper | Coolamon |
| Hillston Fire Station | 10x Firefighters, 1x Medium Pumper | Hillston |
| Junee Fire Station | 10x Firefighters, 1x Medium Pumper | Junee |
| Lake Cargelligo Fire Station | 10x Firefighters, 1x Medium Pumper | Lake Cargelligo |
| Condobolin Fire Station | 10x Firefighters, 1x Heavy Tanker | Condobolin |
| Hay Fire Station | 10x Firefighters, 1x Heavy Tanker | Hay |
NOTE: Community Fire Unit volunteers do not operate from fire stations, they operate within their local communities as first responders to bushfires until fire authorities can arrive. |
| Region: | Size: |
|---|---|
| Metropolitan East | 800x Community Fire Unit Volunteers, 80x Community Fire Unit Trailers |
| Metropolitan West | 800x Community Fire Unit Volunteers, 80x Community Fire Unit Trailers |
| Metropolitan South | 800x Community Fire Unit Volunteers, 80x Community Fire Unit Trailers |
| Metropolitan North | 800x Community Fire Unit Volunteers, 80x Community Fire Unit Trailers |
| Regional North | 600x Community Fire Unit Volunteers, 60x Community Fire Unit Trailers |
| Regional South | 600x Community Fire Unit Volunteers, 60x Community Fire Unit Trailers |
| Regional West | 600x Community Fire Unit Volunteers, 60x Community Fire Unit Trailers |
 |
Headquarters |
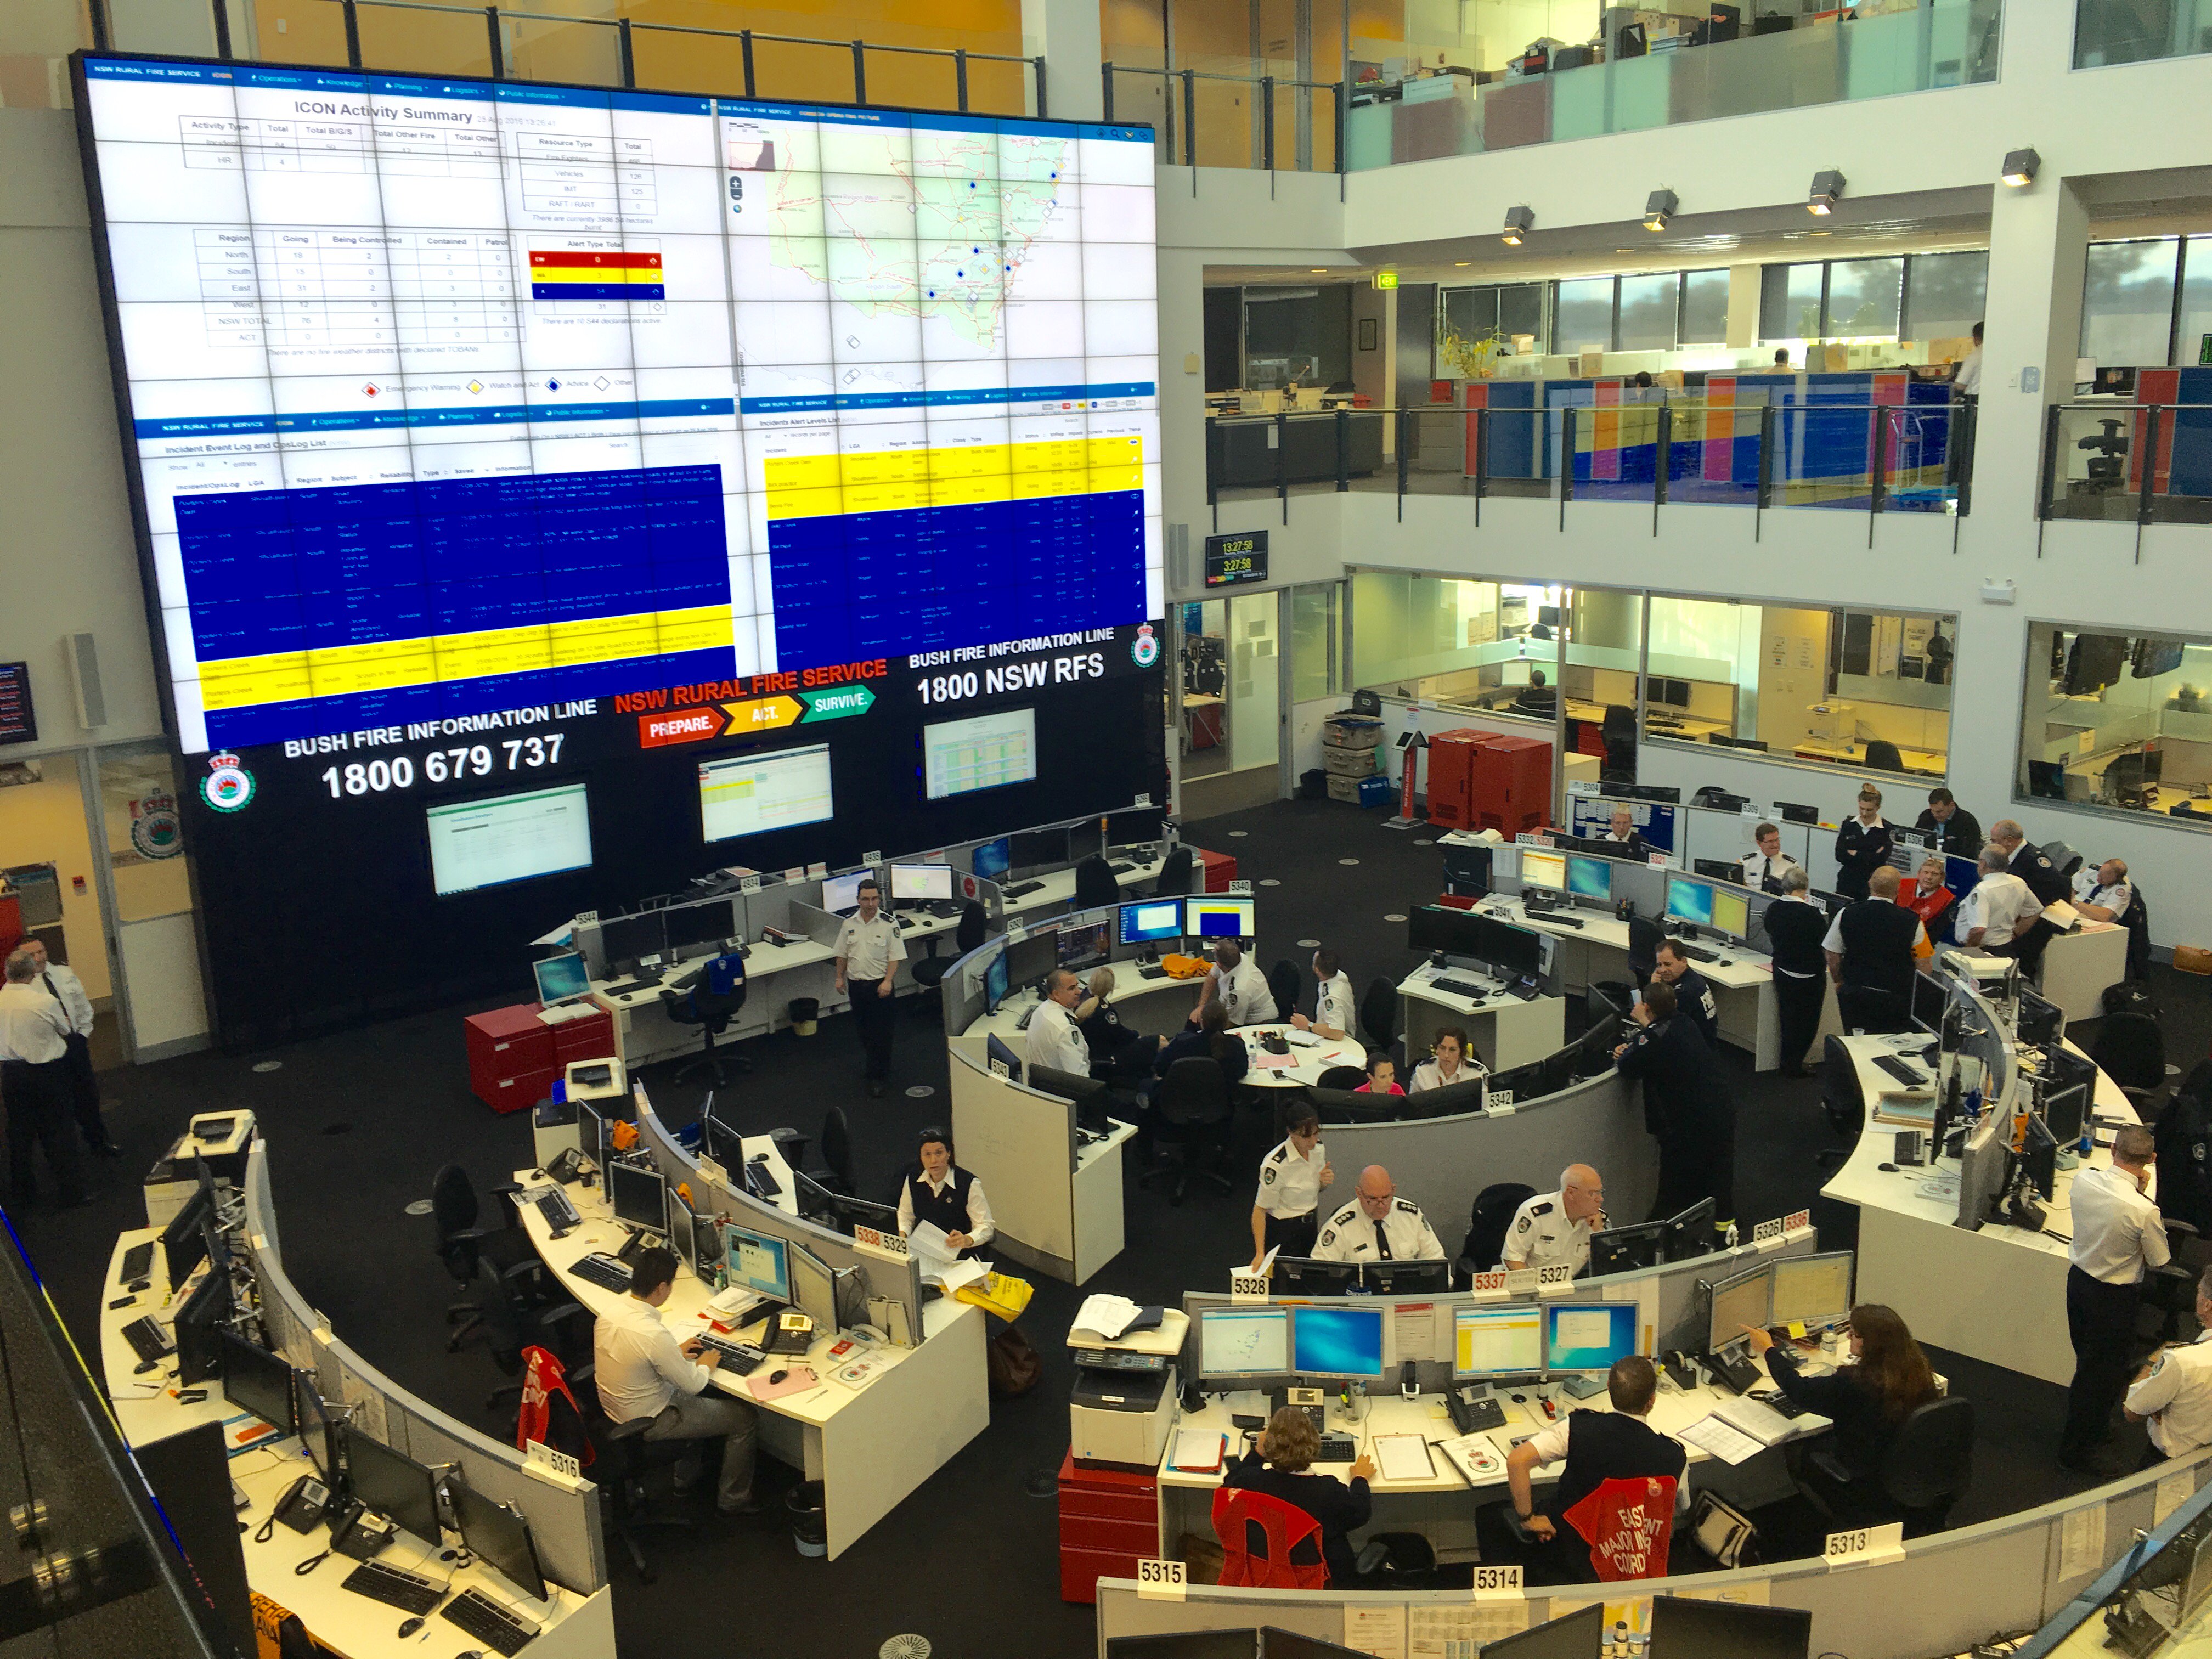 |
State Operations Centre, Sydney Olympic Park, New South Wales |
| Type: | Amount: | Image: |
|---|---|---|
| Permanent Personnel | 1,300 |  |
| Volunteer Firefighters | 70,000 |  |
| Type: | Amount: | Image: |
|---|---|---|
| Medium Pumper | 81 |  |
| Heavy Tanker | 1,963 |  |
| Medium Tanker | 121 |  |
| Light Tanker | 1,315 |  |
| Light Unit | 547 |  |
| Bulk Water Carrier | 100 | 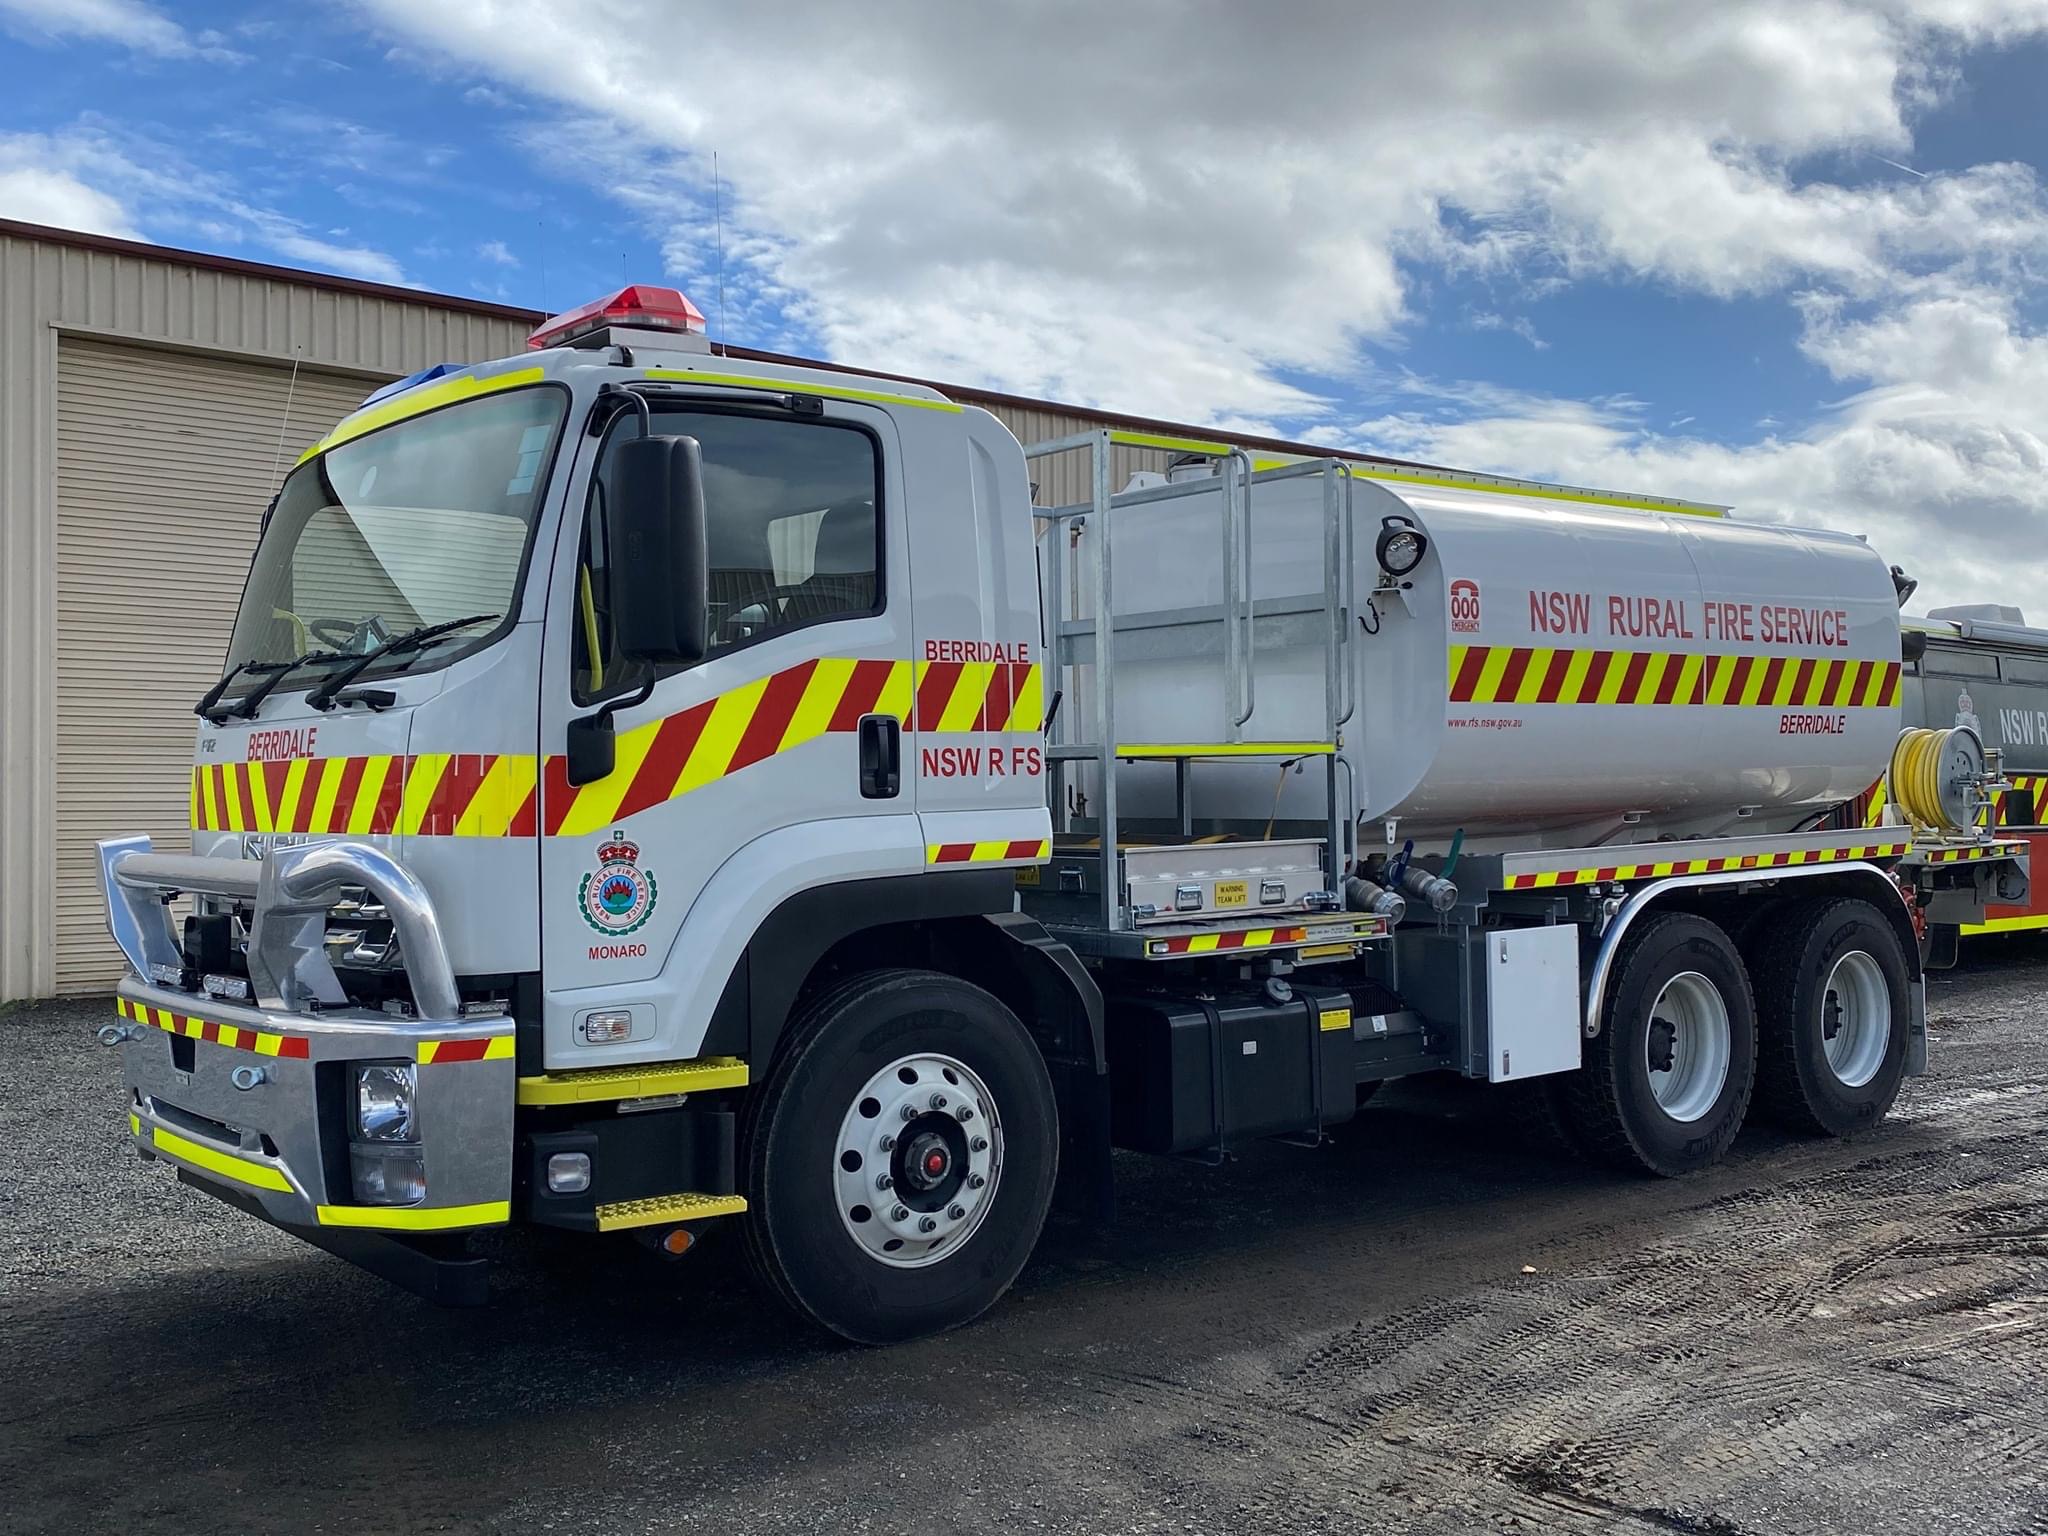 |
| Heavy Bulk Water Carrier | 4 | 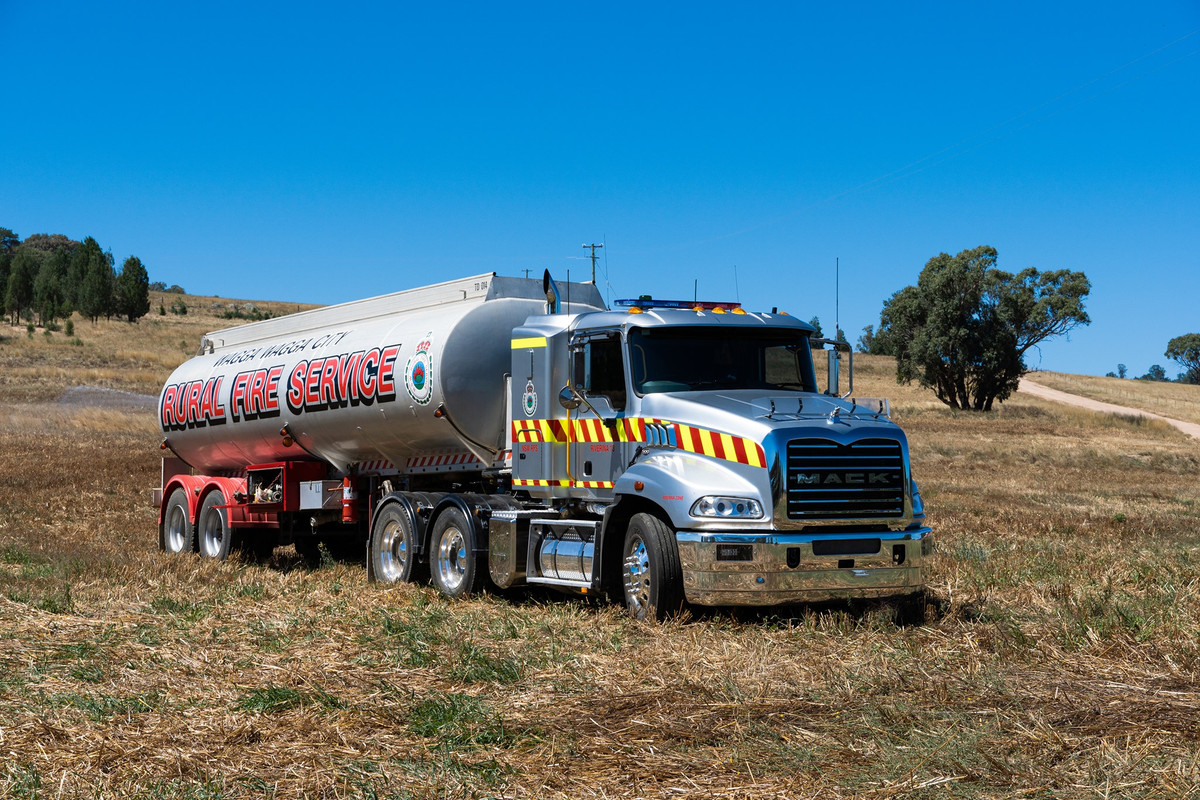 |
| Fireboat | 9 |  |
| Light Boats | 29 |  |
| Command Vehicle | 386 | 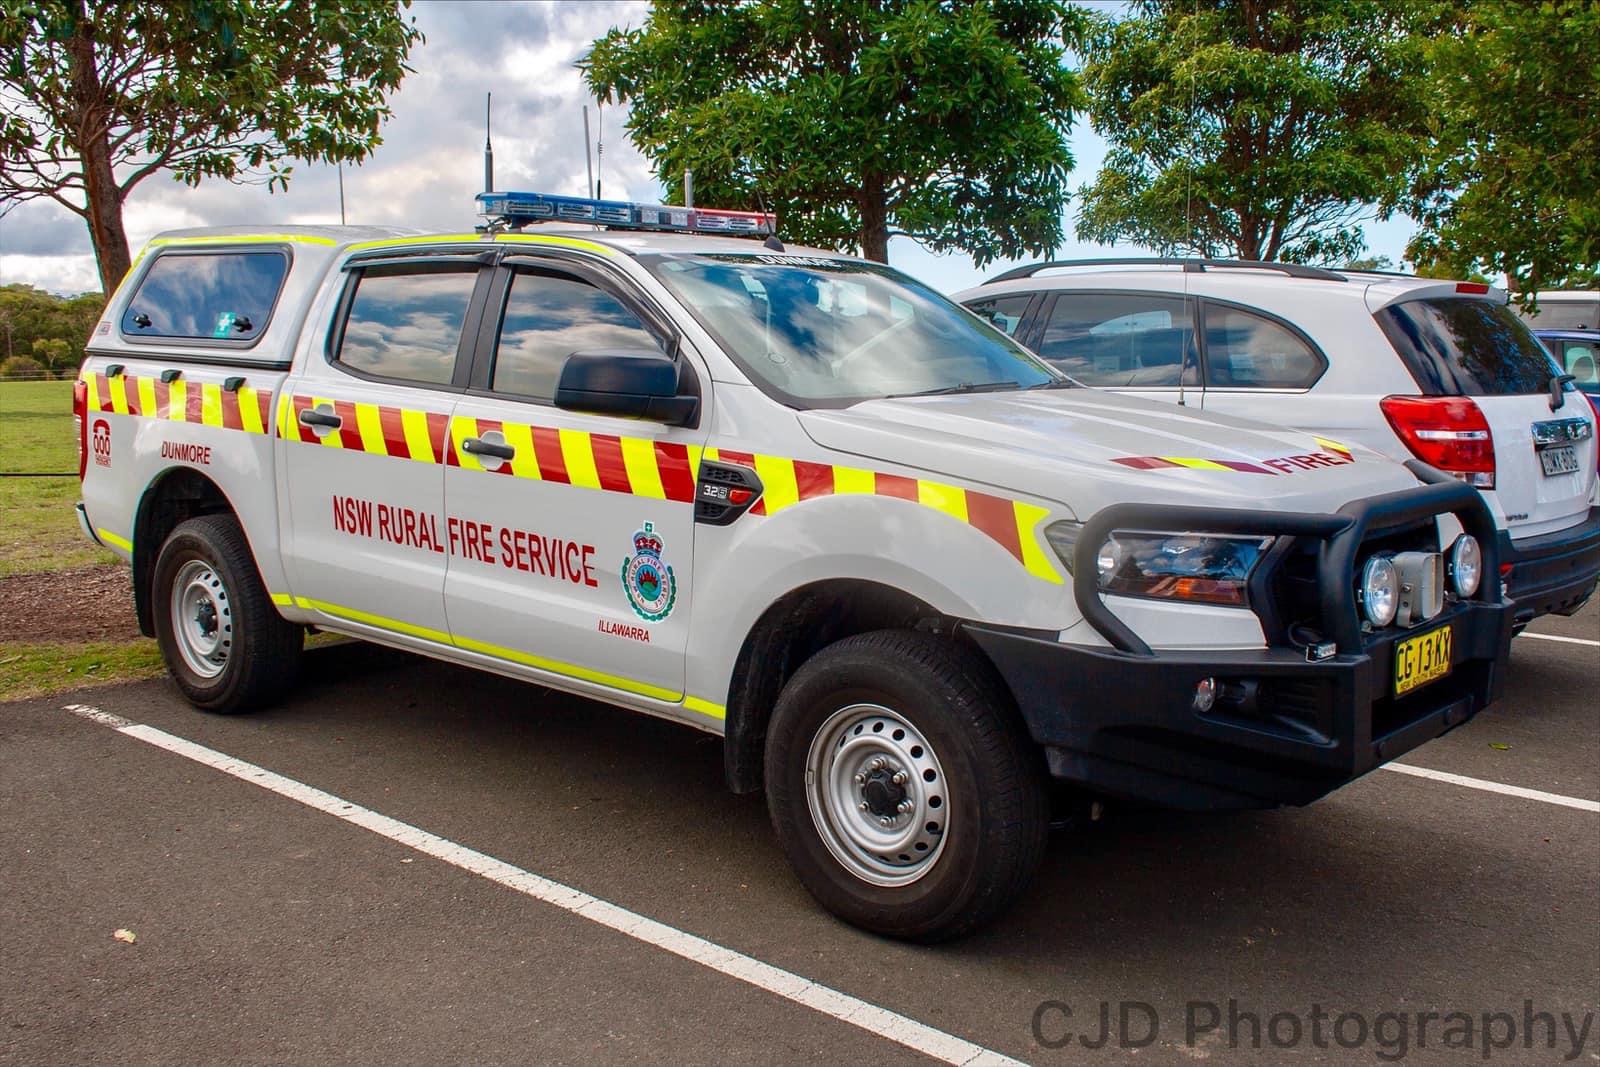 |
| Command Bus | 2 | 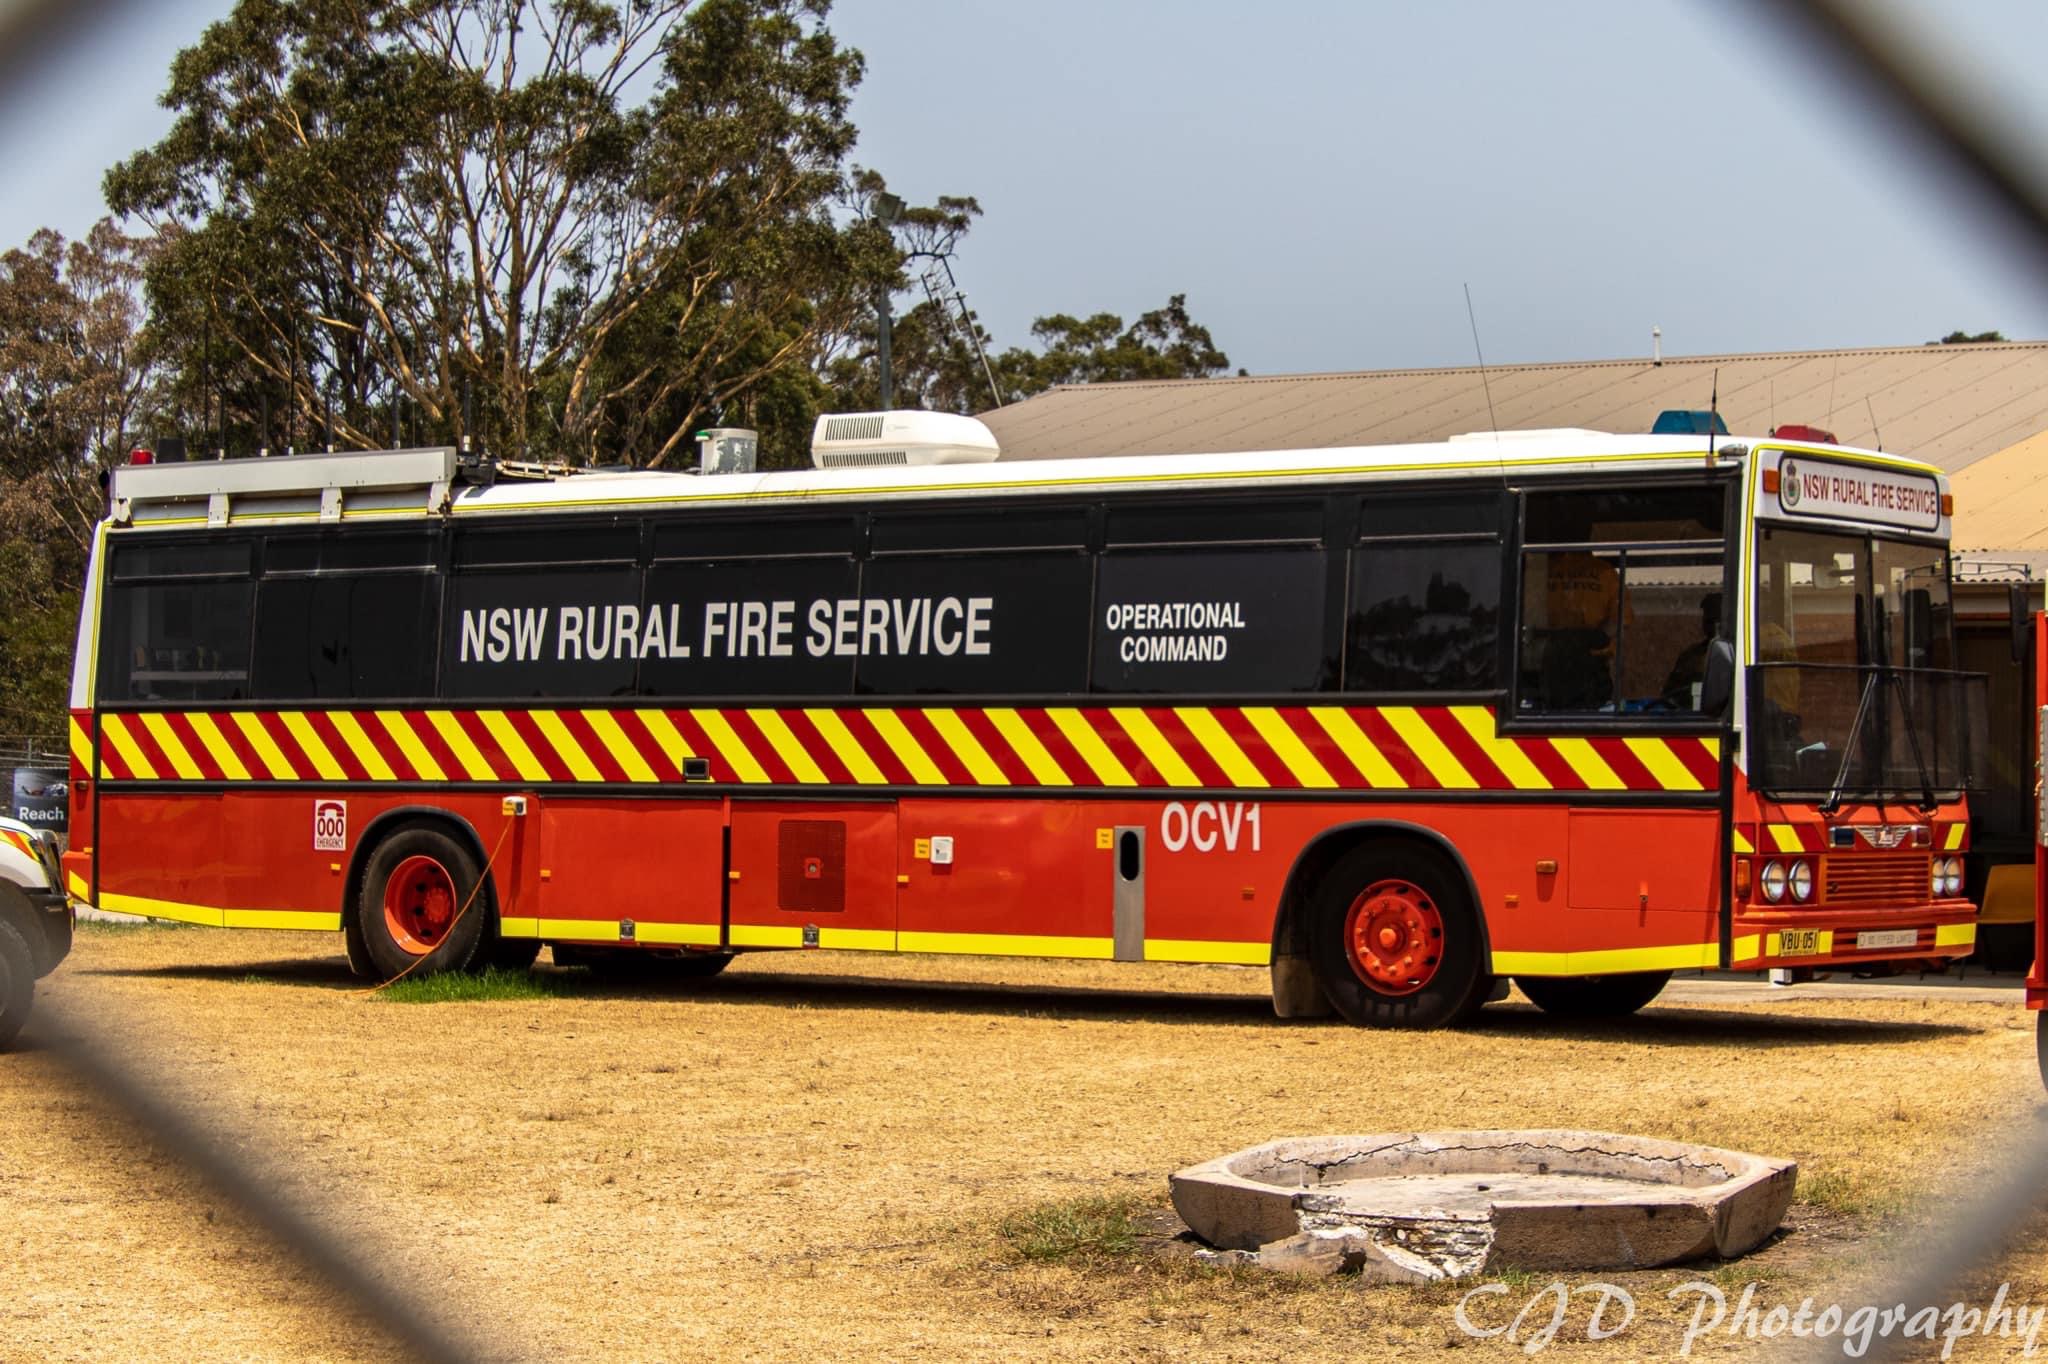 |
| Transport Bus | 46 |  |
| Logistics Support Vehicles | 86 |  |
| Logistics Trucks | 49 |  |
| Catering Trucks | 8 |  |
| Communications Trucks | 50 |  |
| Rescue Truck | 12 |  |
| Rescue Support Vehicle | 12 |  |
| Boeing 737 Air Tanker | 1 |  |
| Cessna Citation V | 2 |  |
| Boeing CH-47D Chinook | 1 | 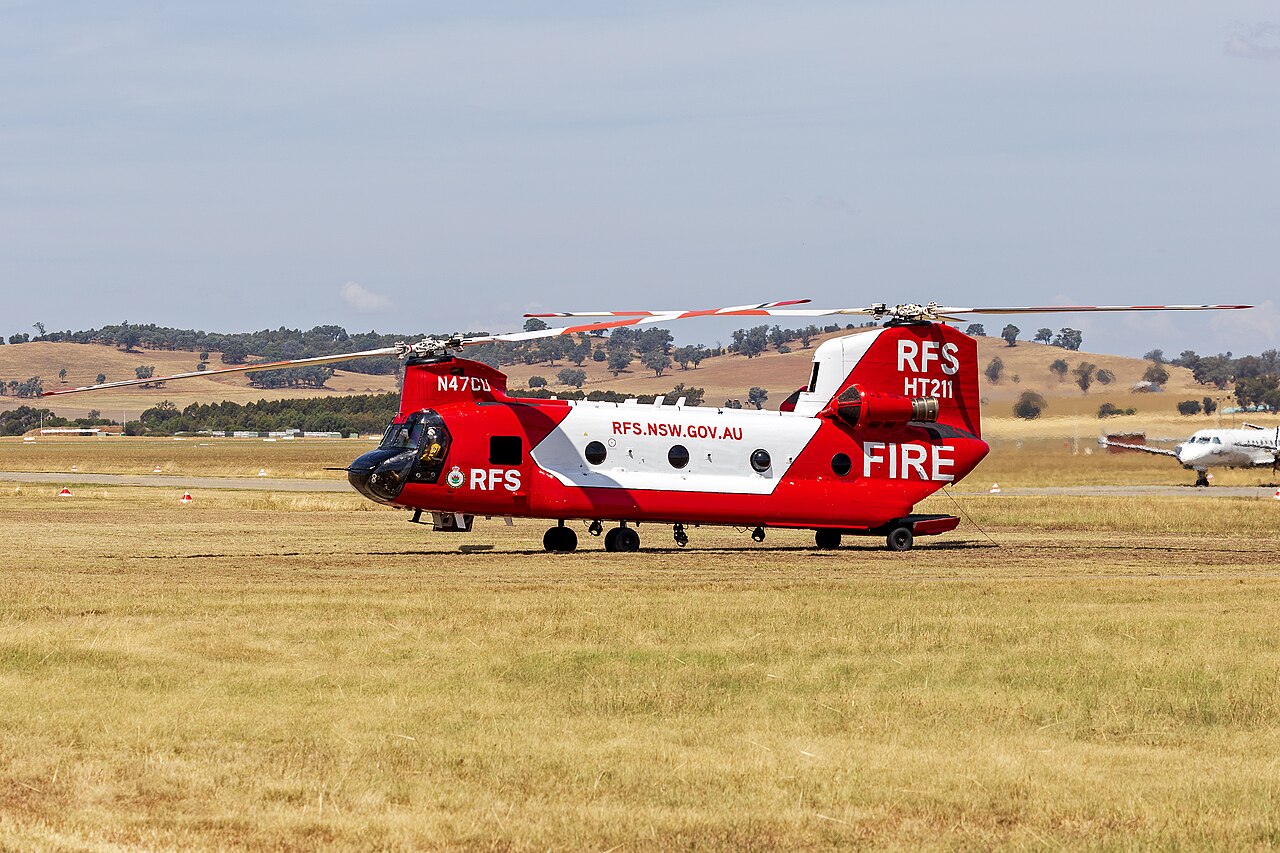 |
| Bell 412 | 6 |  |
| Kawasaki BK 117 | 2 |  |
| Sikorsky UH-60 Blackhawk | 1 |  |
| Beechcraft Super King Air 350 | 1 |  |
| Air Tractor AT-802 | 8 |  |
| Air Tractor AT-802F Fireboss | 1 | 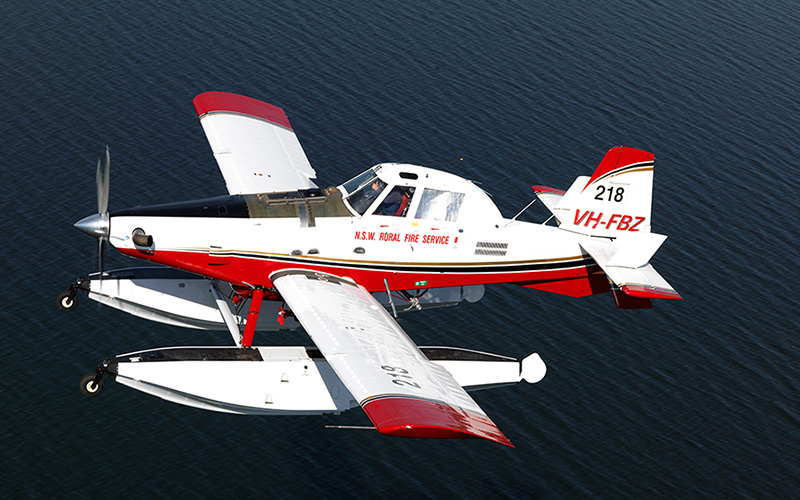 |
| Bell 204 | 1 | 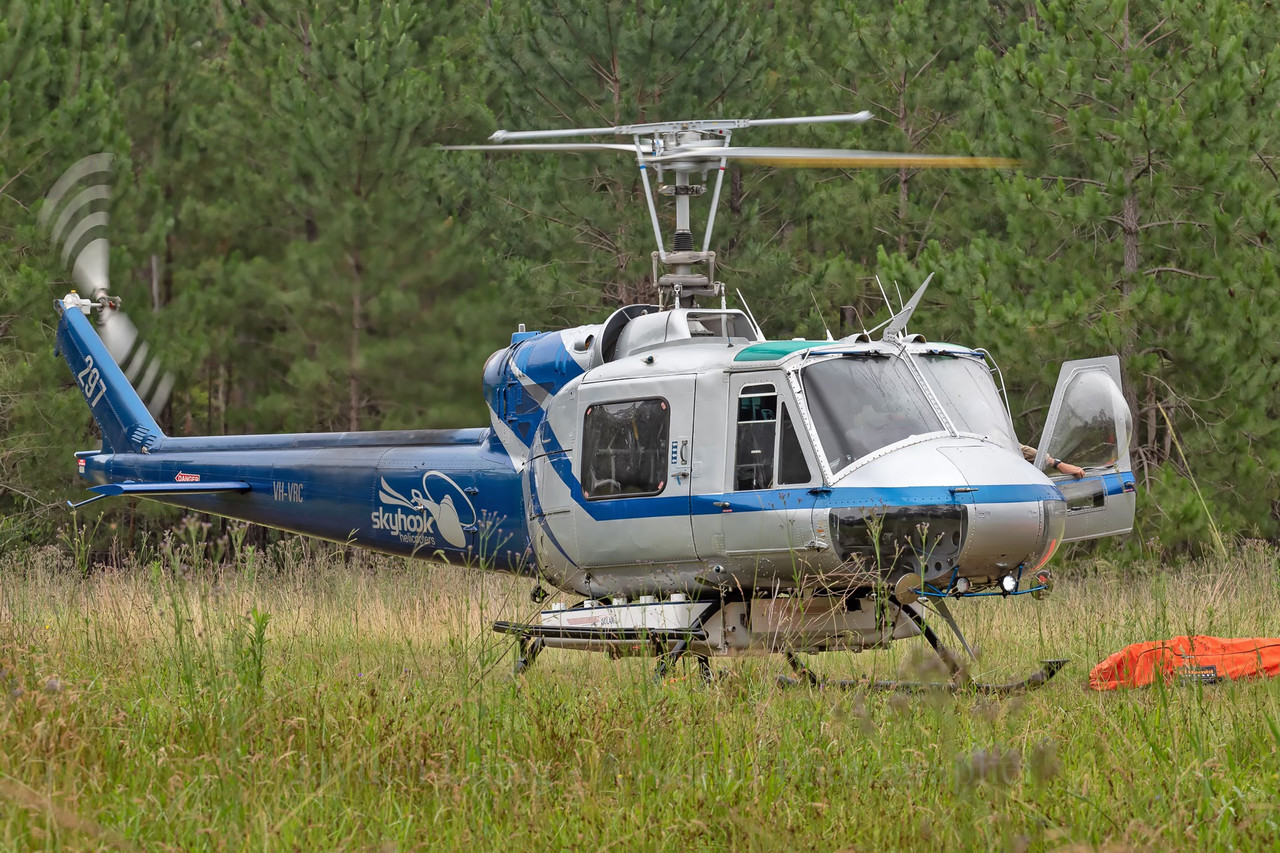 |
| Bell 214 | 2 | 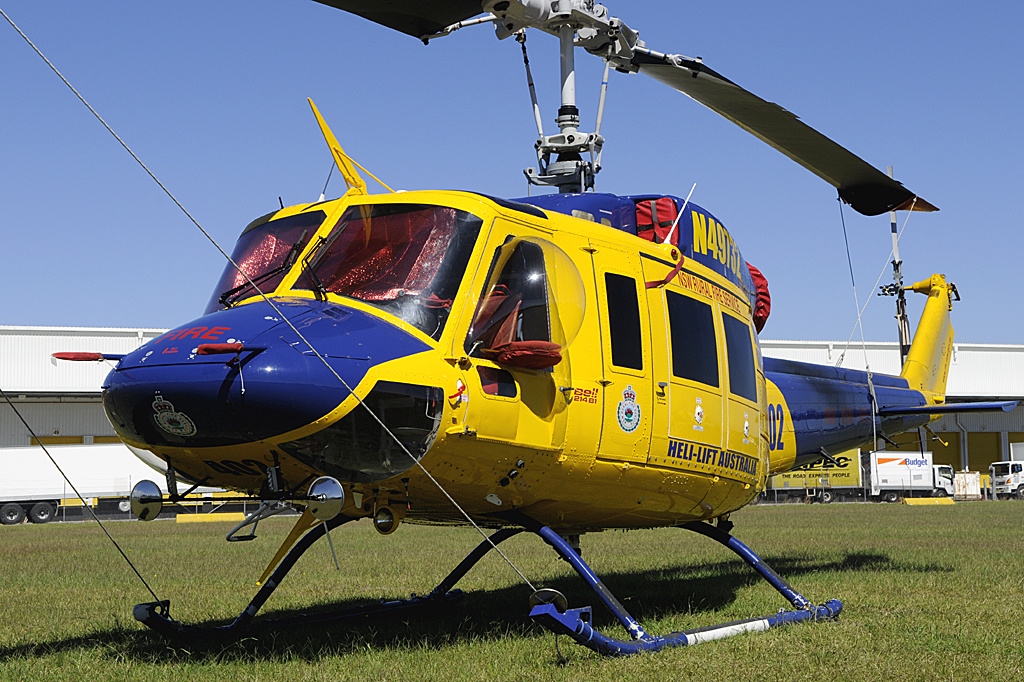 |
| British Aerospace 146 | 1 |  |
| Lockheed C-130 Hercules | 2 |  |
| Cessna 208 Caravan | 1 |  |
| Eurocopter AS350 Squirrel | 1 |  |
| Unit: | Size: | Base: |
|---|---|---|
State Headquarters
| 100x Permanent Personnel, 1x Medium Pumper, 8x Command Vehicles, 2x Command Buses | Sydney Olympic Park |
| Unit: | Size: | Base: |
|---|---|---|
| State Air Desk | 30x Permanent Personnel | State Operations Centre, Sydney Olympic Park |
| Air Operations - Richmond | 50x Volunteer Firefighters, 1x Boeing 737 Air Tanker, 2x Lockheed C-130 Hercules, 1x Cessna Citation V, 3x Logistics Support Vehicles | RAAF Base Richmond |
| Air Operations - Bankstown | 50x Volunteer Firefighters, 1x Beechcraft Super King Air 350, 1x Boeing CH-47D Chinook, 1x Sikorsky UH-60 Blackhawk, 2x Bell 412s, 3x Logistics Support Vehicles | Sydney-Bankstown Airport |
| Air Operations - Camden | 30x Volunteer Firefighters, 2x Bell 412s, 1x Eurocopter AS350 Squirrel, 2x Logistics Support Vehicles | Sydney-Camden Airport |
| Air Operations - Albury | 20x Volunteer Firefighters, 1x Air Tractor AT-802F Fireboss, 1x Cessna 208 Caravan, 1x Logistics Support Vehicle | Albury Airport |
| Air Operations - Dubbo | 20x Volunteer Firefighters, 1x British Aerospace 146, 1x Logistics Support Vehicle | Dubbo Regional Airport |
| Air Operations - Moree | 20x Volunteer Firefighters, 2x Air Tractor AT-802s, 1x Logistics Support Vehicle | Moree Airport |
| Air Operations - Cowra | 20x Volunteer Firefighters, 2x Air Tractor AT-802s, 1x Logistics Support Vehicle | Cowra Airport |
| Air Operations - Gunnedah | 20x Volunteer Firefighters, 2x Air Tractor AT-802s, 1x Logistics Support Vehicle | Gunnedah Airport |
| Air Operations - Griffith | 10x Volunteer Firefighters, 1x Air Tractor AT-802, 1x Logistics Support Vehicle | Griffith Regional Airport |
| Air Operations - Wagga Wagga | 10x Volunteer Firefighters, 1x Air Tractor AT-802, 1x Logistics Support Vehicle | Wagga Wagga Regional Airport |
| Air Operations - Newcastle | 10x Volunteer Firefighters, 1x Bell 204, 1x Logistics Support Vehicle | Newcastle-Williamtown Airport |
| Air Operations - Kempsey | 10x Volunteer Firefighters, 1x Bell 214, 1x Logistics Support Vehicle | Kempsey Airport |
| Air Operations - Central Coast | 10x Volunteer Firefighters, 1x Bell 214, 1x Logistics Support Vehicle | Central Coast-Warnervale Airport |
| Air Operations - Moruya | 10x Volunteer Firefighters, 1x Bell 412, 1x Logistics Support Vehicle | Moruya Airport |
| Air Operations - Cessnock | 10x Volunteer Firefighters, 1x Bell 412, 1x Logistics Support Vehicle | Cessnock Airport |
| Air Operations - Grafton | 10x Volunteer Firefighters, 1x Kawasaki BK 117, 1x Logistics Support Vehicle | Grafton-Clarence Valley Regional Airport |
| Air Operations - Tumut | 10x Volunteer Firefighters, 1x Kawasaki BK 117, 1x Logistics Support Vehicle | Tumut Airport |
| Unit: | Size: | Base: |
|---|---|---|
| State Fleet Services | 50x Permanent Personnel, 100x Volunteer Firefighters, 38x Heavy Tankers, 20x Light Tankers, 8x Medium Tankers | Sydney Olympic Park |
| State Engineering Services | 50x Permanent Personel, 3x Heavy Tankers, 5x Light Tankers, 2x Bulk Water Carriers | Sydney Olympic Park |
| State Mitigation Support Services | 30x Permanent Personnel, 60x Volunteer Firefighters, 1x Heavy Tanker, 2x Light Tankers, 1x Light Unit, 2x Logistics Support Vehicles | Sydney Olympic Park |
| Local Government Areas not covered by the Rural Fire Service: |
|
| Unit: | Size: | Base: |
|---|---|---|
| Hunter Area Command Headquarters | 50x Permanent Personnel | Cameron Park |
| Unit: | Size: | Base: |
|---|---|---|
| Lower North Coast District Headquarters | 15x Permanent Personnel, 1x Command Vehicle | West Kempsey |
| Lower North Coast Support Rural Fire Brigade | 100x Volunteer Firefighters, 1x Heavy Tanker, 1x Bulk Water Carrier, 1x Transport Bus, 1x Logistics Support Vehicle, 1x Logistics Truck, 2x Command Vehicles | West Kempsey |
| Lower North Coast Communications Rural Fire Brigade | 30x Volunteer Firefighters, 1x Communications Truck, 1x Command Vehicle | West Kempsey |
| Brigade: | Size: | Location: |
|---|---|---|
| Nambucca Rural Fire Brigade | 30x Volunteer Firefighters, 1x Heavy Tanker, 1x Light Tanker | Macksville |
| Valla Beach Rural Fire Brigade | 30x Volunteer Firefighters, 1x Heavy Tanker, 1x Light Tanker | Valla Beach |
| Valla Rural Fire Brigade | 30x Volunteer Firefighters, 1x Heavy Tanker, 1x Light Tanker | Valla |
| Missabotti Rural Fire Brigade | 30x Volunteer Firefighters, 1x Heavy Tanker, 1x Light Tanker | Missabotti |
| North Arm Rural Fire Brigade | 30x Volunteer Firefighters, 1x Heavy Tanker, 1x Light Tanker | Girralong |
| Argent's Hill Rural Fire Brigade | 30x Volunteer Firefighters, 1x Heavy Tanker, 1x Light Tanker | Argents Hill |
| Newee Creek Rural Fire Brigade | 30x Volunteer Firefighters, 1x Heavy Tanker, 1x Light Tanker | Newee Creek |
| South Arm Rural Fire Brigade | 30x Volunteer Firefighters, 1x Heavy Tanker, 1x Light Tanker | South Arm |
| Talarm Rural Fire Brigade | 30x Volunteer Firefighters, 1x Heavy Tanker, 1x Light Tanker | Talarm |
| Utungun Rural Fire Brigade | 30x Volunteer Firefighters, 1x Heavy Tanker, 1x Light Tanker | Utungun |
| Grays Crossing-Taylors Arm Rural Fire Brigade | 30x Volunteer Firefighters, 1x Heavy Tanker, 1x Light Tanker | Taylors Arm |
| Warrell Creek Rural Fire Brigade | 30x Volunteer Firefighters, 1x Heavy Tanker, 1x Light Tanker | Warrell Creek |
| Gumma Rural Fire Brigade | 30x Volunteer Firefighters, 1x Heavy Tanker, 1x Light Tanker | Gumma |
| Scotts Head Rural Fire Brigade | 30x Volunteer Firefighters, 1x Heavy Tanker, 1x Light Tanker | Scotts Head |
| Eungai Rural Fire Brigade | 30x Volunteer Firefighters, 1x Heavy Tanker, 1x Light Tanker | Eungai Rail |
| Brigade: | Size: | Location: |
|---|---|---|
| Frederickton Rural Fire Brigade | 30x Volunteer Firefighters, 1x Heavy Tanker, 1x Light Tanker | Frederickton |
| Gladstone-Smithtown Rural Fire Brigade | 30x Volunteer Firefighters, 1x Heavy Tanker, 1x Light Tanker | Gladstone |
| Clybucca Rural Fire Brigade | 30x Volunteer Firefighters, 1x Heavy Tanker, 1x Light Tanker | Clybucca |
| Yarrahapinni (Yarrahapinni) Rural Fire Brigade | 30x Volunteer Firefighters, 1x Heavy Tanker, 1x Light Tanker | Yarrahapinni |
| Yarrahapinni (Stuarts Point) Rural Fire Brigade | 30x Volunteer Firefighters, 1x Heavy Tanker, 1x Light Tanker | Stuarts Point |
| Yarrahapinni (Fishermans Reach) Rural Fire Brigade | 30x Volunteer Firefighters, 1x Heavy Tanker, 1x Light Tanker | Fishermans Reach |
| South West Rocks Rural Fire Brigade | 30x Volunteer Firefighters, 1x Heavy Tanker, 1x Light Tanker | South West Rocks |
| Hat Head Rural Fire Brigade | 30x Volunteer Firefighters, 1x Heavy Tanker, 1x Light Tanker | Hat Head |
| Crescent Head Rural Fire Brigade | 30x Volunteer Firefighters, 1x Heavy Tanker, 1x Light Tanker | Crescent Head |
| Kundabung Rural Fire Brigade | 30x Volunteer Firefighters, 1x Heavy Tanker, 1x Light Tanker | Kundabung |
| Aldavilla (Airport) Rural Fire Brigade | 30x Volunteer Firefighters, 1x Heavy Tanker, 1x Light Tanker | Aldavilla (North) |
| Aldavilla (Aldavilla Road) Rural Fire Brigade | 30x Volunteer Firefighters, 1x Heavy Tanker, 1x Light Tanker | Aldavilla (South) |
| Dondingalong/Sherwood Rural Fire Brigade | 30x Volunteer Firefighters, 1x Heavy Tanker, 1x Light Tanker | Dondingalong |
| Wittitrin Rural Fire Brigade | 30x Volunteer Firefighters, 1x Heavy Tanker, 1x Light Tanker | Wittitrin |
| Mooneba-Turners Flat Rural Fire Brigade | 30x Volunteer Firefighters, 1x Heavy Tanker, 1x Light Tanker | Turners Flat |
| Temagog Rural Fire Brigade | 30x Volunteer Firefighters, 1x Heavy Tanker, 1x Light Tanker | Temagog |
| Willawarrin Rural Fire Brigade | 30x Volunteer Firefighters, 1x Heavy Tanker, 1x Light Tanker | Willawarrin |
| Collombatti Rural Fire Brigade | 30x Volunteer Firefighters, 1x Heavy Tanker, 1x Light Tanker | Collombatti |
| Bellbrook Rural Fire Brigade | 30x Volunteer Firefighters, 1x Heavy Tanker, 1x Light Tanker | Bellbrook |
| Unit: | Size: | Base: |
|---|---|---|
| Mid Coast District Headquarters | 15x Permanent Personnel, 1x Command Vehicle | Taree |
| Mid Coast Support Rural Fire Brigade | 100x Volunteer Firefighters, 1x Heavy Tanker, 1x Bulk Water Carrier, 1x Transport Bus, 1x Logistics Support Vehicle, 1x Logistics Truck, 2x Command Vehicles | Taree |
| Mid Coast Communications Rural Fire Brigade | 30x Volunteer Firefighters, 1x Communications Truck, 1x Command Vehicle | Taree |
| Brigade: | Size: | Location: |
|---|---|---|
| Lake Innes Rural Fire Brigade | 45x Volunteer Firefighters, 1x Medium Pumper, 1x Heavy Tanker, 1x Bulk Water Carrier | Lake Innes |
| Gloucester Rural Fire Brigade | 30x Volunteer Firefighters, 1x Heavy Tanker, 1x Light Tanker | Gloucester |
| North Shore Rural Fire Brigade | 30x Volunteer Firefighters, 1x Heavy Tanker, 1x Light Tanker | Riverside |
| Telegraph Point Rural Fire Brigade | 30x Volunteer Firefighters, 1x Heavy Tanker, 1x Light Tanker | Telegraph Point |
| Rollands Plains Rural Fire Brigade | 30x Volunteer Firefighters, 1x Heavy Tanker, 1x Light Tanker | Rollands Plains |
| Pappinbarra Rural Fire Brigade | 30x Volunteer Firefighters, 1x Heavy Tanker, 1x Light Tanker | Upper Pappinbarra |
| Long Flat/Ellenborough Rural Fire Brigade | 30x Volunteer Firefighters, 1x Heavy Tanker, 1x Light Tanker | Long Flat |
| Hollisdale Rural Fire Brigade | 30x Volunteer Firefighters, 1x Heavy Tanker, 1x Light Tanker | Hollisdale |
| Bellangry Rural Fire Brigade | 30x Volunteer Firefighters, 1x Heavy Tanker, 1x Light Tanker | Bellangry |
| Pembrooke Rural Fire Brigade | 30x Volunteer Firefighters, 1x Heavy Tanker, 1x Light Tanker | Pembrooke |
| Byabarra Rural Fire Brigade | 30x Volunteer Firefighters, 1x Heavy Tanker, 1x Light Tanker | Byabarra |
| Comboyne Rural Fire Brigade | 30x Volunteer Firefighters, 1x Heavy Tanker, 1x Light Tanker | Comboyne |
| Lorne Rural Fire Brigade | 30x Volunteer Firefighters, 1x Heavy Tanker, 1x Light Tanker | Lorne |
| Camden Haven Rural Fire Brigade | 30x Volunteer Firefighters, 1x Heavy Tanker, 1x Light Tanker | Kew |
| Bonny Hills Rural Fire Brigade | 30x Volunteer Firefighters, 1x Heavy Tanker, 1x Light Tanker | Bonny Hills |
| Lake Cathie Rural Fire Brigade | 30x Volunteer Firefighters, 1x Heavy Tanker, 1x Light Tanker | Lake Cathie |
| Sancrox-Thrumster Rural Fire Brigade | 30x Volunteer Firefighters, 1x Heavy Tanker, 1x Light Tanker | Thrumster |
| King Creek Rural Fire Brigade | 30x Volunteer Firefighters, 1x Heavy Tanker, 1x Light Tanker | King Creek |
| Wauchope Rural Fire Brigade | 30x Volunteer Firefighters, 1x Heavy Tanker, 1x Light Tanker | Wauchope |
| Huntingdon Rural Fire Brigade | 30x Volunteer Firefighters, 1x Heavy Tanker, 1x Light Tanker | Huntingdon |
| Beechwood Rural Fire Brigade | 30x Volunteer Firefighters, 1x Heavy Tanker, 1x Light Tanker | Beechwood |
| Lord Howe Island Rural Fire Brigade | 30x Volunteer Firefighters, 1x Heavy Tanker, 1x Light Unit | Lord Howe Island |
| Brigade: | Size: | Location: |
|---|---|---|
| Taree Rural Fire Brigade | 45x Volunteer Firefighters, 1x Medium Pumper, 1x Heavy Tanker, 1x Light Tanker | Taree |
| Bulahdelah Rural Fire Brigade | 45x Volunteer Firefighters, 1x Medium Pumper, 1x Heavy Tanker, 1x Light Tanker | Bulahdelah |
| Bulga-Taree Rural Fire Brigade | 30x Volunteer Firefighters, 1x Heavy Tanker, 1x Light Tanker | Elands |
| Hannam Vale Rural Fire Brigade | 30x Volunteer Firefighters, 1x Heavy Tanker, 1x Light Tanker | Hannam Vale |
| Johns River Rural Fire Brigade | 30x Volunteer Firefighters, 1x Heavy Tanker, 1x Light Tanker | Johns River |
| Moorland Rural Fire Brigade | 30x Volunteer Firefighters, 1x Heavy Tanker, 1x Light Tanker | Moorland |
| Lansdowne Rural Fire Brigade | 30x Volunteer Firefighters, 1x Heavy Tanker, 1x Light Tanker | Lansdowne |
| Coopernook Rural Fire Brigade | 30x Volunteer Firefighters, 1x Heavy Tanker, 1x Light Tanker | Coopernook |
| Kundle/Moto Rural Fire Brigade | 30x Volunteer Firefighters, 1x Heavy Tanker, 1x Light Tanker | Moto |
| Harrington Rural Fire Brigade | 30x Volunteer Firefighters, 1x Heavy Tanker, 1x Light Tanker | Harrington |
| Mitchells Island Rural Fire Brigade | 30x Volunteer Firefighters, 1x Heavy Tanker, 1x Light Tanker | Mitchells Island |
| Old Bar Rural Fire Brigade | 30x Volunteer Firefighters, 1x Heavy Tanker, 1x Light Tanker | Old Bar |
| Wallaby Joe Rural Fire Brigade | 30x Volunteer Firefighters, 1x Heavy Tanker, 1x Light Tanker | Wingham |
| Killabakh Rural Fire Brigade | 30x Volunteer Firefighters, 1x Heavy Tanker, 1x Light Tanker | Killabakh |
| Mooral Creek Rural Fire Brigade | 30x Volunteer Firefighters, 1x Heavy Tanker, 1x Light Tanker | Mooral Creek |
| Bobin Rural Fire Brigade | 30x Volunteer Firefighters, 1x Heavy Tanker, 1x Light Tanker | Bobin |
| Marlee Rural Fire Brigade | 30x Volunteer Firefighters, 1x Heavy Tanker, 1x Light Tanker | Marlee |
| Wherrol Flat Rural Fire Brigade | 30x Volunteer Firefighters, 1x Heavy Tanker, 1x Light Tanker | Wherrol Flat |
| Tinonee Rural Fire Brigade | 30x Volunteer Firefighters, 1x Heavy Tanker, 1x Light Tanker | Tinonee |
| Rainbow Flat Rural Fire Brigade | 30x Volunteer Firefighters, 1x Heavy Tanker, 1x Light Tanker | Rainbow Flat |
| Diamond Beach Rural Fire Brigade | 30x Volunteer Firefighters, 1x Heavy Tanker, 1x Light Tanker | Diamond Beach |
| Nabiac-Taree Rural Fire Brigade | 30x Volunteer Firefighters, 1x Heavy Tanker, 1x Light Tanker | Nabiac |
| Burrell Creek Rural Fire Brigade | 30x Volunteer Firefighters, 1x Heavy Tanker, 1x Light Tanker | Burrell Creek |
| Mount George Rural Fire Brigade | 30x Volunteer Firefighters, 1x Heavy Tanker, 1x Light Tanker | Mount George |
| Bundook Rural Fire Brigade | 30x Volunteer Firefighters, 1x Heavy Tanker, 1x Light Tanker | Bundook |
| Bulliac Rural Fire Brigade | 30x Volunteer Firefighters, 1x Heavy Tanker, 1x Light Tanker | Bulliac |
| Krambach Rural Fire Brigade | 30x Volunteer Firefighters, 1x Heavy Tanker, 1x Light Tanker | Krambach |
| Firefly Rural Fire Brigade | 30x Volunteer Firefighters, 1x Heavy Tanker, 1x Light Tanker | Firefly |
| Bunyah Rural Fire Brigade | 30x Volunteer Firefighters, 1x Heavy Tanker, 1x Light Tanker | Bunyah |
| Minimbah Rural Fire Brigade | 30x Volunteer Firefighters, 1x Heavy Tanker, 1x Light Tanker | Minimbah |
| Tuncurry Rural Fire Brigade | 30x Volunteer Firefighters, 1x Heavy Tanker, 1x Light Tanker | Tuncurry |
| Coomba Park Rural Fire Brigade | 30x Volunteer Firefighters, 1x Heavy Tanker, 1x Light Tanker | Coomba Park |
| Green Point Rural Fire Brigade | 30x Volunteer Firefighters, 1x Heavy Tanker, 1x Light Tanker | Green Point |
| Coolongolook Rural Fire Brigade | 30x Volunteer Firefighters, 1x Heavy Tanker, 1x Light Tanker | Coolongolook |
| Pacific Palms Rural Fire Brigade | 30x Volunteer Firefighters, 1x Heavy Tanker, 1x Light Tanker | Smiths Lake |
| Wootton Rural Fire Brigade | 30x Volunteer Firefighters, 1x Heavy Tanker, 1x Light Tanker | Wootton |
| Bungwahl Rural Fire Brigade | 30x Volunteer Firefighters, 1x Heavy Tanker, 1x Light Tanker | Bungwahl |
| Markwell Rural Fire Brigade | 30x Volunteer Firefighters, 1x Heavy Tanker, 1x Light Tanker | Upper Myall |
| North Arm Cove Rural Fire Brigade | 30x Volunteer Firefighters, 1x Heavy Tanker, 1x Light Tanker | North Arm Cove |
| Limeburners Creek Rural Fire Brigade | 30x Volunteer Firefighters, 1x Heavy Tanker, 1x Light Tanker | Limeburners Creek |
| Girvan Rural Fire Brigade | 30x Volunteer Firefighters, 1x Heavy Tanker, 1x Light Tanker | Girvan |
| Booral Rural Fire Brigade | 30x Volunteer Firefighters, 1x Heavy Tanker, 1x Light Tanker | Booral |
| Stroud Rural Fire Brigade | 30x Volunteer Firefighters, 1x Heavy Tanker, 1x Light Tanker | Stroud |
| Stroud Road Rural Fire Brigade | 30x Volunteer Firefighters, 1x Heavy Tanker, 1x Light Tanker | Stroud Road |
| Monkerai Rural Fire Brigade | 30x Volunteer Firefighters, 1x Heavy Tanker, 1x Light Tanker | Monkerai |
| Wards River Rural Fire Brigade | 30x Volunteer Firefighters, 1x Heavy Tanker, 1x Light Tanker | Wards River |
| Avon Rural Fire Brigade | 30x Volunteer Firefighters, 1x Heavy Tanker, 1x Light Tanker | Stratford |
| Waukivory Rural Fire Brigade | 30x Volunteer Firefighters, 1x Heavy Tanker, 1x Light Tanker | Waukivory |
| Gangat Rural Fire Brigade | 30x Volunteer Firefighters, 1x Heavy Tanker, 1x Light Tanker | Tugrabakh |
| Barrington Rural Fire Brigade | 30x Volunteer Firefighters, 1x Heavy Tanker, 1x Light Tanker | Barrington |
| Gloucester River Rural Fire Brigade | 30x Volunteer Firefighters, 1x Heavy Tanker, 1x Light Tanker | Invergordon |
| Rawdon Vale Rural Fire Brigade | 30x Volunteer Firefighters, 1x Heavy Tanker, 1x Light Tanker | Rawdon Vale |
| Bowman River Rural Fire Brigade | 30x Volunteer Firefighters, 1x Heavy Tanker, 1x Light Tanker | Bowman River |
| Rookhurst Rural Fire Brigade | 30x Volunteer Firefighters, 1x Heavy Tanker, 1x Light Tanker | Rookhurst |
| Tibbuc Rural Fire Brigade | 30x Volunteer Firefighters, 1x Heavy Tanker, 1x Light Tanker | Tibbuc |
| Curricabark Rural Fire Brigade | 30x Volunteer Firefighters, 1x Heavy Tanker, 1x Light Tanker | Glen Ward |
| Tea Gardens Rural Fire Brigade | 30x Volunteer Firefighters, 1x Heavy Tanker, 1x Bulk Water Carrier | Tea Gardens |
| Pindimar Rural Fire Brigade | 30x Volunteer Firefighters, 1x Light Tanker, 1x Light Unit | Pindimar |
| Unit: | Size: | Base: |
|---|---|---|
| Lower Hunter District Headquarters | 15x Permanent Personnel, 1x Command Vehicle | East Maitland |
| Lower Hunter Support Rural Fire Brigade | 100x Volunteer Firefighters, 1x Heavy Tanker, 1x Bulk Water Carrier, 1x Transport Bus, 1x Logistics Support Vehicle, 1x Logistics Truck, 2x Command Vehicles | East Maitland |
| Lower Hunter Communications Rural Fire Brigade | 30x Volunteer Firefighters, 1x Communications Truck, 1x Command Vehicle | East Maitland |
| Brigade: | Size: | Location: |
|---|---|---|
| East Maitland Rural Fire Brigade | 60x Volunteer Firefighters, 1x Heavy Tanker, 1x Light Tanker, 1x Light Unit, 1x Bulk Water Carrier | East Maitland |
| Thornton Rural Fire Brigade | 45x Volunteer Firefighters, 1x Medium Pumper, 1x Heavy Tanker, 1x Light Tanker | Thornton |
| Bishops Bridge Rural Fire Brigade | 45x Volunteer Firefighters, 1x Medium Pumper, 1x Heavy Tanker, 1x Light Tanker | Bishops Bridge |
| Lochinvar Rural Fire Brigade | 45x Volunteer Firefighters, 1x Heavy Tanker, 2x Light Tankers | Lochinvar |
| Bolwarra-Largs Rural Fire Brigade | 45x Volunteer Firefighters, 1x Heavy Tanker, 1x Light Tanker, 1x Bulk Water Carrier | Bolwarra Heights |
| Maitland Vale/Luskintyre Rural Fire Brigade | 30x Volunteer Firefighters, 1x Medium Pumper, 1x Heavy Tanker | Rosebrook |
| Brigade: | Size: | Location: |
|---|---|---|
| Wollombi Rural Fire Brigade | 45x Volunteer Firefighters, 1x Medium Pumper, 2x Heavy Tankers | Wollombi |
| Mulbring Rural Fire Brigade | 45x Volunteer Firefighters, 1x Medium Pumper, 1x Heavy Tanker, 1x Light Unit | Mulbring |
| Laguna Rural Fire Brigade | 45x Volunteer Firefighters, 1x Medium Pumper, 2x Light Tankers | Laguna |
| Greta Rural Fire Brigade | 45x Volunteer Firefighters, 1x Heavy Tanker, 1x Light Tanker, 1x Bulk Water Carrier | Greta |
| Bucketty Rural Fire Brigade | 30x Volunteer Firefighters, 1x Medium Pumper, 1x Heavy Tanker | Bucketty |
| North Rothbury Rural Fire Brigade | 30x Volunteer Firefighters, 1x Medium Pumper, 1x Heavy Tanker | North Rothbury |
| Neath Rural Fire Brigade | 30x Volunteer Firefighters, 1x Heavy Tanker, 1x Light Tanker | Neath |
| Rothbury Rural Fire Brigade | 30x Volunteer Firefighters, 1x Heavy Tanker, 1x Light Tanker | Pokolbin (East) |
| Pokolbin Rural Fire Brigade | 30x Volunteer Firefighters, 1x Heavy Tanker, 1x Light Tanker | Pokolbin (West) |
| Central-Cessnock Rural Fire Brigade | 30x Volunteer Firefighters, 1x Heavy Tanker, 1x Light Tanker | Cessnock |
| Kearsley Rural Fire Brigade | 30x Volunteer Firefighters, 1x Heavy Tanker, 1x Light Tanker | Kearsley |
| Millfield Rural Fire Brigade | 30x Volunteer Firefighters, 1x Heavy Tanker, 1x Light Tanker | Ellalong |
| Quorrobolong Rural Fire Brigade | 30x Volunteer Firefighters, 1x Heavy Tanker, 1x Light Tanker | Quorrobolong |
| Paxton Rural Fire Brigade | 30x Volunteer Firefighters, 1x Heavy Tanker, 1x Light Tanker | Paxton |
| Benwerrin Rural Fire Brigade | 30x Volunteer Firefighters, 1x Heavy Tanker, 1x Light Unit | Buttai |
| Brigade: | Size: | Location: |
|---|---|---|
| Paterson Rural Fire Brigade | 45x Volunteer Firefighters, 1x Medium Pumper, 1x Heavy Tanker, 1x Light Tanker | Paterson |
| Gresford Rural Fire Brigade | 45x Volunteer Firefighters, 1x Medium Pumper, 1x Heavy Tanker, 1x Light Tanker | Gresford |
| Vacy Rural Fire Brigade | 45x Volunteer Firefighters, 2x Heavy Tankers, 1x Light Tanker | Vacy |
| Clarence Town Rural Fire Brigade | 45x Volunteer Firefighters, 1x Heavy Tanker, 1x Light Tanker, 1x Command Vehicle | Clarence Town |
| Bendolba-Salisbury Rural Fire Brigade | 30x Volunteer Firefighters, 1x Medium Pumper, 1x Light Tanker | Munni |
| Martins Creek Rural Fire Brigade | 30x Volunteer Firefighters, 1x Heavy Tanker, 1x Light Tanker | Martins Creek |
| Dungog Rural Fire Brigade | 30x Volunteer Firefighters, 1x Heavy Tanker, 1x Light Tanker | Dungog |
| Lostock Rural Fire Brigade | 30x Volunteer Firefighters, 1x Heavy Tanker, 1x Light Tanker | Lostock |
| Eccleston Rural Fire Brigade | 30x Volunteer Firefighters, 1x Heavy Tanker, 1x Light Tanker | Eccleston |
| Wallarobba Rural Fire Brigade | 30x Volunteer Firefighters, 2x Light Tankers | Wallarobba |
| Flat Tops Rural Fire Brigade | 30x Volunteer Firefighters, 2x Light Tankers | Alison |
| Brigade: | Size: | Location: |
|---|---|---|
| Tanilba Bay-Mallabula Rural Fire Brigade | 60x Volunteer Firefighters, 1x Medium Pumper, 1x Heavy Tanker, 2x Light Tankers | Tanilba Bay |
| Soldiers Point Rural Fire Brigade | 60x Volunteer Firefighters, 1x Medium Pumper, 1x Heavy Tanker, 1x Light Tanker, 1x Fireboat | Salamander Bay |
| Lemon Tree Passage Rural Fire Brigade | 45x Volunteer Firefighters, 1x Medium Pumper, 1x Heavy Tanker, 1x Light Tanker | Lemon Tree Passage |
| Medowie Rural Fire Brigade | 45x Volunteer Firefighters, 1x Medium Pumper, 1x Heavy Tanker, 1x Light Tanker | Medowie |
| Williamtown-Salt Ash Rural Fire Brigade | 45x Volunteer Firefighters, 1x Medium Pumper, 1x Heavy Tanker, 1x Light Tanker | Salt Ash |
| Anna Bay/Bobs Farm Rural Fire Brigade | 45x Volunteer Firefighters, 1x Medium Pumper, 1x Heavy Tanker, 1x Light Tanker | Anna Bay |
| Iona/Duns Creek Rural Fire Brigade | 30x Volunteer Firefighters, 1x Heavy Tanker, 1x Light Tanker | Duns Creek |
| Bowthorne/Hinton Rural Fire Brigade | 30x Volunteer Firefighters, 1x Heavy Tanker, 1x Light Tanker | Wallalong |
| Raymond Terrace Rural Fire Brigade | 30x Volunteer Firefighters, 1x Heavy Tanker, 1x Light Tanker | Ferodale |
| Karuah Rural Fire Brigade | 30x Volunteer Firefighters, 1x Heavy Tanker, 1x Light Tanker | Karuah |
| Fingal Bay Rural Fire Brigade | 30x Volunteer Firefighters, 1x Heavy Tanker, 1x Light Tanker | Fingal Bay |
| Seaham Rural Fire Brigade | 30x Volunteer Firefighters, 1x Heavy Tanker, 1x Command Vehicle | Seaham |
| Unit: | Size: | Base: |
|---|---|---|
| Hunter Valley District Headquarters | 15x Permanent Personnel, 1x Command Vehicle | Bulga |
| Hunter Valley Support Rural Fire Brigade | 100x Volunteer Firefighters, 1x Heavy Tanker, 1x Bulk Water Carrier, 1x Transport Bus, 1x Logistics Support Vehicle, 1x Logistics Truck, 2x Command Vehicles | Bulga |
| Hunter Valley Communications Rural Fire Brigade | 30x Volunteer Firefighters, 1x Communications Truck, 1x Command Vehicle | Bulga |
| Brigade: | Size: | Location: |
|---|---|---|
| Howes Valley Rural Fire Brigade | 60x Volunteer Firefighters, 1x Heavy Tanker, 1x Light Unit, 1x Rescue Truck, 1x Rescue Support Vehicle | Howes Valley |
| Whittingham Rural Fire Brigade | 45x Volunteer Firefighters, 1x Heavy Tanker, 1x Light Unit, 1x Bulk Water Carrier | Whittingham |
| Putty Rural Fire Brigade | 30x Volunteer Firefighters, 1x Heavy Tanker, 1x Light Unit | Putty |
| Broke Rural Fire Brigade | 30x Volunteer Firefighters, 1x Heavy Tanker, 1x Light Unit | Broke |
| Bulga-Singleton Rural Fire Brigade | 30x Volunteer Firefighters, 1x Heavy Tanker, 1x Light Unit | Bulga |
| Jerrys Plains Rural Fire Brigade | 30x Volunteer Firefighters, 1x Heavy Tanker, 1x Light Unit | Jerrys Plains |
| Darlington Rural Fire Brigade | 30x Volunteer Firefighters, 1x Heavy Tanker, 1x Light Unit | Wattle Ponds |
| Belford Rural Fire Brigade | 30x Volunteer Firefighters, 1x Heavy Tanker, 1x Light Unit | Lower Belford |
| Scotts Flat Rural Fire Brigade | 30x Volunteer Firefighters, 1x Heavy Tanker, 1x Light Unit | Roughit |
| Scotts Flat (Stanhope) Rural Fire Brigade | 30x Volunteer Firefighters, 1x Heavy Tanker, 1x Light Unit | Stanhope |
| Glendonbrook Rural Fire Brigade | 30x Volunteer Firefighters, 1x Heavy Tanker, 1x Light Unit | Glendon Brook |
| Mirannie Rural Fire Brigade | 30x Volunteer Firefighters, 1x Heavy Tanker, 1x Light Unit | Reedy Creek |
| Glennies Creek Rural Fire Brigade | 30x Volunteer Firefighters, 1x Heavy Tanker, 1x Light Unit | Mount Olive |
| Goorangoola Seven Rural Fire Brigade | 30x Volunteer Firefighters, 1x Heavy Tanker, 1x Light Unit | Goorangoola |
| Mount Royal Rural Fire Brigade | 30x Volunteer Firefighters, 1x Heavy Tanker, 1x Light Unit | Mount Royal |
| Brigade: | Size: | Location: |
|---|---|---|
| Edinglassie Rural Fire Brigade | 45x Volunteer Firefighters, 1x Medium Pumper, 1x Heavy Tanker, 1x Bulk Water Carrier | Muswellbrook |
| Hebden Rural Fire Brigade | 30x Volunteer Firefighters, 1x Heavy Tanker, 1x Light Unit | Hebden |
| Muscle Creek Rural Fire Brigade | 30x Volunteer Firefighters, 1x Heavy Tanker, 1x Light Unit | Muscle Creek |
| McCullys Gap Rural Fire Brigade | 30x Volunteer Firefighters, 1x Heavy Tanker, 1x Light Unit | McCullys Gap |
| Wybong Rural Fire Brigade | 30x Volunteer Firefighters, 1x Heavy Tanker, 1x Light Unit | Manobalai |
| Sandy Hollow Rural Fire Brigade | 30x Volunteer Firefighters, 1x Heavy Tanker, 1x Light Unit | Sandy Hollow |
| Mangoola Rural Fire Brigade | 30x Volunteer Firefighters, 1x Heavy Tanker, 1x Light Unit | Denman (West) |
| Dalswinton Rural Fire Brigade | 30x Volunteer Firefighters, 1x Heavy Tanker, 1x Light Unit | Denman (East) |
| Bureen Rural Fire Brigade | 30x Volunteer Firefighters, 1x Heavy Tanker, 1x Light Unit | Bureen |
| Baerami Rural Fire Brigade | 30x Volunteer Firefighters, 1x Heavy Tanker, 1x Light Unit | Baerami |
| Martindale Rural Fire Brigade | 30x Volunteer Firefighters, 1x Heavy Tanker, 1x Light Unit | Martindale |
| Widden Valley Rural Fire Brigade | 30x Volunteer Firefighters, 1x Heavy Tanker, 1x Light Unit | Widden |
| Unit: | Size: | Base: |
|---|---|---|
| Central Coast District Headquarters | 15x Permanent Personnel, 1x Command Vehicle | Charmhaven |
| Central Coast Support Rural Fire Brigade | 100x Volunteer Firefighters, 2x Heavy Tankers, 1x Transport Bus, 1x Logistics Support Vehicle, 1x Logistics Truck, 2x Command Vehicles | Charmhaven |
| Central Coast Communications Rural Fire Brigade | 30x Volunteer Firefighters, 1x Communications Truck, 1x Command Vehicle | Charmhaven |
| Brigade: | Size: | Location: |
|---|---|---|
| Gosford Support Rural Fire Brigade | 45x Volunteer Firefighters, 2x Bulk Water Carriers, 1x Heavy Bulk Water Carrier | Kariong |
| Wyong Support Rural Fire Brigade | 30x Volunteer Firefighters, 2x Bulk Water Carriers | Wyong |
| Gosford Catering Rural Fire Brigade | 30x Volunteer Firefighters, 1x Catering Truck, 1x Command Vehicle | Kariong |
| Brisbane Waters Rural Fire Brigade | 75x Volunteer Firefighters, 1x Heavy Tanker, 1x Light Tanker, 1x Command Vehicle, 1x Light Boat, 1x Logistics Truck | Erina |
| Copacabana Rural Fire Brigade | 60x Volunteer Firefighters, 1x Medium Pumper, 2x Heavy Tankers, 1x Light Unit | Copacabana |
| Wamberal Rural Fire Brigade | 60x Volunteer Firefighters, 1x Medium Pumper, 1x Heavy Tanker, 1x Medium Tanker, 1x Light Unit | Wamberal |
| Gwandalan Rural Fire Brigade | 60x Volunteer Firefighters, 1x Medium Pumper, 1x Heavy Tanker, 1x Light Tanker, 1x Light Unit | Gwandalan |
| Bar Point Rural Fire Brigade | 60x Volunteer Firefighters, 1x Fireboat, 2x Light Boats, 1x Command Vehicle | Bar Point |
| Kariong Rural Fire Brigade | 45x Volunteer Firefighters, 1x Medium Pumper, 2x Heavy Tankers | Kariong |
| Lake Munmorah Rural Fire Brigade | 45x Volunteer Firefighters, 1x Medium Pumper, 1x Heavy Tanker, 1x Light Unit | Lake Munmorah |
| Killcare/Wagstaff Rural Fire Brigade | 45x Volunteer Firefighters, 1x Heavy Tanker, 1x Light Tanker, 1x Light Unit | Killcare |
| Charmhaven Rural Fire Brigade | 45x Volunteer Firefighters, 1x Heavy Tanker, 1x Light Tanker, 1x Light Unit | Charmhaven |
| Yarramalong Rural Fire Brigade | 45x Volunteer Firefighters, 1x Heavy Tanker, 1x Light Tanker, 1x Light Unit | Yarramalong |
| Patonga Beach Rural Fire Brigade | 45x Volunteer Firefighters, 1x Heavy Tanker, 1x Light Unit, 1x Light Boat | Patonga |
| Tuggerah Rural Fire Brigade | 30x Volunteer Firefighters, 1x Medium Pumper, 1x Heavy Tanker | Tuggerah |
| Chittaway Rural Fire Brigade | 30x Volunteer Firefighters, 1x Medium Pumper, 1x Heavy Tanker | Tuggerah |
| Narara Rural Fire Brigade | 30x Volunteer Firefighters, 2x Heavy Tankers | Narara |
| Calga/Mount White Rural Fire Brigade | 30x Volunteer Firefighters, 1x Heavy Tanker, 1x Light Tanker | Mount White |
| The Bays Rural Fire Brigade | 30x Volunteer Firefighters, 1x Heavy Tanker, 1x Light Tanker | Phegans Bay |
| Empire Bay Rural Fire Brigade | 30x Volunteer Firefighters, 1x Heavy Tanker, 1x Light Tanker | Empire Bay |
| MacMasters Beach Rural Fire Brigade | 30x Volunteer Firefighters, 1x Heavy Tanker, 1x Light Tanker | MacMasters Beach |
| Somersby Rural Fire Brigade | 30x Volunteer Firefighters, 1x Heavy Tanker, 1x Light Tanker | Somersby |
| Matcham/Holgate Rural Fire Brigade | 30x Volunteer Firefighters, 1x Heavy Tanker, 1x Light Tanker | Holgate |
| Berkeley Vale Rural Fire Brigade | 30x Volunteer Firefighters, 1x Heavy Tanker, 1x Light Tanker | Berkeley Vale |
| Mangrove Mountain Rural Fire Brigade | 30x Volunteer Firefighters, 1x Heavy Tanker, 1x Light Tanker | Mangrove Mountain |
| Warnervale Rural Fire Brigade | 30x Volunteer Firefighters, 1x Heavy Tanker, 1x Light Tanker | Warnervale |
| Spencer Rural Fire Brigade | 30x Volunteer Firefighters, 1x Heavy Tanker, 1x Light Tanker | Spencer |
| Wendoree Park Rural Fire Brigade | 30x Volunteer Firefighters, 1x Heavy Tanker, 1x Light Unit | Wendoree Park |
| Avoca Beach Rural Fire Brigade | 30x Volunteer Firefighters, 1x Heavy Tanker, 1x Light Unit | Avoca Beach |
| Ourimbah Rural Fire Brigade | 30x Volunteer Firefighters, 1x Heavy Tanker, 1x Light Unit | Ourimbah |
| Kulnura Rural Fire Brigade | 30x Volunteer Firefighters, 1x Heavy Tanker, 1x Light Unit | Kulnua |
| Dooralong Rural Fire Brigade | 30x Volunteer Firefighters, 1x Heavy Tanker, 1x Light Unit | Dooralong |
| Wadalba Rural Fire Brigade | 30x Volunteer Firefighters, 1x Heavy Tanker, 1x Light Unit | Wadalba |
| Mannering Park Rural Fire Brigade | 30x Volunteer Firefighters, 1x Heavy Tanker, 1x Light Unit | Mannering Park |
| Pearl Beach Rural Fire Brigade | 30x Volunteer Firefighters, 1x Heavy Tanker, 1x Command Vehicle | Pearl Beach |
| Mooney Mooney Rural Fire Brigade | 30x Volunteer Firefighters, 1x Heavy Tanker, 1x Light Boat | Mooney Mooney |
| Brigade: | Size: | Location: |
|---|---|---|
| Peninsula Rural Fire Brigade | 75x Volunteer Firefighters, 1x Medium Pumper, 1x Heavy Tanker, 1x Fireboat, 2x Light Boats | Mirrabooka |
| Cameron Park Rural Fire Brigade | 60x Volunteer Firefighters, 1x Medium Pumper, 1x Heavy Tanker, 1x Light Tanker, 1x Bulk Water Carrier | West Wallsend |
| Wallarah Rural Fire Brigade | 45x Volunteer Firefighters, 1x Medium Pumper, 1x Heavy Tanker, 1x Bulk Water Carrier | Murrays Beach |
| Dora Creek Rural Fire Brigade | 45x Volunteer Firefighters, 1x Medium Pumper, 1x Heavy Tanker, 1x Light Unit | Dora Creek |
| Killingworth Rural Fire Brigade | 30x Volunteer Firefighters, 1x Medium Pumper, 1x Heavy Tanker | Killingworth |
| Cooranbong Rural Fire Brigade | 30x Volunteer Firefighters, 1x Medium Pumper, 1x Heavy Tanker | Cooranbong |
| Wyee Rural Fire Brigade | 30x Volunteer Firefighters, 1x Heavy Tanker, 1x Light Tanker | Wyee |
| Wyee Point Rural Fire Brigade | 30x Volunteer Firefighters, 1x Heavy Tanker, 1x Light Tanker | Wyee Point |
| Mandalong Rural Fire Brigade | 30x Volunteer Firefighters, 1x Heavy Tanker, 1x Light Tanker | Mandalong |
| Wakefield Rural Fire Brigade | 30x Volunteer Firefighters, 1x Heavy Tanker, 1x Light Tanker | Wakefield |
| Seahampton Rural Fire Brigade | 30x Volunteer Firefighters, 1x Heavy Tanker, 1x Light Tanker | Seahampton |
| Martinsville Rural Fire Brigade | 30x Volunteer Firefighters, 1x Heavy Tanker, 1x Light Unit | Martinsville |
| Awaba Rural Fire Brigade | 30x Volunteer Firefighters, 1x Heavy Tanker, 1x Light Unit | Awaba |
| Wallarah (Nords Wharf) Rural Fire Brigade | 30x Volunteer Firefighters, 1x Heavy Tanker, 1x Light Unit | Nords Wharf |
| Unit: | Size: | Base: |
|---|---|---|
| North Western Area Command Headquarters | 50x Permanent Personnel | Westdale |
| Unit: | Size: | Base: |
|---|---|---|
| Namoi/Gwydir District Headquarters | 15x Permanent Personnel, 1x Command Vehicle | Narrabri |
| Namoi/Gwydir Support Rural Fire Brigade | 100x Volunteer Firefighters, 1x Heavy Tanker, 1x Bulk Water Carrier, 1x Transport Bus, 1x Logistics Support Vehicle, 1x Logistics Truck, 2x Command Vehicles | Narrabri |
| Namoi/Gwydir Communications Rural Fire Brigade | 30x Volunteer Firefighters, 1x Communications Truck, 1x Command Vehicle | Narrabri |
| Brigade: | Size: | Location: |
|---|---|---|
| North Star Rural Fire Brigade | 30x Volunteer Firefighters, 1x Heavy Tanker, 1x Light Tanker | North Star |
| Croppa Creek Rural Fire Brigade | 30x Volunteer Firefighters, 1x Heavy Tanker, 1x Light Tanker | Croppa Creek |
| Coolatai Rural Fire Brigade | 30x Volunteer Firefighters, 1x Heavy Tanker, 1x Light Tanker | Coolatai |
| Gravesend Rural Fire Brigade | 30x Volunteer Firefighters, 1x Heavy Tanker, 1x Light Tanker | Gravesend |
| Stonefield Rural Fire Brigade | 30x Volunteer Firefighters, 1x Heavy Tanker, 1x Light Tanker | Warialda Rail |
| Warialda Rural Fire Brigade | 30x Volunteer Firefighters, 1x Heavy Tanker, 1x Light Tanker | Warialda |
| Gragin Rural Fire Brigade | 30x Volunteer Firefighters, 1x Heavy Tanker, 1x Light Tanker | Balfours Peak |
| Bangheet Rural Fire Brigade | 30x Volunteer Firefighters, 1x Heavy Tanker, 1x Light Tanker | Bangheet |
| Bingara Rural Fire Brigade | 30x Volunteer Firefighters, 1x Heavy Tanker, 1x Light Tanker | Bingara |
| Pallal Rural Fire Brigade | 30x Volunteer Firefighters, 1x Heavy Tanker, 1x Light Tanker | Pallal |
| Dinoga Rural Fire Brigade | 30x Volunteer Firefighters, 1x Heavy Tanker, 1x Light Tanker | Dinoga |
| Diamond Swamp Rural Fire Brigade | 30x Volunteer Firefighters, 1x Heavy Tanker, 1x Light Tanker | Bundarra |
| Rocky Creek-Gwydir Rural Fire Brigade | 30x Volunteer Firefighters, 1x Heavy Tanker, 1x Light Tanker | Rocky Creek |
| Upper Horton Rural Fire Brigade | 30x Volunteer Firefighters, 1x Heavy Tanker, 1x Light Tanker | Upper Horton |
| Cobbadah Rural Fire Brigade | 30x Volunteer Firefighters, 1x Heavy Tanker, 1x Light Tanker | Cobbadah |
| Brigade: | Size: | Location: |
|---|---|---|
| Boggabilla Rural Fire Brigade | 60x Volunteer Firefighters, 1x Heavy Tanker, 1x Light Tanker, 1x Rescue Truck, 1x Rescue Support Vehicle | Boggabilla |
| Mungindi Rural Fire Brigade | 60x Volunteer Firefighters, 1x Heavy Tanker, 1x Light Tanker, 1x Rescue Truck, 1x Rescue Support Vehicle | Mungindi |
| Boomi Rural Fire Brigade | 30x Volunteer Firefighters, 1x Heavy Tanker, 1x Light Tanker | Boomi |
| Tulloona Rural Fire Brigade | 30x Volunteer Firefighters, 1x Heavy Tanker, 1x Light Tanker | Tulloona |
| Weemelah Rural Fire Brigade | 30x Volunteer Firefighters, 1x Heavy Tanker, 1x Light Tanker | Weemelah |
| Garah Rural Fire Brigade | 30x Volunteer Firefighters, 1x Heavy Tanker, 1x Light Tanker | Garah |
| Ashley Rural Fire Brigade | 30x Volunteer Firefighters, 1x Heavy Tanker, 1x Light Tanker | Ashley |
| Moree Rural Fire Brigade | 30x Volunteer Firefighters, 1x Heavy Tanker, 1x Light Tanker | Moree |
| Pallamallawa & District (Moree) Rural Fire Brigade | 30x Volunteer Firefighters, 1x Heavy Tanker, 1x Light Tanker | Pallamallawa |
| Moree (Biniguy Station) Rural Fire Brigade | 30x Volunteer Firefighters, 1x Heavy Tanker, 1x Light Tanker | Biniguy |
| Collymongle Rural Fire Brigade | 30x Volunteer Firefighters, 1x Heavy Tanker, 1x Light Tanker | Collarenebri (East) |
| Bullarah Rural Fire Brigade | 30x Volunteer Firefighters, 1x Heavy Tanker, 1x Light Tanker | Bullarah |
| Gurley Rural Fire Brigade | 30x Volunteer Firefighters, 1x Heavy Tanker, 1x Light Tanker | Gurley |
| Terry-Hie-Hie Rural Fire Brigade | 30x Volunteer Firefighters, 1x Heavy Tanker, 1x Light Tanker | Terry Hie Hie |
| Berrigal Creek Rural Fire Brigade | 30x Volunteer Firefighters, 1x Heavy Tanker, 1x Light Tanker | Berrigal |
| Brigade: | Size: | Location: |
|---|---|---|
| Myall Vale Rural Fire Brigade | 45x Volunteer Firefighters, 1x Heavy Tanker, 1x Light Tanker, 1x Bulk Water Carrier | Wee Waa |
| Bellata Town Rural Fire Brigade | 30x Volunteer Firefighters, 1x Heavy Tanker, 1x Light Tanker | Bellata |
| Pilliga-Narrabri Rural Fire Brigade | 30x Volunteer Firefighters, 1x Heavy Tanker, 1x Light Tanker | Pilliga |
| Merimborough Rural Fire Brigade | 30x Volunteer Firefighters, 1x Heavy Tanker, 1x Light Tanker | Cuttabri |
| Merah North Rural Fire Brigade | 30x Volunteer Firefighters, 1x Heavy Tanker, 1x Light Tanker | Merah North |
| Gwabegar Rural Fire Brigade | 30x Volunteer Firefighters, 1x Heavy Tanker, 1x Light Tanker | Gwabegar |
| Nandewar Rural Fire Brigade | 30x Volunteer Firefighters, 1x Heavy Tanker, 1x Light Tanker | Boggabri (East) |
| Wynella Rural Fire Brigade | 30x Volunteer Firefighters, 1x Heavy Tanker, 1x Light Tanker | Boggabri (West) |
| Baan Baa Rural Fire Brigade | 30x Volunteer Firefighters, 1x Heavy Tanker, 1x Light Tanker | Baan Baa |
| Jacks Creek Rural Fire Brigade | 30x Volunteer Firefighters, 1x Heavy Tanker, 1x Light Tanker | Jacks Creek |
| Turrawan Rural Fire Brigade | 30x Volunteer Firefighters, 1x Heavy Tanker, 1x Light Tanker | Turrawan |
| Bohena Rural Fire Brigade | 30x Volunteer Firefighters, 1x Heavy Tanker, 1x Light Tanker | Bohena Creek |
| Bullawa-Eulah Creek Rural Fire Brigade | 30x Volunteer Firefighters, 1x Heavy Tanker, 1x Light Tanker | Eulah Creek |
| Bobbiwa Rural Fire Brigade | 30x Volunteer Firefighters, 1x Heavy Tanker, 1x Light Tanker | Narrabri (North) |
| Deep Creek-Narrabri Rural Fire Brigade | 30x Volunteer Firefighters, 1x Heavy Tanker, 1x Light Tanker | Narrabri (East) |
| Tibbereena Rural Fire Brigade | 30x Volunteer Firefighters, 1x Heavy Tanker, 1x Light Tanker | Narrabri (South) |
| Narrabri Rural Fire Brigade | 30x Volunteer Firefighters, 1x Heavy Tanker, 1x Light Tanker | Narrabri (West) |
| Unit: | Size: | Base: |
|---|---|---|
| Tamworth District Headquarters | 15x Permanent Personnel, 1x Command Vehicle | Westdale |
| Tamworth District Support Rural Fire Brigade | 100x Volunteer Firefighters, 1x Heavy Tanker, 1x Bulk Water Carrier, 2x Transport Buses, 1x Logistics Truck, 2x Command Vehicles | Westdale |
| Tamworth District Communications Rural Fire Brigade | 30x Volunteer Firefighters, 1x Communications Truck, 1x Command Vehicle | Westdale |
| Brigade: | Size: | Location: |
|---|---|---|
| Barraba Rural Fire Brigade | 30x Volunteer Firefighters, 1x Heavy Tanker, 1x Light Tanker | Barraba |
| Crow Mountain Rural Fire Brigade | 30x Volunteer Firefighters, 1x Heavy Tanker, 1x Light Tanker | Red Hill |
| Thirldene Rural Fire Brigade | 30x Volunteer Firefighters, 1x Heavy Tanker, 1x Light Tanker | Thirldene |
| Manilla Rural Fire Brigade | 30x Volunteer Firefighters, 1x Heavy Tanker, 1x Light Tanker | Manilla |
| Halls Creek Rural Fire Brigade | 30x Volunteer Firefighters, 1x Heavy Tanker, 1x Light Tanker | Halls Creek |
| Watsons Creek Rural Fire Brigade | 30x Volunteer Firefighters, 1x Heavy Tanker, 1x Light Tanker | Watsons Creek |
| Somerton Rural Fire Brigade | 30x Volunteer Firefighters, 1x Heavy Tanker, 1x Light Tanker | Somerton |
| Attunga Rural Fire Brigade | 30x Volunteer Firefighters, 1x Heavy Tanker, 1x Light Tanker | Attunga |
| Bendemeer Rural Fire Brigade | 30x Volunteer Firefighters, 1x Heavy Tanker, 1x Light Tanker | Bendemeer |
| Moore Creek Rural Fire Brigade | 30x Volunteer Firefighters, 1x Heavy Tanker, 1x Light Tanker | Moore Creek |
| Kootingal/Moonbi Rural Fire Brigade | 30x Volunteer Firefighters, 1x Heavy Tanker, 1x Light Tanker | Moonbi |
| Limbri/Mulla Creek Rural Fire Brigade | 30x Volunteer Firefighters, 1x Heavy Tanker, 1x Light Tanker | Limbri |
| Tamworth City Rural Fire Brigade | 30x Volunteer Firefighters, 1x Heavy Tanker, 1x Light Tanker | Taminda |
| Warral Rural Fire Brigade | 30x Volunteer Firefighters, 1x Heavy Tanker, 1x Light Tanker | Warral |
| Kingswood Rural Fire Brigade | 30x Volunteer Firefighters, 1x Heavy Tanker, 1x Light Tanker | Kingswood |
| Duri Rural Fire Brigade | 30x Volunteer Firefighters, 1x Heavy Tanker, 1x Light Tanker | Duri |
| Piallamore Rural Fire Brigade | 30x Volunteer Firefighters, 1x Heavy Tanker, 1x Light Tanker | Piallamore |
| Dungowan Rural Fire Brigade | 30x Volunteer Firefighters, 1x Heavy Tanker, 1x Light Tanker | Dungowan |
| Loomberah Rural Fire Brigade | 30x Volunteer Firefighters, 1x Heavy Tanker, 1x Light Tanker | Loomberah |
| Niangala Rural Fire Brigade | 30x Volunteer Firefighters, 1x Heavy Tanker, 1x Light Tanker | Niangala |
| Weabonga Rural Fire Brigade | 30x Volunteer Firefighters, 1x Heavy Tanker, 1x Light Tanker | Weabonga |
| Ogunbil Rural Fire Brigade | 30x Volunteer Firefighters, 1x Heavy Tanker, 1x Light Tanker | Ogunbil |
| Woolomin-Duncans Creek Rural Fire Brigade | 30x Volunteer Firefighters, 1x Heavy Tanker, 1x Light Tanker | Woolomin |
| Hanging Rock-Tamworth Rural Fire Brigade | 30x Volunteer Firefighters, 1x Heavy Tanker, 1x Light Tanker | Hanging Rock |
| Nundle Rural Fire Brigade | 30x Volunteer Firefighters, 1x Heavy Tanker, 1x Light Tanker | Nundle |
| Garoo Rural Fire Brigade | 30x Volunteer Firefighters, 1x Heavy Tanker, 1x Light Tanker | Garoo |
| Gowrie Rural Fire Brigade | 30x Volunteer Firefighters, 1x Heavy Tanker, 1x Light Tanker | Gowrie |
| Unit: | Size: | Base: |
|---|---|---|
| Liverpool Range District Headquarters | 15x Permanent Personnel, 1x Command Vehicle | Quirindi |
| Liverpool Range Support Rural Fire Brigade | 100x Volunteer Firefighters, 1x Heavy Tanker, 1x Bulk Water Carrier, 1x Transport Bus, 1x Logistics Support Vehicle, 1x Logistics Truck, 2x Command Vehicles | Quirindi |
| Liverpool Range Communications Rural Fire Brigade | 30x Volunteer Firefighters, 1x Communications Truck, 1x Command Vehicle | Quirindi |
| Brigade: | Size: | Location: |
|---|---|---|
| Willala Rural Fire Brigade | 30x Volunteer Firefighters, 1x Heavy Tanker, 1x Light Tanker | Willala |
| Quia Rural Fire Brigade | 30x Volunteer Firefighters, 1x Heavy Tanker, 1x Light Tanker | Ghoolendaadi |
| Gunnedah Rural Fire Brigade | 30x Volunteer Firefighters, 1x Heavy Tanker, 1x Light Tanker | Gunnedah |
| Kelvin Rural Fire Brigade | 30x Volunteer Firefighters, 1x Heavy Tanker, 1x Light Tanker | Kelvin |
| Carroll Rural Fire Brigade | 30x Volunteer Firefighters, 1x Heavy Tanker, 1x Light Tanker | Carroll |
| Curlewis Rural Fire Brigade | 30x Volunteer Firefighters, 1x Heavy Tanker, 1x Light Tanker | Curlewis |
| Mullaley Rural Fire Brigade | 30x Volunteer Firefighters, 1x Heavy Tanker, 1x Light Tanker | Mullaley |
| Tambar Springs Rural Fire Brigade | 30x Volunteer Firefighters, 1x Heavy Tanker, 1x Light Tanker | Tambar Springs |
| Brigade: | Size: | Location: |
|---|---|---|
| Premer-Bundella Rural Fire Brigade | 30x Volunteer Firefighters, 1x Heavy Tanker, 1x Light Tanker | Premer |
| Spring Ridge Rural Fire Brigade | 30x Volunteer Firefighters, 1x Heavy Tanker, 1x Light Tanker | Spring Ridge |
| Caroona Rural Fire Brigade | 30x Volunteer Firefighters, 1x Heavy Tanker, 1x Light Tanker | Caroona |
| Pine Ridge Rural Fire Brigade | 30x Volunteer Firefighters, 1x Heavy Tanker, 1x Light Tanker | Pine Ridge |
| Blackville Rural Fire Brigade | 30x Volunteer Firefighters, 1x Heavy Tanker, 1x Light Tanker | Blackville |
| Currabubula Rural Fire Brigade | 30x Volunteer Firefighters, 1x Heavy Tanker, 1x Light Tanker | Currabubula |
| Werris Creek Rural Fire Brigade | 30x Volunteer Firefighters, 1x Heavy Tanker, 1x Light Tanker | Werris Creek |
| Braefield/Dury Rural Fire Brigade | 30x Volunteer Firefighters, 1x Heavy Tanker, 1x Light Tanker | Quirindi |
| Wallabadah District Rural Fire Brigade | 30x Volunteer Firefighters, 1x Heavy Tanker, 1x Light Tanker | Wallabadah |
| Willow Tree Rural Fire Brigade | 30x Volunteer Firefighters, 1x Heavy Tanker, 1x Light Tanker | Willow Tree |
| Warrah Creek Rural Fire Brigade | 30x Volunteer Firefighters, 1x Heavy Tanker, 1x Light Tanker | Warrah Creek |
| Big Jacks Rural Fire Brigade | 30x Volunteer Firefighters, 1x Heavy Tanker, 1x Light Tanker | Big Jacks Creek |
| Borambil Rural Fire Brigade | 30x Volunteer Firefighters, 1x Heavy Tanker, 1x Light Tanker | Borambil |
| Brigade: | Size: | Location: |
|---|---|---|
| Ellerston Rural Fire Brigade | 60x Volunteer Firefighters, 1x Heavy Tanker, 1x Light Tanker, 1x Rescue Truck, 1x Rescue Support Vehicle | Ellerston |
| Cassilis Rural Fire Brigade | 30x Volunteer Firefighters, 1x Heavy Tanker, 1x Light Tanker | Cassilis (Central) |
| Collaroy Rural Fire Brigade | 30x Volunteer Firefighters, 1x Heavy Tanker, 1x Light Tanker | Cassilis (South) |
| Idaville Rural Fire Brigade | 30x Volunteer Firefighters, 1x Heavy Tanker, 1x Light Tanker | Merriwa (North) |
| Settlement Rural Fire Brigade | 30x Volunteer Firefighters, 1x Heavy Tanker, 1x Light Tanker | Merriwa (Southwest) |
| Killoe Rural Fire Brigade | 30x Volunteer Firefighters, 1x Heavy Tanker, 1x Light Tanker | Merriwa (South) |
| Merriwa River Rural Fire Brigade | 30x Volunteer Firefighters, 1x Heavy Tanker, 1x Light Tanker | Merriwa (Central) |
| Flags Road Rural Fire Brigade | 30x Volunteer Firefighters, 1x Heavy Tanker, 1x Light Tanker | Merriwa (Southeast) |
| Worondi Rural Fire Brigade | 30x Volunteer Firefighters, 1x Heavy Tanker, 1x Light Tanker | Gungal |
| Bunnan Rural Fire Brigade | 30x Volunteer Firefighters, 1x Heavy Tanker, 1x Light Tanker | Bunnan |
| Blandford Rural Fire Brigade | 30x Volunteer Firefighters, 1x Heavy Tanker, 1x Light Tanker | Blandford |
| Wingen Rural Fire Brigade | 30x Volunteer Firefighters, 1x Heavy Tanker, 1x Light Tanker | Wingen |
| Parkville Rural Fire Brigade | 30x Volunteer Firefighters, 1x Heavy Tanker, 1x Light Tanker | Parkville |
| Kingdon Ponds Rural Fire Brigade | 30x Volunteer Firefighters, 1x Heavy Tanker, 1x Light Tanker | Scone |
| Dartbrook Rural Fire Brigade | 30x Volunteer Firefighters, 1x Heavy Tanker, 1x Light Tanker | Moobi |
| Dangarfield Rural Fire Brigade | 30x Volunteer Firefighters, 1x Heavy Tanker, 1x Light Tanker | Rouchel |
| Rouchel Rural Fire Brigade | 30x Volunteer Firefighters, 1x Heavy Tanker, 1x Light Tanker | Upper Rouchel |
| Gundy Rural Fire Brigade | 30x Volunteer Firefighters, 1x Heavy Tanker, 1x Light Tanker | Gundy |
| Stewarts Brook Rural Fire Brigade | 30x Volunteer Firefighters, 1x Heavy Tanker, 1x Light Tanker | Woolooma |
| Moonan Rural Fire Brigade | 30x Volunteer Firefighters, 1x Heavy Tanker, 1x Light Tanker | Moonan Flat |
| Timor-Upper Hunter Rural Fire Brigade | 30x Volunteer Firefighters, 1x Heavy Tanker, 1x Light Tanker | Timor |
| Hunter Springs Rural Fire Brigade | 30x Volunteer Firefighters, 1x Heavy Tanker, 1x Light Tanker | Tomalla |
| Unit: | Size: | Base: |
|---|---|---|
| Castlereagh District Headquarters | 15x Permanent Personnel, 1x Command Vehicle | Coonabarabran |
| Castlereagh Support Rural Fire Brigade | 100x Volunteer Firefighters, 1x Heavy Tanker, 1x Bulk Water Carrier, 1x Transport Bus, 1x Logistics Support Vehicle, 1x Logistics Truck, 2x Command Vehicles | Coonabarabran |
| Castlereagh Communications Rural Fire Brigade | 30x Volunteer Firefighters, 1x Communications Truck, 1x Command Vehicle | Coonabarabran |
| Brigade: | Size: | Location: |
|---|---|---|
| Armatree Rural Fire Brigade | 30x Volunteer Firefighters, 1x Heavy Tanker, 1x Light Tanker | Armatree |
| Curban Rural Fire Brigade | 30x Volunteer Firefighters, 1x Heavy Tanker, 1x Light Tanker | Curban |
| New Merrigal Rural Fire Brigade | 30x Volunteer Firefighters, 1x Heavy Tanker, 1x Light Tanker | Collie (East) |
| Deep Creek-Gilgandra Rural Fire Brigade | 30x Volunteer Firefighters, 1x Heavy Tanker, 1x Light Tanker | Gilgandra |
| Breelong Rural Fire Brigade | 30x Volunteer Firefighters, 1x Heavy Tanker, 1x Light Tanker | Breelong |
| Boybean Rural Fire Brigade | 30x Volunteer Firefighters, 1x Heavy Tanker, 1x Light Tanker | Mendooran (West) |
| Bearbong Rural Fire Brigade | 30x Volunteer Firefighters, 1x Heavy Tanker, 1x Light Tanker | Bearbong |
| Torraweenah Rural Fire Brigade | 30x Volunteer Firefighters, 1x Heavy Tanker, 1x Light Tanker | Torraweenah (West) |
| Uargon Rural Fire Brigade | 30x Volunteer Firefighters, 1x Heavy Tanker, 1x Light Tanker | Torraweenah (East) |
| Brigade: | Size: | Location: |
|---|---|---|
| Baradine Rural Fire Brigade | 45x Volunteer Firefighters, 2x Heavy Tankers, 1x Light Unit | Baradine |
| Bugaldie Rural Fire Brigade | 45x Volunteer Firefighters, 2x Heavy Tankers, 1x Light Unit | Bugaldie (North) |
| Yearinan Rural Fire Brigade | 45x Volunteer Firefighters, 2x Heavy Tankers, 1x Light Unit | Bugaldie (South) |
| Timor-Warrumbungle Rural Fire Brigade | 45x Volunteer Firefighters, 2x Heavy Tankers, 1x Light Unit | Coonabarabran (West) |
| Urabrible Rural Fire Brigade | 45x Volunteer Firefighters, 2x Heavy Tankers, 1x Light Unit | Ulamambri |
| Purlewaugh Rural Fire Brigade | 45x Volunteer Firefighters, 2x Heavy Tankers, 1x Light Unit | Purlewaugh |
| Gowang Rural Fire Brigade | 45x Volunteer Firefighters, 2x Heavy Tankers, 1x Light Unit | Gowang |
| Binnaway Rural Fire Brigade | 45x Volunteer Firefighters, 2x Heavy Tankers, 1x Light Unit | Binnaway |
| Weetaliba Rural Fire Brigade | 45x Volunteer Firefighters, 2x Heavy Tankers, 1x Light Unit | Weetaliba |
| Mendooran Rural Fire Brigade | 45x Volunteer Firefighters, 2x Heavy Tankers, 1x Light Unit | Mendooran (East) |
| Merrygoen Rural Fire Brigade | 45x Volunteer Firefighters, 2x Heavy Tankers, 1x Light Unit | Merrygoen |
| Cobbora Rural Fire Brigade | 45x Volunteer Firefighters, 2x Heavy Tankers, 1x Light Unit | Cobbora |
| Dapper Rural Fire Brigade | 45x Volunteer Firefighters, 2x Heavy Tankers, 1x Light Unit | Dunedoo (South) |
| Uarbry Rural Fire Brigade | 45x Volunteer Firefighters, 2x Heavy Tankers, 1x Light Unit | Uarbry |
| Coona Fringe Rural Fire Brigade | 45x Volunteer Firefighters, 2x Heavy Tankers, 1x Bulk Water Carrier | Coonabarabran (Central) |
| Unit: | Size: | Base: |
|---|---|---|
| North West District Headquarters | 15x Permanent Personnel, 1x Command Vehicle | Coonamble |
| North West Support Rural Fire Brigade | 100x Volunteer Firefighters, 1x Heavy Tanker, 1x Bulk Water Carrier, 1x Transport Bus, 1x Logistics Support Vehicle, 1x Logistics Truck, 2x Command Vehicles | Coonamble |
| North West Communications Rural Fire Brigade | 30x Volunteer Firefighters, 1x Communications Truck, 1x Command Vehicle | Coonamble |
| Brigade: | Size: | Location: |
|---|---|---|
| Collarenebri Town Rural Fire Brigade | 30x Volunteer Firefighters, 1x Heavy Tanker, 1x Light Tanker | Collarenebri (West) |
| Lightning Ridge Rural Fire Brigade | 30x Volunteer Firefighters, 1x Heavy Tanker, 1x Light Tanker | Lightning Ridge (South) |
| Glengarry/Grawin Rural Fire Brigade | 30x Volunteer Firefighters, 1x Heavy Tanker, 1x Light Tanker | Cumborah (Central) |
| Cumborah Village Rural Fire Brigade | 30x Volunteer Firefighters, 1x Heavy Tanker, 1x Light Tanker | Cumborah (East) |
| Walgett Rural Fire Brigade | 30x Volunteer Firefighters, 1x Heavy Tanker, 1x Light Tanker | Walgett (Central) |
| Rowena Rural Fire Brigade | 30x Volunteer Firefighters, 1x Heavy Tanker, 1x Light Tanker | Rowena |
| Burren Junction Rural Fire Brigade | 30x Volunteer Firefighters, 1x Heavy Tanker, 1x Light Tanker | Burren Junction |
| Come By Chance Rural Fire Brigade | 30x Volunteer Firefighters, 1x Heavy Tanker, 1x Light Tanker | Come By Chance |
| Carinda (Rural) Rural Fire Brigade | 30x Volunteer Firefighters, 1x Heavy Tanker, 1x Light Tanker | Carinda (East) |
| Carinda Town Rural Fire Brigade | 30x Volunteer Firefighters, 1x Heavy Tanker, 1x Light Tanker | Carinda (Central) |
| Allawa Rural Fire Brigade | 30x Volunteer Firefighters, 1x Heavy Tanker, 1x Light Tanker | Walgett (Southwest) |
| Angledool-Walgett Rural Fire Brigade | 30x Volunteer Firefighters, 1x Heavy Tanker, 1x Light Tanker | Angledool (East) |
| Barwon-Walgett Rural Fire Brigade | 30x Volunteer Firefighters, 1x Heavy Tanker, 1x Light Tanker | Walgett (Northeast) |
| Beanbri Rural Fire Brigade | 30x Volunteer Firefighters, 1x Heavy Tanker, 1x Light Tanker | Walgett (East) |
| Boorooma Rural Fire Brigade | 30x Volunteer Firefighters, 1x Heavy Tanker, 1x Light Tanker | Walgett (West) |
| Cumborah (Rural) Rural Fire Brigade | 30x Volunteer Firefighters, 1x Heavy Tanker, 1x Light Tanker | Cumborah (North) |
| Dungalear Rural Fire Brigade | 30x Volunteer Firefighters, 1x Heavy Tanker, 1x Light Tanker | Walgett (North) |
| Euroka Rural Fire Brigade | 30x Volunteer Firefighters, 1x Heavy Tanker, 1x Light Tanker | Walgett (South) |
| Ginghet Rural Fire Brigade | 30x Volunteer Firefighters, 1x Heavy Tanker, 1x Light Tanker | Carinda (West) |
| Gingie Rural Fire Brigade | 30x Volunteer Firefighters, 1x Heavy Tanker, 1x Light Tanker | Walgett (Northwest) |
| Lightning Ridge (Rural) Rural Fire Brigade | 30x Volunteer Firefighters, 1x Heavy Tanker, 1x Light Tanker | Lightning Ridge (North) |
| Moonie River Rural Fire Brigade | 30x Volunteer Firefighters, 1x Heavy Tanker, 1x Light Tanker | Collarenebri (North) |
| Pokataroo Rural Fire Brigade | 30x Volunteer Firefighters, 1x Heavy Tanker, 1x Light Tanker | Collarenebri (South) |
| Yarraldool Rural Fire Brigade | 30x Volunteer Firefighters, 1x Heavy Tanker, 1x Light Tanker | Walgett (Southeast) |
| Brigade: | Size: | Location: |
|---|---|---|
| Quambone Rural Fire Brigade | 30x Volunteer Firefighters, 1x Heavy Tanker, 1x Light Tanker | Quambone (North) |
| Coonamble Rural Fire Brigade | 30x Volunteer Firefighters, 1x Heavy Tanker, 1x Light Tanker | Coonamble (Central) |
| Willow Downs Rural Fire Brigade | 30x Volunteer Firefighters, 1x Heavy Tanker, 1x Light Tanker | Magometon |
| Combara Rural Fire Brigade | 30x Volunteer Firefighters, 1x Heavy Tanker, 1x Light Tanker | Combara |
| Gulargambone Rural Fire Brigade | 30x Volunteer Firefighters, 1x Heavy Tanker, 1x Light Tanker | Gulargambone |
| Bourbah Rural Fire Brigade | 30x Volunteer Firefighters, 1x Heavy Tanker, 1x Light Tanker | Bourbah |
| Calga Rural Fire Brigade | 30x Volunteer Firefighters, 1x Heavy Tanker, 1x Light Tanker | Magometon (East) |
| Gumin Rural Fire Brigade | 30x Volunteer Firefighters, 1x Heavy Tanker, 1x Light Tanker | Quanda |
| Hollywood Rural Fire Brigade | 30x Volunteer Firefighters, 1x Heavy Tanker, 1x Light Tanker | Billeroy (North) |
| Mowima-Coonamble Rural Fire Brigade | 30x Volunteer Firefighters, 1x Heavy Tanker, 1x Light Tanker | Wingadee |
| Mount Tenandra Rural Fire Brigade | 30x Volunteer Firefighters, 1x Heavy Tanker, 1x Light Tanker | Mount Tenandra |
| Myall Ridge Rural Fire Brigade | 30x Volunteer Firefighters, 1x Heavy Tanker, 1x Light Tanker | Coonamble (Northwest) |
| Nebo Rural Fire Brigade | 30x Volunteer Firefighters, 1x Heavy Tanker, 1x Light Tanker | Conimbia |
| Nedgera Rural Fire Brigade | 30x Volunteer Firefighters, 1x Heavy Tanker, 1x Light Tanker | Quambone (East) |
| Pine Grove Rural Fire Brigade | 30x Volunteer Firefighters, 1x Heavy Tanker, 1x Light Tanker | Pine Grove |
| Quambone Village Rural Fire Brigade | 30x Volunteer Firefighters, 1x Heavy Tanker, 1x Light Tanker | Quambone (Central) |
| Teridgerie Rural Fire Brigade | 30x Volunteer Firefighters, 1x Heavy Tanker, 1x Light Tanker | Teridgerie |
| Weetaliba-Coonamble Rural Fire Brigade | 30x Volunteer Firefighters, 1x Heavy Tanker, 1x Light Tanker | Gilgooma |
| Wycombe Rural Fire Brigade | 30x Volunteer Firefighters, 1x Heavy Tanker, 1x Light Tanker | Coonamble (North) |
| Youie Rural Fire Brigade | 30x Volunteer Firefighters, 1x Heavy Tanker, 1x Light Tanker | Coonamble (West) |
| Brigade: | Size: | Location: |
|---|---|---|
| Nevertire Rural Fire Brigade | 30x Volunteer Firefighters, 1x Heavy Tanker, 1x Light Tanker | Nevertire |
| Central-Warren Rural Fire Brigade | 30x Volunteer Firefighters, 1x Heavy Tanker, 1x Light Tanker | Warren |
| Collie Rural Fire Brigade | 30x Volunteer Firefighters, 1x Heavy Tanker, 1x Light Tanker | Collie (West) |
| Bogan Rural Fire Brigade | 30x Volunteer Firefighters, 1x Heavy Tanker, 1x Light Tanker | Bogan |
| Buckinguy-Lemongrove Rural Fire Brigade | 30x Volunteer Firefighters, 1x Heavy Tanker, 1x Light Tanker | The Marra (South) |
| Buttabone Rural Fire Brigade | 30x Volunteer Firefighters, 1x Heavy Tanker, 1x Light Tanker | Mount Harris |
| Ewenmar Rural Fire Brigade | 30x Volunteer Firefighters, 1x Heavy Tanker, 1x Light Tanker | Bundemar (South) |
| Gillendoon-Yarrandale Rural Fire Brigade | 30x Volunteer Firefighters, 1x Heavy Tanker, 1x Light Tanker | Beemunnel |
| Gradgery Rural Fire Brigade | 30x Volunteer Firefighters, 1x Heavy Tanker, 1x Light Tanker | Marthaguy (Central) |
| Marthaguy Rural Fire Brigade | 30x Volunteer Firefighters, 1x Heavy Tanker, 1x Light Tanker | Marthaguy (South) |
| Mumblebone Rural Fire Brigade | 30x Volunteer Firefighters, 1x Heavy Tanker, 1x Light Tanker | Mumblebone Plain |
| Noonbah Rural Fire Brigade | 30x Volunteer Firefighters, 1x Heavy Tanker, 1x Light Tanker | Marthaguy (North) |
| North Area Rural Fire Brigade | 30x Volunteer Firefighters, 1x Heavy Tanker, 1x Light Tanker | Carinda (Southwest) |
| Pigeonbah Rural Fire Brigade | 30x Volunteer Firefighters, 1x Heavy Tanker, 1x Light Tanker | Pigeonbah |
| Brigade: | Size: | Location: |
|---|---|---|
| Coolabah Rural Fire Brigade | 30x Volunteer Firefighters, 1x Heavy Tanker, 1x Light Tanker | Coolabah |
| Girilambone Rural Fire Brigade | 30x Volunteer Firefighters, 1x Heavy Tanker, 1x Light Tanker | Girilambone |
| Nyngan Rural Fire Brigade | 30x Volunteer Firefighters, 1x Heavy Tanker, 1x Light Tanker | Nyngan (Central) |
| Hermidale Rural Fire Brigade | 30x Volunteer Firefighters, 1x Heavy Tanker, 1x Light Tanker | Hermidale |
| Babinda Rural Fire Brigade | 30x Volunteer Firefighters, 1x Heavy Tanker, 1x Light Tanker | Babinda |
| Balgay-Bogan Rural Fire Brigade | 30x Volunteer Firefighters, 1x Heavy Tanker, 1x Light Tanker | Five Ways |
| Bobadah Rural Fire Brigade | 30x Volunteer Firefighters, 1x Heavy Tanker, 1x Light Tanker | Bobadah |
| Duck Creek Rural Fire Brigade | 30x Volunteer Firefighters, 1x Heavy Tanker, 1x Light Tanker | Canonba |
| East Bogan Rural Fire Brigade | 30x Volunteer Firefighters, 1x Heavy Tanker, 1x Light Tanker | Mulla |
| Gunninbar Creek Rural Fire Brigade | 30x Volunteer Firefighters, 1x Heavy Tanker, 1x Light Tanker | Nyngan (East) |
| Honeybugle Rural Fire Brigade | 30x Volunteer Firefighters, 1x Heavy Tanker, 1x Light Tanker | Honeybugle |
| Miandetta Rural Fire Brigade | 30x Volunteer Firefighters, 1x Heavy Tanker, 1x Light Tanker | Miandetta |
| Moonagee Rural Fire Brigade | 30x Volunteer Firefighters, 1x Heavy Tanker, 1x Light Tanker | Nyngan (North) |
| Mudal Rural Fire Brigade | 30x Volunteer Firefighters, 1x Heavy Tanker, 1x Light Tanker | Nyngan (South) |
| Mullengudgery Rural Fire Brigade | 30x Volunteer Firefighters, 1x Heavy Tanker, 1x Light Tanker | Mullengudgery |
| Murrawombie Rural Fire Brigade | 30x Volunteer Firefighters, 1x Heavy Tanker, 1x Light Tanker | Murrawombie |
| West Bogan Rural Fire Brigade | 30x Volunteer Firefighters, 1x Heavy Tanker, 1x Light Tanker | Canbelego (East) |
| Unit: | Size: | Base: |
|---|---|---|
| North Eastern Area Command Headquarters | 50x Permanent Personnel | North Boambee Valley |
| Unit: | Size: | Base: |
|---|---|---|
| Far North Coast District Headquarters | 15x Permanent Personnel, 1x Command Vehicle | Murwillumbah |
| Far North Coast Support Rural Fire Brigade | 100x Volunteer Firefighters, 1x Light Tanker, 1x Bulk Water Carrier, 1x Transport Bus, 1x Logistics Support Vehicle, 1x Logistics Truck, 2x Command Vehicles | Murwillumbah |
| Far North Coast Communications Rural Fire Brigade | 30x Volunteer Firefighters, 1x Communications Truck, 1x Command Vehicle | Murwillumbah |
| Brigade: | Size: | Location: |
|---|---|---|
| Cudgen Rural Fire Brigade | 45x Volunteer Firefighters, 2x Heavy Tankers, 1x Light Tanker | Cudgen |
| Tweed Coast Rural Fire Brigade | 30x Volunteer Firefighters, 1x Heavy Tanker, 1x Light Tanker | Pottsville |
| Crabbes Creek Rural Fire Brigade | 30x Volunteer Firefighters, 1x Heavy Tanker, 1x Light Tanker | Crabbes Creek |
| Burringbar Rural Fire Brigade | 30x Volunteer Firefighters, 1x Heavy Tanker, 1x Light Tanker | Burringbar |
| Murwillumbah Rural Fire Brigade | 30x Volunteer Firefighters, 1x Heavy Tanker, 1x Light Tanker | Murwillumbah |
| Chillingham Rural Fire Brigade | 30x Volunteer Firefighters, 1x Heavy Tanker, 1x Light Tanker | Chillingham |
| Tyalgum Rural Fire Brigade | 30x Volunteer Firefighters, 1x Heavy Tanker, 1x Light Tanker | Tyalgum |
| Uki Rural Fire Brigade | 30x Volunteer Firefighters, 1x Heavy Tanker, 1x Light Tanker | Uki |
| Kunghur Rural Fire Brigade | 30x Volunteer Firefighters, 1x Heavy Tanker, 1x Light Tanker | Kunghur |
| Bilambil Rural Fire Brigade | 30x Volunteer Firefighters, 2x Light Tankers | Bilambil Heights |
| Brigade: | Size: | Location: |
|---|---|---|
| Main Arm Rural Fire Brigade | 30x Volunteer Firefighters, 1x Heavy Tanker, 1x Light Tanker | Main Arm |
| Billinudgel/Ocean Shores Rural Fire Brigade | 30x Volunteer Firefighters, 1x Heavy Tanker, 1x Light Tanker | Billinudgel |
| Mullumbimby Rural Fire Brigade | 30x Volunteer Firefighters, 1x Heavy Tanker, 1x Light Tanker | Mullumbimby |
| Wilsons Creek Rural Fire Brigade | 30x Volunteer Firefighters, 1x Heavy Tanker, 1x Light Tanker | Wilsons Creek |
| Goonengerry Rural Fire Brigade | 30x Volunteer Firefighters, 1x Heavy Tanker, 1x Light Tanker | Goonengerry |
| Federal Rural Fire Brigade | 30x Volunteer Firefighters, 1x Heavy Tanker, 1x Light Tanker | Federal |
| Byron Bay Rural Fire Brigade | 30x Volunteer Firefighters, 1x Heavy Tanker, 1x Light Tanker | Suffolk Park |
| Brigade: | Size: | Location: |
|---|---|---|
| Newrybar Rural Fire Brigade | 30x Volunteer Firefighters, 1x Heavy Tanker, 1x Light Tanker | Newrybar |
| Lennox Head Rural Fire Brigade | 30x Volunteer Firefighters, 1x Heavy Tanker, 1x Light Tanker | Lennox Head |
| Alstonville-Wollongbar Rural Fire Brigade | 30x Volunteer Firefighters, 1x Heavy Tanker, 1x Light Tanker | Alstonville |
| Meerschaum Vale Rural Fire Brigade | 30x Volunteer Firefighters, 1x Heavy Tanker, 1x Light Tanker | Meerschaum Vale |
| Wardell Rural Fire Brigade | 30x Volunteer Firefighters, 1x Heavy Tanker, 1x Light Tanker | Wardell |
| Unit: | Size: | Base: |
|---|---|---|
| Northern Rivers District Headquarters | 15x Permanent Personnel, 1x Command Vehicle | Casino |
| Northern Rivers Support Rural Fire Brigade | 100x Volunteer Firefighters, 1x Heavy Tanker, 1x Bulk Water Carrier, 1x Transport Bus, 1x Logistics Support Vehicle, 1x Logistics Truck, 2x Command Vehicles | Casino |
| Northern Rivers Communications Rural Fire Brigade | 30x Volunteer Firefighters, 1x Communications Truck, 1x Command Vehicle | Casino |
| Brigade: | Size: | Location: |
|---|---|---|
| Blue Knob Rural Fire Brigade | 30x Volunteer Firefighters, 1x Heavy Tanker, 1x Light Tanker | Blue Knob |
| Stony Chute Rural Fire Brigade | 30x Volunteer Firefighters, 1x Heavy Tanker, 1x Light Tanker | Stony Chute |
| Nimbin Rural Fire Brigade | 30x Volunteer Firefighters, 1x Heavy Tanker, 1x Light Tanker | Nimbin |
| Jiggi Valley Rural Fire Brigade | 30x Volunteer Firefighters, 1x Heavy Tanker, 1x Light Tanker | Georgica |
| Larnook Rural Fire Brigade | 30x Volunteer Firefighters, 1x Heavy Tanker, 1x Light Tanker | Larnook |
| Goolmangar Rural Fire Brigade | 30x Volunteer Firefighters, 1x Heavy Tanker, 1x Light Tanker | Koonorigan |
| The Channon Rural Fire Brigade | 30x Volunteer Firefighters, 1x Heavy Tanker, 1x Light Tanker | The Channon |
| Dunoon Rural Fire Brigade | 30x Volunteer Firefighters, 1x Heavy Tanker, 1x Light Tanker | Dunoon |
| Rosebank Rural Fire Brigade | 30x Volunteer Firefighters, 1x Heavy Tanker, 1x Light Tanker | Rosebank |
| Clunes Rural Fire Brigade | 30x Volunteer Firefighters, 1x Heavy Tanker, 1x Light Tanker | Clunes |
| Boatharbour Rural Fire Brigade | 30x Volunteer Firefighters, 1x Heavy Tanker, 1x Light Tanker | Bexhill |
| Tullera Rural Fire Brigade | 30x Volunteer Firefighters, 1x Heavy Tanker, 1x Light Tanker | Tullera |
| Alphadale Rural Fire Brigade | 30x Volunteer Firefighters, 1x Heavy Tanker, 1x Light Tanker | Lindendale |
| Tuncester Rural Fire Brigade | 30x Volunteer Firefighters, 1x Heavy Tanker, 1x Light Tanker | Tuncester |
| Caniaba Rural Fire Brigade | 30x Volunteer Firefighters, 1x Heavy Tanker, 1x Light Tanker | Caniaba |
| Monaltrie Rural Fire Brigade | 30x Volunteer Firefighters, 1x Heavy Tanker, 1x Light Tanker | Monaltrie |
| Wyrallah Rural Fire Brigade | 30x Volunteer Firefighters, 1x Heavy Tanker, 1x Light Tanker | Wyrallah |
| Lower River Rural Fire Brigade | 30x Volunteer Firefighters, 1x Heavy Tanker, 1x Light Tanker | North Woodburn |
| Brigade: | Size: | Location: |
|---|---|---|
| Woodenbong Rural Fire Brigade | 30x Volunteer Firefighters, 1x Heavy Tanker, 1x Light Tanker | Woodenbong |
| Grevillia Rural Fire Brigade | 30x Volunteer Firefighters, 1x Heavy Tanker, 1x Light Tanker | Grevillia |
| Wiangaree Rural Fire Brigade | 30x Volunteer Firefighters, 1x Heavy Tanker, 1x Light Tanker | Wiangaree |
| Green Pigeon Rural Fire Brigade | 30x Volunteer Firefighters, 1x Heavy Tanker, 1x Light Tanker | Green Pigeon |
| Hanging Rock-Kyogle Rural Fire Brigade | 30x Volunteer Firefighters, 1x Heavy Tanker, 1x Light Tanker | Barkers Vale |
| Kyogle Rural Fire Brigade | 30x Volunteer Firefighters, 1x Heavy Tanker, 1x Light Tanker | Kyogle |
| Wyneden Rural Fire Brigade | 30x Volunteer Firefighters, 1x Heavy Tanker, 1x Light Tanker | Eden Creek |
| Toonumbar Rural Fire Brigade | 30x Volunteer Firefighters, 1x Heavy Tanker, 1x Light Tanker | Afterlee |
| Sextonville Rural Fire Brigade | 30x Volunteer Firefighters, 1x Heavy Tanker, 1x Light Tanker | Doubtful Creek |
| Old Bonalbo Rural Fire Brigade | 30x Volunteer Firefighters, 1x Heavy Tanker, 1x Light Tanker | Old Bonalbo |
| Bonalbo Rural Fire Brigade | 30x Volunteer Firefighters, 1x Heavy Tanker, 1x Light Tanker | Bonalbo |
| Mummulgum Rural Fire Brigade | 30x Volunteer Firefighters, 1x Heavy Tanker, 1x Light Tanker | Mummulgum |
| Mallanganee Rural Fire Brigade | 30x Volunteer Firefighters, 1x Heavy Tanker, 1x Light Tanker | Mallanganee |
| Tabulam Rural Fire Brigade | 30x Volunteer Firefighters, 1x Heavy Tanker, 1x Light Tanker | Tabulam |
| Brigade: | Size: | Location: |
|---|---|---|
| North Casino Rural Fire Brigade | 30x Volunteer Firefighters, 1x Heavy Tanker, 1x Light Tanker | Fairy Hill |
| Casino Rural Fire Brigade | 30x Volunteer Firefighters, 1x Heavy Tanker, 1x Light Tanker | Casino |
| Bentley-Lismore Rural Fire Brigade | 30x Volunteer Firefighters, 1x Heavy Tanker, 1x Light Tanker | Bentley |
| Woodview Rural Fire Brigade | 30x Volunteer Firefighters, 1x Heavy Tanker, 1x Light Tanker | Woodview |
| Shannonbrook Rural Fire Brigade | 30x Volunteer Firefighters, 1x Heavy Tanker, 1x Light Tanker | Shannon Brook |
| Yorklea Rural Fire Brigade | 30x Volunteer Firefighters, 1x Heavy Tanker, 1x Light Tanker | Yorklea |
| Casino East Rural Fire Brigade | 30x Volunteer Firefighters, 1x Heavy Tanker, 1x Light Tanker | Greenridge |
| Tomki Rural Fire Brigade | 30x Volunteer Firefighters, 1x Heavy Tanker, 1x Light Tanker | Tomki |
| Hogarth Range Rural Fire Brigade | 30x Volunteer Firefighters, 1x Heavy Tanker, 1x Light Tanker | Hogarth Range |
| Middle Creek Rural Fire Brigade | 30x Volunteer Firefighters, 1x Heavy Tanker, 1x Light Tanker | Mongogarie |
| Rappville Rural Fire Brigade | 30x Volunteer Firefighters, 1x Heavy Tanker, 1x Light Tanker | Rappville |
| Ellangowan Rural Fire Brigade | 30x Volunteer Firefighters, 1x Heavy Tanker, 1x Light Tanker | Ellangowan |
| West Coraki Rural Fire Brigade | 30x Volunteer Firefighters, 1x Heavy Tanker, 1x Light Tanker | Bora Ridge |
| Woodburn Rural Fire Brigade | 30x Volunteer Firefighters, 1x Heavy Tanker, 1x Light Tanker | Woodburn |
| Broadwater Rural Fire Brigade | 30x Volunteer Firefighters, 1x Heavy Tanker, 1x Light Tanker | Broadwater |
| Myall Creek Road Rural Fire Brigade | 30x Volunteer Firefighters, 1x Heavy Tanker, 1x Light Tanker | West Bungawalbin |
| Bungawalbin Rural Fire Brigade | 30x Volunteer Firefighters, 1x Heavy Tanker, 1x Light Tanker | Gibberagee |
| Whiporie Rural Fire Brigade | 30x Volunteer Firefighters, 1x Heavy Tanker, 1x Light Tanker | Whiporie |
| Unit: | Size: | Base: |
|---|---|---|
| Clarence Valley District Headquarters | 15x Permanent Personnel, 1x Command Vehicle | Ulmarra |
| Clarence Valley Support Rural Fire Brigade | 100x Volunteer Firefighters, 1x Heavy Tanker, 1x Bulk Water Carrier, 1x Transport Bus, 1x Logistics Support Vehicle, 1x Logistics Truck, 2x Command Vehicles | Ulmarra |
| Clarence Valley Communications Rural Fire Brigade | 30x Volunteer Firefighters, 1x Communications Truck, 1x Command Vehicle | Ulmarra |
| Brigade: | Size: | Location: |
|---|---|---|
| Ewingar Rural Fire Brigade | 30x Volunteer Firefighters, 1x Medium Tanker, 1x Light Tanker | Bulldog |
| Fine Flower Rural Fire Brigade | 30x Volunteer Firefighters, 1x Medium Tanker, 1x Light Tanker | Fine Flower |
| Coaldale Rural Fire Brigade | 30x Volunteer Firefighters, 1x Medium Tanker, 1x Light Tanker | Coaldale |
| Jackadgery Rural Fire Brigade | 30x Volunteer Firefighters, 1x Medium Tanker, 1x Light Tanker | Jackadgery |
| Copmanhurst Rural Fire Brigade | 30x Volunteer Firefighters, 1x Medium Tanker, 1x Light Tanker | Copmanhurst |
| Mount Ramornie Rural Fire Brigade | 30x Volunteer Firefighters, 1x Medium Tanker, 1x Light Tanker | Ramornie |
| Woombah Rural Fire Brigade | 30x Volunteer Firefighters, 1x Medium Tanker, 1x Light Tanker | Woombah |
| Iluka Rural Fire Brigade | 30x Volunteer Firefighters, 1x Medium Tanker, 1x Light Tanker | Iluka |
| Wooloweyah Rural Fire Brigade | 30x Volunteer Firefighters, 1x Medium Tanker, 1x Light Tanker | Wooloweyah |
| Ashby Rural Fire Brigade | 30x Volunteer Firefighters, 1x Medium Tanker, 1x Light Tanker | Ashby |
| Gulmarrad Rural Fire Brigade | 30x Volunteer Firefighters, 1x Medium Tanker, 1x Light Tanker | Gulmarrad |
| Woodford Rural Fire Brigade | 30x Volunteer Firefighters, 1x Medium Tanker, 1x Light Tanker | Ilarwill |
| Lawrence Rural Fire Brigade | 30x Volunteer Firefighters, 1x Medium Tanker, 1x Light Tanker | Lawrence |
| Baryulgil Rural Fire Brigade | 30x Volunteer Firefighters, 1x Medium Tanker, 1x Light Tanker | Baryulgil |
| Dilkoon Rural Fire Brigade | 30x Volunteer Firefighters, 1x Medium Tanker, 1x Light Tanker | Clifden |
| Trenayr Rural Fire Brigade | 30x Volunteer Firefighters, 1x Medium Tanker, 1x Light Tanker | Koolkhan |
| Ulmarra Rural Fire Brigade | 30x Volunteer Firefighters, 1x Medium Tanker, 1x Light Tanker | Ulmarra |
| Tucabia Rural Fire Brigade | 30x Volunteer Firefighters, 1x Medium Tanker, 1x Light Tanker | Tucabia |
| Southampton Rural Fire Brigade | 30x Volunteer Firefighters, 1x Medium Tanker, 1x Light Tanker | Waterview Heights |
| Grafton City Rural Fire Brigade | 30x Volunteer Firefighters, 1x Medium Tanker, 1x Light Tanker | Rushforth |
| Glenugie Rural Fire Brigade | 30x Volunteer Firefighters, 1x Medium Tanker, 1x Light Tanker | Glenugie |
| Pillar Valley Rural Fire Brigade | 30x Volunteer Firefighters, 1x Medium Tanker, 1x Light Tanker | Pillar Valley |
| Brooms Head Rural Fire Brigade | 30x Volunteer Firefighters, 1x Medium Tanker, 1x Light Tanker | Brooms Head |
| Minnie Water Rural Fire Brigade | 30x Volunteer Firefighters, 1x Medium Tanker, 1x Light Tanker | Minnie Water |
| Wooli Rural Fire Brigade | 30x Volunteer Firefighters, 1x Medium Tanker, 1x Light Tanker | Wooli |
| Halfway Creek Rural Fire Brigade | 30x Volunteer Firefighters, 1x Medium Tanker, 1x Light Tanker | Halfway Creek |
| Lanitza/Kungala Rural Fire Brigade | 30x Volunteer Firefighters, 1x Medium Tanker, 1x Light Tanker | Lanitza |
| Braunstone Rural Fire Brigade | 30x Volunteer Firefighters, 1x Medium Tanker, 1x Light Tanker | Braunstone |
| Coutts Crossing Rural Fire Brigade | 30x Volunteer Firefighters, 1x Medium Tanker, 1x Light Tanker | Coutts Crossing |
| Chambigne-Obx Rural Fire Brigade | 30x Volunteer Firefighters, 1x Medium Tanker, 1x Light Tanker | Chambigne |
| Nymboida Rural Fire Brigade | 30x Volunteer Firefighters, 1x Medium Tanker, 1x Light Tanker | Nymboida |
| Kangaroo Creek Rural Fire Brigade | 30x Volunteer Firefighters, 1x Medium Tanker, 1x Light Tanker | Kangaroo Creek |
| Glenreagh Rural Fire Brigade | 30x Volunteer Firefighters, 1x Medium Tanker, 1x Light Tanker | Glenreagh |
| Tyringham Rural Fire Brigade | 30x Volunteer Firefighters, 1x Medium Tanker, 1x Light Tanker | Tyringham |
| Unit: | Size: | Base: |
|---|---|---|
| Coffs Coast District Headquarters | 15x Permanent Personnel, 1x Command Vehicle | Coffs Harbour |
| Coffs Coast Support Rural Fire Brigade | 100x Volunteer Firefighters, 1x Heavy Tanker, 1x Bulk Water Carrier, 1x Transport Bus, 1x Logistics Support Vehicle, 1x Logistics Truck, 2x Command Vehicles | Coffs Harbour |
| Coffs Coast Communications Rural Fire Brigade | 30x Volunteer Firefighters, 1x Communications Truck, 1x Command Vehicle | Coffs Harbour |
| Brigade: | Size: | Location: |
|---|---|---|
| Corindi/Red Rock Rural Fire Brigade | 30x Volunteer Firefighters, 1x Heavy Tanker, 1x Light Tanker | Corindi Beach |
| Sherwood Creek Rural Fire Brigade | 30x Volunteer Firefighters, 1x Heavy Tanker, 1x Light Tanker | Upper Corindi |
| Mullaway Rural Fire Brigade | 30x Volunteer Firefighters, 1x Heavy Tanker, 1x Light Tanker | Mullaway |
| Country Club Rural Fire Brigade | 30x Volunteer Firefighters, 1x Heavy Tanker, 1x Light Tanker | Woolgoolga (West) |
| Woolgoolga Rural Fire Brigade | 30x Volunteer Firefighters, 1x Heavy Tanker, 1x Light Tanker | Woolgoolga (East) |
| Sandy Beach Rural Fire Brigade | 30x Volunteer Firefighters, 1x Heavy Tanker, 1x Light Tanker | Sandy Beach |
| Nana Glen Rural Fire Brigade | 30x Volunteer Firefighters, 1x Heavy Tanker, 1x Light Tanker | Nana Glen |
| Moonee Rural Fire Brigade | 30x Volunteer Firefighters, 1x Heavy Tanker, 1x Light Tanker | Moonee Beach |
| Solitary Rural Fire Brigade | 30x Volunteer Firefighters, 1x Heavy Tanker, 1x Light Tanker | Korora |
| Karangi Rural Fire Brigade | 30x Volunteer Firefighters, 1x Heavy Tanker, 1x Light Tanker | Karangi |
| Orara Rural Fire Brigade | 30x Volunteer Firefighters, 1x Heavy Tanker, 1x Light Tanker | Upper Orara |
| Coramba Rural Fire Brigade | 30x Volunteer Firefighters, 1x Heavy Tanker, 1x Light Tanker | Coramba (South) |
| Lowanna Rural Fire Brigade | 30x Volunteer Firefighters, 1x Heavy Tanker, 1x Light Tanker | Lowanna |
| Ulong Rural Fire Brigade | 30x Volunteer Firefighters, 1x Heavy Tanker, 1x Light Tanker | Ulong |
| Red Hill-Coffs Harbour Rural Fire Brigade | 30x Volunteer Firefighters, 1x Heavy Tanker, 1x Light Tanker | Coffs Harbour |
| Boambee Rural Fire Brigade | 30x Volunteer Firefighters, 1x Heavy Tanker, 1x Light Tanker | Boambee |
| Bonville Rural Fire Brigade | 30x Volunteer Firefighters, 1x Heavy Tanker, 1x Light Tanker | Bonville |
| Eastbank Rural Fire Brigade | 30x Volunteer Firefighters, 1x Light Tanker, 1x Light Unit | Coramba (North) |
| Brigade: | Size: | Location: |
|---|---|---|
| Deervale Rural Fire Brigade | 30x Volunteer Firefighters, 1x Heavy Tanker, 1x Light Unit | Deer Vale |
| Bostobrick Rural Fire Brigade | 30x Volunteer Firefighters, 1x Heavy Tanker, 1x Light Unit | Bostobrick |
| Megan (Dorrigo) Rural Fire Brigade | 30x Volunteer Firefighters, 1x Heavy Tanker, 1x Light Unit | Dorrigo |
| Megan (Megan) Rural Fire Brigade | 30x Volunteer Firefighters, 1x Heavy Tanker, 1x Light Unit | Megan |
| Darkwood Rural Fire Brigade | 30x Volunteer Firefighters, 1x Heavy Tanker, 1x Light Unit | Darkwood |
| Thora Rural Fire Brigade | 30x Volunteer Firefighters, 1x Heavy Tanker, 1x Light Unit | Thora |
| Kalang Rural Fire Brigade | 30x Volunteer Firefighters, 1x Heavy Tanker, 1x Light Unit | Kalang (Central) |
| Scotchman Rural Fire Brigade | 30x Volunteer Firefighters, 1x Heavy Tanker, 1x Light Unit | Kalang (East) |
| Boggy Creek Rural Fire Brigade | 30x Volunteer Firefighters, 1x Heavy Tanker, 1x Light Unit | Bellingen (West) |
| Gleniffer Rural Fire Brigade | 30x Volunteer Firefighters, 1x Heavy Tanker, 1x Light Unit | Gleniffer |
| Hydes Creek Rural Fire Brigade | 30x Volunteer Firefighters, 1x Heavy Tanker, 1x Light Unit | Hydes Creek |
| North Bellingen Rural Fire Brigade | 30x Volunteer Firefighters, 1x Heavy Tanker, 1x Light Unit | Bellingen (East) |
| Fernmount Rural Fire Brigade | 30x Volunteer Firefighters, 1x Heavy Tanker, 1x Light Unit | Fernmount |
| Brierfield Rural Fire Brigade | 30x Volunteer Firefighters, 1x Heavy Tanker, 1x Light Unit | Brierfield |
| Valery Rural Fire Brigade | 30x Volunteer Firefighters, 1x Heavy Tanker, 1x Light Unit | Valery |
| Repton Rural Fire Brigade | 30x Volunteer Firefighters, 1x Heavy Tanker, 1x Light Unit | Repton |
| Mylestom Rural Fire Brigade | 30x Volunteer Firefighters, 1x Heavy Tanker, 1x Light Unit | Mylestom |
| Urunga Rural Fire Brigade | 30x Volunteer Firefighters, 1x Heavy Tanker, 1x Light Unit | Urunga |
| Unit: | Size: | Base: |
|---|---|---|
| Northern Tablelands District Headquarters | 15x Permanent Personnel, 1x Command Vehicle | Glen Innes |
| Northern Tablelands Support Rural Fire Brigade | 100x Volunteer Firefighters, 1x Heavy Tanker, 1x Bulk Water Carrier, 1x Transport Bus, 1x Logistics Support Vehicle, 1x Logistics Truck, 2x Command Vehicles | Glen Innes |
| Northern Tablelands Communications Rural Fire Brigade | 30x Volunteer Firefighters, 1x Communications Truck, 1x Command Vehicle | Glen Innes |
| Brigade: | Size: | Location: |
|---|---|---|
| Emmaville Rural Fire Brigade | 30x Volunteer Firefighters, 1x Heavy Tanker, 1x Light Tanker | Emmaville |
| Deepwater Rural Fire Brigade | 30x Volunteer Firefighters, 1x Heavy Tanker, 1x Light Tanker | Deepwater |
| Dundee Rural Fire Brigade | 30x Volunteer Firefighters, 1x Heavy Tanker, 1x Light Tanker | Dundee |
| Glen Elgin Rural Fire Brigade | 30x Volunteer Firefighters, 1x Heavy Tanker, 1x Light Tanker | Glen Elgin |
| Wellingrove Rural Fire Brigade | 30x Volunteer Firefighters, 1x Heavy Tanker, 1x Light Tanker | Wellingrove |
| Matheson Rural Fire Brigade | 30x Volunteer Firefighters, 1x Heavy Tanker, 1x Light Tanker | Matheson |
| Reddestone Rural Fire Brigade | 30x Volunteer Firefighters, 1x Heavy Tanker, 1x Light Tanker | Glen Innes (North) |
| Glen Innes Rural Fire Brigade | 30x Volunteer Firefighters, 1x Heavy Tanker, 1x Light Tanker | Glen Innes (East) |
| Red Range Rural Fire Brigade | 30x Volunteer Firefighters, 1x Heavy Tanker, 1x Light Tanker | Red Range |
| Shannon Vale Rural Fire Brigade | 30x Volunteer Firefighters, 1x Heavy Tanker, 1x Light Tanker | Shannon Vale |
| Bald Nob Rural Fire Brigade | 30x Volunteer Firefighters, 1x Heavy Tanker, 1x Light Tanker | Bald Nob |
| Wytaliba Rural Fire Brigade | 30x Volunteer Firefighters, 1x Heavy Tanker, 1x Light Tanker | Diehard |
| Glencoe-Glen Innes Rural Fire Brigade | 30x Volunteer Firefighters, 1x Heavy Tanker, 1x Light Tanker | Glencoe |
| Mount Mitchell Rural Fire Brigade | 30x Volunteer Firefighters, 1x Heavy Tanker, 1x Light Tanker | Mount Mitchell |
| Brigade: | Size: | Location: |
|---|---|---|
| Urbenville Rural Fire Brigade | 30x Volunteer Firefighters, 1x Heavy Tanker, 1x Light Tanker | Urbenville |
| Legume Rural Fire Brigade | 30x Volunteer Firefighters, 1x Heavy Tanker, 1x Light Tanker | Legume |
| Liston/Wylie Creek Rural Fire Brigade | 30x Volunteer Firefighters, 1x Heavy Tanker, 1x Light Tanker | Liston |
| Pretty Gully Rural Fire Brigade | 30x Volunteer Firefighters, 1x Heavy Tanker, 1x Light Tanker | Tabulam (North) |
| Frazers Cutting Rural Fire Brigade | 30x Volunteer Firefighters, 1x Heavy Tanker, 1x Light Tanker | Tabulam (South) |
| Drake Rural Fire Brigade | 30x Volunteer Firefighters, 1x Heavy Tanker, 1x Light Tanker | Drake Village |
| Barney Downs Rural Fire Brigade | 30x Volunteer Firefighters, 1x Heavy Tanker, 1x Light Tanker | Tenterfield (Northeast) |
| Steinbrook Rural Fire Brigade | 30x Volunteer Firefighters, 1x Heavy Tanker, 1x Light Tanker | Tenterfield (Central) |
| Homestead Rural Fire Brigade | 30x Volunteer Firefighters, 1x Heavy Tanker, 1x Light Tanker | Tenterfield (North) |
| Leefield/Mount MacKenzie Rural Fire Brigade | 30x Volunteer Firefighters, 1x Heavy Tanker, 1x Light Tanker | Tenterfield (Northwest) |
| Sandy Flat/Bolivia Rural Fire Brigade | 30x Volunteer Firefighters, 1x Heavy Tanker, 1x Light Tanker | Sandy Flat |
| Pyes Creek Rural Fire Brigade | 30x Volunteer Firefighters, 1x Heavy Tanker, 1x Light Tanker | Bolivia |
| Stanum/Torrington Rural Fire Brigade | 30x Volunteer Firefighters, 1x Heavy Tanker, 1x Light Tanker | Torrington |
| Brigade: | Size: | Location: |
|---|---|---|
| Yetman Rural Fire Brigade | 30x Volunteer Firefighters, 1x Heavy Tanker, 1x Light Tanker | Yetman |
| Bonshaw Rural Fire Brigade | 30x Volunteer Firefighters, 1x Heavy Tanker, 1x Light Tanker | Bonshaw |
| Wallangra Rural Fire Brigade | 30x Volunteer Firefighters, 1x Heavy Tanker, 1x Light Tanker | Wallangra |
| Ashford Rural Fire Brigade | 30x Volunteer Firefighters, 1x Heavy Tanker, 1x Light Tanker | Ashford |
| Graman Rural Fire Brigade | 30x Volunteer Firefighters, 1x Heavy Tanker, 1x Light Tanker | Graman |
| Bukkulla Rural Fire Brigade | 30x Volunteer Firefighters, 1x Heavy Tanker, 1x Light Tanker | Bukkulla |
| Delungra Rural Fire Brigade | 30x Volunteer Firefighters, 1x Heavy Tanker, 1x Light Tanker | Delungra |
| Oakwood Rural Fire Brigade | 30x Volunteer Firefighters, 1x Heavy Tanker, 1x Light Tanker | Oakwood |
| Nullamanna Rural Fire Brigade | 30x Volunteer Firefighters, 1x Heavy Tanker, 1x Light Tanker | Nullamanna |
| Kings Plains (Inverell) Rural Fire Brigade | 30x Volunteer Firefighters, 1x Heavy Tanker, 1x Light Tanker | Kings Plains |
| Whitlow Rural Fire Brigade | 30x Volunteer Firefighters, 1x Heavy Tanker, 1x Light Tanker | Myall Creek |
| Gum Flat Rural Fire Brigade | 30x Volunteer Firefighters, 1x Heavy Tanker, 1x Light Tanker | Gum Flat |
| Inverell Rural Fire Brigade | 30x Volunteer Firefighters, 1x Heavy Tanker, 1x Light Tanker | Inverell |
| Gilgai Rural Fire Brigade | 30x Volunteer Firefighters, 1x Heavy Tanker, 1x Light Tanker | Gilgai |
| Elsmore Rural Fire Brigade | 30x Volunteer Firefighters, 1x Heavy Tanker, 1x Light Tanker | Elsmore |
| Stannifer Rural Fire Brigade | 30x Volunteer Firefighters, 1x Heavy Tanker, 1x Light Tanker | Stannifer |
| Tingha Rural Fire Brigade | 30x Volunteer Firefighters, 1x Heavy Tanker, 1x Light Tanker | Tingha |
| Unit: | Size: | Base: |
|---|---|---|
| New England District Headquarters | 15x Permanent Personnel, 1x Command Vehicle | Armidale |
| New England Support Rural Fire Brigade | 100x Volunteer Firefighters, 1x Heavy Tanker, 1x Bulk Water Carrier, 1x Transport Bus, 1x Logistics Support Vehicle, 1x Logistics Truck, 2x Command Vehicles | Armidale |
| New England Communications Rural Fire Brigade | 30x Volunteer Firefighters, 1x Communications Truck, 1x Command Vehicle | Armidale |
| New England District Remote Area Firefighting Team | 60x Volunteer Firefighters, 2x Logistics Support Vehicles, 2x Logistics Trucks | Armidale |
| Brigade: | Size: | Location: |
|---|---|---|
| Ben Lomond Rural Fire Brigade | 30x Volunteer Firefighters, 1x Heavy Tanker, 1x Light Tanker | Ben Lomond |
| Wards Mistake Rural Fire Brigade | 30x Volunteer Firefighters, 1x Heavy Tanker, 1x Light Tanker | Wards Mistake |
| Llangothlin Rural Fire Brigade | 30x Volunteer Firefighters, 1x Heavy Tanker, 1x Light Tanker | Llangothlin |
| Tenterden Rural Fire Brigade | 30x Volunteer Firefighters, 1x Heavy Tanker, 1x Light Tanker | Tenterden |
| Baldersleigh Rural Fire Brigade | 30x Volunteer Firefighters, 1x Heavy Tanker, 1x Light Tanker | Baldersleigh |
| Guyra Rural Fire Brigade | 30x Volunteer Firefighters, 1x Heavy Tanker, 1x Light Tanker | Guyra |
| Bald Blair Rural Fire Brigade | 30x Volunteer Firefighters, 1x Heavy Tanker, 1x Light Tanker | Bald Blair |
| Black Mountain Rural Fire Brigade | 30x Volunteer Firefighters, 1x Heavy Tanker, 1x Light Tanker | Black Mountain |
| Boorolong Rural Fire Brigade | 30x Volunteer Firefighters, 1x Heavy Tanker, 1x Light Tanker | Boorolong |
| Devils Pinch Rural Fire Brigade | 30x Volunteer Firefighters, 1x Heavy Tanker, 1x Light Tanker | Tilbuster |
| Herbert Park Rural Fire Brigade | 30x Volunteer Firefighters, 1x Heavy Tanker, 1x Light Tanker | Thalgarrah (West) |
| Lyndhurst-Dumaresq Rural Fire Brigade | 30x Volunteer Firefighters, 1x Heavy Tanker, 1x Light Tanker | Thalgarrah (East) |
| Wongwibinda Rural Fire Brigade | 30x Volunteer Firefighters, 1x Heavy Tanker, 1x Light Tanker | Wongwibinda |
| Ebor Rural Fire Brigade | 30x Volunteer Firefighters, 1x Heavy Tanker, 1x Light Tanker | Ebor |
| Point Lookout Rural Fire Brigade | 30x Volunteer Firefighters, 1x Heavy Tanker, 1x Light Tanker | Ebor |
| Jeogla Rural Fire Brigade | 30x Volunteer Firefighters, 1x Heavy Tanker, 1x Light Tanker | Jeogla |
| Wollomombi Rural Fire Brigade | 30x Volunteer Firefighters, 1x Heavy Tanker, 1x Light Tanker | Wollomombi |
| Hillgrove Rural Fire Brigade | 30x Volunteer Firefighters, 1x Heavy Tanker, 1x Light Tanker | Hillgrove |
| Lower Creek Rural Fire Brigade | 30x Volunteer Firefighters, 1x Heavy Tanker, 1x Light Tanker | Lower Creek |
| Enmore Rural Fire Brigade | 30x Volunteer Firefighters, 1x Heavy Tanker, 1x Light Tanker | Enmore |
| Commissioners Waters Rural Fire Brigade | 30x Volunteer Firefighters, 1x Heavy Tanker, 1x Light Tanker | Castle Doyle |
| Dangarsleigh Rural Fire Brigade | 30x Volunteer Firefighters, 1x Heavy Tanker, 1x Light Tanker | Dangarsleigh |
| Dumaresq Rural Fire Brigade | 30x Volunteer Firefighters, 1x Heavy Tanker, 1x Light Tanker | Armidale |
| Brigade: | Size: | Location: |
|---|---|---|
| Woolbrook-Tamworth Rural Fire Brigade | 30x Volunteer Firefighters, 1x Heavy Tanker, 1x Light Tanker | Woolbrook |
| Walcha Road Rural Fire Brigade | 30x Volunteer Firefighters, 1x Heavy Tanker, 1x Light Tanker | Walcha Road |
| Bergen Rural Fire Brigade | 30x Volunteer Firefighters, 1x Heavy Tanker, 1x Light Tanker | Walcha (Northwest) |
| Moona-Winterbourne Rural Fire Brigade | 30x Volunteer Firefighters, 1x Heavy Tanker, 1x Light Tanker | Walcha (North) |
| Oxley Rural Fire Brigade | 30x Volunteer Firefighters, 1x Heavy Tanker, 1x Light Tanker | Walcha (Central) |
| Ingleba Rural Fire Brigade | 30x Volunteer Firefighters, 1x Heavy Tanker, 1x Light Tanker | Walcha (West) |
| Flags/Niangala South Rural Fire Brigade | 30x Volunteer Firefighters, 1x Heavy Tanker, 1x Light Tanker | Walcha (South) |
| Nowendoc Rural Fire Brigade | 30x Volunteer Firefighters, 1x Heavy Tanker, 1x Light Tanker | Nowendoc |
| Yarrowitch-Tia Rural Fire Brigade | 30x Volunteer Firefighters, 1x Heavy Tanker, 1x Light Tanker | Yarrowitch |
| Brigade: | Size: | Location: |
|---|---|---|
| Bundarra Rural Fire Brigade | 30x Volunteer Firefighters, 1x Heavy Tanker, 1x Light Tanker | Bundarra |
| Torryburn Rural Fire Brigade | 30x Volunteer Firefighters, 1x Heavy Tanker, 1x Light Tanker | Yarrowyck |
| Balala Rural Fire Brigade | 30x Volunteer Firefighters, 1x Heavy Tanker, 1x Light Tanker | Balala |
| Diggings (Rocky River) Rural Fire Brigade | 30x Volunteer Firefighters, 1x Heavy Tanker, 1x Light Tanker | Rocky River |
| Diggings (Bilga Road) Rural Fire Brigade | 30x Volunteer Firefighters, 1x Heavy Tanker, 1x Light Tanker | Invergowrie |
| Kentucky Rural Fire Brigade | 30x Volunteer Firefighters, 1x Heavy Tanker, 1x Light Tanker | Kentucky |
| Local Government Areas not covered by the Rural Fire Service: |
|
| Unit: | Size: | Base: |
|---|---|---|
| Western Area Command Headquarters | 50x Permanent Personnel | Cowra |
| Unit: | Size: | Base: |
|---|---|---|
| Cudgegong District Headquarters | 15x Permanent Personnel, 1x Command Vehicle | Eurunderee |
| Cudgegong Support Rural Fire Brigade | 100x Volunteer Firefighters, 1x Heavy Tanker, 1x Bulk Water Carrier, 1x Transport Bus, 1x Logistics Support Vehicle, 1x Logistics Truck, 2x Command Vehicles | Eurunderee |
| Cudgegong Communications Rural Fire Brigade | 30x Volunteer Firefighters, 1x Communications Truck, 1x Command Vehicle | Eurunderee |
| Brigade: | Size: | Location: |
|---|---|---|
| Gulgong Rural Fire Brigade | 90x Volunteer Firefighters, 1x Medium Pumper, 1x Heavy Tanker, 2x Light Tankers, 1x Light Unit, 1x Command Vehicle | Gulgong |
| Mudgee Rural Fire Brigade | 75x Volunteer Firefighters, 1x Medium Pumper, 1x Heavy Tanker, 1x Light Unit, 1x Command Vehicle, 1x Bulk Water Carrier | Mudgee |
| Windeyer Rural Fire Brigade | 60x Volunteer Firefighters, 1x Heavy Tanker, 2x Light Tankers, 1x Light Unit | Windeyer |
| Lawson-Cudgegong Rural Fire Brigade | 60x Volunteer Firefighters, 1x Heavy Tanker, 2x Light Tankers, 1x Light Unit | Eurunderee |
| Grattai Rural Fire Brigade | 60x Volunteer Firefighters, 2x Light Tankers, 2x Light Units | Grattai |
| Piambong Rural Fire Brigade | 60x Volunteer Firefighters, 2x Light Tankers, 2x Light Units | Piambong |
| Moolarben Rural Fire Brigade | 60x Volunteer Firefighters, 2x Light Tankers, 2x Light Units | Moolarben |
| Bylong Rural Fire Brigade | 60x Volunteer Firefighters, 1x Light Tanker, 3x Light Units | Bylong |
| Goolma Rural Fire Brigade | 45x Volunteer Firefighters, 1x Heavy Tanker, 1x Light Tanker, 1x Light Unit | Goolma |
| Cooyal Rural Fire Brigade | 45x Volunteer Firefighters, 1x Heavy Tanker, 1x Light Tanker, 1x Light Unit | Cooyal |
| Mullamuddy Rural Fire Brigade | 45x Volunteer Firefighters, 1x Heavy Tanker, 1x Light Tanker, 1x Light Unit | Mullamuddy |
| Rylstone Rural Fire Brigade | 45x Volunteer Firefighters, 1x Heavy Tanker, 1x Light Tanker, 1x Light Unit | Rylstone |
| Cooks Gap (Ulan) Rural Fire Brigade | 45x Volunteer Firefighters, 1x Heavy Tanker, 1x Light Tanker, 1x Command Vehicle | Cooks Gap |
| Cooyal (Botobolar) Rural Fire Brigade | 45x Volunteer Firefighters, 1x Medium Tanker, 1x Light Tanker, 1x Light Unit | Botobolar |
| Hargraves Rural Fire Brigade | 45x Volunteer Firefighters, 2x Light Tankers, 1x Light Unit | Hargraves |
| Lue/Havilah Rural Fire Brigade | 45x Volunteer Firefighters, 1x Light Tanker, 2x Light Units | Lue |
| Birriwa Rural Fire Brigade | 30x Volunteer Firefighters, 1x Heavy Tanker, 1x Light Tanker | Birriwa |
| Clandulla Rural Fire Brigade | 30x Volunteer Firefighters, 1x Heavy Tanker, 1x Light Tanker | Clandulla |
| Cainbil-Bungaba Rural Fire Brigade | 30x Volunteer Firefighters, 1x Heavy Tanker, 1x Light Unit | Bungaba |
| Two Mile Rural Fire Brigade | 30x Volunteer Firefighters, 1x Medium Tanker, 1x Light Tanker | Sofala (North) |
| Ilford Rural Fire Brigade | 30x Volunteer Firefighters, 1x Medium Tanker, 1x Light Tanker | Ilford |
| Munmurra Rural Fire Brigade | 30x Volunteer Firefighters, 2x Light Tankers | Turill |
| Pyramul Rural Fire Brigade | 30x Volunteer Firefighters, 2x Light Tankers | Pyramul |
| Cooks Gap (Mays) Rural Fire Brigade | 30x Volunteer Firefighters, 1x Light Tanker, 1x Light Unit | Yarrawonga |
| Cooks Gap (Wollar) Rural Fire Brigade | 30x Volunteer Firefighters, 1x Light Tanker, 1x Light Unit | Wollar |
| Crudine Rural Fire Brigade | 30x Volunteer Firefighters, 1x Light Tanker, 1x Light Unit | Crudine |
| Running Stream Rural Fire Brigade | 30x Volunteer Firefighters, 1x Light Tanker, 1x Light Unit | Running Stream |
| Olinda Rural Fire Brigade | 30x Volunteer Firefighters, 1x Light Tanker, 1x Light Unit | Olinda |
| Yarrabin Rural Fire Brigade | 30x Volunteer Firefighters, 1x Light Tanker, 1x Light Unit | Yarrabin |
| Unit: | Size: | Base: |
|---|---|---|
| Chifley Lithgow District Headquarters | 15x Permanent Personnel, 1x Command Vehicle | Kelso |
| Chifley Lithgow Support Rural Fire Brigade | 100x Volunteer Firefighters, 1x Heavy Tanker, 1x Bulk Water Carrier, 1x Transport Bus, 1x Logistics Support Vehicle, 1x Logistics Truck, 2x Command Vehicles | Kelso |
| Chifley Lithgow Communications Rural Fire Brigade | 30x Volunteer Firefighters, 1x Communications Truck, 1x Command Vehicle | Kelso |
| Brigade: | Size: | Location: |
|---|---|---|
| Lowther-Hampton Rural Fire Brigade | 135x Volunteer Firefighters, 2x Heavy Tankers, 5x Light Tankers, 2x Light Units | Hampton |
| Glen Alice Rural Fire Brigade | 105x Volunteer Firefighters, 1x Heavy Tanker, 3x Light Tankers, 2x Light Units, 1x Command Vehicle | Glen Alice |
| Hartley Rural Fire Brigade | 90x Volunteer Firefighters, 1x Heavy Tanker, 2x Light Tankers, 1x Light Unit, 1x Catering Truck | Hartley |
| Tarana Rural Fire Brigade | 75x Volunteer Firefighters, 1x Heavy Tanker, 3x Light Tankers, 1x Light Unit | Tarana |
| Wallerawang Rural Fire Brigade | 60x Volunteer Firefighters, 1x Heavy Tanker, 3x Light Tankers | Lidsdale |
| Capertee Rural Fire Brigade | 60x Volunteer Firefighters, 1x Heavy Tanker, 1x Light Tanker, 1x Light Unit, 1x Command Vehicle | Capertee |
| Kanimbla Rural Fire Brigade | 60x Volunteer Firefighters, 3x Light Tankers, 1x Light Unit | Kanimbla |
| Bogee Rural Fire Brigade | 60x Volunteer Firefighters, 2x Light Tankers, 2x Light Units | Bogee |
| South Bowenfels Rural Fire Brigade | 45x Volunteer Firefighters, 2x Heavy Tankers, 1x Light Tanker | South Bowenfels |
| Cullen Bullen Rural Fire Brigade | 45x Volunteer Firefighters, 1x Heavy Tanker, 2x Light Tankers | Cullen Bullen |
| Marrangaroo Rural Fire Brigade | 45x Volunteer Firefighters, 1x Heavy Tanker, 2x Light Tankers | Marrangaroo |
| Portland Rural Fire Brigade | 45x Volunteer Firefighters, 1x Heavy Tanker, 1x Light Tanker, 1x Light Unit | Portland |
| Rydal-Crossroads Rural Fire Brigade | 45x Volunteer Firefighters, 1x Heavy Tanker, 1x Light Tanker, 1x Light Unit | Rydal (South) |
| Rydal Rural Fire Brigade | 45x Volunteer Firefighters, 1x Heavy Tanker, 1x Light Tanker, 1x Light Unit | Rydal (North) |
| Clarence-Dargen Rural Fire Brigade | 45x Volunteer Firefighters, 1x Heavy Tanker, 1x Light Tanker, 1x Light Unit | Clarence |
| Palmers Oaky Rural Fire Brigade | 45x Volunteer Firefighters, 2x Light Tankers, 1x Light Unit | Palmers Oaky |
| Dark Corner Rural Fire Brigade | 45x Volunteer Firefighters, 2x Light Tankers, 1x Light Unit | Dark Corner |
| Brigade: | Size: | Location: |
|---|---|---|
| Eglinton Rural Fire Brigade | 60x Volunteer Firefighters, 1x Medium Pumper, 2x Heavy Tankers, 1x Bulk Water Carrier | Eglinton |
| Wattle Flat-Sofala Rural Fire Brigade | 60x Volunteer Firefighters, 1x Heavy Tanker, 3x Light Tankers | Sofala (South) |
| Hill End Rural Fire Brigade | 60x Volunteer Firefighters, 1x Heavy Tanker, 2x Light Tankers, 1x Light Unit | Hill End |
| Raglan Rural Fire Brigade | 45x Volunteer Firefighters, 1x Medium Pumper, 1x Heavy Tanker, 1x Light Tanker | Raglan |
| Sunny Corner/Meadow Flat Rural Fire Brigade | 45x Volunteer Firefighters, 1x Heavy Tanker, 1x Light Tanker, 1x Light Unit | Sunny Corner |
| Georges Plains Rural Fire Brigade | 45x Volunteer Firefighters, 1x Heavy Tanker, 1x Light Tanker, 1x Light Unit | Perthville |
| Trunkey Rural Fire Brigade | 45x Volunteer Firefighters, 1x Heavy Tanker, 1x Light Tanker, 1x Light Unit | Trunkey Creek |
| Bathurst Rural Fire Brigade | 30x Volunteer Firefighters, 1x Heavy Tanker, 1x Light Tanker | Robin Hill |
| Glanmire-Walang Rural Fire Brigade | 30x Volunteer Firefighters, 1x Heavy Tanker, 1x Light Tanker | Napoleon Reef |
| Yetholme Rural Fire Brigade | 30x Volunteer Firefighters, 1x Heavy Tanker, 1x Light Tanker | Yetholme |
| Turondale Rural Fire Brigade | 30x Volunteer Firefighters, 1x Heavy Tanker, 1x Light Tanker | Turondale |
| Peel Rural Fire Brigade | 30x Volunteer Firefighters, 1x Heavy Tanker, 1x Light Tanker | Peel |
| Rockley Rural Fire Brigade | 30x Volunteer Firefighters, 1x Heavy Tanker, 1x Light Tanker | Rockley |
| Fitzgeralds Valley Rural Fire Brigade | 30x Volunteer Firefighters, 1x Heavy Tanker, 1x Light Unit | Bathampton |
| Kings Plains Rural Fire Brigade | 30x Volunteer Firefighters, 1x Medium Tanker, 1x Light Tanker | Fitzgeralds Mount |
| Sallys Flat Rural Fire Brigade | 30x Volunteer Firefighters, 1x Light Tanker, 1x Light Unit | Sallys Flat |
| Bruinbun Rural Fire Brigade | 30x Volunteer Firefighters, 1x Light Tanker, 1x Light Unit | Bruinbun |
| Freemantle Rural Fire Brigade | 30x Volunteer Firefighters, 1x Light Tanker, 1x Light Unit | Killongbutta |
| Rock Forest Rural Fire Brigade | 30x Volunteer Firefighters, 1x Light Tanker, 1x Light Unit | Rock Forest |
| The Lagoon Rural Fire Brigade | 30x Volunteer Firefighters, 1x Light Tanker, 1x Light Unit | The Lagoon |
| Arkell Rural Fire Brigade | 30x Volunteer Firefighters, 1x Light Tanker, 1x Light Unit | Caloola |
| Brigade: | Size: | Location: |
|---|---|---|
| Burraga Rural Fire Brigade | 75x Volunteer Firefighters, 2x Heavy Tankers, 1x Medium Tanker, 2x Light Tankers | Burraga |
| Jerrong/Paling Yards Rural Fire Brigade | 60x Volunteer Firefighters, 1x Heavy Tanker, 1x Light Tanker, 2x Light Units | Paling Yards |
| Oberon Rural Fire Brigade | 60x Volunteer Firefighters, 1x Heavy Tanker, 1x Light Tanker, 2x Command Vehicles | Oberon (Central) |
| Jenolan Caves Rural Fire Brigade | 60x Volunteer Firefighters, 1x Heavy Tanker, 1x Light Tanker, 2x Command Vehicles | Jenolan |
| Black Springs Rural Fire Brigade | 45x Volunteer Firefighters, 1x Heavy Tanker, 1x Light Tanker, 1x Command Vehicle | Black Springs |
| O'Connell Rural Fire Brigade | 30x Volunteer Firefighters, 1x Heavy Tanker, 1x Light Tanker | O'Connell |
| Norway Rural Fire Brigade | 30x Volunteer Firefighters, 1x Heavy Tanker, 1x Light Tanker | Norway |
| Black Springs-Isabella Rural Fire Brigade | 30x Volunteer Firefighters, 1x Heavy Tanker, 1x Light Tanker | Isabella |
| Gurnang Rural Fire Brigade | 30x Volunteer Firefighters, 1x Heavy Tanker, 1x Light Tanker | Gurnang |
| Hazelgrove Rural Fire Brigade | 30x Volunteer Firefighters, 1x Heavy Tanker, 1x Light Unit | Hazelgrove |
| Native Dog Rural Fire Brigade | 30x Volunteer Firefighters, 1x Heavy Tanker, 1x Light Unit | Essington |
| Mayfield Rural Fire Brigade | 30x Volunteer Firefighters, 1x Light Tanker, 1x Light Unit | Oberon (North) |
| Duckmaloi Rural Fire Brigade | 30x Volunteer Firefighters, 1x Light Tanker, 1x Light Unit | Duckmaloi |
| Back Creek-Oberon Rural Fire Brigade | 30x Volunteer Firefighters, 1x Light Tanker, 1x Light Unit | Oberon (South) |
| Edith Rural Fire Brigade | 30x Volunteer Firefighters, 1x Light Tanker, 1x Light Unit | Edith |
| Gingkin Rural Fire Brigade | 30x Volunteer Firefighters, 1x Light Tanker, 1x Light Unit | Gingkin |
| Shooters Hill-Jaunter Rural Fire Brigade | 30x Volunteer Firefighters, 1x Light Tanker, 1x Light Unit | Shooters Hill |
| Porters Retreat Rural Fire Brigade | 30x Volunteer Firefighters, 1x Light Tanker, 1x Light Unit | Porters Retreat |
| Unit: | Size: | Base: |
|---|---|---|
| Orana District Headquarters | 15x Permanent Personnel, 1x Command Vehicle | Dubbo |
| Orana Support Rural Fire Brigade | 100x Volunteer Firefighters, 2x Bulk Water Carriers, 1x Transport Bus, 1x Logistics Support Vehicle, 1x Logistics Truck, 2x Command Vehicles | Dubbo |
| Orana Communications Rural Fire Brigade | 30x Volunteer Firefighters, 1x Communications Truck, 1x Command Vehicle | Dubbo |
| Brigade: | Size: | Location: |
|---|---|---|
| Dubbo Rural Fire Brigade | 45x Volunteer Firefighters, 2x Heavy Tankers, 1x Bulk Water Carrier | Dubbo (Central) |
| Eumungerie Rural Fire Brigade | 45x Volunteer Firefighters, 1x Heavy Tanker, 1x Medium Tanker, 1x Logistics Support Vehicle | Eumungerie |
| Mogriguy Rural Fire Brigade | 30x Volunteer Firefighters, 1x Heavy Tanker, 1x Light Tanker | Mogriguy |
| Terramungamine Rural Fire Brigade | 30x Volunteer Firefighters, 1x Heavy Tanker, 1x Light Tanker | Terramungamine |
| Burrabadine Rural Fire Brigade | 30x Volunteer Firefighters, 1x Heavy Tanker, 1x Light Tanker | Dubbo (West) |
| Boothenba Rural Fire Brigade | 30x Volunteer Firefighters, 1x Heavy Tanker, 1x Light Tanker | Dubbo (East) |
| Ballimore Rural Fire Brigade | 30x Volunteer Firefighters, 1x Heavy Tanker, 1x Light Tanker | Ballimore |
| Elong Elong Rural Fire Brigade | 30x Volunteer Firefighters, 1x Heavy Tanker, 1x Light Tanker | Elong Elong |
| Eulomogo Rural Fire Brigade | 30x Volunteer Firefighters, 1x Heavy Tanker, 1x Light Tanker | Dubbo (Southeast) |
| Minore Rural Fire Brigade | 30x Volunteer Firefighters, 1x Heavy Tanker, 1x Light Tanker | Dubbo (West) |
| Mountain Creek-Dubbo Rural Fire Brigade | 30x Volunteer Firefighters, 1x Heavy Tanker, 1x Light Tanker | Dubbo (Southwest) |
| Cumboogle Rural Fire Brigade | 30x Volunteer Firefighters, 1x Heavy Tanker, 1x Light Tanker | Dubbo (South) |
| Eschol Rural Fire Brigade | 30x Volunteer Firefighters, 1x Heavy Tanker, 1x Light Tanker | Dubbo (South) |
| Wongarbon Rural Fire Brigade | 30x Volunteer Firefighters, 1x Heavy Tanker, 1x Light Tanker | Wongarbon |
| Comobella Rural Fire Brigade | 30x Volunteer Firefighters, 1x Heavy Tanker, 1x Light Tanker | Comobella |
| Geurie Rural Fire Brigade | 30x Volunteer Firefighters, 1x Heavy Tanker, 1x Light Tanker | Geurie |
| Benolong Rural Fire Brigade | 30x Volunteer Firefighters, 1x Heavy Tanker, 1x Light Tanker | Benolong |
| Emmagool Rural Fire Brigade | 30x Volunteer Firefighters, 1x Heavy Tanker, 1x Light Tanker | Wambangalang |
| Arthurville Rural Fire Brigade | 30x Volunteer Firefighters, 1x Heavy Tanker, 1x Light Tanker | Suntop |
| Mount Arthur Rural Fire Brigade | 30x Volunteer Firefighters, 1x Heavy Tanker, 1x Light Tanker | Wellington |
| Walmer Rural Fire Brigade | 30x Volunteer Firefighters, 1x Heavy Tanker, 1x Light Tanker | Walmer |
| Bournewood Rural Fire Brigade | 30x Volunteer Firefighters, 1x Heavy Tanker, 1x Light Tanker | Bournewood |
| Curra Creek Rural Fire Brigade | 30x Volunteer Firefighters, 1x Heavy Tanker, 1x Light Tanker | Curra Creek |
| Dripstone Rural Fire Brigade | 30x Volunteer Firefighters, 1x Heavy Tanker, 1x Light Tanker | Dripstone |
| Mumbil Rural Fire Brigade | 30x Volunteer Firefighters, 1x Heavy Tanker, 1x Light Tanker | Mumbil |
| Stuart Town Rural Fire Brigade | 30x Volunteer Firefighters, 1x Heavy Tanker, 1x Light Tanker | Stuart Town |
| Eurimbla Rural Fire Brigade | 30x Volunteer Firefighters, 1x Heavy Tanker, 1x Light Tanker | Eurimbla |
| Cundumbul Rural Fire Brigade | 30x Volunteer Firefighters, 1x Heavy Tanker, 1x Light Tanker | Cundumbul |
| Euchareena Rural Fire Brigade | 30x Volunteer Firefighters, 1x Heavy Tanker, 1x Light Tanker | Euchareena |
| Gollan Rural Fire Brigade | 30x Volunteer Firefighters, 1x Heavy Tanker, 1x Light Tanker | Gollan |
| Bodangora Rural Fire Brigade | 30x Volunteer Firefighters, 1x Heavy Tanker, 1x Light Tanker | Bodangora |
| Maryvale Rural Fire Brigade | 30x Volunteer Firefighters, 1x Heavy Tanker, 1x Light Tanker | Maryvale |
| Neurea Rural Fire Brigade | 30x Volunteer Firefighters, 1x Heavy Tanker, 1x Light Tanker | Neurea |
| Ponto Rural Fire Brigade | 30x Volunteer Firefighters, 1x Heavy Tanker, 1x Light Tanker | Ponto |
| Spicers Creek Rural Fire Brigade | 30x Volunteer Firefighters, 1x Heavy Tanker, 1x Light Tanker | Spicers Creek |
| Wuuluman Rural Fire Brigade | 30x Volunteer Firefighters, 1x Heavy Tanker, 1x Light Tanker | Wuuluman |
| Brigade: | Size: | Location: |
|---|---|---|
| Bundemar Rural Fire Brigade | 30x Volunteer Firefighters, 1x Heavy Tanker, 1x Light Unit | Gin Gin |
| Burroway Rural Fire Brigade | 30x Volunteer Firefighters, 1x Heavy Tanker, 1x Light Unit | Burroway (North) |
| Trangie Townships Rural Fire Brigade | 30x Volunteer Firefighters, 1x Heavy Tanker, 1x Light Unit | Trangie (Central) |
| Timbrebongie Rural Fire Brigade | 30x Volunteer Firefighters, 1x Heavy Tanker, 1x Light Unit | Burroway (South) |
| Euromedah Rural Fire Brigade | 30x Volunteer Firefighters, 1x Heavy Tanker, 1x Light Unit | Narromine (Northeast) |
| Narromine Shire Rural Fire Brigade | 30x Volunteer Firefighters, 1x Heavy Tanker, 1x Light Unit | Narromine (North) |
| Frost Rural Fire Brigade | 30x Volunteer Firefighters, 1x Heavy Tanker, 1x Light Unit | Narromine (Central) |
| Tomingley Rural Fire Brigade | 30x Volunteer Firefighters, 1x Heavy Tanker, 1x Light Unit | Tomingley (Central) |
| Waterloo Rural Fire Brigade | 30x Volunteer Firefighters, 1x Heavy Tanker, 1x Light Unit | Narromine (Southwest) |
| Boggy Plains Rural Fire Brigade | 30x Volunteer Firefighters, 1x Heavy Tanker, 1x Light Unit | Narromine (Northwest) |
| Brennans Rural Fire Brigade | 30x Volunteer Firefighters, 1x Heavy Tanker, 1x Light Unit | Trangie (South) |
| Corry Rural Fire Brigade | 30x Volunteer Firefighters, 1x Heavy Tanker, 1x Light Unit | Dandaloo (East) |
| Fairview Rural Fire Brigade | 30x Volunteer Firefighters, 1x Heavy Tanker, 1x Light Unit | Narromine (South-Central) |
| Mungeribar Rural Fire Brigade | 30x Volunteer Firefighters, 1x Heavy Tanker, 1x Light Unit | Trangie (Southeast) |
| Mungery-Narromine Rural Fire Brigade | 30x Volunteer Firefighters, 1x Heavy Tanker, 1x Light Unit | Narromine (South) |
| Narwonah Rural Fire Brigade | 30x Volunteer Firefighters, 1x Heavy Tanker, 1x Light Unit | Narromine (West-Central) |
| North West-Narromine Rural Fire Brigade | 30x Volunteer Firefighters, 1x Heavy Tanker, 1x Light Unit | Trangie (West) |
| Spring Creek-Narromine Rural Fire Brigade | 30x Volunteer Firefighters, 1x Heavy Tanker, 1x Light Unit | Tomingley (East) |
| Tyrie Rural Fire Brigade | 30x Volunteer Firefighters, 1x Heavy Tanker, 1x Light Unit | Dandaloo (North) |
| Webbs Siding Rural Fire Brigade | 30x Volunteer Firefighters, 1x Heavy Tanker, 1x Light Unit | Narromine (East) |
| Weemabah Rural Fire Brigade | 30x Volunteer Firefighters, 1x Heavy Tanker, 1x Light Unit | Trangie (East) |
| Widgeree Rural Fire Brigade | 30x Volunteer Firefighters, 1x Heavy Tanker, 1x Light Unit | Trangie (North) |
| Unit: | Size: | Base: |
|---|---|---|
| Canobolas District Headquarters | 15x Permanent Personnel, 1x Command Vehicle | Orange |
| Canobolas Support Rural Fire Brigade | 210x Volunteer Firefighters, 5x Heavy Tankers, 2x Bulk Water Carriers, 2x Light Tankers, 1x Light Unit, 3x Command Vehicles, 1x Logistics Truck | Orange |
| Canobolas Communications Rural Fire Brigade | 30x Volunteer Firefighters, 1x Communications Truck, 1x Command Vehicle | Orange |
| Brigade: | Size: | Location: |
|---|---|---|
| North West-Canobolas Rural Fire Brigade | 60x Volunteer Firefighters, 1x Heavy Tanker, 1x Medium Tanker, 1x Light Tanker, 1x Light Unit | Orange (Central) |
| Clifton Grove-Ophir Rural Fire Brigade | 60x Volunteer Firefighters, 1x Heavy Tanker, 2x Light Tankers, 1x Light Unit | Clifton Grove |
| Springside Rural Fire Brigade | 45x Volunteer Firefighters, 2x Heavy Tankers, 1x Light Tanker | Springside |
| Orange Rural Fire Brigade | 30x Volunteer Firefighters, 1x Heavy Tanker, 1x Light Tanker | Orange (South) |
| Lucknow-Summer Hill Creek Rural Fire Brigade | 30x Volunteer Firefighters, 1x Heavy Tanker, 1x Light Tanker | Lucknow |
| Spring Hill-Huntley Rural Fire Brigade | 30x Volunteer Firefighters, 1x Heavy Tanker, 1x Light Tanker | Spring Hill |
| Brigade: | Size: | Location: |
|---|---|---|
| Gooloogong Rural Fire Brigade | 45x Volunteer Firefighters, 1x Heavy Tanker, 1x Medium Tanker, 1x Light Tanker | Gooloogong |
| Kangaroo Flat Rural Fire Brigade | 30x Volunteer Firefighters, 1x Heavy Tanker, 1x Medium Tanker | Cowra (Far East) |
| Rivers Rural Fire Brigade | 30x Volunteer Firefighters, 1x Heavy Tanker, 1x Light Tanker | Canowindra (West) |
| Woodstock Rural Fire Brigade | 30x Volunteer Firefighters, 1x Heavy Tanker, 1x Light Tanker | Woodstock (West) |
| Walli/Islands Rural Fire Brigade | 30x Volunteer Firefighters, 1x Heavy Tanker, 1x Light Tanker | Mandurama (East) |
| Waugoola Rural Fire Brigade | 30x Volunteer Firefighters, 1x Heavy Tanker, 1x Light Tanker | Cowra (Central) |
| Wattamondara Rural Fire Brigade | 30x Volunteer Firefighters, 1x Heavy Tanker, 1x Light Tanker | Wattamondara |
| Darbys Falls Rural Fire Brigade | 30x Volunteer Firefighters, 1x Heavy Tanker, 1x Light Tanker | Darbys Falls |
| Wyangala Rural Fire Brigade | 30x Volunteer Firefighters, 1x Heavy Tanker, 1x Light Tanker | Wyangala (South) |
| Mount McDonald Rural Fire Brigade | 30x Volunteer Firefighters, 1x Heavy Tanker, 1x Light Tanker | Wyangala (North) |
| Holmwood Rural Fire Brigade | 30x Volunteer Firefighters, 1x Heavy Tanker, 1x Light Tanker | Cowra (Northeast) |
| Warwick/Glenlogan Rural Fire Brigade | 30x Volunteer Firefighters, 1x Heavy Tanker, 1x Light Tanker | Cowra (North) |
| Kangarooby Rural Fire Brigade | 30x Volunteer Firefighters, 1x Heavy Tanker, 1x Light Unit | Bumbaldry (East) |
| Milburn Creek Rural Fire Brigade | 30x Volunteer Firefighters, 1x Heavy Tanker, 1x Light Unit | Woodstock (South) |
| Morongla/Cucumgilliga Rural Fire Brigade | 30x Volunteer Firefighters, 1x Heavy Tanker, 1x Light Unit | Cowra (South) |
| Chaucer Rural Fire Brigade | 30x Volunteer Firefighters, 1x Heavy Tanker, 1x Light Unit | Mandurama (West) |
| Billimari Rural Fire Brigade | 30x Volunteer Firefighters, 1x Heavy Tanker, 1x Light Unit | Billimari |
| Nargong Rural Fire Brigade | 30x Volunteer Firefighters, 1x Heavy Tanker, 1x Light Unit | Woodstock (East) |
| Porters Mount Rural Fire Brigade | 30x Volunteer Firefighters, 1x Heavy Tanker, 1x Light Unit | Cowra (Central-East) |
| Torrington Rural Fire Brigade | 30x Volunteer Firefighters, 1x Heavy Tanker, 1x Light Unit | Canowindra (East) |
| North Bangaroo Rural Fire Brigade | 30x Volunteer Firefighters, 1x Heavy Tanker, 1x Light Unit | Canowindra (South) |
| Koorawatha (Rural) Rural Fire Brigade | 30x Volunteer Firefighters, 1x Medium Tanker, 1x Light Unit | Koorawatha (Northwest) |
| Merriganowry Rural Fire Brigade | 30x Volunteer Firefighters, 1x Medium Tanker, 1x Light Unit | Cowra (Northwest) |
| Back Creek-Cowra Rural Fire Brigade | 30x Volunteer Firefighters, 2x Light Tankers | Cowra (Southwest) |
| Barryrenie Rural Fire Brigade | 30x Volunteer Firefighters, 1x Light Tanker, 1x Light Unit | Cowra (West) |
| Neila Rural Fire Brigade | 30x Volunteer Firefighters, 1x Light Tanker, 1x Light Unit | Cowra (Southeast) |
| Brigade: | Size: | Location: |
|---|---|---|
| Panuara-Burnt Yards Rural Fire Brigade | 60x Volunteer Firefighters, 1x Heavy Tanker, 2x Light Tankers, 1x Light Unit | Panuara |
| Mandurama Rural Fire Brigade | 45x Volunteer Firefighters, 1x Heavy Tanker, 2x Light Tankers | Mandurama |
| Carcoar Rural Fire Brigade | 45x Volunteer Firefighters, 1x Heavy Tanker, 1x Light Tanker, 1x Light Unit | Carcoar |
| Lyndhurst Rural Fire Brigade | 45x Volunteer Firefighters, 1x Heavy Tanker, 1x Light Tanker, 1x Light Unit | Lyndhurst (East) |
| Blayney Rural Fire Brigade | 45x Volunteer Firefighters, 1x Heavy Tanker, 1x Light Tanker, 1x Light Unit | Blayney |
| Millthorpe Rural Fire Brigade | 30x Volunteer Firefighters, 1x Heavy Tanker, 1x Light Tanker | Millthorpe |
| Tallwood Rural Fire Brigade | 30x Volunteer Firefighters, 1x Heavy Tanker, 1x Light Tanker | Tallwood |
| Barry-Hobbys Yard Rural Fire Brigade | 30x Volunteer Firefighters, 1x Heavy Tanker, 1x Light Tanker | Barry |
| Neville Rural Fire Brigade | 30x Volunteer Firefighters, 1x Heavy Tanker, 1x Light Tanker | Neville |
| Newbridge Rural Fire Brigade | 30x Volunteer Firefighters, 1x Heavy Tanker, 1x Light Unit | Newbridge |
| Gap Rural Fire Brigade | 30x Volunteer Firefighters, 1x Light Tanker, 1x Light Unit | Lyndhurst (West) |
| Brigade: | Size: | Location: |
|---|---|---|
| Washpen Rural Fire Brigade | 60x Volunteer Firefighters, 4x Heavy Tankers | Obley |
| Baldry Rural Fire Brigade | 60x Volunteer Firefighters, 2x Heavy Tankers, 2x Light Tankers | Baldry |
| Yeoval Rural Fire Brigade | 60x Volunteer Firefighters, 2x Heavy Tankers, 1x Light Tanker, 1x Light Unit | Yeoval |
| Cumnock Rural Fire Brigade | 60x Volunteer Firefighters, 1x Heavy Tanker, 1x Medium Tanker, 1x Light Tanker, 1x Light Unit | Cumnock |
| Towac (Nashdale) Rural Fire Brigade | 45x Volunteer Firefighters, 1x Heavy Tanker, 1x Light Tanker, 1x Light Unit | Nashdale |
| Mullion Creek Rural Fire Brigade | 45x Volunteer Firefighters, 1x Heavy Tanker, 1x Light Tanker, 1x Light Unit | Mullion Creek |
| The Ponds (Lewis Ponds) Rural Fire Brigade | 45x Volunteer Firefighters, 1x Medium Tanker, 1x Light Tanker, 1x Light Unit | Lewis Ponds |
| Boomey Rural Fire Brigade | 30x Volunteer Firefighters, 2x Heavy Tankers | Boomey |
| Molong Rural Fire Brigade | 30x Volunteer Firefighters, 1x Heavy Tanker, 1x Light Tanker | Molong (Central) |
| Manildra Rural Fire Brigade | 30x Volunteer Firefighters, 1x Heavy Tanker, 1x Light Tanker | Manildra (Central) |
| Eugowra Rural Fire Brigade | 30x Volunteer Firefighters, 1x Heavy Tanker, 1x Light Tanker | Eugowra (Central) |
| Moorbel Rural Fire Brigade | 30x Volunteer Firefighters, 1x Heavy Tanker, 1x Light Tanker | Moorbel |
| Cargo Rural Fire Brigade | 30x Volunteer Firefighters, 1x Heavy Tanker, 1x Light Tanker | Cargo |
| Cudal Rural Fire Brigade | 30x Volunteer Firefighters, 1x Heavy Tanker, 1x Light Tanker | Cudal |
| Panuara-Burnt Yards (Cadia Road) Rural Fire Brigade | 30x Volunteer Firefighters, 1x Heavy Tanker, 1x Light Tanker | Cadia |
| Lidster Rural Fire Brigade | 30x Volunteer Firefighters, 1x Heavy Tanker, 1x Light Tanker | Lidster |
| Borenore Rural Fire Brigade | 30x Volunteer Firefighters, 1x Heavy Tanker, 1x Light Tanker | Borenore (South) |
| Orange-Molong Road Rural Fire Brigade | 30x Volunteer Firefighters, 1x Heavy Tanker, 1x Light Tanker | Belgravia |
| Spring Glen Rural Fire Brigade | 30x Volunteer Firefighters, 1x Heavy Tanker, 1x Light Tanker | Summer Hill Creek |
| Lockwood Rural Fire Brigade | 30x Volunteer Firefighters, 1x Heavy Tanker, 1x Light Tanker | Canowindra (North) |
| Nashdale Rural Fire Brigade | 30x Volunteer Firefighters, 1x Heavy Tanker, 1x Light Tanker | Nashdale |
| Mount Pleasant Rural Fire Brigade | 30x Volunteer Firefighters, 1x Heavy Tanker, 1x Light Unit | Canowindra (Northwest) |
| Nyrang Creek Rural Fire Brigade | 30x Volunteer Firefighters, 1x Heavy Tanker, 1x Light Unit | Nyrang Creek |
| Byng/Emu Swamp Rural Fire Brigade | 30x Volunteer Firefighters, 1x Heavy Tanker, 1x Light Unit | Byng |
| Bocobra Rural Fire Brigade | 30x Volunteer Firefighters, 1x Heavy Tanker, 1x Light Unit | Bocobra |
| Bowan Park Rural Fire Brigade | 30x Volunteer Firefighters, 1x Heavy Tanker, 1x Light Unit | Bowan Park |
| Eulimore Rural Fire Brigade | 30x Volunteer Firefighters, 1x Heavy Tanker, 1x Light Unit | Eugowra (East) |
| Canobolas Rural Fire Brigade | 30x Volunteer Firefighters, 1x Heavy Tanker, 1x Light Unit | Canobolas |
| Toogong Rural Fire Brigade | 30x Volunteer Firefighters, 1x Heavy Tanker, 1x Light Unit | Toogong |
| Trajere Rural Fire Brigade | 30x Volunteer Firefighters, 1x Heavy Tanker, 1x Light Unit | Eugowra (South) |
| Mogong Rural Fire Brigade | 30x Volunteer Firefighters, 1x Heavy Tanker, 1x Light Unit | Canowindra (Northeast) |
| Mandagery Rural Fire Brigade | 30x Volunteer Firefighters, 1x Medium Tanker, 1x Light Tanker | Mandagery |
| March Rural Fire Brigade | 30x Volunteer Firefighters, 1x Medium Tanker, 1x Light Tanker | March |
| Garra Rural Fire Brigade | 30x Volunteer Firefighters, 1x Medium Tanker, 1x Light Unit | Garra |
| Murga Rural Fire Brigade | 30x Volunteer Firefighters, 1x Medium Tanker, 1x Light Unit | Murga |
| Cheesemans Creek Rural Fire Brigade | 30x Volunteer Firefighters, 1x Medium Tanker, 1x Light Unit | Borenore (North) |
| Gamboola Rural Fire Brigade | 30x Volunteer Firefighters, 1x Medium Tanker, 1x Light Unit | Molong (East) |
| Red Hill-Cabonne Rural Fire Brigade | 30x Volunteer Firefighters, 1x Medium Tanker, 1x Light Unit | Manildra (West) |
| Gumble Rural Fire Brigade | 30x Volunteer Firefighters, 1x Medium Tanker, 1x Light Unit | Gumble |
| Gregra Rural Fire Brigade | 30x Volunteer Firefighters, 1x Light Tanker, 1x Light Unit | Manildra (East) |
| Unit: | Size: | Base: |
|---|---|---|
| South West Slopes District Headquarters | 15x Permanent Personnel, 1x Command Vehicle | Cunningar |
| South West Slopes Support Rural Fire Brigade | 100x Volunteer Firefighters, 1x Heavy Tanker, 1x Bulk Water Carrier, 1x Transport Bus, 1x Logistics Support Vehicle, 1x Logistics Truck, 2x Command Vehicles | Cunningar |
| South West Slopes Communications Rural Fire Brigade | 30x Volunteer Firefighters, 1x Communications Truck, 1x Command Vehicle | Cunningar |
| Brigade: | Size: | Location: |
|---|---|---|
| Stockinbingal Rural Fire Brigade | 45x Volunteer Firefighters, 2x Heavy Tankers, 1x Light Unit | Stockinbingal |
| Wallendbeen Rural Fire Brigade | 45x Volunteer Firefighters, 2x Heavy Tankers, 1x Light Unit | Wallendbeen |
| Cullinga Rural Fire Brigade | 45x Volunteer Firefighters, 2x Heavy Tankers, 1x Light Unit | Cootamundra (East) |
| Cootamundra (Forsyth) Rural Fire Brigade | 45x Volunteer Firefighters, 2x Heavy Tankers, 1x Light Unit | Cootamundra (North) |
| Cooneys Creek Rural Fire Brigade | 45x Volunteer Firefighters, 2x Heavy Tankers, 1x Light Unit | Cootamundra (Southeast) |
| Muttama Rural Fire Brigade | 45x Volunteer Firefighters, 2x Heavy Tankers, 1x Light Unit | Muttama |
| Coolac Rural Fire Brigade | 45x Volunteer Firefighters, 2x Heavy Tankers, 1x Light Unit | Coolac |
| Mundarlo Rural Fire Brigade | 45x Volunteer Firefighters, 2x Heavy Tankers, 1x Light Unit | Mundarlo |
| Nangus Rural Fire Brigade | 45x Volunteer Firefighters, 2x Heavy Tankers, 1x Light Unit | Nangus |
| Tumblong Rural Fire Brigade | 45x Volunteer Firefighters, 2x Heavy Tankers, 1x Light Unit | Tumblong |
| South Gundagai Rural Fire Brigade | 45x Volunteer Firefighters, 2x Heavy Tankers, 1x Light Unit | South Gundagai |
| North Gundagai Rural Fire Brigade | 45x Volunteer Firefighters, 2x Heavy Tankers, 1x Light Unit | Gundagai |
| Darbalara Rural Fire Brigade | 45x Volunteer Firefighters, 2x Heavy Tankers, 1x Light Unit | Darbalara |
| Adjungbilly Rural Fire Brigade | 45x Volunteer Firefighters, 2x Heavy Tankers, 1x Light Unit | Adjungbilly (Central) |
| Tumorrama Rural Fire Brigade | 45x Volunteer Firefighters, 2x Heavy Tankers, 1x Light Unit | Adjungbilly (South) |
| Cootamundra Rural Fire Brigade | 45x Volunteer Firefighters, 2x Heavy Tankers, 1x Bulk Water Carrier | Cootamundra (Central) |
| Brigade: | Size: | Location: |
|---|---|---|
| Bribbaree-Young Rural Fire Brigade | 30x Volunteer Firefighters, 1x Heavy Tanker, 1x Light Unit | Bribbaree |
| Tubbul Rural Fire Brigade | 30x Volunteer Firefighters, 1x Heavy Tanker, 1x Light Unit | Tubbul |
| Milvale Rural Fire Brigade | 30x Volunteer Firefighters, 1x Heavy Tanker, 1x Light Unit | Milvale |
| Koorawatha Town Rural Fire Brigade | 30x Volunteer Firefighters, 1x Heavy Tanker, 1x Light Unit | Koorawatha |
| Bendick Murrell Rural Fire Brigade | 30x Volunteer Firefighters, 1x Heavy Tanker, 1x Light Unit | Bendick Murrell |
| Monteagle Rural Fire Brigade | 30x Volunteer Firefighters, 1x Heavy Tanker, 1x Light Unit | Monteagle |
| Young Rural Fire Brigade | 30x Volunteer Firefighters, 1x Heavy Tanker, 1x Light Unit | Young (West) |
| Wambanumba Rural Fire Brigade | 30x Volunteer Firefighters, 1x Heavy Tanker, 1x Light Unit | Young (East) |
| Boara Rural Fire Brigade | 30x Volunteer Firefighters, 1x Heavy Tanker, 1x Light Unit | Young (South) |
| Wombat Rural Fire Brigade | 30x Volunteer Firefighters, 1x Heavy Tanker, 1x Light Unit | Wombat |
| Kingsvale Rural Fire Brigade | 30x Volunteer Firefighters, 1x Heavy Tanker, 1x Light Unit | Kingsvale |
| Barwang Rural Fire Brigade | 30x Volunteer Firefighters, 1x Heavy Tanker, 1x Light Unit | Barwang |
| Murringo Rural Fire Brigade | 30x Volunteer Firefighters, 1x Heavy Tanker, 1x Light Unit | Murringo |
| Kenyu-Goba Rural Fire Brigade | 30x Volunteer Firefighters, 1x Heavy Tanker, 1x Light Unit | Boorowa (North) |
| Frogmore Rural Fire Brigade | 30x Volunteer Firefighters, 1x Heavy Tanker, 1x Light Unit | Frogmore |
| Rugby Rural Fire Brigade | 30x Volunteer Firefighters, 1x Heavy Tanker, 1x Light Unit | Rugby |
| Rye Park Rural Fire Brigade | 30x Volunteer Firefighters, 1x Heavy Tanker, 1x Light Unit | Rye Park |
| Boorowa Rural Fire Brigade | 30x Volunteer Firefighters, 1x Heavy Tanker, 1x Light Unit | Boorowa (South) |
| Galong Rural Fire Brigade | 30x Volunteer Firefighters, 1x Heavy Tanker, 1x Light Unit | Galong |
| McMahons Reef Rural Fire Brigade | 30x Volunteer Firefighters, 1x Heavy Tanker, 1x Light Unit | McMahons Reef |
| Cunningar Rural Fire Brigade | 30x Volunteer Firefighters, 1x Heavy Tanker, 1x Light Unit | Cunningar |
| Demondrille Rural Fire Brigade | 30x Volunteer Firefighters, 1x Heavy Tanker, 1x Light Unit | Harden |
| Jugiong Rural Fire Brigade | 30x Volunteer Firefighters, 1x Heavy Tanker, 1x Light Unit | Jugiong |
| Unit: | Size: | Base: |
|---|---|---|
| Mid Lachlan Valley District Headquarters | 15x Permanent Personnel, 1x Command Vehicle | Forbes |
| Mid Lachlan Valley Support Rural Fire Brigade | 100x Volunteer Firefighters, 1x Heavy Tanker, 1x Bulk Water Carrier, 1x Transport Bus, 1x Logistics Support Vehicle, 1x Logistics Truck, 2x Command Vehicles | Forbes |
| Mid Lachlan Valley Communications Rural Fire Brigade | 30x Volunteer Firefighters, 1x Communications Truck, 1x Command Vehicle | Forbes |
| Brigade: | Size: | Location: |
|---|---|---|
| Mickibri Rural Fire Brigade | 45x Volunteer Firefighters, 1x Heavy Tanker, 1x Light Tanker, 1x Bulk Water Carrier | Peak Hill (South) |
| Tullamore Village Rural Fire Brigade | 30x Volunteer Firefighters, 1x Heavy Tanker, 1x Light Tanker | Tullamore (South) |
| Peak Hill Rural Fire Brigade | 30x Volunteer Firefighters, 1x Heavy Tanker, 1x Light Tanker | Peak Hill (Central) |
| The Troffs Rural Fire Brigade | 30x Volunteer Firefighters, 1x Heavy Tanker, 1x Light Tanker | Trundle (North) |
| Trundle Village Rural Fire Brigade | 30x Volunteer Firefighters, 1x Heavy Tanker, 1x Light Tanker | Trundle (South) |
| Bogan Gate Village Rural Fire Brigade | 30x Volunteer Firefighters, 1x Heavy Tanker, 1x Light Tanker | Bogan Gate (Central) |
| Gunningbland Rural Fire Brigade | 30x Volunteer Firefighters, 1x Heavy Tanker, 1x Light Tanker | Gunningbland |
| Parkes Rural Fire Brigade | 30x Volunteer Firefighters, 1x Heavy Tanker, 1x Light Tanker | Parkes (Central) |
| Alectown Rural Fire Brigade | 30x Volunteer Firefighters, 1x Heavy Tanker, 1x Light Tanker | Alectown |
| West Parkes Rural Fire Brigade | 30x Volunteer Firefighters, 1x Heavy Tanker, 1x Light Tanker | Cooks Myalls |
| Cookamidgera Rural Fire Brigade | 30x Volunteer Firefighters, 1x Heavy Tanker, 1x Light Tanker | Cookamidgera |
| Alagala Road Rural Fire Brigade | 30x Volunteer Firefighters, 1x Heavy Tanker, 1x Light Tanker | Tullamore (North) |
| Ormond-Mungery Rural Fire Brigade | 30x Volunteer Firefighters, 1x Heavy Tanker, 1x Light Tanker | Peak Hill (North) |
| Waratah Rural Fire Brigade | 30x Volunteer Firefighters, 1x Heavy Tanker, 1x Light Tanker | Peak Hill |
| Sandy Creek-Parkes Rural Fire Brigade | 30x Volunteer Firefighters, 1x Heavy Tanker, 1x Light Tanker | Tullamore (East) |
| Backwater-Parkes Rural Fire Brigade | 30x Volunteer Firefighters, 1x Heavy Tanker, 1x Light Tanker | Trundle (West) |
| Blowclear-Parkes Rural Fire Brigade | 30x Volunteer Firefighters, 1x Heavy Tanker, 1x Light Tanker | Bogan Gate (North) |
| Monomie Rural Fire Brigade | 30x Volunteer Firefighters, 1x Heavy Tanker, 1x Light Tanker | Bogan Gate (West) |
| South Bogan Gate Rural Fire Brigade | 30x Volunteer Firefighters, 1x Heavy Tanker, 1x Light Tanker | Bogan Gate (South) |
| Coradgery Rural Fire Brigade | 30x Volunteer Firefighters, 1x Heavy Tanker, 1x Light Tanker | Goonumbla (North) |
| Coobang Rural Fire Brigade | 30x Volunteer Firefighters, 1x Heavy Tanker, 1x Light Tanker | Parkes (North) |
| Tichborne Rural Fire Brigade | 30x Volunteer Firefighters, 1x Heavy Tanker, 1x Light Tanker | Tichborne |
| East Parkes Rural Fire Brigade | 30x Volunteer Firefighters, 1x Heavy Tanker, 1x Light Tanker | Parkes (East) |
| Bruie Plains Rural Fire Brigade | 30x Volunteer Firefighters, 1x Heavy Tanker, 1x Light Tanker | Bruie Plains |
| Brigade: | Size: | Location: |
|---|---|---|
| Ootha Rural Fire Brigade | 30x Volunteer Firefighters, 1x Heavy Tanker, 1x Light Tanker | Ootha |
| Monwonga Rural Fire Brigade | 30x Volunteer Firefighters, 1x Heavy Tanker, 1x Light Tanker | Warroo (North) |
| Bedgerebong Rural Fire Brigade | 30x Volunteer Firefighters, 1x Heavy Tanker, 1x Light Tanker | Bedgerebong |
| Lake Rural Fire Brigade | 30x Volunteer Firefighters, 1x Heavy Tanker, 1x Light Tanker | Corinella (South) |
| Weelong Rural Fire Brigade | 30x Volunteer Firefighters, 1x Heavy Tanker, 1x Light Tanker | Wirrinya (North) |
| Garema Rural Fire Brigade | 30x Volunteer Firefighters, 1x Heavy Tanker, 1x Light Tanker | Ooma (West) |
| Ooma Rural Fire Brigade | 30x Volunteer Firefighters, 1x Heavy Tanker, 1x Light Tanker | Ooma (Central) |
| Forbes-Central Rural Fire Brigade | 30x Volunteer Firefighters, 1x Heavy Tanker, 1x Light Tanker | Forbes (Central) |
| Cumbijowa Rural Fire Brigade | 30x Volunteer Firefighters, 1x Heavy Tanker, 1x Light Tanker | Forbes (East) |
| Bandon Rural Fire Brigade | 30x Volunteer Firefighters, 1x Heavy Tanker, 1x Light Tanker | Paytens Bridge |
| Mulyandry Rural Fire Brigade | 30x Volunteer Firefighters, 1x Heavy Tanker, 1x Light Tanker | Mulyandry |
| Vychan Rural Fire Brigade | 30x Volunteer Firefighters, 1x Heavy Tanker, 1x Light Tanker | Eugowra (West) |
| Eugowra North Rural Fire Brigade | 30x Volunteer Firefighters, 1x Heavy Tanker, 1x Light Tanker | Eugowra (North) |
| Back Yamma Rural Fire Brigade | 30x Volunteer Firefighters, 1x Heavy Tanker, 1x Light Tanker | Daroobalgie |
| Bundaburrah Rural Fire Brigade | 30x Volunteer Firefighters, 1x Heavy Tanker, 1x Light Tanker | Forbes (South) |
| Carrawobitty Rural Fire Brigade | 30x Volunteer Firefighters, 1x Heavy Tanker, 1x Light Tanker | Forbes (West) |
| Corinella Rural Fire Brigade | 30x Volunteer Firefighters, 1x Heavy Tanker, 1x Light Tanker | Corinella (North) |
| Grawlin Rural Fire Brigade | 30x Volunteer Firefighters, 1x Heavy Tanker, 1x Light Tanker | Forbes (Southeast) |
| Gunning Gap Rural Fire Brigade | 30x Volunteer Firefighters, 1x Heavy Tanker, 1x Light Tanker | Gunning Gap (West) |
| Jemalong Rural Fire Brigade | 30x Volunteer Firefighters, 1x Heavy Tanker, 1x Light Tanker | Jemalong |
| Nanima Rural Fire Brigade | 30x Volunteer Firefighters, 1x Heavy Tanker, 1x Light Tanker | Eugowra (Central) |
| Ooma-North Rural Fire Brigade | 30x Volunteer Firefighters, 1x Heavy Tanker, 1x Light Tanker | Ooma (North) |
| Warroo Rural Fire Brigade | 30x Volunteer Firefighters, 1x Heavy Tanker, 1x Light Tanker | Warroo (South) |
| Wirrinya Rural Fire Brigade | 30x Volunteer Firefighters, 1x Heavy Tanker, 1x Light Tanker | Wirrinya (Central) |
| Yarragong-Forbes Rural Fire Brigade | 30x Volunteer Firefighters, 1x Heavy Tanker, 1x Light Tanker | Gunning Gap (East) |
| Brigade: | Size: | Location: |
|---|---|---|
| Lachlan Communications Rural Fire Brigade | 30x Volunteer Firefighters, 1x Communications Truck, 1x Command Vehicle | Condobolin (Central) |
| Tottenham Rural Fire Brigade | 30x Volunteer Firefighters, 1x Heavy Tanker, 1x Light Tanker | Tottenham (Central) |
| Albert Rural Fire Brigade | 30x Volunteer Firefighters, 1x Heavy Tanker, 1x Light Tanker | Albert |
| Fifield Rural Fire Brigade | 30x Volunteer Firefighters, 1x Heavy Tanker, 1x Light Tanker | Fifield (Central) |
| Derriwong Rural Fire Brigade | 30x Volunteer Firefighters, 1x Heavy Tanker, 1x Light Tanker | Derriwong |
| Condobolin Rural Fire Brigade | 30x Volunteer Firefighters, 1x Heavy Tanker, 1x Light Tanker | Condobolin (Central) |
| Tullibigeal Rural Fire Brigade | 30x Volunteer Firefighters, 1x Heavy Tanker, 1x Light Tanker | Tullibigeal (Central) |
| Burcher Rural Fire Brigade | 30x Volunteer Firefighters, 1x Heavy Tanker, 1x Light Tanker | Burcher |
| Avondale Rural Fire Brigade | 30x Volunteer Firefighters, 1x Heavy Tanker, 1x Light Tanker | Condobolin (Southeast) |
| Baratta Rural Fire Brigade | 30x Volunteer Firefighters, 1x Heavy Tanker, 1x Light Tanker | Condobolin (Central-Northwest) |
| Boona-Lachlan Rural Fire Brigade | 30x Volunteer Firefighters, 1x Heavy Tanker, 1x Light Tanker | Boona Mount |
| Burgooney Rural Fire Brigade | 30x Volunteer Firefighters, 1x Heavy Tanker, 1x Light Tanker | Tullibigeal (West) |
| Curlew Rural Fire Brigade | 30x Volunteer Firefighters, 1x Heavy Tanker, 1x Light Tanker | Lake Cargelligo (Northeast) |
| Curriba Rural Fire Brigade | 30x Volunteer Firefighters, 1x Heavy Tanker, 1x Light Tanker | Tullibigeal (South) |
| Fairholme Rural Fire Brigade | 30x Volunteer Firefighters, 1x Heavy Tanker, 1x Light Tanker | Fairholme (North) |
| Jumble Springs Rural Fire Brigade | 30x Volunteer Firefighters, 1x Heavy Tanker, 1x Light Tanker | Tullamore (Northwest) |
| Kelvin Grove Rural Fire Brigade | 30x Volunteer Firefighters, 1x Heavy Tanker, 1x Light Tanker | Tullamore (Southwest) |
| Lake Cargelligo Rural Fire Brigade | 30x Volunteer Firefighters, 1x Heavy Tanker, 1x Light Tanker | Lake Cargelligo (Central) |
| Manna Mount Rural Fire Brigade | 30x Volunteer Firefighters, 1x Heavy Tanker, 1x Light Tanker | Fairholme (South) |
| Melrose Plains Rural Fire Brigade | 30x Volunteer Firefighters, 1x Heavy Tanker, 1x Light Tanker | Fifield (West) |
| Mineral Hill Rural Fire Brigade | 30x Volunteer Firefighters, 1x Heavy Tanker, 1x Light Tanker | Condobolin (Northeast) |
| Mogandale Rural Fire Brigade | 30x Volunteer Firefighters, 1x Heavy Tanker, 1x Light Tanker | Condobolin (Central-Northeast) |
| Miamley Rural Fire Brigade | 30x Volunteer Firefighters, 1x Heavy Tanker, 1x Light Tanker | Miamley |
| Top Woodlands Rural Fire Brigade | 30x Volunteer Firefighters, 1x Heavy Tanker, 1x Light Tanker | Tottenham (South) |
| Triangle Rural Fire Brigade | 30x Volunteer Firefighters, 1x Heavy Tanker, 1x Light Tanker | Condobolin (West) |
| Vermont Hill North Rural Fire Brigade | 30x Volunteer Firefighters, 1x Heavy Tanker, 1x Light Tanker | Condobolin (Far Northwest) |
| Vermont Hill South Rural Fire Brigade | 30x Volunteer Firefighters, 1x Heavy Tanker, 1x Light Tanker | Condobolin (Northwest) |
| Wallaroi Rural Fire Brigade | 30x Volunteer Firefighters, 1x Heavy Tanker, 1x Light Tanker | Condobolin (Southwest) |
| West Milby Rural Fire Brigade | 30x Volunteer Firefighters, 1x Heavy Tanker, 1x Light Tanker | Tullibigeal (East) |
| Yaddra Rural Fire Brigade | 30x Volunteer Firefighters, 1x Heavy Tanker, 1x Light Tanker | Kiacatoo (South) |
| Yambora Rural Fire Brigade | 30x Volunteer Firefighters, 1x Heavy Tanker, 1x Light Tanker | Tullamore (West) |
| Yarnel Rural Fire Brigade | 30x Volunteer Firefighters, 1x Heavy Tanker, 1x Light Tanker | Condobolin (East) |
| Yelkin Rural Fire Brigade | 30x Volunteer Firefighters, 1x Heavy Tanker, 1x Light Tanker | Lake Cargelligo (South) |
| Brewer/Bootoowa Rural Fire Brigade | 30x Volunteer Firefighters, 1x Heavy Tanker, 1x Light Tanker | Lake Cargelligo (Southwest) |
| Brigade: | Size: | Location: |
|---|---|---|
| West Wirrinya Rural Fire Brigade | 30x Volunteer Firefighters, 1x Heavy Tanker, 1x Light Tanker | Wirrinya (South) |
| Caragabal Rural Fire Brigade | 30x Volunteer Firefighters, 1x Heavy Tanker, 1x Light Tanker | Caragabal |
| Quandialla Rural Fire Brigade | 30x Volunteer Firefighters, 1x Heavy Tanker, 1x Light Tanker | Quandialla |
| Bimbi Rural Fire Brigade | 30x Volunteer Firefighters, 1x Heavy Tanker, 1x Light Tanker | Bimbi |
| Piney Range Rural Fire Brigade | 30x Volunteer Firefighters, 1x Heavy Tanker, 1x Light Tanker | Piney Range |
| Grenfell Rural Fire Brigade | 30x Volunteer Firefighters, 1x Heavy Tanker, 1x Light Tanker | Grenfell (Central) |
| Emu Creek (Mary Gilmore Way) Rural Fire Brigade | 30x Volunteer Firefighters, 1x Heavy Tanker, 1x Light Tanker | Grenfell (South) |
| Emu Creek (Henry Lawson Way) Rural Fire Brigade | 30x Volunteer Firefighters, 1x Heavy Tanker, 1x Light Tanker | Grenfell (Southeast) |
| Cowra Road Rural Fire Brigade | 30x Volunteer Firefighters, 1x Heavy Tanker, 1x Light Tanker | Grenfell (East) |
| Greenethorpe Rural Fire Brigade | 30x Volunteer Firefighters, 1x Heavy Tanker, 1x Light Tanker | Greenethorpe (Central) |
| Bogolong-Eualdrie Rural Fire Brigade | 30x Volunteer Firefighters, 1x Heavy Tanker, 1x Light Tanker | Grenfell (West) |
| Glenelg Rural Fire Brigade | 30x Volunteer Firefighters, 1x Heavy Tanker, 1x Light Tanker | Glenelg |
| Pullabooka Rural Fire Brigade | 30x Volunteer Firefighters, 1x Heavy Tanker, 1x Light Tanker | Pullabooka |
| Warraderry Rural Fire Brigade | 30x Volunteer Firefighters, 1x Heavy Tanker, 1x Light Tanker | Warraderry |
| Brundah Rural Fire Brigade | 30x Volunteer Firefighters, 1x Heavy Tanker, 1x Light Tanker | Greenethorpe (North) |
| Bumbaldry Rural Fire Brigade | 30x Volunteer Firefighters, 1x Heavy Tanker, 1x Light Tanker | Bumbaldry |
| Unit: | Size: | Base: |
|---|---|---|
| Far West District Headquarters | 15x Permanent Personnel, 1x Command Vehicle | Cobar |
| Far West Support Rural Fire Brigade | 100x Volunteer Firefighters, 1x Heavy Tanker, 1x Bulk Water Carrier, 1x Transport Bus, 1x Logistics Support Vehicle, 1x Logistics Truck, 2x Command Vehicles | Cobar |
| Far West Communications Rural Fire Brigade | 30x Volunteer Firefighters, 1x Communications Truck, 1x Command Vehicle | Cobar |
| Brigade: | Size: | Location: |
|---|---|---|
| Barwon Darling Communications Rural Fire Brigade | 30x Volunteer Firefighters, 1x Communications Truck, 1x Command Vehicle | North Bourke (South) |
| Louth Rural Fire Brigade | 60x Volunteer Firefighters, 1x Heavy Tanker, 1x Light Tanker, 1x Rescue Truck, 1x Rescue Support Vehicle | Louth |
| Bourke Rural Fire Brigade | 30x Volunteer Firefighters, 1x Heavy Tanker, 1x Light Tanker | North Bourke (South) |
| Enngonia Rural Fire Brigade | 30x Volunteer Firefighters, 1x Heavy Tanker, 1x Light Unit | Enngonia |
| Wampralea Rural Fire Brigade | 30x Volunteer Firefighters, 1x Heavy Tanker, 1x Light Unit | Wanaaring (Central) |
| Fords Bridge Rural Fire Brigade | 30x Volunteer Firefighters, 1x Heavy Tanker, 1x Light Unit | Fords Bridge |
| Pera Bore Rural Fire Brigade | 30x Volunteer Firefighters, 1x Heavy Tanker, 1x Light Unit | North Bourke (Southwest) |
| Byrock Rural Fire Brigade | 30x Volunteer Firefighters, 1x Heavy Tanker, 1x Light Unit | Byrock |
| Yantabulla Rural Fire Brigade | 30x Volunteer Firefighters, 1x Heavy Tanker, 1x Light Unit | Yantabulla |
| Brigade: | Size: | Location: |
|---|---|---|
| Wilcannia (Rural) Rural Fire Brigade | 45x Volunteer Firefighters, 1x Heavy Tanker, 1x Light Unit, 1x Light Boat | Tilpa |
| Cobar Rural Fire Brigade | 30x Volunteer Firefighters, 1x Heavy Tanker, 1x Light Tanker | Cobar (Central) |
| Euabalong Central Rural Fire Brigade | 30x Volunteer Firefighters, 1x Heavy Tanker, 1x Light Tanker | Euabalong West |
| Noona Rural Fire Brigade | 30x Volunteer Firefighters, 1x Heavy Tanker, 1x Light Unit | Noona |
| Tindarey Rural Fire Brigade | 30x Volunteer Firefighters, 1x Heavy Tanker, 1x Light Unit | Tindarey |
| Geandale Rural Fire Brigade | 30x Volunteer Firefighters, 1x Heavy Tanker, 1x Light Unit | Cobar (South) |
| Canbelego Rural Fire Brigade | 30x Volunteer Firefighters, 1x Heavy Tanker, 1x Light Unit | Canbelego (West) |
| Sandy Creek-Cobar Rural Fire Brigade | 30x Volunteer Firefighters, 1x Heavy Tanker, 1x Light Unit | Sandy Creek |
| Nymagee Rural Fire Brigade | 30x Volunteer Firefighters, 1x Heavy Tanker, 1x Light Unit | Nymagee |
| Eremerang Rural Fire Brigade | 30x Volunteer Firefighters, 1x Heavy Tanker, 1x Light Unit | Eremerang |
| Mount Hope Rural Fire Brigade | 30x Volunteer Firefighters, 1x Heavy Tanker, 1x Light Unit | Mount Hope |
| Euabalong (Rural) Rural Fire Brigade | 30x Volunteer Firefighters, 1x Heavy Tanker, 1x Light Unit | Euabalong |
| Bulla Rural Fire Brigade | 30x Volunteer Firefighters, 1x Heavy Tanker, 1x Light Unit | Bulla |
| Cubba Rural Fire Brigade | 30x Volunteer Firefighters, 1x Heavy Tanker, 1x Light Unit | Cubba |
| Irymple Rural Fire Brigade | 30x Volunteer Firefighters, 1x Heavy Tanker, 1x Light Unit | Irymple |
| Kerrigundi Rural Fire Brigade | 30x Volunteer Firefighters, 1x Heavy Tanker, 1x Light Unit | Kerrigundi |
| Kulwin Rural Fire Brigade | 30x Volunteer Firefighters, 1x Heavy Tanker, 1x Light Unit | Kulwin |
| Louth Road Rural Fire Brigade | 30x Volunteer Firefighters, 1x Heavy Tanker, 1x Light Unit | Cobar (North) |
| Brigade: | Size: | Location: |
|---|---|---|
| Goodooga Rural Fire Brigade | 30x Volunteer Firefighters, 1x Heavy Tanker, 1x Light Unit | Goodooga |
| New Angledool Rural Fire Brigade | 30x Volunteer Firefighters, 1x Heavy Tanker, 1x Light Unit | Angledool |
| Weilmoringle Rural Fire Brigade | 30x Volunteer Firefighters, 1x Heavy Tanker, 1x Light Unit | Weilmoringle |
| Twin Rivers Rural Fire Brigade | 30x Volunteer Firefighters, 1x Heavy Tanker, 1x Light Unit | Brewarrina (West) |
| Narran Lake Rural Fire Brigade | 30x Volunteer Firefighters, 1x Heavy Tanker, 1x Light Unit | Brewarrina (East) |
| Gongolgon Rural Fire Brigade | 30x Volunteer Firefighters, 1x Heavy Tanker, 1x Light Unit | Gongolgon |
| Brewarrina Rural Fire Brigade | 30x Volunteer Firefighters, 1x Heavy Tanker, 1x Bulk Water Carrier | Brewarrina (Central) |
| Unit: | Size: | Base: |
|---|---|---|
| Western Border District Headquarters | 15x Permanent Personnel, 1x Command Vehicle | Broken Hill |
| Western Border Support Rural Fire Brigade | 100x Volunteer Firefighters, 1x Heavy Tanker, 1x Bulk Water Carrier, 1x Transport Bus, 1x Logistics Support Vehicle, 1x Logistics Truck, 2x Command Vehicles | Broken Hill |
| Western Border Communications Rural Fire Brigade | 30x Volunteer Firefighters, 1x Communications Truck, 1x Command Vehicle | Broken Hill |
| Brigade: | Size: | Location: |
|---|---|---|
| Menindee Rural Fire Brigade | 75x Volunteer Firefighters, 1x Heavy Tanker, 1x Light Tanker, 1x Rescue Truck, 1x Rescue Support Vehicle, 1x Light Boat | Menindee |
| White Cliffs Rural Fire Brigade | 30x Volunteer Firefighters, 1x Heavy Tanker, 1x Light Unit | White Cliffs |
| Wilcannia Rural Fire Brigade | 30x Volunteer Firefighters, 1x Heavy Tanker, 1x Light Unit | Wilcannia |
| Menindee (Sunset Strip) Rural Fire Brigade | 30x Volunteer Firefighters, 1x Heavy Tanker, 1x Light Unit | Sunset Strip |
| Ivanhoe Rural Fire Brigade | 30x Volunteer Firefighters, 1x Heavy Tanker, 1x Light Unit | Ivanhoe (Central) |
| Darnick Rural Fire Brigade | 30x Volunteer Firefighters, 1x Heavy Tanker, 1x Light Unit | Ivanhoe (West) |
| Brigade: | Size: | Location: |
|---|---|---|
| Tibooburra Rural Fire Brigade | 30x Volunteer Firefighters, 1x Heavy Tanker, 1x Light Unit | Tibooburra |
| Silverton Rural Fire Brigade | 30x Volunteer Firefighters, 1x Heavy Tanker, 1x Light Unit | Silverton |
| Barrier Range Rural Fire Brigade | 30x Volunteer Firefighters, 1x Heavy Tanker, 1x Light Unit | Fowlers Gap |
| Netley Rural Fire Brigade | 30x Volunteer Firefighters, 1x Heavy Tanker, 1x Light Unit | Broken Hill (South) |
| Far West Rural Fire Brigade | 30x Volunteer Firefighters, 1x Heavy Tanker, 1x Light Unit | Broken Hill (West) |
| Koonenberry Rural Fire Brigade | 30x Volunteer Firefighters, 1x Heavy Tanker, 1x Light Unit | Packsaddle |
| Little Topar Rural Fire Brigade | 30x Volunteer Firefighters, 1x Heavy Tanker, 1x Light Unit | Little Topar |
| Wanaaring (Rural) Rural Fire Brigade | 30x Volunteer Firefighters, 1x Heavy Tanker, 1x Light Unit | Wanaaring (West) |
| Local Government Areas not covered by the Rural Fire Service: |
|
| Unit: | Size: | Base: |
|---|---|---|
| Greater Sydney Area Command Headquarters | 50x Permanent Personnel | Glendenning |
| Greater Sydney Mitigation Rural Fire Brigade | 165x Volunteer Firefighters, 1x Heavy Tanker, 1x Light Unit, 9x Logistics Support Vehicles | Regentville |
| Unit: | Size: | Base: |
|---|---|---|
| Northern Beaches District Headquarters | 15x Permanent Personnel, 1x Command Vehicle | Terrey Hills |
| Northern Beaches Support Rural Fire Brigade | 255x Volunteer Firefighters, 1x Medium Pumper, 1x Heavy Tanker, 2x Bulk Water Carriers, 7x Command Vehicles, 6x Logistics Support Vehicles | Terrey Hills |
| Northern Beaches Communications Rural Fire Brigade | 30x Volunteer Firefighters, 1x Communications Truck, 1x Command Vehicle | Terrey Hills |
| Northern Beaches Catering Rural Fire Brigade | 30x Volunteer Firefighters, 1x Catering Truck, 1x Command Vehicle | Terrey Hills |
| Brigade: | Size: | Location: |
|---|---|---|
| Davidson Rural Fire Brigade | 60x Volunteer Firefighters, 1x Heavy Tanker, 1x Light Tanker, 1x Light Unit, 1x Command Vehicle | Davidson |
| Scotland Island Rural Fire Brigade | 60x Volunteer Firefighters, 1x Light Tanker, 1x Light Unit, 1x Command Vehicle, 1x Fireboat | Scotland Island |
Terrey Hills Rural Fire Brigade
| 45x Volunteer Firefighters, 1x Medium Pumper, 1x Heavy Tanker, 1x Command Vehicle | Terrey Hills |
| Ingleside Rural Fire Brigade | 45x Volunteer Firefighters, 1x Medium Pumper, 1x Heavy Tanker, 1x Command Vehicle | Ingleside (East) |
| Belrose Rural Fire Brigade | 45x Volunteer Firefighters, 2x Heavy Tankers, 1x Command Vehicle | Belrose |
| Coal and Candle Rural Fire Brigade | 45x Volunteer Firefighters, 2x Heavy Tankers, 1x Command Vehicle | Terrey Hills (North) |
| Beacon Hill Rural Fire Brigade | 45x Volunteer Firefighters, 1x Heavy Tanker, 1x Light Tanker, 1x Command Vehicle | Beacon Hill |
| Tumbledown Dick Rural Fire Brigade | 45x Volunteer Firefighters, 1x Heavy Tanker, 1x Light Tanker, 1x Command Vehicle | Ingleside (West) |
| Duffys Forest Rural Fire Brigade | 45x Volunteer Firefighters, 1x Heavy Tanker, 1x Light Unit, 1x Command Vehicle | Duffys Forest |
| West Pittwater (Elvina) Rural Fire Brigade | 45x Volunteer Firefighters, 1x Light Tanker, 1x Command Vehicle, 1x Fireboat | Elvina Bay |
| Cottage Point Rural Fire Brigade | 30x Volunteer Firefighters, 1x Heavy Tanker, 1x Command Vehicle | Cottage Point |
| Mackerel Beach Rural Fire Brigade | 30x Volunteer Firefighters, 1x Light Tanker, 1x Light Boat | Great Mackerel Beach |
| Coasters Retreat Rural Fire Brigade | 30x Volunteer Firefighters, 1x Light Tanker, 1x Light Boat | Coasters Retreat |
| West Pittwater (Lovett) Rural Fire Brigade | 30x Volunteer Firefighters, 1x Light Tanker, 1x Light Boat | Lovett Bay |
| Unit: | Size: | Base: |
|---|---|---|
| Hornsby/Ku-ring-gai District Headquarters | 15x Permanent Personnel, 1x Command Vehicle | Hornsby Heights |
Hornsby/Ku-ring-gai Support Rural Fire Brigade
| 165x Volunteer Firefighters, 1x Heavy Tanker, 5x Command Vehicles, 1x Transport Bus, 4x Logistics Support Vehicles | Cowan |
| Hornsby/Ku-ring-gai Communications Rural Fire Brigade | 30x Volunteer Firefighters, 1x Communications Truck, 1x Command Vehicle | Cowan |
| Brigade: | Size: | Location: |
|---|---|---|
| Galston Rural Fire Brigade | 60x Volunteer Firefighters, 1x Medium Pumper, 1x Heavy Tanker, 1x Command Vehicle, 1x Bulk Water Carrier | Galston |
| Brooklyn-Hornsby Rural Fire Brigade | 60x Volunteer Firefighters, 1x Medium Pumper, 1x Heavy Tanker, 1x Command Vehicle, 1x Light Boat | Brooklyn |
| Ku-ring-gai Rural Fire Brigade | 60x Volunteer Firefighters, 2x Heavy Tankers, 1x Light Unit, 1x Command Vehicle | North Wahroonga |
| Wisemans Ferry Rural Fire Brigade | 60x Volunteer Firefighters, 1x Heavy Tanker, 1x Light Tanker, 1x Light Unit, 1x Light Boat | Wisemans Ferry (East) |
| Cherrybrook Rural Fire Brigade | 60x Volunteer Firefighters, 1x Heavy Tanker, 1x Light Tanker, 1x Rescue Truck, 1x Rescue Support Vehicle | Cherrybrook |
| Berowra Waters Rural Fire Brigade | 60x Volunteer Firefighters, 1x Fireboat, 2x Light Boats, 1x Command Vehicle | Berowra Heights |
| Milsons Passage Rural Fire Brigade | 60x Volunteer Firefighters, 1x Fireboat, 2x Light Boats, 1x Command Vehicle | Milsons Passage |
| Westleigh Rural Fire Brigade | 45x Volunteer Firefighters, 2x Heavy Tankers, 1x Command Vehicle | Westleigh |
| Arcadia Rural Fire Brigade | 45x Volunteer Firefighters, 2x Heavy Tankers, 1x Bulk Water Carrier | Arcadia |
| Dural Rural Fire Brigade | 45x Volunteer Firefighters, 1x Heavy Tanker, 1x Light Tanker, 1x Command Vehicle | Dural |
| Mount Kuring-gai Rural Fire Brigade | 45x Volunteer Firefighters, 1x Heavy Tanker, 1x Light Tanker, 1x Command Vehicle | Mount Colah |
| Muogamarra Rural Fire Brigade | 45x Volunteer Firefighters, 1x Heavy Tanker, 1x Light Tanker, 1x Command Vehicle | Cowan (South) |
| Hornsby Rural Fire Brigade | 45x Volunteer Firefighters, 1x Heavy Tanker, 1x Light Tanker, 1x Command Vehicle | Hornsby |
| Berowra Rural Fire Brigade | 45x Volunteer Firefighters, 1x Heavy Tanker, 1x Light Tanker, 1x Bulk Water Carrier | Berowra |
| Middle Dural Rural Fire Brigade | 45x Volunteer Firefighters, 1x Light Tanker, 1x Light Unit, 1x Command Vehicle | Middle Dural |
| Canoelands Rural Fire Brigade | 30x Volunteer Firefighters, 1x Heavy Tanker, 1x Light Tanker | Canoelands |
| Killara Rural Fire Brigade | 30x Volunteer Firefighters, 1x Heavy Tanker, 1x Light Tanker | East Killara |
| Hornsby Heights Rural Fire Brigade | 30x Volunteer Firefighters, 1x Heavy Tanker, 1x Command Vehicle | Hornsby Heights |
| Cowan Rural Fire Brigade | 30x Volunteer Firefighters, 1x Heavy Tanker, 1x Command Vehicle | Cowan (North) |
| Dangar Island Rural Fire Brigade | 30x Volunteer Firefighters, 1x Light Tanker, 1x Light Boat | Dangar Island |
| Unit: | Size: | Base: |
|---|---|---|
| The Hills District Headquarters | 15x Permanent Personnel, 1x Command Vehicle | Kenthurst |
| The Hills Support Rural Fire Brigade | 165x Volunteer Firefighters, 3x Heavy Tankers, 1x Medium Tanker, 1x Light Tanker, 5x Command Vehicles, 1x Light Boat | Kenthurst |
| The Hills Communications Rural Fire Brigade | 30x Volunteer Firefighters, 1x Communications Truck, 1x Command Vehicle | Kenthurst |
| The Hills Catering Rural Fire Brigade | 30x Volunteer Firefighters, 1x Catering Truck, 1x Command Vehicle | Kenthurst |
| Brigade: | Size: | Location: |
|---|---|---|
| Round Corner Rural Fire Brigade | 105x Volunteer Firefighters, 1x Heavy Tanker, 1x Medium Tanker, 1x Light Tanker, 1x Light Unit, 2x Bulk Water Carriers, 1x Command Vehicle | Kenthurst (South) |
| Kellyville Rural Fire Brigade | 90x Volunteer Firefighters, 1x Medium Pumper, 2x Heavy Tankers, 1x Rescue Truck, 1x Rescue Support Vehicle, 1x Command Vehicle | Kellyville |
| Rouse Hill Rural Fire Brigade | 75x Volunteer Firefighters, 1x Medium Pumper, 1x Heavy Tanker, 1x Medium Tanker, 1x Light Tanker, 1x Command Vehicle | Rouse Hill |
| Sackville North Rural Fire Brigade | 75x Volunteer Firefighters, 1x Heavy Tanker, 1x Light Tanker, 1x Light Unit, 1x Command Vehicle, 1x Light Boat | Sackville North |
| Kenthurst Rural Fire Brigade | 60x Volunteer Firefighters, 2x Heavy Tankers, 1x Light Tanker, 1x Command Vehicle | Kenthurst (North) |
| Glenorie Rural Fire Brigade | 60x Volunteer Firefighters, 2x Heavy Tankers, 1x Light Unit, 1x Command Vehicle | Glenorie (East) |
| Annangrove Rural Fire Brigade | 60x Volunteer Firefighters, 1x Heavy Tanker, 1x Light Tanker, 1x Light Unit, 1x Command Vehicle | Annangrove |
| Glenhaven Rural Fire Brigade | 60x Volunteer Firefighters, 1x Heavy Tanker, 1x Light Tanker, 1x Light Unit, 1x Command Vehicle | Glenhaven |
| Maroota Rural Fire Brigade | 45x Volunteer Firefighters, 1x Heavy Tanker, 1x Light Tanker, 1x Command Vehicle | Maroota |
| North Rocks Rural Fire Brigade | 45x Volunteer Firefighters, 1x Heavy Tanker, 1x Light Tanker, 1x Command Vehicle | Carlingford |
| Maroota South Rural Fire Brigade | 45x Volunteer Firefighters, 1x Heavy Tanker, 1x Light Unit, 1x Command Vehicle | South Maroota |
| Box Hill Rural Fire Brigade | 30x Volunteer Firefighters, 1x Heavy Tanker, 1x Light Tanker | Box Hill |
| Nelson Rural Fire Brigade | 30x Volunteer Firefighters, 1x Heavy Tanker, 1x Light Tanker | Nelson |
| Hillside-The Hills Rural Fire Brigade | 30x Volunteer Firefighters, 1x Heavy Tanker, 1x Light Unit | Glenorie (West) |
| Unit: | Size: | Base: |
|---|---|---|
| Hawkesbury District Headquarters | 15x Permanent Personnel, 1x Command Vehicle | Bligh Park |
| Hawkesbury Support Rural Fire Brigade | 100x Volunteer Firefighters, 1x Heavy Tanker, 1x Bulk Water Carrier, 1x Transport Bus, 1x Logistics Support Vehicle, 1x Logistics Truck, 2x Command Vehicles | Bligh Park |
| Hawkesbury Communications Rural Fire Brigade | 30x Volunteer Firefighters, 1x Communications Truck, 1x Command Vehicle | Bligh Park |
| Brigade: | Size: | Location: |
|---|---|---|
| Oakville Rural Fire Brigade | 60x Volunteer Firefighters, 1x Medium Pumper, 2x Heavy Tankers, 1x Command Vehicle | Oakville |
| Glossodia Rural Fire Brigade | 60x Volunteer Firefighters, 1x Medium Pumper, 1x Heavy Tanker, 1x Light Tanker, 1x Command Vehicle | Glossodia |
| Bilpin Rural Fire Brigade | 45x Volunteer Firefighters, 2x Heavy Tankers, 1x Light Unit | Bilpin |
| Tennyson Rural Fire Brigade | 45x Volunteer Firefighters, 2x Heavy Tankers, 1x Light Tanker | Tennyson |
| East Kurrajong Rural Fire Brigade | 45x Volunteer Firefighters, 1x Heavy Tanker, 1x Light Tanker, 1x Command Vehicle | East Kurrajong |
| Kurrajong-Hawkesbury Rural Fire Brigade | 45x Volunteer Firefighters, 1x Heavy Tanker, 1x Light Tanker, 1x Command Vehicle | Kurrajong |
| Colo Heights Rural Fire Brigade | 45x Volunteer Firefighters, 1x Heavy Tanker, 1x Light Tanker, 1x Command Vehicle | Colo Heights |
| Lower Macdonald Rural Fire Brigade | 45x Volunteer Firefighters, 1x Heavy Tanker, 1x Light Tanker, 1x Command Vehicle | Wisemans Ferry (North) |
| Bligh Park Rural Fire Brigade | 45x Volunteer Firefighters, 1x Heavy Tanker, 1x Light Unit, 1x Bulk Water Carrier | Bligh Park |
| Lower Portland-Hawkesbury Rural Fire Brigade | 45x Volunteer Firefighters, 1x Heavy Tanker, 1x Light Unit, 1x Light Boat | Lower Portland |
| Wilberforce Rural Fire Brigade | 30x Volunteer Firefighters, 1x Heavy Tanker, 1x Light Tanker | Wilberforce |
| Kurrajong Heights Rural Fire Brigade | 30x Volunteer Firefighters, 1x Heavy Tanker, 1x Light Tanker | Kurrajong Heights |
| Blaxlands Ridge Rural Fire Brigade | 30x Volunteer Firefighters, 1x Heavy Tanker, 1x Light Tanker | Blaxlands Ridge |
| Yarramundi Rural Fire Brigade | 30x Volunteer Firefighters, 1x Heavy Tanker, 1x Light Unit | Yarramundi |
| Grose Wold Rural Fire Brigade | 30x Volunteer Firefighters, 1x Heavy Tanker, 1x Light Unit | Grose Wold |
| Grose Vale Rural Fire Brigade | 30x Volunteer Firefighters, 1x Heavy Tanker, 1x Light Unit | Grose Vale |
| Oakville (Scheyville) Rural Fire Brigade | 30x Volunteer Firefighters, 1x Heavy Tanker, 1x Light Unit | Scheyville |
| Grose Vale (Bowen Mountain) Rural Fire Brigade | 30x Volunteer Firefighters, 1x Heavy Tanker, 1x Light Unit | Bowen Mountain |
| Upper Colo Rural Fire Brigade | 30x Volunteer Firefighters, 1x Heavy Tanker, 1x Light Unit | Upper Colo |
| Mountain Lagoon Rural Fire Brigade | 30x Volunteer Firefighters, 1x Heavy Tanker, 1x Light Unit | Mountain Lagoon |
| Lower Macdonald (St Albans Road) Rural Fire Brigade | 30x Volunteer Firefighters, 1x Heavy Tanker, 1x Light Unit | Wisemans Ferry (West) |
| St Albans Rural Fire Brigade | 30x Volunteer Firefighters, 1x Heavy Tanker, 1x Light Unit | St Albans |
| Freemans Reach Rural Fire Brigade | 30x Volunteer Firefighters, 1x Heavy Tanker, 1x Command Vehicle | Freemans Reach |
| Ebenezer Rural Fire Brigade | 30x Volunteer Firefighters, 1x Heavy Tanker, 1x Command Vehicle | Ebenezer |
| Unit: | Size: | Base: |
|---|---|---|
| Cumberland District Headquarters | 15x Permanent Personnel, 1x Command Vehicle | Regentville |
| Cumberland Support Rural Fire Brigade | 100x Volunteer Firefighters, 1x Heavy Tanker, 1x Bulk Water Carrier, 1x Transport Bus, 1x Logistics Support Vehicle, 1x Logistics Truck, 2x Command Vehicles | Regentville |
| Cumberland Communications Rural Fire Brigade | 30x Volunteer Firefighters, 1x Communications Truck, 1x Command Vehicle | Regentville |
| Brigade: | Size: | Location: |
|---|---|---|
| Plumpton Rural Fire Brigade | 60x Volunteer Firefighters, 1x Medium Pumper, 1x Heavy Tanker, 1x Light Tanker, 1x Command Vehicle | Oakhurst |
| Horsley Park Rural Fire Brigade | 60x Volunteer Firefighters, 2x Heavy Tankers, 1x Light Unit, 1x Command Vehicle | Horsley Park |
| Schofields Rural Fire Brigade | 45x Volunteer Firefighters, 2x Heavy Tankers, 1x Command Vehicle | Schofields |
| Shanes Park Rural Fire Brigade | 45x Volunteer Firefighters, 1x Heavy Tanker, 1x Light Unit, 1x Command Vehicle | Shalvey |
| Marsden Park Rural Fire Brigade | 45x Volunteer Firefighters, 1x Heavy Tanker, 1x Light Unit, 1x Command Vehicle | Marsden Park |
| Eastern Creek Rural Fire Brigade | 30x Volunteer Firefighters, 1x Heavy Tanker, 1x Command Vehicle | Eastern Creek |
| Brigade: | Size: | Location: |
|---|---|---|
| Londonderry Rural Fire Brigade | 75x Volunteer Firefighters, 1x Medium Pumper, 2x Heavy Tankers, 1x Light Unit, 1x Command Vehicle | Londonderry |
| Regentville Rural Fire Brigade | 75x Volunteer Firefighters, 1x Medium Pumper, 2x Heavy Tankers, 1x Command Vehicle, 1x Light Boat | Regentville |
| Wallacia Rural Fire Brigade | 60x Volunteer Firefighters, 2x Heavy Tankers, 1x Light Tanker, 1x Command Vehicle | Wallacia |
| Erskine Park Rural Fire Brigade | 60x Volunteer Firefighters, 1x Heavy Tanker, 2x Light Tankers, 1x Command Vehicle | Orchard Hills (East) |
| Mulgoa Rural Fire Brigade | 45x Volunteer Firefighters, 1x Heavy Tanker, 1x Light Tanker, 1x Light Unit | Mulgoa |
| Orchard Hills Rural Fire Brigade | 45x Volunteer Firefighters, 1x Heavy Tanker, 1x Light Tanker, 1x Command Vehicle | Orchard Hills (West) |
| Llandilo Rural Fire Brigade | 45x Volunteer Firefighters, 1x Heavy Tanker, 1x Light Tanker, 1x Command Vehicle | Llandilo |
| Castlereagh-Penrith Rural Fire Brigade | 45x Volunteer Firefighters, 1x Heavy Tanker, 1x Light Tanker, 1x Command Vehicle | Castlereagh |
| Berkshire Park Rural Fire Brigade | 45x Volunteer Firefighters, 1x Heavy Tanker, 1x Light Tanker, 1x Command Vehicle | Berkshire Park |
| St Paul's Cadets Rural Fire Brigade | 15x Volunteer Firefighters, 1x Light Tanker | Cranebrook |
| Unit: | Size: | Base: |
|---|---|---|
| Blue Mountains District Headquarters | 15x Permanent Personnel, 1x Command Vehicle | Katoomba |
| Blue Mountains Support Rural Fire Brigade | 180x Volunteer Firefighters, 1x Medium Pumper, 1x Heavy Tanker, 1x Light Unit, 1x Bulk Water Carrier, 6x Command Vehicles, 1x Logistics Support Vehicle, 1x Catering Truck | Katoomba |
| Blue Mountains Communications Rural Fire Brigade | 30x Volunteer Firefighters, 1x Communications Truck, 1x Command Vehicle | Katoomba |
| Brigade: | Size: | Location: |
|---|---|---|
| Winmalee Rural Fire Brigade | 75x Volunteer Firefighters, 1x Medium Pumper, 2x Heavy Tankers, 1x Light Tanker, 1x Command Vehicle | Winmalee |
| Hazelbrook Rural Fire Brigade | 75x Volunteer Firefighters, 1x Heavy Tanker, 1x Medium Tanker, 2x Light Tankers, 1x Command Vehicle | Hazelbrook |
| Mount Wilson Rural Fire Brigade | 60x Volunteer Firefighters, 1x Medium Pumper, 1x Light Tanker, 1x Light Unit, 1x Command Vehicle | Mount Wilson |
| Katoomba-Leura Rural Fire Brigade | 60x Volunteer Firefighters, 1x Heavy Tanker, 2x Light Tankers, 1x Command Vehicle | Katoomba (North) |
| Glenbrook/Lapstone Rural Fire Brigade | 60x Volunteer Firefighters, 1x Heavy Tanker, 1x Light Tanker, 1x Light Unit, 1x Command Vehicle | Glenbrook |
| Megalong Valley Rural Fire Brigade | 60x Volunteer Firefighters, 1x Heavy Tanker, 1x Light Tanker, 1x Light Unit, 1x Command Vehicle | Megalong Valley |
| Mount Riverview Rural Fire Brigade | 45x Volunteer Firefighters, 1x Heavy Tanker, 1x Light Tanker, 1x Command Vehicle | Mount Riverview |
| Blaxland Rural Fire Brigade | 45x Volunteer Firefighters, 1x Heavy Tanker, 1x Light Tanker, 1x Command Vehicle | Blaxland |
| Warrimoo Rural Fire Brigade | 45x Volunteer Firefighters, 1x Heavy Tanker, 1x Light Tanker, 1x Command Vehicle | Warrimoo |
| Faulconbridge Rural Fire Brigade | 45x Volunteer Firefighters, 1x Heavy Tanker, 1x Light Tanker, 1x Command Vehicle | Faulconbridge |
| Woodford-Blue Mountains Rural Fire Brigade | 45x Volunteer Firefighters, 1x Heavy Tanker, 1x Light Tanker, 1x Command Vehicle | Woodford |
| Lawson-Blue Mountains Rural Fire Brigade | 45x Volunteer Firefighters, 1x Heavy Tanker, 1x Light Tanker, 1x Command Vehicle | Lawson |
| Bullaburra Rural Fire Brigade | 45x Volunteer Firefighters, 1x Heavy Tanker, 1x Light Tanker, 1x Command Vehicle | Bullaburra |
| Wentworth Falls Rural Fire Brigade | 45x Volunteer Firefighters, 1x Heavy Tanker, 1x Light Tanker, 1x Command Vehicle | Wentworth Falls |
| South Katoomba Rural Fire Brigade | 45x Volunteer Firefighters, 1x Heavy Tanker, 1x Light Tanker, 1x Command Vehicle | Katoomba (South) |
| Shipley Rural Fire Brigade | 45x Volunteer Firefighters, 1x Heavy Tanker, 1x Light Tanker, 1x Command Vehicle | Blackheath (South) |
| Blackheath Rural Fire Brigade | 45x Volunteer Firefighters, 1x Heavy Tanker, 1x Light Tanker, 1x Command Vehicle | Blackheath (North) |
| Medlow Bath Rural Fire Brigade | 45x Volunteer Firefighters, 1x Heavy Tanker, 1x Light Tanker, 1x Command Vehicle | Medlow Bath |
| Mount Victoria Rural Fire Brigade | 45x Volunteer Firefighters, 1x Heavy Tanker, 1x Light Tanker, 1x Command Vehicle | Mount Victoria |
| Bell Rural Fire Brigade | 45x Volunteer Firefighters, 1x Heavy Tanker, 1x Light Tanker, 1x Command Vehicle | Bell |
| Mount Tomah Rural Fire Brigade | 45x Volunteer Firefighters, 1x Heavy Tanker, 1x Light Tanker, 1x Command Vehicle | Mount Tomah |
| Mount Irvine Rural Fire Brigade | 45x Volunteer Firefighters, 1x Heavy Tanker, 1x Light Unit, 1x Bulk Water Carrier | Mount Irvine |
| Valley Heights Rural Fire Brigade | 45x Volunteer Firefighters, 1x Heavy Tanker, 1x Bulk Water Carrier, 1x Command Vehicle | Valley Heights |
| Linden Rural Fire Brigade | 30x Volunteer Firefighters, 1x Heavy Tanker, 1x Command Vehicle | Linden |
| Unit: | Size: | Base: |
|---|---|---|
| Macarthur District Headquarters | 15x Permanent Personnel, 1x Command Vehicle | Minto |
| Macarthur Support Rural Fire Brigade | 100x Volunteer Firefighters, 1x Heavy Tanker, 1x Bulk Water Carrier, 1x Transport Bus, 1x Logistics Support Vehicle, 1x Logistics Truck, 2x Command Vehicles | Minto |
| Macarthur Communications Rural Fire Brigade | 30x Volunteer Firefighters, 1x Communications Truck, 1x Command Vehicle | Minto |
| Macarthur Catering Rural Fire Brigade | 30x Volunteer Firefighters, 1x Catering Truck, 1x Command Vehicle | Minto |
| Macarthur District Remote Area Firefighting Team | 60x Volunteer Firefighters, 2x Logistics Support Vehicles, 2x Logistics Trucks | Minto |
| Brigade: | Size: | Location: |
|---|---|---|
| Lynwood Park Rural Fire Brigade | 75x Volunteer Firefighters, 2x Heavy Tankers, 1x Light Tanker, 1x Bulk Water Carrier, 1x Command Vehicle | St Helens Park |
| Wedderburn Rural Fire Brigade | 60x Volunteer Firefighters, 2x Heavy Tankers, 1x Light Unit, 1x Command Vehicle | Wedderburn |
| Minto Heights Rural Fire Brigade | 45x Volunteer Firefighters, 1x Heavy Tanker, 1x Light Tanker, 1x Command Vehicle | Minto Heights |
| Varroville Rural Fire Brigade | 45x Volunteer Firefighters, 1x Heavy Tanker, 1x Light Tanker, 1x Command Vehicle | Minto |
| Kentlyn Rural Fire Brigade | 45x Volunteer Firefighters, 1x Heavy Tanker, 1x Light Tanker, 1x Command Vehicle | Kentlyn |
| Menangle Park Rural Fire Brigade | 45x Volunteer Firefighters, 1x Heavy Tanker, 1x Light Tanker, 1x Command Vehicle | Menangle Park |
| Brigade: | Size: | Location: |
|---|---|---|
| Middleton Rural Fire Brigade | 75x Volunteer Firefighters, 2x Heavy Tankers, 1x Light Tanker, 2x Command Vehicles | West Hoxton |
| Casula Rural Fire Brigade | 60x Volunteer Firefighters, 1x Medium Pumper, 1x Heavy Tanker, 1x Light Unit, 1x Command Vehicle | Casula |
| Hoxton Park Rural Fire Brigade | 45x Volunteer Firefighters, 1x Heavy Tanker, 1x Light Tanker, 1x Command Vehicle | Hoxton Park |
| Luddenham Rural Fire Brigade | 30x Volunteer Firefighters, 1x Heavy Tanker, 1x Light Tanker | Luddenham |
| Bringelly Rural Fire Brigade | 30x Volunteer Firefighters, 1x Heavy Tanker, 1x Light Tanker | Bringelly |
| Kemps Creek Rural Fire Brigade | 30x Volunteer Firefighters, 1x Heavy Tanker, 1x Light Unit | Kemps Creek |
| Austral Rural Fire Brigade | 30x Volunteer Firefighters, 1x Heavy Tanker, 1x Light Unit | Austral |
| Brigade: | Size: | Location: |
|---|---|---|
| Narellan Rural Fire Brigade | 60x Volunteer Firefighters, 1x Medium Pumper, 1x Heavy Tanker, 1x Light Tanker, 1x Command Vehicle | Narellan |
| Camden West Rural Fire Brigade | 60x Volunteer Firefighters, 2x Heavy Tankers, 1x Light Tanker, 1x Command Vehicle | Grasmere |
| Gledswood Rural Fire Brigade | 60x Volunteer Firefighters, 2x Heavy Tankers, 1x Light Tanker, 1x Command Vehicle | Gledswood Hills |
| Cobbitty Rural Fire Brigade | 60x Volunteer Firefighters, 1x Heavy Tanker, 1x Light Tanker, 1x Light Unit, 1x Command Vehicle | Cobbitty |
| Leppington Rural Fire Brigade | 30x Volunteer Firefighters, 1x Heavy Tanker, 1x Light Tanker | Leppington |
| Catherine Field Rural Fire Brigade | 30x Volunteer Firefighters, 1x Heavy Tanker, 1x Light Tanker | Catherine Field |
| Unit: | Size: | Base: |
|---|---|---|
| Sutherland District Headquarters | 15x Permanent Personnel, 1x Command Vehicle | Royal National Park |
| Sutherland Support Rural Fire Brigade | 100x Volunteer Firefighters, 1x Heavy Tanker, 1x Bulk Water Carrier, 1x Transport Bus, 1x Logistics Support Vehicle, 1x Logistics Truck, 2x Command Vehicles | Royal National Park |
| Sutherland Communications Rural Fire Brigade | 30x Volunteer Firefighters, 1x Communications Truck, 1x Command Vehicle | Royal National Park |
| Brigade: | Size: | Location: |
|---|---|---|
| Heathcote Rural Fire Brigade | 75x Volunteer Firefighters, 2x Heavy Tankers, 1x Light Tanker, 1x Bulk Water Carrier, 1x Command Vehicle | Royal National Park |
| Woronora Rural Fire Brigade | 60x Volunteer Firefighters, 1x Fireboat, 2x Light Boats, 1x Command Vehicle | Woronora |
| Sandy Point Rural Fire Brigade | 45x Volunteer Firefighters, 2x Heavy Tankers, 1x Command Vehicle | Sandy Point |
| Illawong Rural Fire Brigade | 45x Volunteer Firefighters, 2x Heavy Tankers, 1x Command Vehicle | Alfords Point |
| Menai Rural Fire Brigade | 45x Volunteer Firefighters, 2x Heavy Tankers, 1x Command Vehicle | Barden Ridge |
| Engadine Rural Fire Brigade | 45x Volunteer Firefighters, 2x Heavy Tankers, 1x Command Vehicle | Engadine |
| Waterfall Rural Fire Brigade | 45x Volunteer Firefighters, 2x Heavy Tankers, 1x Command Vehicle | Waterfall |
| Bundeena Rural Fire Brigade | 45x Volunteer Firefighters, 2x Heavy Tankers, 1x Command Vehicle | Bundeena |
| Maianbar Rural Fire Brigade | 45x Volunteer Firefighters, 2x Heavy Tankers, 1x Command Vehicle | Maianbar |
| Grays Point Rural Fire Brigade | 45x Volunteer Firefighters, 2x Heavy Tankers, 1x Command Vehicle | Grays Point |
| Loftus Rural Fire Brigade | 45x Volunteer Firefighters, 2x Heavy Tankers, 1x Command Vehicle | Loftus |
| Kurnell Rural Fire Brigade | 45x Volunteer Firefighters, 2x Heavy Tankers, 1x Command Vehicle | Kurnell |
| Unit: | Size: | Base: |
|---|---|---|
| Illawarra District Headquarters | 15x Permanent Personnel, 1x Command Vehicle | Albion Park Rail |
| Illawarra Support Rural Fire Brigade | 90x Volunteer Firefighters, 1x Heavy Tanker, 1x Bulk Water Carrier, 1x Logistics Truck, 3x Command Vehicles | Albion Park Rail |
| Illawarra Communications Rural Fire Brigade | 30x Volunteer Firefighters, 1x Communications Truck, 1x Command Vehicle | Albion Park Rail |
| Brigade: | Size: | Location: |
|---|---|---|
| Bulli Rural Fire Brigade | 90x Volunteer Firefighters, 2x Heavy Tankers, 1x Light Unit, 1x Bulk Water Carrier, 1x Command Vehicle, 1x Logistics Support Vehicle | Bulli |
| Helensburgh Rural Fire Brigade | 60x Volunteer Firefighters, 1x Medium Pumper, 2x Heavy Tankers, 1x Command Vehicle | Helensburgh |
| Dapto Rural Fire Brigade | 60x Volunteer Firefighters, 2x Heavy Tankers, 1x Light Tanker, 1x Command Vehicle | Wongawilli |
| Austinmer Rural Fire Brigade | 60x Volunteer Firefighters, 1x Heavy Tanker, 2x Light Tankers, 1x Command Vehicle | Austinmer |
| Farmborough Heights Rural Fire Brigade | 45x Volunteer Firefighters, 2x Heavy Tankers, 1x Command Vehicle | Kembla Grange |
| Otford Rural Fire Brigade | 45x Volunteer Firefighters, 1x Heavy Tanker, 1x Light Tanker, 1x Command Vehicle | Otford |
| Stanwell Park Rural Fire Brigade | 45x Volunteer Firefighters, 1x Heavy Tanker, 1x Light Tanker, 1x Command Vehicle | Stanwell Park |
| Darkes Forest Rural Fire Brigade | 45x Volunteer Firefighters, 1x Heavy Tanker, 1x Light Tanker, 1x Command Vehicle | Darkes Forest |
| Mount Keira Rural Fire Brigade | 45x Volunteer Firefighters, 1x Heavy Tanker, 1x Light Tanker, 1x Command Vehicle | Mount Keira |
| Mount Kembla Rural Fire Brigade | 45x Volunteer Firefighters, 1x Heavy Tanker, 1x Light Unit, 1x Command Vehicle | Mount Kembla |
| Brigade: | Size: | Location: |
|---|---|---|
| Oak Flats Rural Fire Brigade | 75x Volunteer Firefighters, 1x Heavy Tanker, 1x Light Tanker, 1x Command Vehicle, 2x Light Boats | Albion Park Rail |
| Albion Park Rural Fire Brigade | 60x Volunteer Firefighters, 1x Medium Pumper, 2x Heavy Tankers, 1x Command Vehicle | Albion Park |
| Dunmore Rural Fire Brigade | 45x Volunteer Firefighters, 1x Heavy Tanker, 1x Light Tanker, 1x Command Vehicle | Dunmore |
| Calderwood Rural Fire Brigade | 30x Volunteer Firefighters, 1x Heavy Tanker, 1x Light Tanker | Calderwood |
| Brigade: | Size: | Location: |
|---|---|---|
| Jamberoo Rural Fire Brigade | 60x Volunteer Firefighters, 1x Medium Pumper, 1x Heavy Tanker, 1x Light Unit, 1x Command Vehicle | Jamberoo |
| Foxground Rural Fire Brigade | 45x Volunteer Firefighters, 1x Heavy Tanker, 1x Light Tanker, 1x Command Vehicle | Foxground |
| Gerringong Rural Fire Brigade | 45x Volunteer Firefighters, 1x Medium Pumper, 1x Heavy Tanker, 1x Command Vehicle | Gerringong |
| Carrington Falls Rural Fire Brigade | 30x Volunteer Firefighters, 1x Heavy Tanker, 1x Light Tanker | Carrington Falls |
| Unit: | Size: | Base: |
|---|---|---|
| Southern Highlands District Headquarters | 15x Permanent Personnel, 1x Command Vehicle | Picton |
| Southern Highlands Support Rural Fire Brigade | 100x Volunteer Firefighters, 1x Heavy Tanker, 1x Bulk Water Carrier, 1x Transport Bus, 1x Logistics Support Vehicle, 1x Logistics Truck, 2x Command Vehicles | Picton |
| Southern Highlands Communications Rural Fire Brigade | 30x Volunteer Firefighters, 1x Communications Truck, 1x Command Vehicle | Picton |
| Brigade: | Size: | Location: |
|---|---|---|
| Wollondilly Support Rural Fire Brigade | 45x Volunteer Firefighters, 1x Heavy Tanker, 1x Light Tanker, 1x Transport Bus | Picton |
| Wollondilly Communications Rural Fire Brigade | 30x Volunteer Firefighters, 1x Communications Truck, 1x Command Vehicle | Picton |
| The Oaks Rural Fire Brigade | 45x Volunteer Firefighters, 1x Medium Pumper, 1x Heavy Tanker, 1x Light Tanker | The Oaks |
| Appin Rural Fire Brigade | 45x Volunteer Firefighters, 1x Medium Pumper, 1x Heavy Tanker, 1x Light Tanker | Appin |
| Bargo Rural Fire Brigade | 45x Volunteer Firefighters, 1x Medium Pumper, 1x Heavy Tanker, 1x Command Vehicle | Bargo |
| Picton Rural Fire Brigade | 45x Volunteer Firefighters, 1x Heavy Tanker, 1x Medium Tanker, 1x Light Unit | Picton |
| Lakesland Rural Fire Brigade | 45x Volunteer Firefighters, 1x Heavy Tanker, 1x Light Tanker, 1x Light Unit | Lakesland |
| Pheasants Nest Rural Fire Brigade | 45x Volunteer Firefighters, 1x Heavy Tanker, 1x Light Unit, 1x Logistics Support Vehicle | Pheasants Nest |
| Orangeville/Werombi Rural Fire Brigade | 30x Volunteer Firefighters, 1x Heavy Tanker, 1x Light Tanker | Werombi |
| Theresa Park Rural Fire Brigade | 30x Volunteer Firefighters, 1x Heavy Tanker, 1x Light Tanker | Theresa Park |
| Buxton Rural Fire Brigade | 30x Volunteer Firefighters, 1x Heavy Tanker, 1x Light Tanker | Buxton |
| Tahmoor Rural Fire Brigade | 30x Volunteer Firefighters, 1x Heavy Tanker, 1x Light Tanker | Tahmoor |
| Douglas Park Rural Fire Brigade | 30x Volunteer Firefighters, 1x Heavy Tanker, 1x Light Tanker | Douglas Park |
| Thirlmere Rural Fire Brigade | 30x Volunteer Firefighters, 1x Heavy Tanker, 1x Light Tanker | Thirlmere |
| Oakdale Rural Fire Brigade | 30x Volunteer Firefighters, 1x Heavy Tanker, 1x Light Unit | Oakdale |
| Silverdale Rural Fire Brigade | 30x Volunteer Firefighters, 1x Heavy Tanker, 1x Light Unit | Silverdale |
| Cawdor Rural Fire Brigade | 30x Volunteer Firefighters, 1x Heavy Tanker, 1x Light Unit | Cawdor |
| Menangle Rural Fire Brigade | 30x Volunteer Firefighters, 1x Heavy Tanker, 1x Light Unit | Menangle |
| Wilton Rural Fire Brigade | 30x Volunteer Firefighters, 1x Heavy Tanker, 1x Light Unit | Wilton |
| Yanderra Rural Fire Brigade | 30x Volunteer Firefighters, 1x Medium Tanker, 1x Light Unit | Yanderra |
| Mount Hunter Rural Fire Brigade | 30x Volunteer Firefighters, 1x Medium Tanker, 1x Light Unit | Brownlow Hill |
| Brigade: | Size: | Location: |
|---|---|---|
| Wingecarribee Support Rural Fire Brigade | 45x Volunteer Firefighters, 1x Medium Pumper, 1x Bulk Water Carrier, 1x Transport Bus | Mittagong |
| Wingecarribee Communications Rural Fire Brigade | 30x Volunteer Firefighters, 1x Communications Truck, 1x Command Vehicle | Mittagong |
| Robertson Rural Fire Brigade | 45x Volunteer Firefighters, 1x Medium Pumper, 1x Light Unit, 1x Command Vehicle | Robertson |
| Mandemar-Joadja Rural Fire Brigade | 45x Volunteer Firefighters, 1x Heavy Tanker, 1x Medium Tanker, 1x Command Vehicle | Joadja |
| Mittagong Rural Fire Brigade | 45x Volunteer Firefighters, 1x Heavy Tanker, 1x Light Tanker, 1x Command Vehicle | Mittagong |
| Wingello Rural Fire Brigade | 45x Volunteer Firefighters, 1x Heavy Tanker, 1x Light Tanker, 1x Command Vehicle | Wingello |
| Colo Vale Rural Fire Brigade | 45x Volunteer Firefighters, 1x Heavy Tanker, 1x Light Unit, 1x Command Vehicle | Colo Vale |
| Canyonleigh Rural Fire Brigade | 45x Volunteer Firefighters, 1x Heavy Tanker, 1x Light Unit, 1x Command Vehicle | Canyonleigh |
| Alpine Rural Fire Brigade | 30x Volunteer Firefighters, 1x Medium Pumper, 1x Light Tanker | Aylmerton |
| Berrima Rural Fire Brigade | 30x Volunteer Firefighters, 1x Medium Pumper, 1x Light Unit | Berrima |
| Hill Top Rural Fire Brigade | 30x Volunteer Firefighters, 1x Heavy Tanker, 1x Light Tanker | Hill Top |
| Yerrinbool Rural Fire Brigade | 30x Volunteer Firefighters, 1x Heavy Tanker, 1x Light Tanker | Yerrinbool |
| Wollondilly Rural Fire Brigade | 30x Volunteer Firefighters, 1x Heavy Tanker, 1x Light Tanker | High Range (West) |
| Mandemar-High Range Rural Fire Brigade | 30x Volunteer Firefighters, 1x Heavy Tanker, 1x Light Tanker | High Range (East) |
| Moss Vale Rural Fire Brigade | 30x Volunteer Firefighters, 1x Heavy Tanker, 1x Light Tanker | Moss Vale (West) |
| Penrose Rural Fire Brigade | 30x Volunteer Firefighters, 1x Heavy Tanker, 1x Light Unit | Penrose |
| Balmoral Village Rural Fire Brigade | 30x Volunteer Firefighters, 1x Heavy Tanker, 1x Light Unit | Balmoral |
| Avoca-Wingecarribee Rural Fire Brigade | 30x Volunteer Firefighters, 1x Heavy Tanker, 1x Light Unit | Moss Vale (East) |
| Bundanoon Rural Fire Brigade | 30x Volunteer Firefighters, 1x Heavy Tanker, 1x Command Vehicle | Bundanoon |
| Exeter Rural Fire Brigade | 30x Volunteer Firefighters, 1x Heavy Tanker, 1x Command Vehicle | Exeter |
| Burrawang Rural Fire Brigade | 30x Volunteer Firefighters, 1x Medium Tanker, 1x Light Unit | Burrawang |
| Woodlands-Wingecarribee Rural Fire Brigade | 30x Volunteer Firefighters, 1x Medium Tanker, 1x Command Vehicle | Woodlands |
| Unit: | Size: | Base: |
|---|---|---|
| South Eastern Area Command Headquarters | 50x Permanent Personnel | Batemans Bay |
| Unit: | Size: | Base: |
|---|---|---|
| Shoalhaven District Headquarters | 15x Permanent Personnel, 1x Command Vehicle | Nowra |
| Shoalhaven Support Rural Fire Brigade | 100x Volunteer Firefighters, 1x Heavy Tanker, 1x Bulk Water Carrier, 1x Transport Bus, 1x Logistics Support Vehicle, 1x Logistics Truck, 2x Command Vehicles | Nowra |
| Shoalhaven Communications Rural Fire Brigade | 30x Volunteer Firefighters, 1x Communications Truck, 1x Command Vehicle | Nowra |
| Shoalhaven Community Engagement Rural Fire Brigade | 30x Volunteer Firefighters, 2x Command Vehicles | Nowra |
| Shoalhaven Catering Rural Fire Brigade | 30x Volunteer Firefighters, 1x Catering Truck, 1x Command Vehicle | Milton |
| Shoalhaven Marine Group Rural Fire Brigade | 60x Volunteer Firefighters, 1x Fireboat, 2x Light Boats, 1x Command Vehicle | Basin View |
| Brigade: | Size: | Location: |
|---|---|---|
| Shoalhaven Heads Rural Fire Brigade | 75x Volunteer Firefighters, 1x Medium Pumper, 1x Heavy Tanker, 1x Light Tanker, 2x Bulk Water Carriers | Shoalhaven Heads |
| St Georges Basin Rural Fire Brigade | 60x Volunteer Firefighters, 1x Medium Pumper, 1x Heavy Tanker, 1x Light Tanker, 1x Command Vehicle | St Georges Basin |
| Sussex Inlet Rural Fire Brigade | 60x Volunteer Firefighters, 1x Medium Pumper, 1x Heavy Tanker, 1x Light Tanker, 1x Command Vehicle | Sussex Inlet |
| West Nowra Rural Fire Brigade | 60x Volunteer Firefighters, 1x Heavy Tanker, 1x Light Tanker, 1x Light Unit, 1x Command Vehicle | South Nowra |
| Bawley Point Rural Fire Brigade | 60x Volunteer Firefighters, 1x Heavy Tanker, 1x Light Tanker, 1x Light Unit, 1x Command Vehicle | Bawley Point |
| Huskisson Rural Fire Brigade | 45x Volunteer Firefighters, 1x Medium Pumper, 1x Heavy Tanker, 1x Light Unit | Huskisson |
| Culburra Rural Fire Brigade | 45x Volunteer Firefighters, 1x Medium Pumper, 1x Heavy Tanker, 1x Command Vehicle | Culburra Beach |
| Kangaroo Valley Rural Fire Brigade | 45x Volunteer Firefighters, 1x Heavy Tanker, 1x Medium Tanker, 1x Light Tanker | Kangaroo Valley |
| Crossroads Rural Fire Brigade | 45x Volunteer Firefighters, 1x Heavy Tanker, 1x Light Tanker, 1x Light Unit | Vincentia |
| Cambewarra Rural Fire Brigade | 45x Volunteer Firefighters, 1x Heavy Tanker, 1x Light Tanker, 1x Command Vehicle | Tapitallee |
| Tabourie Rural Fire Brigade | 45x Volunteer Firefighters, 1x Heavy Tanker, 1x Light Tanker, 1x Bulk Water Carrier | Lake Tabourie |
| Tomerong Rural Fire Brigade | 30x Volunteer Firefighters, 1x Heavy Tanker, 1x Medium Tanker | Tomerong |
| Conjola (Manyana) Rural Fire Brigade | 30x Volunteer Firefighters, 1x Heavy Tanker, 1x Medium Tanker | Conjola |
| Conjola (Fishermans Paradise) Rural Fire Brigade | 30x Volunteer Firefighters, 1x Heavy Tanker, 1x Light Tanker | Fishermans Paradise |
| Conjola (Lake Conjola) Rural Fire Brigade | 30x Volunteer Firefighters, 1x Heavy Tanker, 1x Light Tanker | Lake Conjola |
| Cunjurong Point Rural Fire Brigade | 30x Volunteer Firefighters, 1x Heavy Tanker, 1x Light Tanker | Cunjurong Point |
| Bendalong Rural Fire Brigade | 30x Volunteer Firefighters, 1x Heavy Tanker, 1x Light Tanker | Bendalong |
| Falls Creek Rural Fire Brigade | 30x Volunteer Firefighters, 1x Heavy Tanker, 1x Light Tanker | Falls Creek |
| Basin View Rural Fire Brigade | 30x Volunteer Firefighters, 1x Heavy Tanker, 1x Light Tanker | Basin View |
| Callala Bay Rural Fire Brigade | 30x Volunteer Firefighters, 1x Heavy Tanker, 1x Light Tanker | Callala Bay |
| Kioloa Rural Fire Brigade | 30x Volunteer Firefighters, 1x Heavy Tanker, 1x Light Tanker | Kioloa |
| Illaroo Road Rural Fire Brigade | 30x Volunteer Firefighters, 1x Heavy Tanker, 1x Light Tanker | Bangalee |
| Hyams Beach Rural Fire Brigade | 30x Volunteer Firefighters, 1x Heavy Tanker, 1x Light Tanker | Hyams Beach |
| Wreck Bay-Jervis Bay Territory Rural Fire Brigade | 30x Volunteer Firefighters, 1x Heavy Tanker, 1x Light Tanker | Wreck Bay Village, Jervis Bay Territory |
| Jervis Bay Rural Fire Brigade | 30x Volunteer Firefighters, 1x Heavy Tanker, 1x Light Unit | Jervis Bay Village, Jervis Bay Territory |
| Greenwell Point Rural Fire Brigade | 30x Volunteer Firefighters, 1x Heavy Tanker, 1x Light Unit | Greenwell Point |
| Currarong Rural Fire Brigade | 30x Volunteer Firefighters, 1x Heavy Tanker, 1x Light Unit | Beecroft Peninsula |
| Callala Beach Rural Fire Brigade | 30x Volunteer Firefighters, 1x Heavy Tanker, 1x Light Unit | Callala Beach |
| Wandandian Rural Fire Brigade | 30x Volunteer Firefighters, 1x Heavy Tanker, 1x Light Unit | Wandandian |
| Milton Rural Fire Brigade | 30x Volunteer Firefighters, 1x Heavy Tanker, 1x Light Unit | Milton |
| Depot Beach Rural Fire Brigade | 30x Volunteer Firefighters, 1x Medium Tanker, 1x Light Tanker | Depot Beach |
| Cudmirrah/Berrara Rural Fire Brigade | 30x Volunteer Firefighters, 1x Medium Tanker, 1x Light Unit | Cudmirrah |
| Beaumont Rural Fire Brigade | 30x Volunteer Firefighters, 1x Medium Tanker, 1x Light Unit | Bellawongarah |
| Broughton Vale/Berry Rural Fire Brigade | 30x Volunteer Firefighters, 1x Medium Tanker, 1x Light Unit | Berry |
| Christian's Minde (Jervis Bay) Rural Fire Brigade | 30x Volunteer Firefighters, 1x Light Tanker, 1x Light Unit | Christians Minde Settlement, Jervis Bay Territory |
| Unit: | Size: | Base: |
|---|---|---|
| Far South Coast District Headquarters | 15x Permanent Personnel, 1x Command Vehicle | Bega |
| Far South Coast Support Rural Fire Brigade | 100x Volunteer Firefighters, 1x Heavy Tanker, 1x Bulk Water Carrier, 1x Transport Bus, 1x Logistics Support Vehicle, 1x Logistics Truck, 2x Command Vehicles | Bega |
| Far South Coast Communications Rural Fire Brigade | 30x Volunteer Firefighters, 1x Communications Truck, 1x Command Vehicle | Bega |
| Brigade: | Size: | Location: |
|---|---|---|
| Eurobodalla Catering Rural Fire Brigade | 30x Volunteer Firefighters, 1x Catering Truck, 1x Command Vehicle | Batemans Bay |
| Broulee Rural Fire Brigade | 60x Volunteer Firefighters, 2x Heavy Tankers, 1x Light Unit, 1x Bulk Water Carrier | Broulee |
| Surf Beach Rural Fire Brigade | 45x Volunteer Firefighters, 1x Medium Pumper, 1x Heavy Tanker, 1x Light Unit | Sunshine Bay |
| Narooma Rural Fire Brigade | 45x Volunteer Firefighters, 1x Medium Pumper, 1x Heavy Tanker, 1x Light Unit | Narooma |
| Moruya Rural Fire Brigade | 45x Volunteer Firefighters, 1x Heavy Tanker, 1x Light Tanker, 1x Light Unit | Moruya |
| Bodalla Rural Fire Brigade | 30x Volunteer Firefighters, 1x Heavy Tanker, 1x Medium Tanker | Bodalla |
| Durras South Rural Fire Brigade | 30x Volunteer Firefighters, 1x Heavy Tanker, 1x Light Tanker | South Durras |
| Nelligen Rural Fire Brigade | 30x Volunteer Firefighters, 1x Heavy Tanker, 1x Light Tanker | Nelligen |
| Long Beach Rural Fire Brigade | 30x Volunteer Firefighters, 1x Heavy Tanker, 1x Light Tanker | Long Beach |
| Batemans Bay Rural Fire Brigade | 30x Volunteer Firefighters, 1x Heavy Tanker, 1x Light Tanker | Batemans Bay |
| Mogo Rural Fire Brigade | 30x Volunteer Firefighters, 1x Heavy Tanker, 1x Light Tanker | Mogo |
| Malua Bay Rural Fire Brigade | 30x Volunteer Firefighters, 1x Heavy Tanker, 1x Light Tanker | Malua Bay |
| Central Tilba Rural Fire Brigade | 30x Volunteer Firefighters, 1x Heavy Tanker, 1x Light Tanker | Central Tilba |
| Tuross Head Rural Fire Brigade | 30x Volunteer Firefighters, 1x Heavy Tanker, 1x Light Tanker | Tuross Head |
| Mogendoura Rural Fire Brigade | 30x Volunteer Firefighters, 1x Heavy Tanker, 1x Light Unit | Mogendoura |
| Bingie Rural Fire Brigade | 30x Volunteer Firefighters, 1x Heavy Tanker, 1x Light Unit | Bingie |
| Potato Point Rural Fire Brigade | 30x Volunteer Firefighters, 1x Heavy Tanker, 1x Light Unit | Potato Point |
| Dalmeny-Kianga Rural Fire Brigade | 30x Volunteer Firefighters, 1x Heavy Tanker, 1x Light Unit | Dalmeny |
| Runnyford Rural Fire Brigade | 30x Volunteer Firefighters, 1x Heavy Tanker, 1x Light Unit | Runnyford |
| Belowra Rural Fire Brigade | 30x Volunteer Firefighters, 1x Light Tanker, 1x Light Unit | Belowra |
| Nerrigundah Rural Fire Brigade | 30x Volunteer Firefighters, 1x Light Tanker, 1x Light Unit | Nerrigundah |
| Tinpot Rural Fire Brigade | 30x Volunteer Firefighters, 1x Light Tanker, 1x Light Unit | Tinpot |
| Deua River Rural Fire Brigade | 30x Volunteer Firefighters, 2x Light Units | Deua River Valley |
| Brigade: | Size: | Location: |
|---|---|---|
| Cobargo Rural Fire Brigade | 60x Volunteer Firefighters, 1x Heavy Tanker, 2x Light Tankers, 1x Light Unit | Cobargo |
| Brogo Rural Fire Brigade | 60x Volunteer Firefighters, 1x Medium Tanker, 1x Light Tanker, 2x Light Units | Brogo (South) |
| Bermagui Rural Fire Brigade | 45x Volunteer Firefighters, 1x Heavy Tanker, 1x Light Tanker, 1x Light Unit | Bermagui |
| Bemboka Rural Fire Brigade | 45x Volunteer Firefighters, 1x Heavy Tanker, 1x Light Tanker, 1x Light Unit | Bemboka |
| Candelo Rural Fire Brigade | 45x Volunteer Firefighters, 1x Heavy Tanker, 1x Light Tanker, 1x Light Unit | Candelo |
| Pambula Rural Fire Brigade | 45x Volunteer Firefighters, 1x Heavy Tanker, 1x Light Tanker, 1x Light Unit | Pambula |
| Wyndham-Bega Valley Rural Fire Brigade | 45x Volunteer Firefighters, 1x Medium Tanker, 1x Light Tanker, 1x Light Unit | Wyndham |
| Merimbula Rural Fire Brigade | 45x Volunteer Firefighters, 1x Medium Tanker, 1x Light Tanker, 1x Light Unit | Merimbula |
| Eden Rural Fire Brigade | 45x Volunteer Firefighters, 1x Medium Tanker, 1x Light Tanker, 1x Light Unit | Eden |
| Wonboyn Rural Fire Brigade | 45x Volunteer Firefighters, 1x Medium Tanker, 1x Light Tanker, 1x Light Unit | Wonboyn |
| Bega Rural Fire Brigade | 45x Volunteer Firefighters, 1x Medium Tanker, 2x Light Units | Bega |
| Quaama Rural Fire Brigade | 45x Volunteer Firefighters, 2x Light Tankers, 1x Light Unit | Quaama |
| Wolumla Rural Fire Brigade | 45x Volunteer Firefighters, 2x Light Tankers, 1x Light Unit | Wolumla |
| Towamba Rural Fire Brigade | 45x Volunteer Firefighters, 2x Light Tankers, 1x Light Unit | Towamba |
| Tathra Rural Fire Brigade | 30x Volunteer Firefighters, 1x Heavy Tanker, 1x Light Unit | Tathra |
| Nethercote Rural Fire Brigade | 30x Volunteer Firefighters, 2x Light Tankers | Nethercote |
| Kiah Rural Fire Brigade | 30x Volunteer Firefighters, 2x Light Tankers | Kiah |
| Upper Brogo Rural Fire Brigade | 30x Volunteer Firefighters, 1x Light Tanker, 1x Light Unit | Brogo (North) |
| Wapengo Rural Fire Brigade | 30x Volunteer Firefighters, 1x Light Tanker, 1x Light Unit | Wapengo |
| Tanja Rural Fire Brigade | 30x Volunteer Firefighters, 1x Light Tanker, 1x Light Unit | Tanja |
| Angledale/Stony Creek Rural Fire Brigade | 30x Volunteer Firefighters, 1x Light Tanker, 1x Light Unit | Stony Creek |
| Numbugga Rural Fire Brigade | 30x Volunteer Firefighters, 1x Light Tanker, 1x Light Unit | Numbugga |
| Tarraganda Rural Fire Brigade | 30x Volunteer Firefighters, 1x Light Tanker, 1x Light Unit | Tarraganda |
| Buckajo/Springvale Rural Fire Brigade | 30x Volunteer Firefighters, 1x Light Tanker, 1x Light Unit | Buckajo |
| Jellat Jellat Rural Fire Brigade | 30x Volunteer Firefighters, 1x Light Tanker, 1x Light Unit | Jellat Jellat |
| Rocky Hall Rural Fire Brigade | 30x Volunteer Firefighters, 1x Light Tanker, 1x Light Unit | Rocky Hall |
| Burragate Rural Fire Brigade | 30x Volunteer Firefighters, 1x Light Tanker, 1x Light Unit | Burragate |
| Unit: | Size: | Base: |
|---|---|---|
| Southern Tablelands District Headquarters | 15x Permanent Personnel, 1x Command Vehicle | Yass |
| Southern Tablelands Support Rural Fire Brigade | 100x Volunteer Firefighters, 1x Heavy Tanker, 1x Bulk Water Carrier, 1x Transport Bus, 1x Logistics Support Vehicle, 1x Logistics Truck, 2x Command Vehicles | Yass |
| Southern Tablelands Communications Rural Fire Brigade | 30x Volunteer Firefighters, 1x Communications Truck, 1x Command Vehicle | Yass |
| Southern Tablelands District Remote Area Firefighting Team | 60x Volunteer Firefighters, 2x Logistics Support Vehicles, 2x Logistics Trucks | Goulburn |
| Brigade: | Size: | Location: |
|---|---|---|
| Upper Lachlan Support Rural Fire Brigade | 15x Volunteer Firefighters, 1x Bulk Water Carrier | Crookwell |
| Taralga Rural Fire Brigade | 60x Volunteer Firefighters, 1x Heavy Tanker, 2x Light Tankers, 1x Light Unit | Taralga |
| Gunning-Fish River Rural Fire Brigade | 45x Volunteer Firefighters, 1x Heavy Tanker, 1x Light Tanker, 1x Light Unit | Gunning |
| Crookwell Rural Fire Brigade | 30x Volunteer Firefighters, 1x Heavy Tanker, 1x Medium Tanker | Crookwell (Central) |
| Dalton Rural Fire Brigade | 30x Volunteer Firefighters, 1x Heavy Tanker, 1x Light Unit | Dalton |
| Broadway Rural Fire Brigade | 30x Volunteer Firefighters, 1x Heavy Tanker, 1x Light Unit | Broadway |
| Blakney Creek Rural Fire Brigade | 30x Volunteer Firefighters, 1x Heavy Tanker, 1x Light Unit | Blakney Creek |
| Bevendale Rural Fire Brigade | 30x Volunteer Firefighters, 1x Heavy Tanker, 1x Light Unit | Bevendale |
| Biala Rural Fire Brigade | 30x Volunteer Firefighters, 1x Heavy Tanker, 1x Light Unit | Biala |
| Winduella Rural Fire Brigade | 30x Volunteer Firefighters, 1x Heavy Tanker, 1x Light Unit | Narrawa |
| Grabben Gullen Rural Fire Brigade | 30x Volunteer Firefighters, 1x Heavy Tanker, 1x Light Unit | Grabben Gullen |
| Bannister Rural Fire Brigade | 30x Volunteer Firefighters, 1x Heavy Tanker, 1x Light Unit | Bannister |
| Cotta Walla Rural Fire Brigade | 30x Volunteer Firefighters, 1x Heavy Tanker, 1x Light Unit | Crookwell (South) |
| Roslyn Rural Fire Brigade | 30x Volunteer Firefighters, 1x Heavy Tanker, 1x Light Unit | Roslyn |
| Laggan Rural Fire Brigade | 30x Volunteer Firefighters, 1x Heavy Tanker, 1x Light Unit | Laggan |
| Binda-Sylvia Vale Rural Fire Brigade | 30x Volunteer Firefighters, 1x Heavy Tanker, 1x Light Unit | Binda (West) |
| Binda-Mulgowrie Rural Fire Brigade | 30x Volunteer Firefighters, 1x Heavy Tanker, 1x Light Unit | Crooked Corner |
| Tuena Rural Fire Brigade | 30x Volunteer Firefighters, 1x Heavy Tanker, 1x Light Unit | Tuena |
| Peelwood Rural Fire Brigade | 30x Volunteer Firefighters, 1x Heavy Tanker, 1x Light Unit | Peelwood |
| Peelwood-Limerick Rural Fire Brigade | 30x Volunteer Firefighters, 1x Heavy Tanker, 1x Light Unit | Limerick |
| Fullerton Rural Fire Brigade | 30x Volunteer Firefighters, 1x Heavy Tanker, 1x Light Unit | Fullerton |
| Golspie Rural Fire Brigade | 30x Volunteer Firefighters, 1x Heavy Tanker, 1x Light Unit | Golspie |
| Big Hill Rural Fire Brigade | 30x Volunteer Firefighters, 1x Heavy Tanker, 1x Light Unit | Brayton |
| Collector Rural Fire Brigade | 30x Volunteer Firefighters, 1x Heavy Tanker, 1x Light Unit | Collector |
| Oolong Rural Fire Brigade | 30x Volunteer Firefighters, 1x Heavy Tanker, 1x Light Unit | Oolong |
| Bigga Rural Fire Brigade | 30x Volunteer Firefighters, 1x Medium Tanker, 1x Light Unit | Bigga |
| Binda Rural Fire Brigade | 30x Volunteer Firefighters, 1x Light Tanker, 1x Light Unit | Binda (East) |
| Brigade: | Size: | Location: |
|---|---|---|
| Springfield Rural Fire Brigade | 75x Volunteer Firefighters, 2x Heavy Tankers, 1x Medium Tanker, 1x Light Tanker, 1x Light Unit | Murrumbateman (South) |
| Wallaroo Rural Fire Brigade | 75x Volunteer Firefighters, 1x Heavy Tanker, 1x Medium Tanker, 1x Light Tanker, 1x Light Unit, 1x Command Vehicle | Wallaroo |
| Gundaroo Rural Fire Brigade | 60x Volunteer Firefighters, 2x Heavy Tankers, 1x Light Tanker, 1x Light Unit | Gundaroo (Central) |
| Yass River Rural Fire Brigade | 45x Volunteer Firefighters, 1x Heavy Tanker, 1x Light Tanker, 1x Light Unit | Yass River |
| Binalong Rural Fire Brigade | 30x Volunteer Firefighters, 1x Heavy Tanker, 1x Light Unit | Binalong |
| Bowning Rural Fire Brigade | 30x Volunteer Firefighters, 1x Heavy Tanker, 1x Light Unit | Bowning |
| Brookham Rural Fire Brigade | 30x Volunteer Firefighters, 1x Heavy Tanker, 1x Light Unit | Brookham |
| Jeir North Rural Fire Brigade | 30x Volunteer Firefighters, 1x Heavy Tanker, 1x Light Unit | Murrumbateman (West) |
| Murrumbateman Rural Fire Brigade | 30x Volunteer Firefighters, 1x Heavy Tanker, 1x Light Unit | Murrumbateman (Central) |
| Jeir South Rural Fire Brigade | 30x Volunteer Firefighters, 1x Heavy Tanker, 1x Light Unit | Jeir |
| Fairlight Rural Fire Brigade | 30x Volunteer Firefighters, 1x Heavy Tanker, 1x Light Unit | Uriarra |
| Bellmount Forest Rural Fire Brigade | 30x Volunteer Firefighters, 1x Heavy Tanker, 1x Light Unit | Bellmount Forest |
| Back Creek-Yass Rural Fire Brigade | 30x Volunteer Firefighters, 1x Heavy Tanker, 1x Light Unit | Gundaroo (West) |
| Sutton Rural Fire Brigade | 30x Volunteer Firefighters, 1x Heavy Tanker, 1x Light Unit | Sutton |
| Yass East Rural Fire Brigade | 30x Volunteer Firefighters, 1x Heavy Tanker, 1x Light Unit | Manton |
| Bango Rural Fire Brigade | 30x Volunteer Firefighters, 1x Heavy Tanker, 1x Light Unit | Bango |
| Cavan Rural Fire Brigade | 30x Volunteer Firefighters, 1x Heavy Tanker, 1x Light Unit | Cavan |
| Goodhope Rural Fire Brigade | 30x Volunteer Firefighters, 1x Heavy Tanker, 1x Light Unit | Good Hope |
| Mullion Rural Fire Brigade | 30x Volunteer Firefighters, 1x Heavy Tanker, 1x Light Unit | Mullion |
| Kangiara Rural Fire Brigade | 30x Volunteer Firefighters, 1x Medium Tanker, 1x Light Unit | Kangiara |
| Wee Jasper Rural Fire Brigade | 30x Volunteer Firefighters, 1x Light Tanker, 1x Light Unit | Wee Jasper |
| Brigade: | Size: | Location: |
|---|---|---|
| Goulburn Mulwaree Support Rural Fire Brigade | 45x Volunteer Firefighters, 2x Heavy Tankers, 1x Light Unit | Goulburn |
| Windellama Rural Fire Brigade | 75x Volunteer Firefighters, 1x Heavy Tanker, 1x Medium Tanker, 2x Light Tankers, 1x Light Unit | Windellama |
| Marulan Rural Fire Brigade | 60x Volunteer Firefighters, 2x Heavy Tankers, 1x Light Unit, 1x Command Vehicle | Marulan |
| Middle Arm Rural Fire Brigade | 45x Volunteer Firefighters, 1x Heavy Tanker, 2x Light Tankers | Middle Arm (North) |
| Tarago Rural Fire Brigade | 30x Volunteer Firefighters, 1x Heavy Tanker, 1x Medium Tanker | Tarago (East) |
| Towrang Rural Fire Brigade | 30x Volunteer Firefighters, 1x Heavy Tanker, 1x Light Unit | Towrang |
| Parkesbourne Rural Fire Brigade | 30x Volunteer Firefighters, 1x Medium Tanker, 1x Light Tanker | Parkesbourne |
| Yarra Rural Fire Brigade | 30x Volunteer Firefighters, 1x Medium Tanker, 1x Light Tanker | Yarra |
| Gundary Rural Fire Brigade | 30x Volunteer Firefighters, 1x Medium Tanker, 1x Light Tanker | Tirrannaville |
| Pomeroy Rural Fire Brigade | 30x Volunteer Firefighters, 1x Medium Tanker, 1x Light Tanker | Baw Baw |
| Tallong Rural Fire Brigade | 30x Volunteer Firefighters, 1x Medium Tanker, 1x Light Tanker | Tallong |
| Marulan South Rural Fire Brigade | 30x Volunteer Firefighters, 1x Medium Tanker, 1x Light Tanker | Marulan |
| Bungonia Rural Fire Brigade | 30x Volunteer Firefighters, 1x Medium Tanker, 1x Light Tanker | Bungonia |
| Taylors Creek-Goulburn Rural Fire Brigade | 30x Volunteer Firefighters, 1x Medium Tanker, 1x Light Tanker | Tarago (West) |
| Tarlo Rural Fire Brigade | 30x Volunteer Firefighters, 1x Medium Tanker, 1x Light Unit | Tarlo |
| Tarlo (Campbells Lane) Rural Fire Brigade | 30x Volunteer Firefighters, 2x Light Tankers | Middle Arm (South) |
| Unit: | Size: | Base: |
|---|---|---|
| Lake George District Headquarters | 15x Permanent Personnel, 1x Command Vehicle | Queanbeyan East |
| Lake George Support Rural Fire Brigade | 100x Volunteer Firefighters, 1x Heavy Tanker, 1x Bulk Water Carrier, 1x Transport Bus, 1x Logistics Support Vehicle, 1x Logistics Truck, 2x Command Vehicles | Queanbeyan East |
| Lake George Communications Rural Fire Brigade | 30x Volunteer Firefighters, 1x Communications Truck, 1x Command Vehicle | Queanbeyan East |
| Brigade: | Size: | Location: |
|---|---|---|
| Queanbeyan City Rural Fire Brigade | 75x Volunteer Firefighters, 1x Heavy Tanker, 2x Light Tankers, 1x Command Vehicle, 1x Transport Bus | Queanbeyan East |
| Jerrabomberra Creek Rural Fire Brigade | 60x Volunteer Firefighters, 1x Medium Pumper, 1x Heavy Tanker, 2x Light Tankers | Royalla |
| Bungendore Rural Fire Brigade | 45x Volunteer Firefighters, 1x Medium Pumper, 1x Heavy Tanker, 1x Light Unit | Bungendore |
| Krawarree Rural Fire Brigade | 45x Volunteer Firefighters, 2x Heavy Tankers, 1x Light Tanker | Krawarree |
| Ridgeway Rural Fire Brigade | 45x Volunteer Firefighters, 2x Heavy Tankers, 1x Command Vehicle | The Ridgeway |
| Carwoola Rural Fire Brigade | 45x Volunteer Firefighters, 1x Heavy Tanker, 2x Light Tankers | Carwoola |
| Captains Flat Rural Fire Brigade | 45x Volunteer Firefighters, 1x Heavy Tanker, 1x Light Tanker, 1x Light Unit | Captains Flat |
| Wamboin-Palerang Rural Fire Brigade | 30x Volunteer Firefighters, 1x Heavy Tanker, 1x Light Tanker | Wamboin |
| Boro/Mount Fairy Rural Fire Brigade | 30x Volunteer Firefighters, 1x Heavy Tanker, 1x Light Tanker | Mount Fairy |
| Mulloon Rural Fire Brigade | 30x Volunteer Firefighters, 1x Heavy Tanker, 1x Light Tanker | Manar |
| Charleyong Rural Fire Brigade | 30x Volunteer Firefighters, 1x Heavy Tanker, 1x Light Tanker | Durran Durra |
| Nerriga Rural Fire Brigade | 30x Volunteer Firefighters, 1x Heavy Tanker, 1x Light Tanker | Nerriga |
| Mongarlowe Rural Fire Brigade | 30x Volunteer Firefighters, 1x Heavy Tanker, 1x Light Tanker | Mongarlowe |
| Braidwood Rural Fire Brigade | 30x Volunteer Firefighters, 1x Heavy Tanker, 1x Light Tanker | Braidwood |
| Bombay Rural Fire Brigade | 30x Volunteer Firefighters, 1x Heavy Tanker, 1x Light Tanker | Bombay |
| Araluen Rural Fire Brigade | 30x Volunteer Firefighters, 1x Heavy Tanker, 1x Light Tanker | Araluen |
| Farringdon Rural Fire Brigade | 30x Volunteer Firefighters, 1x Heavy Tanker, 1x Light Tanker | Harolds Cross |
| Hoskinstown/Rossi Rural Fire Brigade | 30x Volunteer Firefighters, 1x Heavy Tanker, 1x Light Tanker | Hoskinstown |
| Fernleigh Park Rural Fire Brigade | 30x Volunteer Firefighters, 1x Heavy Tanker, 1x Light Tanker | Googong |
| Burra Rural Fire Brigade | 30x Volunteer Firefighters, 1x Heavy Tanker, 1x Light Tanker | Burra |
| Majors Creek Rural Fire Brigade | 30x Volunteer Firefighters, 1x Medium Tanker, 1x Light Tanker | Majors Creek |
| Unit: | Size: | Base: |
|---|---|---|
| Monaro District Headquarters | 15x Permanent Personnel, 1x Command Vehicle | Cooma |
| Monaro Support Rural Fire Brigade | 100x Volunteer Firefighters, 1x Heavy Tanker, 1x Bulk Water Carrier, 1x Transport Bus, 1x Logistics Support Vehicle, 1x Logistics Truck, 2x Command Vehicles | Cooma |
| Monaro Communications Rural Fire Brigade | 30x Volunteer Firefighters, 1x Communications Truck, 1x Command Vehicle | Cooma |
| Brigade: | Size: | Location: |
|---|---|---|
| Adaminaby Rural Fire Brigade | 60x Volunteer Firefighters, 1x Heavy Tanker, 1x Light Tanker, 1x Rescue Truck, 1x Rescue Support Vehicle | Adaminaby |
| Berridale Rural Fire Brigade | 60x Volunteer Firefighters, 2x Medium Tankers, 1x Light Tanker, 1x Bulk Water Carrier | Berridale |
| Colinton Rural Fire Brigade | 45x Volunteer Firefighters, 3x Light Tankers | Colinton |
| Smith's Road Rural Fire Brigade | 30x Volunteer Firefighters, 1x Heavy Tanker, 1x Light Tanker | The Angle |
| Michelago Rural Fire Brigade | 30x Volunteer Firefighters, 1x Heavy Tanker, 1x Light Tanker | Michelago |
| Bredbo Rural Fire Brigade | 30x Volunteer Firefighters, 1x Heavy Tanker, 1x Light Tanker | Bredbo |
| Shannon's Flat Rural Fire Brigade | 30x Volunteer Firefighters, 1x Heavy Tanker, 1x Light Tanker | Shannons Flat |
| Peak View Rural Fire Brigade | 30x Volunteer Firefighters, 1x Heavy Tanker, 1x Light Tanker | Peak View |
| Numeralla Rural Fire Brigade | 30x Volunteer Firefighters, 1x Heavy Tanker, 1x Light Tanker | Numeralla |
| Cooma Rural Fire Brigade | 30x Volunteer Firefighters, 1x Heavy Tanker, 1x Light Tanker | Polo Flat |
| Brothers-Frampton Rural Fire Brigade | 30x Volunteer Firefighters, 1x Heavy Tanker, 1x Light Tanker | Coolringdon |
| Dry Plains (Wambrook) Rural Fire Brigade | 30x Volunteer Firefighters, 1x Heavy Tanker, 1x Light Tanker | Wambrook |
| Dry Plains (Caddigat) Rural Fire Brigade | 30x Volunteer Firefighters, 1x Heavy Tanker, 1x Light Tanker | Dry Plain |
| Anglers Reach Rural Fire Brigade | 30x Volunteer Firefighters, 1x Heavy Tanker, 1x Light Tanker | Anglers Reach |
| Rocky Plains-Eucumbene Rural Fire Brigade | 30x Volunteer Firefighters, 1x Heavy Tanker, 1x Light Tanker | Eucumbene |
| Rocky Plains Rural Fire Brigade | 30x Volunteer Firefighters, 1x Heavy Tanker, 1x Light Tanker | Rocky Plain |
| Berridale-Kalkite Rural Fire Brigade | 30x Volunteer Firefighters, 1x Heavy Tanker, 1x Light Tanker | Kalkite |
| Jindabyne East Rural Fire Brigade | 30x Volunteer Firefighters, 1x Heavy Tanker, 1x Light Tanker | East Jindabyne |
| Berridale-Avonside Rural Fire Brigade | 30x Volunteer Firefighters, 1x Heavy Tanker, 1x Light Tanker | Avonside |
| Wollondibby-Snowy River Rural Fire Brigade | 30x Volunteer Firefighters, 1x Heavy Tanker, 1x Light Tanker | Crackenback |
| Jindabyne Rural Fire Brigade | 30x Volunteer Firefighters, 1x Heavy Tanker, 1x Light Tanker | Jindabyne |
| Ingebyra-Moonbah Rural Fire Brigade | 30x Volunteer Firefighters, 1x Heavy Tanker, 1x Light Tanker | Moonbah (North) |
| Ingebyra-Abington Park Rural Fire Brigade | 30x Volunteer Firefighters, 1x Heavy Tanker, 1x Light Tanker | Moonbah (South) |
| Ingebyra-South Rural Fire Brigade | 30x Volunteer Firefighters, 1x Heavy Tanker, 1x Light Tanker | Ingebirah |
| Dalgety Rural Fire Brigade | 30x Volunteer Firefighters, 1x Heavy Tanker, 1x Light Tanker | Dalgety |
| Brothers-Bobundara Rural Fire Brigade | 30x Volunteer Firefighters, 1x Heavy Tanker, 1x Light Tanker | Bobundara |
| Nimmitabel Rural Fire Brigade | 30x Volunteer Firefighters, 1x Heavy Tanker, 1x Light Tanker | Nimmitabel |
| Numbla Vale Rural Fire Brigade | 30x Volunteer Firefighters, 1x Heavy Tanker, 1x Light Tanker | Numbla Vale |
| Bungarby Rural Fire Brigade | 30x Volunteer Firefighters, 1x Heavy Tanker, 1x Light Tanker | Bungarby |
| Ando Rural Fire Brigade | 30x Volunteer Firefighters, 1x Heavy Tanker, 1x Light Tanker | Ando |
| Creewah Rural Fire Brigade | 30x Volunteer Firefighters, 1x Heavy Tanker, 1x Light Tanker | Creewah |
| Bibbenluke Rural Fire Brigade | 30x Volunteer Firefighters, 1x Heavy Tanker, 1x Light Tanker | Bibbenluke |
| Cathcart Rural Fire Brigade | 30x Volunteer Firefighters, 1x Heavy Tanker, 1x Light Tanker | Cathcart |
| Bombala Rural Fire Brigade | 30x Volunteer Firefighters, 1x Heavy Tanker, 1x Light Tanker | Bombala |
| Craigie Rural Fire Brigade | 30x Volunteer Firefighters, 1x Heavy Tanker, 1x Light Tanker | Craigie |
| Delegate Rural Fire Brigade | 30x Volunteer Firefighters, 1x Heavy Tanker, 1x Light Tanker | Delegate |
| Corrowong Rural Fire Brigade | 30x Volunteer Firefighters, 1x Heavy Tanker, 1x Light Tanker | Corrowong |
| Unit: | Size: | Base: |
|---|---|---|
| Riverina Highlands District Headquarters | 15x Permanent Personnel, 1x Command Vehicle | Tumut |
| Riverina Highlands Support Rural Fire Brigade | 100x Volunteer Firefighters, 1x Heavy Tanker, 1x Bulk Water Carrier, 1x Transport Bus, 1x Logistics Support Vehicle, 1x Logistics Truck, 2x Command Vehicles | Tumut |
| Riverina Highlands Communications Rural Fire Brigade | 30x Volunteer Firefighters, 1x Communications Truck, 1x Command Vehicle | Tumut |
| Brigade: | Size: | Location: |
|---|---|---|
| Courabyra Rural Fire Brigade | 45x Volunteer Firefighters, 1x Heavy Tanker, 1x Light Tanker, 1x Bulk Water Carrier | Courabyra |
| Bringenbrong Rural Fire Brigade | 30x Volunteer Firefighters, 1x Heavy Tanker, 1x Light Tanker | Khancoban |
| Jingellic-Greater Hume Rural Fire Brigade | 30x Volunteer Firefighters, 1x Heavy Tanker, 1x Light Tanker | Jingellic |
| Ournie Rural Fire Brigade | 30x Volunteer Firefighters, 1x Heavy Tanker, 1x Light Tanker | Ournie |
| Tooma Rural Fire Brigade | 30x Volunteer Firefighters, 1x Heavy Tanker, 1x Light Tanker | Tooma |
| Maragle Rural Fire Brigade | 30x Volunteer Firefighters, 1x Heavy Tanker, 1x Light Tanker | Maragle |
| Tumbarumba-Elliot Way Rural Fire Brigade | 30x Volunteer Firefighters, 1x Heavy Tanker, 1x Light Tanker | Paddys River |
| Glen/Mannus Rural Fire Brigade | 30x Volunteer Firefighters, 1x Heavy Tanker, 1x Light Tanker | Munderoo |
| Tumbarumba Rural Fire Brigade | 30x Volunteer Firefighters, 1x Heavy Tanker, 1x Light Tanker | Tumbarumba |
| Rosewood Rural Fire Brigade | 30x Volunteer Firefighters, 1x Heavy Tanker, 1x Light Tanker | Rosewood |
| Wolseley Park Rural Fire Brigade | 30x Volunteer Firefighters, 1x Heavy Tanker, 1x Light Tanker | Glenroy |
| Willigobung Rural Fire Brigade | 30x Volunteer Firefighters, 1x Heavy Tanker, 1x Light Tanker | Willigobung |
| Lower Bago Rural Fire Brigade | 30x Volunteer Firefighters, 1x Heavy Tanker, 1x Light Tanker | Taradale |
| Talbingo Rural Fire Brigade | 30x Volunteer Firefighters, 1x Heavy Tanker, 1x Light Tanker | Talbingo |
| Batlow Rural Fire Brigade | 30x Volunteer Firefighters, 1x Heavy Tanker, 1x Light Tanker | Batlow |
| Yaven Creek Rural Fire Brigade | 30x Volunteer Firefighters, 1x Heavy Tanker, 1x Light Tanker | Yaven Creek |
| Wondalga Rural Fire Brigade | 30x Volunteer Firefighters, 1x Heavy Tanker, 1x Light Tanker | Wondalga |
| Darlow Rural Fire Brigade | 30x Volunteer Firefighters, 1x Heavy Tanker, 1x Light Tanker | Darlow |
| Gilmore Rural Fire Brigade | 30x Volunteer Firefighters, 1x Heavy Tanker, 1x Light Tanker | Gilmore |
| Adelong Rural Fire Brigade | 30x Volunteer Firefighters, 1x Heavy Tanker, 1x Light Tanker | Adelong |
| Mount Horeb Rural Fire Brigade | 30x Volunteer Firefighters, 1x Heavy Tanker, 1x Light Tanker | Grahamstown |
| Gocup Rural Fire Brigade | 30x Volunteer Firefighters, 1x Heavy Tanker, 1x Light Tanker | Minjary |
| Bombowlee Rural Fire Brigade | 30x Volunteer Firefighters, 1x Heavy Tanker, 1x Light Tanker | Mundongo |
| Tumut Plains Rural Fire Brigade | 30x Volunteer Firefighters, 1x Heavy Tanker, 1x Light Tanker | Tumut Plains |
| Goobarragandra Rural Fire Brigade | 30x Volunteer Firefighters, 1x Heavy Tanker, 1x Light Tanker | Goobarragandra |
| Brungle Rural Fire Brigade | 30x Volunteer Firefighters, 1x Heavy Tanker, 1x Light Tanker | Brungle |
| Brindabella Rural Fire Brigade | 30x Volunteer Firefighters, 1x Heavy Tanker, 1x Light Tanker | Brindabella |
| Tumut Rural Fire Brigade | 30x Volunteer Firefighters, 1x Heavy Tanker, 1x Light Tanker | Tumut |
| Unit: | Size: | Base: |
|---|---|---|
| South Western Area Command Headquarters | 50x Permanent Personnel | Thurgoona |
| Unit: | Size: | Base: |
|---|---|---|
| Bland Temora District Headquarters | 15x Permanent Personnel, 1x Command Vehicle | Temora |
| Bland Temora Support Rural Fire Brigade | 100x Volunteer Firefighters, 1x Heavy Tanker, 1x Bulk Water Carrier, 1x Transport Bus, 1x Logistics Support Vehicle, 1x Logistics Truck, 2x Command Vehicles | Temora |
| Bland Temora Communications Rural Fire Brigade | 30x Volunteer Firefighters, 1x Communications Truck, 1x Command Vehicle | Temora |
| Brigade: | Size: | Location: |
|---|---|---|
| Tallimba Rural Fire Brigade | 60x Volunteer Firefighters, 2x Heavy Tankers, 2x Light Tankers | Tallimba (North) |
| Weethalle Rural Fire Brigade | 45x Volunteer Firefighters, 2x Heavy Tankers, 1x Light Tanker | Weethalle |
| Barmedman Rural Fire Brigade | 45x Volunteer Firefighters, 1x Heavy Tanker, 2x Light Tankers | Barmedman (South) |
| West Wyalong Rural Fire Brigade | 45x Volunteer Firefighters, 1x Heavy Tanker, 1x Light Tanker, 1x Bulk Water Carrier | Wyalong (Central) |
| Ungarie-Bland Rural Fire Brigade | 45x Volunteer Firefighters, 2x Medium Tankers, 1x Light Tanker | Ungarie (East) |
| Blow Clear-Wamboyne Rural Fire Brigade | 30x Volunteer Firefighters, 2x Heavy Tankers | Girral (East) |
| Kikoira-Anona Rural Fire Brigade | 30x Volunteer Firefighters, 1x Heavy Tanker, 1x Light Tanker | Kikoira (Central) |
| Naradhan Rural Fire Brigade | 30x Volunteer Firefighters, 1x Heavy Tanker, 1x Light Tanker | Naradhan |
| Alleena Rural Fire Brigade | 30x Volunteer Firefighters, 1x Heavy Tanker, 1x Light Tanker | Alleena |
| Mandamah Rural Fire Brigade | 30x Volunteer Firefighters, 1x Heavy Tanker, 1x Light Tanker | Ariah Park (Northwest) |
| Sandy Creek-Bland Rural Fire Brigade | 30x Volunteer Firefighters, 1x Heavy Tanker, 1x Light Tanker | Ariah Park (Northeast) |
| Thulloo Rural Fire Brigade | 30x Volunteer Firefighters, 1x Heavy Tanker, 1x Light Unit | Kikoira (East) |
| South Gipps Rural Fire Brigade | 30x Volunteer Firefighters, 1x Heavy Tanker, 1x Light Unit | Ungarie (North) |
| Calleen-Girral Rural Fire Brigade | 30x Volunteer Firefighters, 1x Heavy Tanker, 1x Light Unit | Girral (West) |
| Mirrool Rural Fire Brigade | 30x Volunteer Firefighters, 1x Heavy Tanker, 1x Light Unit | Mirrool |
| Back Creek-Bland Rural Fire Brigade | 30x Volunteer Firefighters, 1x Heavy Tanker, 1x Light Unit | Back Creek |
| Clear Ridge Rural Fire Brigade | 30x Volunteer Firefighters, 1x Heavy Tanker, 1x Light Unit | Wyalong (North) |
| Gubbata Rural Fire Brigade | 30x Volunteer Firefighters, 1x Heavy Tanker, 1x Light Unit | Kikoira (West) |
| Kildary Rural Fire Brigade | 30x Volunteer Firefighters, 1x Heavy Tanker, 1x Light Unit | Tallimba (Southeast) |
| Mallee Plains Rural Fire Brigade | 30x Volunteer Firefighters, 1x Heavy Tanker, 1x Light Unit | Barellan (North) |
| Mildil Rural Fire Brigade | 30x Volunteer Firefighters, 1x Heavy Tanker, 1x Light Unit | West Wyalong (Central) |
| Winnunga Rural Fire Brigade | 30x Volunteer Firefighters, 1x Heavy Tanker, 1x Light Unit | Ungarie (Central) |
| Weja Rural Fire Brigade | 30x Volunteer Firefighters, 1x Heavy Tanker, 1x Light Unit | Ungarie (West) |
| Yalgogrin Rural Fire Brigade | 30x Volunteer Firefighters, 1x Heavy Tanker, 1x Light Unit | North Yalgogrin |
| Yiddah Rural Fire Brigade | 30x Volunteer Firefighters, 1x Heavy Tanker, 1x Light Unit | Barmedman (North) |
| Bland Creek Rural Fire Brigade | 30x Volunteer Firefighters, 1x Heavy Tanker, 1x Bulk Water Carrier | Bland |
| Brigade: | Size: | Location: |
|---|---|---|
| Pinnacle Rural Fire Brigade | 45x Volunteer Firefighters, 2x Heavy Tankers, 1x Light Tanker | Trungley Hall |
| Combaning South Rural Fire Brigade | 45x Volunteer Firefighters, 2x Heavy Tankers, 1x Light Tanker | Combaning |
| Narraburra Rural Fire Brigade | 45x Volunteer Firefighters, 1x Heavy Tanker, 2x Light Tankers | Narraburra |
| Thanowring Rural Fire Brigade | 45x Volunteer Firefighters, 1x Medium Tanker, 1x Light Tanker, 1x Bulk Water Carrier | Temora |
| Ariah Park Rural Fire Brigade | 30x Volunteer Firefighters, 2x Heavy Tankers | Ariah Park (South) |
| Tara-Bectric Rural Fire Brigade | 30x Volunteer Firefighters, 2x Heavy Tankers | Bectric |
| Mimosa Rural Fire Brigade | 30x Volunteer Firefighters, 2x Heavy Tankers | Mimosa |
| Morangarell Rural Fire Brigade | 30x Volunteer Firefighters, 2x Heavy Tankers | Morangarell |
| Quandary-Pucawan Rural Fire Brigade | 30x Volunteer Firefighters, 2x Heavy Tankers | Quandary |
| Springdale Rural Fire Brigade | 30x Volunteer Firefighters, 1x Heavy Tanker, 1x Light Tanker | Springdale |
| Unit: | Size: | Base: |
|---|---|---|
| Riverina District Headquarters | 15x Permanent Personnel, 1x Command Vehicle | Ashmont |
| Riverina Support Rural Fire Brigade | 100x Volunteer Firefighters, 2x Heavy Bulk Water Carriers, 1x Transport Bus, 1x Logistics Support Vehicle, 1x Logistics Truck, 2x Command Vehicles | Ashmont |
| Riverina Communications Rural Fire Brigade | 30x Volunteer Firefighters, 1x Communications Truck, 1x Command Vehicle | Ashmont |
| Brigade: | Size: | Location: |
|---|---|---|
| Lake Albert Rural Fire Brigade | 75x Volunteer Firefighters, 1x Medium Pumper, 2x Heavy Tankers, 2x Medium Tankers | Gregadoo |
| Tarcutta Rural Fire Brigade | 60x Volunteer Firefighters, 2x Heavy Tankers, 1x Medium Tanker, 1x Light Tanker | Tarcutta (North) |
| Forest Hill Rural Fire Brigade | 45x Volunteer Firefighters, 1x Medium Pumper, 2x Heavy Tankers | Forest Hill |
| Currawarna Rural Fire Brigade | 45x Volunteer Firefighters, 3x Heavy Tankers | Currawarna |
| Book Book Rural Fire Brigade | 45x Volunteer Firefighters, 3x Heavy Tankers | Kyeamba |
| Borambola Rural Fire Brigade | 45x Volunteer Firefighters, 2x Heavy Tankers, 1x Medium Tanker | Borambola |
| Galore-Wagga Wagga Rural Fire Brigade | 30x Volunteer Firefighters, 2x Heavy Tankers | Galore |
| Brookdale Rural Fire Brigade | 30x Volunteer Firefighters, 2x Heavy Tankers | Lockhart |
| Kockibitoo Rural Fire Brigade | 30x Volunteer Firefighters, 2x Heavy Tankers | Ganmain (Southwest) |
| Mangain Rural Fire Brigade | 30x Volunteer Firefighters, 2x Heavy Tankers | Ganmain (South) |
| Collingullie Rural Fire Brigade | 30x Volunteer Firefighters, 2x Heavy Tankers | Collingullie |
| Euberta Rural Fire Brigade | 30x Volunteer Firefighters, 2x Heavy Tankers | Euberta |
| Yarragundry Rural Fire Brigade | 30x Volunteer Firefighters, 2x Heavy Tankers | San Isidore |
| Uranquinty Rural Fire Brigade | 30x Volunteer Firefighters, 2x Heavy Tankers | Uranquinty |
| Downside Rural Fire Brigade | 30x Volunteer Firefighters, 2x Heavy Tankers | Downside |
| Eunony Rural Fire Brigade | 30x Volunteer Firefighters, 2x Heavy Tankers | Eunanoreenya |
| Ladysmith Rural Fire Brigade | 30x Volunteer Firefighters, 2x Heavy Tankers | Ladysmith |
| Maxwell Rural Fire Brigade | 30x Volunteer Firefighters, 2x Heavy Tankers | Maxwell |
| Big Springs Rural Fire Brigade | 30x Volunteer Firefighters, 2x Heavy Tankers | Big Springs |
| Mangoplah Rural Fire Brigade | 30x Volunteer Firefighters, 2x Heavy Tankers | Mangoplah |
| Pulletop Rural Fire Brigade | 30x Volunteer Firefighters, 2x Heavy Tankers | Pulletop |
| Tarcutta South Rural Fire Brigade | 30x Volunteer Firefighters, 2x Heavy Tankers | Tarcutta (South) |
| Umbango/Oberne Rural Fire Brigade | 30x Volunteer Firefighters, 2x Heavy Tankers | Oberne Creek (North) |
| Oberne Creek Rural Fire Brigade | 30x Volunteer Firefighters, 2x Heavy Tankers | Oberne Creek (South) |
| Glenfield Rural Fire Brigade | 30x Volunteer Firefighters, 1x Heavy Tanker, 1x Medium Tanker | Ashmont |
| Brucedale Rural Fire Brigade | 30x Volunteer Firefighters, 1x Heavy Tanker, 1x Light Unit | Brucedale |
| Tooyal Rural Fire Brigade | 30x Volunteer Firefighters, 1x Heavy Tanker, 1x Light Unit | The Gap |
| Humula Rural Fire Brigade | 30x Volunteer Firefighters, 1x Light Tanker, 1x Light Unit | Humula |
| Oura Rural Fire Brigade | 30x Volunteer Firefighters, 1x Light Tanker, 1x Light Unit | Oura |
| Brigade: | Size: | Location: |
|---|---|---|
| Ganmain Rural Fire Brigade | 45x Volunteer Firefighters, 1x Heavy Tanker, 1x Light Tanker, 1x Bulk Water Carrier | Ganmain (Central) |
| Marrar Rural Fire Brigade | 30x Volunteer Firefighters, 2x Heavy Tankers | Marrar (North) |
| Ardlethan Rural Fire Brigade | 30x Volunteer Firefighters, 1x Heavy Tanker, 1x Medium Tanker | Ardlethan |
| Rannock Rural Fire Brigade | 30x Volunteer Firefighters, 1x Heavy Tanker, 1x Light Tanker | Rannock |
| Matong Rural Fire Brigade | 30x Volunteer Firefighters, 1x Heavy Tanker, 1x Light Tanker | Matong |
| Walleroobie Rural Fire Brigade | 30x Volunteer Firefighters, 1x Heavy Tanker, 1x Light Unit | Walleroobie |
| Cowabbie Rural Fire Brigade | 30x Volunteer Firefighters, 1x Heavy Tanker, 1x Light Unit | Cowabbie |
| Methul Rural Fire Brigade | 30x Volunteer Firefighters, 1x Heavy Tanker, 1x Light Unit | Methul |
| Murrulebale Rural Fire Brigade | 30x Volunteer Firefighters, 1x Heavy Tanker, 1x Light Unit | Murrulebale |
| Berry Jerry North Rural Fire Brigade | 30x Volunteer Firefighters, 1x Heavy Tanker, 1x Light Unit | Berry Jerry |
| Ganmain North Rural Fire Brigade | 30x Volunteer Firefighters, 1x Heavy Tanker, 1x Light Unit | Ganmain (North) |
| Coolamon Rural Fire Brigade | 30x Volunteer Firefighters, 1x Heavy Tanker, 1x Light Unit | Coolamon |
| Marrarvale Rural Fire Brigade | 30x Volunteer Firefighters, 1x Medium Tanker, 1x Light Unit | Marrar (South) |
| Beckom Rural Fire Brigade | 30x Volunteer Firefighters, 1x Medium Tanker, 1x Light Unit | Beckom |
| Brigade: | Size: | Location: |
|---|---|---|
| Junee Rural Fire Brigade | 60x Volunteer Firefighters, 1x Heavy Tanker, 1x Medium Tanker, 2x Bulk Water Carriers | Junee |
| Bethungra Rural Fire Brigade | 45x Volunteer Firefighters, 1x Heavy Tanker, 2x Light Tankers | Bethungra |
| Wantabadgery Rural Fire Brigade | 45x Volunteer Firefighters, 1x Heavy Tanker, 2x Light Tankers | Wantabadgery |
| Dirnaseer Rural Fire Brigade | 30x Volunteer Firefighters, 2x Heavy Tankers | Dirnaseer |
| Illabo Rural Fire Brigade | 30x Volunteer Firefighters, 1x Heavy Tanker, 1x Medium Tanker | Illabo |
| Marinna Rural Fire Brigade | 30x Volunteer Firefighters, 1x Heavy Tanker, 1x Light Unit | Marinna |
| Junee Reefs Rural Fire Brigade | 30x Volunteer Firefighters, 1x Heavy Tanker, 1x Light Unit | Junee Reefs |
| Old Junee Rural Fire Brigade | 30x Volunteer Firefighters, 1x Heavy Tanker, 1x Light Unit | Old Junee |
| Wantiool Rural Fire Brigade | 30x Volunteer Firefighters, 1x Heavy Tanker, 1x Light Unit | Wantiool |
| Yathella Rural Fire Brigade | 30x Volunteer Firefighters, 1x Heavy Tanker, 1x Light Unit | Yathella |
| Harefield Rural Fire Brigade | 30x Volunteer Firefighters, 1x Heavy Tanker, 1x Light Unit | Harefield |
| Eurongilly Rural Fire Brigade | 30x Volunteer Firefighters, 1x Medium Tanker, 1x Light Unit | Eurongilly |
| Erin Vale Rural Fire Brigade | 30x Volunteer Firefighters, 1x Light Tanker, 1x Light Unit | Erin Vale |
| Brigade: | Size: | Location: |
|---|---|---|
| Fargunyah Rural Fire Brigade | 30x Volunteer Firefighters, 2x Heavy Tankers | Boree Creek (East) |
| Lockhart Central Rural Fire Brigade | 30x Volunteer Firefighters, 2x Heavy Tankers | Lockhart (Central) |
| Brookong Rural Fire Brigade | 30x Volunteer Firefighters, 2x Heavy Tankers | Lockhart (South) |
| Milbrulong Rural Fire Brigade | 30x Volunteer Firefighters, 2x Heavy Tankers | Milbrulong |
| Osborne Rural Fire Brigade | 30x Volunteer Firefighters, 2x Heavy Tankers | Osborne |
| Bidgeemia Rural Fire Brigade | 30x Volunteer Firefighters, 2x Heavy Tankers | Bidgeemia |
| Urangeline Rural Fire Brigade | 30x Volunteer Firefighters, 2x Heavy Tankers | Urangeline |
| Pleasant Hills Rural Fire Brigade | 30x Volunteer Firefighters, 2x Heavy Tankers | Pleasant Hills |
| Munyabla Rural Fire Brigade | 30x Volunteer Firefighters, 2x Heavy Tankers | Munyabla |
| Yerong Creek Rural Fire Brigade | 30x Volunteer Firefighters, 2x Heavy Tankers | Yerong Creek |
| The Rock Rural Fire Brigade | 30x Volunteer Firefighters, 2x Heavy Tankers | The Rock |
| West Brookong Rural Fire Brigade | 30x Volunteer Firefighters, 1x Heavy Tanker, 1x Bulk Water Carrier | Boree Creek (South) |
| Unit: | Size: | Base: |
|---|---|---|
| Southern Border District Headquarters | 15x Permanent Personnel, 1x Command Vehicle | East Albury |
| Southern Border Support Rural Fire Brigade | 100x Volunteer Firefighters, 1x Heavy Tanker, 1x Bulk Water Carrier, 1x Transport Bus, 1x Logistics Support Vehicle, 1x Logistics Truck, 2x Command Vehicles | East Albury |
| Southern Border Communications Rural Fire Brigade | 30x Volunteer Firefighters, 1x Communications Truck, 1x Command Vehicle | East Albury |
| Brigade: | Size: | Location: |
|---|---|---|
| Thurgoona Rural Fire Brigade | 75x Volunteer Firefighters, 1x Medium Pumper, 2x Heavy Tankers, 1x Light Tanker, 1x Command Vehicle | Thurgoona |
| Lavington Rural Fire Brigade | 60x Volunteer Firefighters, 3x Heavy Tankers, 1x Command Vehicle | Lavington |
| Splitters Creek Rural Fire Brigade | 45x Volunteer Firefighters, 2x Heavy Tankers, 1x Command Vehicle | Splitters Creek |
| Table Top Rural Fire Brigade | 45x Volunteer Firefighters, 2x Heavy Tankers, 1x Command Vehicle | Table Top |
| Brigade: | Size: | Location: |
|---|---|---|
| Jindera Rural Fire Brigade | 45x Volunteer Firefighters, 1x Heavy Tanker, 1x Light Tanker, 1x Command Vehicle | Jindera |
| Carabost Rural Fire Brigade | 30x Volunteer Firefighters, 1x Heavy Tanker, 1x Light Tanker | Carabost |
| Lankey's Creek Rural Fire Brigade | 30x Volunteer Firefighters, 1x Heavy Tanker, 1x Light Tanker | Lankeys Creek |
| Talmalmo Rural Fire Brigade | 30x Volunteer Firefighters, 1x Heavy Tanker, 1x Light Tanker | Talmalmo |
| Cookardinia Rural Fire Brigade | 30x Volunteer Firefighters, 1x Heavy Tanker, 1x Light Tanker | Cookardinia |
| Morven Rural Fire Brigade | 30x Volunteer Firefighters, 1x Heavy Tanker, 1x Light Tanker | Morven |
| Central-Greater Hume Rural Fire Brigade | 30x Volunteer Firefighters, 1x Heavy Tanker, 1x Light Tanker | Holbrook |
| Woomargama Rural Fire Brigade | 30x Volunteer Firefighters, 1x Heavy Tanker, 1x Light Tanker | Woomargama |
| Mullengandra Rural Fire Brigade | 30x Volunteer Firefighters, 1x Heavy Tanker, 1x Light Tanker | Mullengandra |
| Gerogery Rural Fire Brigade | 30x Volunteer Firefighters, 1x Heavy Tanker, 1x Light Tanker | Gerogery |
| Walla Walla Rural Fire Brigade | 30x Volunteer Firefighters, 1x Heavy Tanker, 1x Light Tanker | Walla Walla |
| Glenellen Rural Fire Brigade | 30x Volunteer Firefighters, 1x Heavy Tanker, 1x Light Tanker | Glenellen |
| Bungowannah Rural Fire Brigade | 30x Volunteer Firefighters, 1x Heavy Tanker, 1x Light Tanker | Bungowannah |
| Burrumbuttock Rural Fire Brigade | 30x Volunteer Firefighters, 1x Heavy Tanker, 1x Light Tanker | Burrumbuttock |
| Brocklesby Rural Fire Brigade | 30x Volunteer Firefighters, 1x Heavy Tanker, 1x Light Tanker | Brocklesby |
| Goombargana (South) Rural Fire Brigade | 30x Volunteer Firefighters, 1x Heavy Tanker, 1x Light Tanker | Balldale (East) |
| Goombargana (North) Rural Fire Brigade | 30x Volunteer Firefighters, 1x Heavy Tanker, 1x Light Tanker | Goombargana |
| Walbundrie Rural Fire Brigade | 30x Volunteer Firefighters, 1x Heavy Tanker, 1x Light Tanker | Walbundrie |
| Bulgandra Rural Fire Brigade | 30x Volunteer Firefighters, 1x Heavy Tanker, 1x Light Tanker | Rand (East) |
| Brigade: | Size: | Location: |
|---|---|---|
| Federation Support Rural Fire Brigade | 45x Volunteer Firefighters, 1x Heavy Tanker, 1x Bulk Water Carrier, 1x Transport Bus | Corowa |
| Howlong Rural Fire Brigade | 45x Volunteer Firefighters, 1x Medium Pumper, 2x Heavy Tankers | Howlong |
| Savernake Rural Fire Brigade | 45x Volunteer Firefighters, 2x Heavy Tankers, 1x Bulk Water Carrier | Savernake |
| Corowa Rural Fire Brigade | 30x Volunteer Firefighters, 2x Heavy Tankers | Corowa |
| Rand Rural Fire Brigade | 30x Volunteer Firefighters, 2x Heavy Tankers | Rand (West) |
| Balldale Rural Fire Brigade | 30x Volunteer Firefighters, 2x Heavy Tankers | Balldale (West) |
| Redlands Rural Fire Brigade | 30x Volunteer Firefighters, 2x Heavy Tankers | Redlands |
| Buraja Rural Fire Brigade | 30x Volunteer Firefighters, 2x Heavy Tankers | Lowesdale |
| Daysdale Rural Fire Brigade | 30x Volunteer Firefighters, 2x Heavy Tankers | Daysdale |
| Oaklands Rural Fire Brigade | 30x Volunteer Firefighters, 2x Heavy Tankers | Oaklands |
| Urana Rural Fire Brigade | 30x Volunteer Firefighters, 2x Heavy Tankers | Urana (South) |
| Cullivel Rural Fire Brigade | 30x Volunteer Firefighters, 2x Heavy Tankers | Urana (North) |
| Yuluma Rural Fire Brigade | 30x Volunteer Firefighters, 2x Heavy Tankers | Boree Creek (West) |
| Boree Creek Rural Fire Brigade | 30x Volunteer Firefighters, 2x Heavy Tankers | Boree Creek (Central) |
| Boree Creek North Rural Fire Brigade | 30x Volunteer Firefighters, 2x Heavy Tankers | Boree Creek (Northwest) |
| Morundah-Urana Rural Fire Brigade | 30x Volunteer Firefighters, 2x Heavy Tankers | Morundah (North) |
| Widgiewa Rural Fire Brigade | 30x Volunteer Firefighters, 2x Heavy Tankers | Morundah (South) |
| Mulwala-Tarramia Rural Fire Brigade | 30x Volunteer Firefighters, 2x Heavy Tankers | Mulwala |
| Brigade: | Size: | Location: |
|---|---|---|
| Barooga Rural Fire Brigade | 60x Volunteer Firefighters, 1x Medium Pumper, 1x Heavy Tanker, 1x Light Tanker, 1x Light Unit | Barooga |
| Berrigan Rural Fire Brigade | 45x Volunteer Firefighters, 3x Heavy Tankers | Berrigan |
| Tocumwal Rural Fire Brigade | 45x Volunteer Firefighters, 2x Heavy Tankers, 1x Light Unit | Tocumwal |
| Finley Rural Fire Brigade | 45x Volunteer Firefighters, 2x Heavy Tankers, 1x Command Vehicle | Finley |
| Mount Gwynne Rural Fire Brigade | 30x Volunteer Firefighters, 1x Heavy Tanker, 1x Light Unit | Boomanoomana |
| Unit: | Size: | Base: |
|---|---|---|
| MIA District Headquarters | 15x Permanent Personnel, 1x Command Vehicle | Griffith |
| MIA District Support Rural Fire Brigade | 100x Volunteer Firefighters, 1x Heavy Tanker, 1x Bulk Water Carrier, 1x Transport Bus, 1x Logistics Support Vehicle, 1x Logistics Truck, 2x Command Vehicles | Griffith |
| MIA District Communications Rural Fire Brigade | 30x Volunteer Firefighters, 1x Communications Truck, 1x Command Vehicle | Griffith |
| Brigade: | Size: | Location: |
|---|---|---|
| Warrawidgee Rural Fire Brigade | 30x Volunteer Firefighters, 2x Heavy Tankers | Warrawidgee |
| Wyangan Rural Fire Brigade | 30x Volunteer Firefighters, 2x Heavy Tankers | Lake Wyangan |
| Beelbangera Rural Fire Brigade | 30x Volunteer Firefighters, 2x Heavy Tankers | Beelbangera |
| Hanwood Rural Fire Brigade | 30x Volunteer Firefighters, 2x Heavy Tankers | Griffith |
| Bilbul Rural Fire Brigade | 30x Volunteer Firefighters, 2x Heavy Tankers | Bilbul |
| Myall Park Rural Fire Brigade | 30x Volunteer Firefighters, 2x Heavy Tankers | Myall Park (South) |
| Benerembah Rural Fire Brigade | 30x Volunteer Firefighters, 2x Heavy Tankers | Benerembah |
| Kooba Rural Fire Brigade | 30x Volunteer Firefighters, 2x Heavy Tankers | Kooba |
| Warburn Rural Fire Brigade | 30x Volunteer Firefighters, 2x Heavy Tankers | Warburn |
| Widgelli/Wumbulgal Rural Fire Brigade | 30x Volunteer Firefighters, 2x Heavy Tankers | Widgelli |
| Brigade: | Size: | Location: |
|---|---|---|
| Hay Shire Support Rural Fire Brigade | 15x Volunteer Firefighters, 1x Heavy Bulk Water Carrier | Hay |
| Booligal Village Rural Fire Brigade | 30x Volunteer Firefighters, 1x Heavy Tanker, 1x Light Tanker | Booligal (South) |
| Area D Rural Fire Brigade | 30x Volunteer Firefighters, 1x Heavy Tanker, 1x Light Tanker | One Tree |
| Area E Rural Fire Brigade | 30x Volunteer Firefighters, 1x Heavy Tanker, 1x Light Tanker | Hay South (West) |
| Area C Rural Fire Brigade | 30x Volunteer Firefighters, 1x Heavy Tanker, 1x Light Tanker | Maude (South) |
| Maude Rural Fire Brigade | 30x Volunteer Firefighters, 1x Heavy Tanker, 1x Light Tanker | Maude (North) |
| Area A Rural Fire Brigade | 30x Volunteer Firefighters, 1x Heavy Tanker, 1x Light Tanker | Booligal (North) |
| Area B Rural Fire Brigade | 30x Volunteer Firefighters, 1x Heavy Tanker, 1x Light Tanker | Hay South (East) |
| Brigade: | Size: | Location: |
|---|---|---|
| Murrami Rural Fire Brigade | 30x Volunteer Firefighters, 1x Heavy Tanker, 1x Light Tanker | Murrami |
| Whitton Rural Fire Brigade | 30x Volunteer Firefighters, 1x Heavy Tanker, 1x Light Tanker | Whitton |
| Five Bough/Stony Point Rural Fire Brigade | 30x Volunteer Firefighters, 1x Heavy Tanker, 1x Light Tanker | Leeton |
| Gogeldrie Rural Fire Brigade | 30x Volunteer Firefighters, 1x Heavy Tanker, 1x Light Tanker | Gogeldrie |
| Yanco-Wamoon Rural Fire Brigade | 30x Volunteer Firefighters, 1x Heavy Tanker, 1x Light Tanker | Yanco |
| Euroley-Leeton Rural Fire Brigade | 30x Volunteer Firefighters, 1x Heavy Tanker, 1x Light Tanker | Euroley |
| Brigade: | Size: | Location: |
|---|---|---|
| Mossgiel Rural Fire Brigade | 30x Volunteer Firefighters, 1x Heavy Tanker, 1x Light Tanker | Mossgiel |
| Hillston Strategic Rural Fire Brigade | 30x Volunteer Firefighters, 1x Heavy Tanker, 1x Light Tanker | Hillston (Central) |
| Merriwagga Rural Fire Brigade | 30x Volunteer Firefighters, 1x Heavy Tanker, 1x Light Tanker | Merriwagga |
| Rankins Springs Town Rural Fire Brigade | 30x Volunteer Firefighters, 1x Heavy Tanker, 1x Light Tanker | Rankins Springs (Central) |
| Carrathool Town Rural Fire Brigade | 30x Volunteer Firefighters, 1x Heavy Tanker, 1x Light Tanker | Carrathool (Central) |
| Goolgowi (Lowan Street) Rural Fire Brigade | 30x Volunteer Firefighters, 1x Heavy Tanker, 1x Light Tanker | Goolgowi (Central) |
| Goolgowi (Napier Street) Rural Fire Brigade | 30x Volunteer Firefighters, 1x Heavy Tanker, 1x Light Tanker | Goolgowi (Central) |
| Ballandry Rural Fire Brigade | 30x Volunteer Firefighters, 1x Heavy Tanker, 1x Light Tanker | Myall Park (East) |
| Boorga Rural Fire Brigade | 30x Volunteer Firefighters, 1x Heavy Tanker, 1x Light Tanker | Boorga |
| Bringagee Rural Fire Brigade | 30x Volunteer Firefighters, 1x Heavy Tanker, 1x Light Tanker | Carrathool (Far East) |
| Bunda North Rural Fire Brigade | 30x Volunteer Firefighters, 1x Heavy Tanker, 1x Light Tanker | Hillston (South) |
| Camp Plain Rural Fire Brigade | 30x Volunteer Firefighters, 1x Heavy Tanker, 1x Light Tanker | Hillston (North) |
| Conapaira West Rural Fire Brigade | 30x Volunteer Firefighters, 1x Heavy Tanker, 1x Light Tanker | Rankin Springs (West) |
| Coonara/Groongal Rural Fire Brigade | 30x Volunteer Firefighters, 1x Heavy Tanker, 1x Light Tanker | Carrathool (East) |
| Corynnia Rural Fire Brigade | 30x Volunteer Firefighters, 1x Heavy Tanker, 1x Light Tanker | Carrathool (North) |
| Erigolia Rural Fire Brigade | 30x Volunteer Firefighters, 1x Heavy Tanker, 1x Light Tanker | Erigolia |
| Goolgowi District Rural Fire Brigade | 30x Volunteer Firefighters, 1x Heavy Tanker, 1x Light Tanker | Goolgowi (Northeast) |
| Gunbar Rural Fire Brigade | 30x Volunteer Firefighters, 1x Heavy Tanker, 1x Light Tanker | Gunbar |
| Hillston Rural Fire Brigade | 30x Volunteer Firefighters, 1x Heavy Tanker, 1x Light Tanker | Hillston (Central) |
| Long Plain Rural Fire Brigade | 30x Volunteer Firefighters, 1x Heavy Tanker, 1x Light Tanker | Hillston (West) |
| Melbergen/Monia Gap Rural Fire Brigade | 30x Volunteer Firefighters, 1x Heavy Tanker, 1x Light Tanker | Melbergen |
| Yoolaroi Rural Fire Brigade | 30x Volunteer Firefighters, 1x Heavy Tanker, 1x Light Tanker | Goolgowi (Northeast) |
| Brigade: | Size: | Location: |
|---|---|---|
| Binya-Narrandera Rural Fire Brigade | 30x Volunteer Firefighters, 1x Heavy Tanker, 1x Light Unit | Binya |
| Barellan Rural Fire Brigade | 30x Volunteer Firefighters, 1x Heavy Tanker, 1x Light Unit | Barellan |
| Brobenah Rural Fire Brigade | 30x Volunteer Firefighters, 1x Heavy Tanker, 1x Light Unit | Colinroobie (West) |
| Colinroobie Rural Fire Brigade | 30x Volunteer Firefighters, 1x Heavy Tanker, 1x Light Unit | Colinroobie (East) |
| Paynters Siding Rural Fire Brigade | 30x Volunteer Firefighters, 1x Heavy Tanker, 1x Light Unit | Narrandera (South) |
| Gillenbah Rural Fire Brigade | 30x Volunteer Firefighters, 1x Heavy Tanker, 1x Light Unit | Gillenbah |
| Grong Grong Rural Fire Brigade | 30x Volunteer Firefighters, 1x Heavy Tanker, 1x Light Unit | Grong Grong |
| Birrego-Faithfull Rural Fire Brigade | 30x Volunteer Firefighters, 1x Heavy Tanker, 1x Light Unit | Boree Creek (Northeast) |
| Corobimilla Rural Fire Brigade | 30x Volunteer Firefighters, 1x Heavy Tanker, 1x Light Unit | Corobimilla |
| Kamarah Rural Fire Brigade | 30x Volunteer Firefighters, 1x Heavy Tanker, 1x Light Unit | Kamarah |
| Landervale Rural Fire Brigade | 30x Volunteer Firefighters, 1x Heavy Tanker, 1x Light Unit | Landervale |
| Midgeon Rural Fire Brigade | 30x Volunteer Firefighters, 1x Heavy Tanker, 1x Light Unit | Narrandera (North) |
| Moombooldool Rural Fire Brigade | 30x Volunteer Firefighters, 1x Heavy Tanker, 1x Light Unit | Moombooldool |
| Sandigo Rural Fire Brigade | 30x Volunteer Firefighters, 1x Heavy Tanker, 1x Light Unit | Sandigo |
| Brigade: | Size: | Location: |
|---|---|---|
| Darlington Point Rural Fire Brigade | 30x Volunteer Firefighters, 1x Heavy Tanker, 1x Light Unit | Darlington Point (East) |
| Tubbo Rural Fire Brigade | 30x Volunteer Firefighters, 1x Heavy Tanker, 1x Light Unit | Coleambally (Northeast) |
| Coleambally Rural Fire Brigade | 30x Volunteer Firefighters, 1x Heavy Tanker, 1x Light Unit | Coleambally (Central) |
| Gidgell Rural Fire Brigade | 30x Volunteer Firefighters, 1x Heavy Tanker, 1x Light Unit | Coleambally (East) |
| Emery Rural Fire Brigade | 30x Volunteer Firefighters, 1x Heavy Tanker, 1x Light Unit | Coleambally (South) |
| Yamma Rural Fire Brigade | 30x Volunteer Firefighters, 1x Heavy Tanker, 1x Light Unit | Coleambally (Southeast) |
| Cadell Rural Fire Brigade | 30x Volunteer Firefighters, 1x Heavy Tanker, 1x Light Unit | Coleambally (Southeast) |
| Bolton Rural Fire Brigade | 30x Volunteer Firefighters, 1x Heavy Tanker, 1x Light Unit | Jerilderie (North) |
| Booroobanilly Rural Fire Brigade | 30x Volunteer Firefighters, 1x Heavy Tanker, 1x Light Unit | Jerilderie (South) |
| Coree South Rural Fire Brigade | 30x Volunteer Firefighters, 1x Heavy Tanker, 1x Light Unit | Jerilderie (West) |
| Nyora Rural Fire Brigade | 30x Volunteer Firefighters, 1x Heavy Tanker, 1x Light Unit | Nyora |
| Yooroobla Rural Fire Brigade | 30x Volunteer Firefighters, 1x Heavy Tanker, 1x Light Unit | Jerilderie (East) |
| Mairjimmy Rural Fire Brigade | 30x Volunteer Firefighters, 1x Heavy Tanker, 1x Light Unit | Mairjimmy |
| Bundure Rural Fire Brigade | 30x Volunteer Firefighters, 1x Heavy Tanker, 1x Light Unit | Bundure (East) |
| Boyd Rural Fire Brigade | 30x Volunteer Firefighters, 1x Heavy Tanker, 1x Light Unit | Bundure (Central) |
| Cararbury Rural Fire Brigade | 30x Volunteer Firefighters, 1x Heavy Tanker, 1x Light Unit | Darlington Point (Central) |
| Gundaline Rural Fire Brigade | 30x Volunteer Firefighters, 1x Heavy Tanker, 1x Light Unit | Carrathool (South) |
| Maley Rural Fire Brigade | 30x Volunteer Firefighters, 1x Heavy Tanker, 1x Light Unit | Coleambally (Southwest) |
| Argoon Rural Fire Brigade | 30x Volunteer Firefighters, 1x Heavy Tanker, 1x Bulk Water Carrier | Bundure (West) |
| Jerilderie Rural Fire Brigade | 30x Volunteer Firefighters, 1x Heavy Tanker, 1x Bulk Water Carrier | Jerilderie (Central) |
| Unit: | Size: | Base: |
|---|---|---|
| Mid Murray District Headquarters | 15x Permanent Personnel, 1x Command Vehicle | Deniliquin |
| Mid Murray Support Rural Fire Brigade | 100x Volunteer Firefighters, 1x Heavy Tanker, 1x Bulk Water Carrier, 1x Transport Bus, 1x Logistics Support Vehicle, 1x Logistics Truck, 2x Command Vehicles | Deniliquin |
| Mid Murray Communications Rural Fire Brigade | 30x Volunteer Firefighters, 1x Communications Truck, 1x Command Vehicle | Deniliquin |
| Brigade: | Size: | Location: |
|---|---|---|
| Moama Rural Fire Brigade | 75x Volunteer Firefighters, 3x Heavy Tankers, 1x Light Tanker, 1x Command Vehicle | Moama |
| Moulamein Town Rural Fire Brigade | 60x Volunteer Firefighters, 2x Heavy Tankers, 1x Rescue Truck, 1x Rescue Support Vehicle | Moulamein |
| Goodnight Rural Fire Brigade | 30x Volunteer Firefighters, 2x Heavy Tankers | Goodnight |
| Tooleybuc Rural Fire Brigade | 30x Volunteer Firefighters, 2x Heavy Tankers | Tooleybuc |
| Koraleigh Rural Fire Brigade | 30x Volunteer Firefighters, 2x Heavy Tankers | Koraleigh |
| Mallan Rural Fire Brigade | 30x Volunteer Firefighters, 2x Heavy Tankers | Mallan |
| Murray Downs Rural Fire Brigade | 30x Volunteer Firefighters, 2x Heavy Tankers | Murray Downs |
| Wakool-Rangemore Rural Fire Brigade | 30x Volunteer Firefighters, 2x Heavy Tankers | Burraboi |
| Tullakool Rural Fire Brigade | 30x Volunteer Firefighters, 2x Heavy Tankers | Tullakool |
| Barham Rural Fire Brigade | 30x Volunteer Firefighters, 2x Heavy Tankers | Barham |
| Wakool Village Rural Fire Brigade | 30x Volunteer Firefighters, 2x Heavy Tankers | Wakool |
| Brassi Rural Fire Brigade | 30x Volunteer Firefighters, 2x Heavy Tankers | Deniliquin (West) |
| Caldwell Rural Fire Brigade | 30x Volunteer Firefighters, 2x Heavy Tankers | Thule |
| Hill Plain-Cobb Highway Rural Fire Brigade | 30x Volunteer Firefighters, 2x Heavy Tankers | Deniliquin (South) |
| Hill Plain-Royal Road Rural Fire Brigade | 30x Volunteer Firefighters, 2x Heavy Tankers | Deniliquin (Southwest) |
| Tantonan Rural Fire Brigade | 30x Volunteer Firefighters, 2x Heavy Tankers | Tantonan |
| Bunnaloo Rural Fire Brigade | 30x Volunteer Firefighters, 2x Heavy Tankers | Bunnaloo |
| Bullatale Rural Fire Brigade | 30x Volunteer Firefighters, 2x Heavy Tankers | Bullatale |
| Mathoura Rural Fire Brigade | 30x Volunteer Firefighters, 2x Heavy Tankers | Mathoura |
| Thyra Rural Fire Brigade | 30x Volunteer Firefighters, 2x Heavy Tankers | Thyra |
| Womboota Rural Fire Brigade | 30x Volunteer Firefighters, 2x Heavy Tankers | Womboota |
| Noorong Rural Fire Brigade | 30x Volunteer Firefighters, 2x Heavy Tankers | Noorong |
| Kyalite Rural Fire Brigade | 30x Volunteer Firefighters, 2x Heavy Tankers | Kyalite |
| Dhuragoon Rural Fire Brigade | 30x Volunteer Firefighters, 2x Heavy Tankers | Dhuragoon |
| Gonn-Mellool Rural Fire Brigade | 30x Volunteer Firefighters, 2x Heavy Tankers | Cobramunga |
| Yanga Rural Fire Brigade | 30x Volunteer Firefighters, 2x Heavy Tankers | Yanga |
| Brigade: | Size: | Location: |
|---|---|---|
| Deniliquin Rural Fire Brigade | 45x Volunteer Firefighters, 2x Heavy Tankers, 1x Bulk Water Carrier | Deniliquin (Central) |
| Conargo Rural Fire Brigade | 45x Volunteer Firefighters, 2x Heavy Tankers, 1x Bulk Water Carrier | Conargo |
| Booroorban Rural Fire Brigade | 30x Volunteer Firefighters, 2x Heavy Tankers | Booroorban |
| West Windouran Rural Fire Brigade | 30x Volunteer Firefighters, 2x Heavy Tankers | Barratta |
| Wanganella Rural Fire Brigade | 30x Volunteer Firefighters, 2x Heavy Tankers | Wanganella |
| Denimein Rural Fire Brigade | 30x Volunteer Firefighters, 2x Heavy Tankers | Morago |
| Wandook Rural Fire Brigade | 30x Volunteer Firefighters, 2x Heavy Tankers | Deniliquin (Northeast) |
| Birganbigil Rural Fire Brigade | 30x Volunteer Firefighters, 2x Heavy Tankers | Lindifferon |
| Mayrung Rural Fire Brigade | 30x Volunteer Firefighters, 2x Heavy Tankers | Mayrung |
| Myrtle Park Rural Fire Brigade | 30x Volunteer Firefighters, 2x Heavy Tankers | Logie Brae |
| Tuppal Rural Fire Brigade | 30x Volunteer Firefighters, 2x Heavy Tankers | Warragoon |
| Blighty Rural Fire Brigade | 30x Volunteer Firefighters, 2x Heavy Tankers | Blighty |
| Pine Lea Rural Fire Brigade | 30x Volunteer Firefighters, 2x Heavy Tankers | Tuppal |
| Goolgumbla Rural Fire Brigade | 30x Volunteer Firefighters, 2x Heavy Tankers | Mabins Well |
| Unit: | Size: | Base: |
|---|---|---|
| Lower Western District Headquarters | 15x Permanent Personnel, 1x Command Vehicle | Dareton |
| Lower Western Support Rural Fire Brigade | 100x Volunteer Firefighters, 1x Heavy Tanker, 1x Bulk Water Carrier, 1x Transport Bus, 1x Logistics Support Vehicle, 1x Logistics Truck, 2x Command Vehicles | Dareton |
| Lower Western Communications Rural Fire Brigade | 30x Volunteer Firefighters, 1x Communications Truck, 1x Command Vehicle | Dareton |
| Brigade: | Size: | Location: |
|---|---|---|
| Euston Town Rural Fire Brigade | 45x Volunteer Firefighters, 1x Heavy Tanker, 1x Rescue Truck, 1x Rescue Support Vehicle | Euston (West) |
| Balranald Rural Fire Brigade | 30x Volunteer Firefighters, 1x Heavy Tanker, 1x Light Tanker | Balranald |
| Weimby Rural Fire Brigade | 30x Volunteer Firefighters, 1x Heavy Tanker, 1x Light Unit | Balranald (South) |
| Sturt Highway West Rural Fire Brigade | 30x Volunteer Firefighters, 1x Heavy Tanker, 1x Light Unit | Balranald (West) |
| Benanee Rural Fire Brigade | 30x Volunteer Firefighters, 1x Heavy Tanker, 1x Light Unit | Euston (East) |
| Homebush Rural Fire Brigade | 30x Volunteer Firefighters, 1x Heavy Tanker, 1x Light Unit | Balranald (North) |
| Fresh Water (Tupra) Rural Fire Brigade | 30x Volunteer Firefighters, 1x Heavy Tanker, 1x Light Unit | Oxley |
| Hatfield Rural Fire Brigade | 30x Volunteer Firefighters, 1x Heavy Tanker, 1x Light Unit | Hatfield |
| Fresh Water (Mayfield) Rural Fire Brigade | 30x Volunteer Firefighters, 1x Heavy Tanker, 1x Light Unit | Booligal |
| Clare Rural Fire Brigade | 30x Volunteer Firefighters, 1x Heavy Tanker, 1x Light Unit | Clare |
| Clare West Rural Fire Brigade | 30x Volunteer Firefighters, 1x Heavy Tanker, 1x Light Unit | Ivanhoe (South) |
| Boree Rural Fire Brigade | 30x Volunteer Firefighters, 1x Heavy Tanker, 1x Light Unit | Arumpo |
| Brigade: | Size: | Location: |
|---|---|---|
| Pooncarie Town Rural Fire Brigade | 60x Volunteer Firefighters, 1x Heavy Tanker, 1x Light Tanker, 1x Rescue Truck, 1x Rescue Support Vehicle | Pooncarie (Central) |
| Dareton Rural Fire Brigade | 30x Volunteer Firefighters, 2x Heavy Tankers | Dareton |
| Cal Lal Rural Fire Brigade | 30x Volunteer Firefighters, 1x Heavy Tanker, 1x Light Tanker | Pine Camp |
| Scotia Rural Fire Brigade | 30x Volunteer Firefighters, 1x Heavy Tanker, 1x Light Tanker | Scotia |
| Anabranch Rural Fire Brigade | 30x Volunteer Firefighters, 1x Heavy Tanker, 1x Light Tanker | Rufus |
| Wyndham-Wentworth (North) Rural Fire Brigade | 30x Volunteer Firefighters, 1x Heavy Tanker, 1x Light Tanker | Anabranch North |
| Wyndham-Wentworth (South) Rural Fire Brigade | 30x Volunteer Firefighters, 1x Heavy Tanker, 1x Light Tanker | Anabranch South |
| Gol Gol Rural Fire Brigade | 30x Volunteer Firefighters, 1x Heavy Tanker, 1x Light Tanker | Gol Gol |
| Buronga Rural Fire Brigade | 30x Volunteer Firefighters, 1x Heavy Tanker, 1x Light Tanker | Buronga |
| Pomona Rural Fire Brigade | 30x Volunteer Firefighters, 1x Heavy Tanker, 1x Light Tanker | Pomona |
| Garnpang (Arumpo) Rural Fire Brigade | 30x Volunteer Firefighters, 1x Heavy Tanker, 1x Light Tanker | Arumpo |
| Karpa Kora Rural Fire Brigade | 30x Volunteer Firefighters, 1x Heavy Tanker, 1x Light Tanker | Pan Ban |
| Ellerslie Rural Fire Brigade | 30x Volunteer Firefighters, 1x Heavy Tanker, 1x Light Tanker | Ellerslie |
| Para Rural Fire Brigade | 30x Volunteer Firefighters, 1x Heavy Tanker, 1x Light Tanker | Para |
| Tapio Rural Fire Brigade | 30x Volunteer Firefighters, 1x Heavy Tanker, 1x Light Tanker | Pooncarie (South) |
| Garnpang (Lelma) Rural Fire Brigade | 30x Volunteer Firefighters, 1x Heavy Tanker, 1x Light Tanker | Pooncarie (South) |
| Polia Rural Fire Brigade | 30x Volunteer Firefighters, 1x Heavy Tanker, 1x Light Tanker | Pooncarie (Central) |
| Pooncarie North Rural Fire Brigade | 30x Volunteer Firefighters, 1x Heavy Tanker, 1x Light Tanker | Pooncarie (North) |
| Curlwaa Rural Fire Brigade | 30x Volunteer Firefighters, 1x Heavy Tanker, 1x Light Unit | Curlwaa |
 |
| Type: | Amount: | Image: |
|---|---|---|
| Paramedics | 7,500 |  |
| Special Operations Paramedics | 300 |  |
| Type: | Amount: | Image: |
|---|---|---|
| Ambulance | 976 |  |
| Rapid Response Vehicle | 200 |  |
| 4WD Ambulance | 80 |  |
| Extended Care Vans | 50 |  |
| Road Retrieval Ambulances | 8 |  |
| Motorcycle Ambulance | 6 |  |
| Command Vehicles | 100 |  |
| Forward Command Centre | 2 |  |
| Alpine Ambulance | 1 | |
| Over Snow Ambulance | 1 |  |
| Snowmobile | 2 |  |
| Alpine 4WD Ambulance | 2 |  |
| Community Emergency Response Vehicles | 51 |  |
| Special Operations Response Vehicles | 18 |  |
| 4WD Rescue Vehicles | 18 |  |
| Rescue Support Vehicles | 2 |  |
| Multipurpose Vehicles | 2 |  |
| Rescue Truck | 8 |  |
| Hazardous Area Rescue Ambulance | 8 |  |
| Major Incident Support Vehicles | 2 |  |
| Flood Boats | 8 |  |
| Pilatus PC-24 | 2 |  |
| AgustaWestland AW139 | 11 | 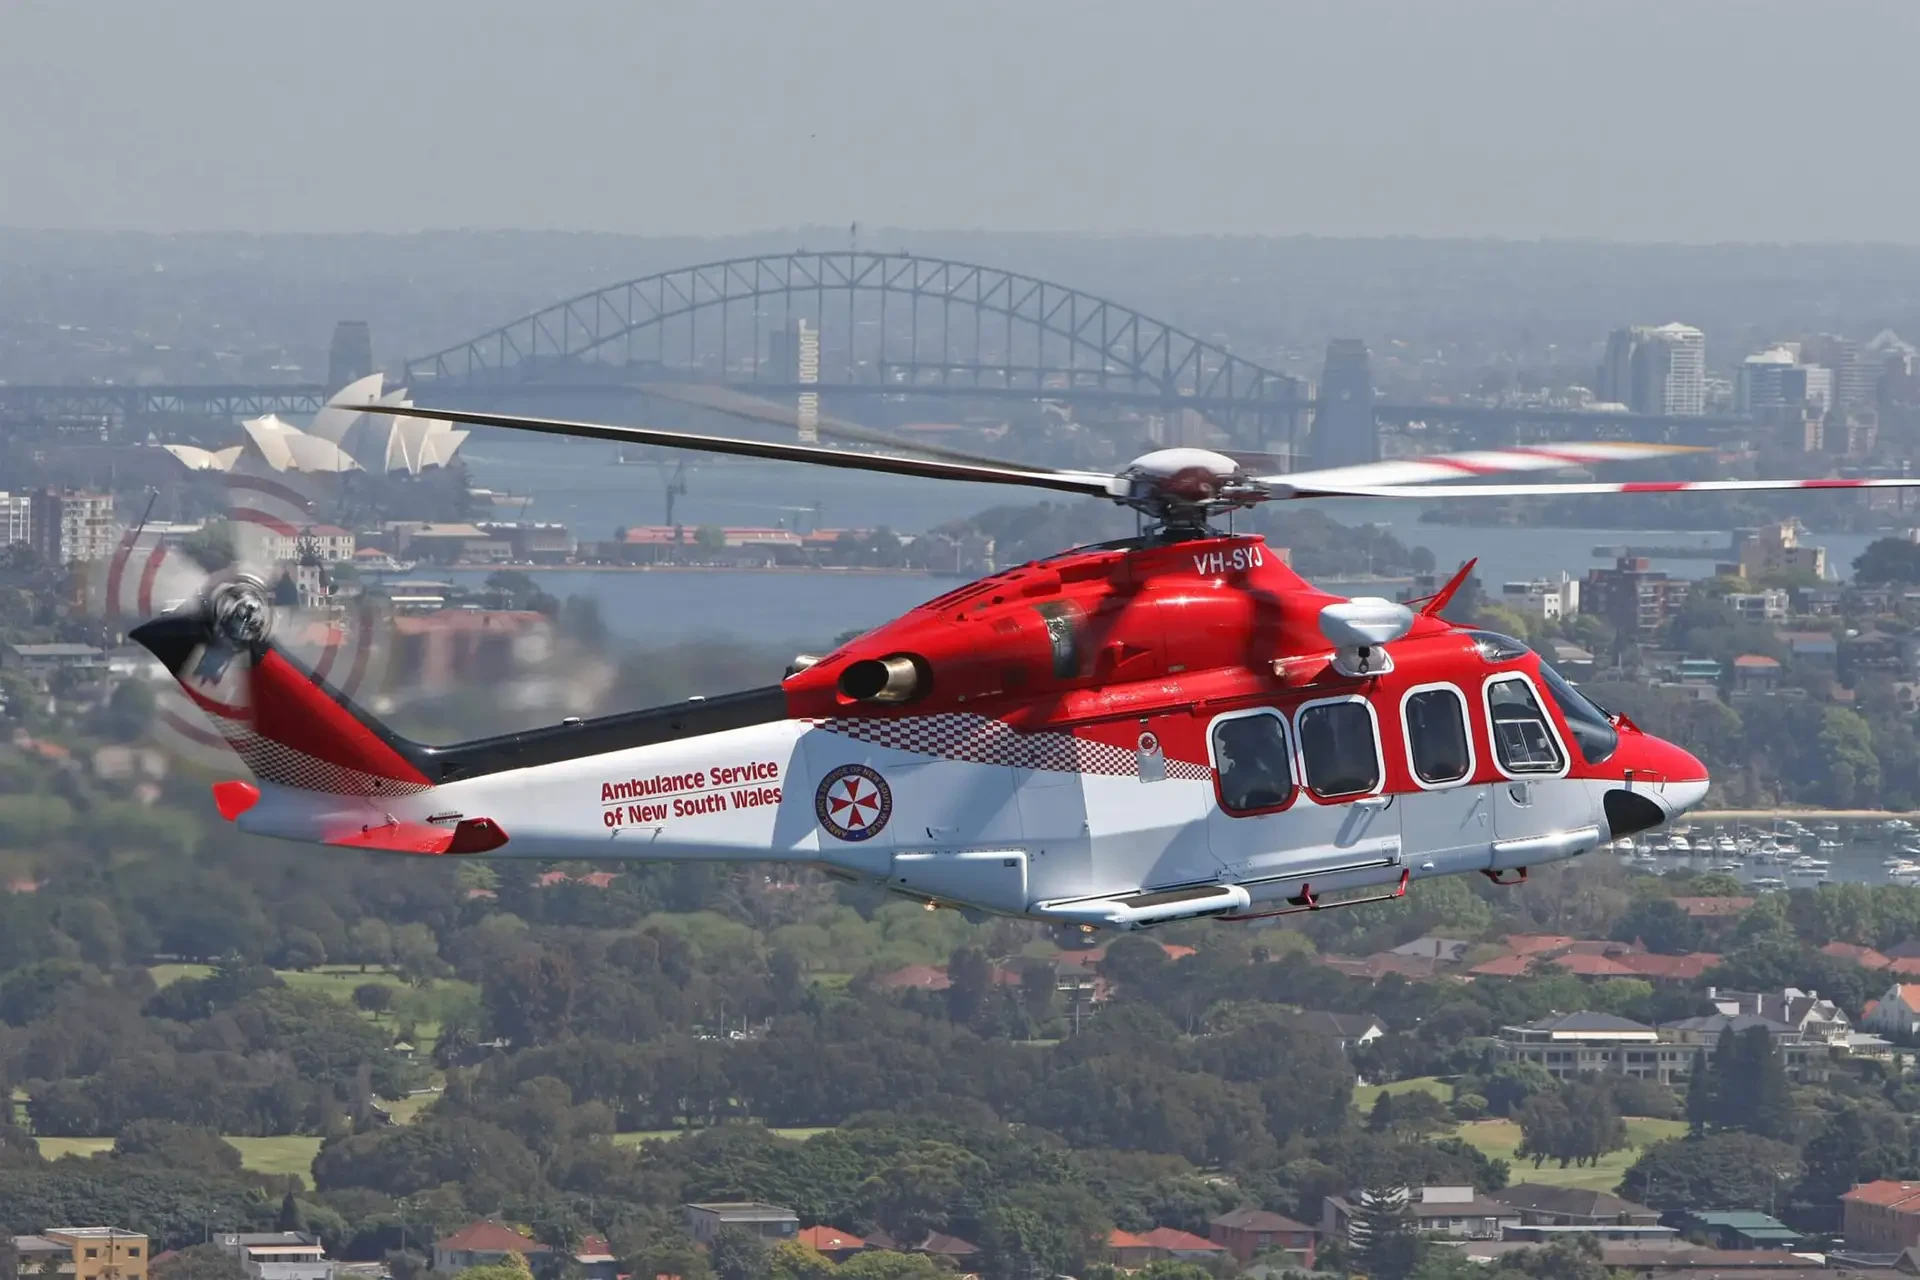 |
| Beechcraft Super King Air 350 | 4 |
| Station: | Size: | Location: |
|---|---|---|
| Central Sydney Ambulance Superstation | 170x Paramedics, 20x Ambulances, 8x Rapid Response Ambulances, 4x Command Vehicles, 2x Extended Care Vans | Forest Lodge |
| Haberfield Ambulance Superstation | 170x Paramedics, 20x Ambulances, 8x Rapid Response Ambulances, 4x Command Vehicles, 2x Extended Care Vans | Haberfield |
| Campsie Ambulance Station | 30x Paramedics, 6x Ambulances | Campsie |
| Concord Ambulance Station | 30x Paramedics, 6x Ambulances | Concord West |
| Marrickville Ambulance Station | 30x Paramedics, 6x Ambulances | Marrickville |
| Paddington Ambulance Station | 20x Paramedics, 4x Ambulances | Paddington |
| Bondi Ambulance Station | 20x Paramedics, 4x Ambulances | Bondi Beach |
| Drummoyne Ambulance Station | 20x Paramedics, 4x Ambulances | Drummoyne |
| Station: | Size: | Location: |
|---|---|---|
| Kogarah Ambulance Superstation | 170x Paramedics, 20x Ambulances, 8x Rapid Response Ambulances, 4x Command Vehicles, 2x Extended Care Vans | Kogarah |
| Randwick Ambulance Superstation | 170x Paramedics, 20x Ambulances, 8x Rapid Response Ambulances, 4x Command Vehicles, 2x Extended Care Vans | Randwick |
| Caringbah Ambulance Superstation | 170x Paramedics, 20x Ambulances, 8x Rapid Response Ambulances, 4x Command Vehicles, 2x Extended Care Vans | Caringbah |
| Maroubra Ambulance Station | 20x Paramedics, 4x Ambulances | Maroubra |
| Mascot Ambulance Station | 20x Paramedics, 4x Ambulances | Mascot |
| Engadine Ambulance Station | 20x Paramedics, 4x Ambulances | Engadine |
| Bundeena Ambulance Station | 10x Paramedics, 2x Ambulances | Bundeena |
| Menai Ambulance Station | 10x Paramedics, 2x Ambulances | Menai |
| Mortdale Paramedic Response Point | 10x Paramedics, 1x Ambulance, 1x Rapid Response Ambulance | Mortdale |
| Station: | Size: | Location: |
|---|---|---|
| Artarmon Ambulance Superstation | 170x Paramedics, 20x Ambulances, 8x Rapid Response Ambulances, 4x Command Vehicles, 2x Extended Care Vans | Artarmon |
| Ryde Ambulance Station | 75x Paramedics, 8x Ambulances, 4x Rapid Response Ambulances, 2x Command Vehicles, 1x Extended Care Van | Denistone |
| Balgowlah Ambulance Station | 75x Paramedics, 8x Ambulances, 4x Rapid Response Ambulances, 2x Command Vehicles, 1x Extended Care Van | Balgowlah |
| St Ives Ambulance Station | 75x Paramedics, 8x Ambulances, 4x Rapid Response Ambulances, 2x Command Vehicles, 1x Extended Care Van | St Ives |
| Narrabeen Ambulance Station | 75x Paramedics, 8x Ambulances, 4x Rapid Response Ambulances, 2x Command Vehicles, 1x Extended Care Van | Narrabeen |
| Naremburn Ambulance Station | 30x Paramedics, 6x Ambulances | Naremburn |
| Lane Cove Ambulance Station | 30x Paramedics, 6x Ambulances | Lane Cove |
| Belrose Ambulance Station | 20x Paramedics, 4x Ambulances | Belrose |
| Wahroonga Ambulance Station | 20x Paramedics, 4x Ambulances | Wahroonga |
| Mona Vale Ambulance Station | 20x Paramedics, 4x Ambulances | Mona Vale |
| Avalon Ambulance Station | 10x Paramedics, 2x Ambulances | Avalon Beach |
| Scotland Island Community First Responder Station | 5x Paramedics, 1x Community Emergency Response Vehicle | Scotland Island |
| Station: | Size: | Location: |
|---|---|---|
| Woy Woy Ambulance Station | 75x Paramedics, 8x Ambulances, 4x Rapid Response Ambulances, 2x Command Vehicles, 1x Extended Care Van | Woy Woy |
| Point Clare Ambulance Station | 75x Paramedics, 8x Ambulances, 4x Rapid Response Ambulances, 2x Command Vehicles, 1x Extended Care Van | Point Clare |
| Bateau Bay Ambulance Station | 75x Paramedics, 8x Ambulances, 4x Rapid Response Ambulances, 2x Command Vehicles, 1x Extended Care Van | Bateau Bay |
| Toukley Ambulance Station | 75x Paramedics, 8x Ambulances, 4x Rapid Response Ambulances, 2x Command Vehicles, 1x Extended Care Van | Toukley |
| Hamlyn Terrace Ambulance Station | 30x Paramedics, 6x Ambulances | Hamlyn Terrace |
| Terrigal Ambulance Station | 30x Paramedics, 6x Ambulances | Terrigal |
| Wyong Ambulance Station | 20x Paramedics, 4x Ambulances | Wyong |
| Doyalson Ambulance Station | 20x Paramedics, 4x Ambulances | Doyalson |
| Morisset Ambulance Station | 20x Paramedics, 4x Ambulances | Morisset |
| Hawkesbury River Ambulance Station | 10x Paramedics, 2x Ambulances | Mooney Mooney |
| Dangar Island Community First Responder Station | 5x Paramedics, 1x Community Emergency Response Vehicle | Dangar Island |
| Station: | Size: | Location: |
|---|---|---|
| Liverpool Ambulance Superstation | 170x Paramedics, 20x Ambulances, 8x Rapid Response Ambulances, 4x Command Vehicles, 2x Extended Care Vans | Liverpool |
| Bowral Ambulance Station | 30x Paramedics, 6x Ambulances | Bowral |
| Camden Ambulance Station | 20x Paramedics, 4x Ambulances | Camden |
| Picton Ambulance Station | 20x Paramedics, 3x Ambulances, 1x 4WD Ambulance | Picton |
| Leppington Paramedic Response Point | 10x Paramedics, 1x Ambulance, 1x Rapid Response Ambulance | Leppington |
| Cecil Hills Paramedic Response Point | 10x Paramedics, 1x Ambulance, 1x Rapid Response Ambulance | Cecil Hills |
| Canyonleigh Community First Responder Station | 5x Paramedics, 1x Community Emergency Response Vehicle | Canyonleigh |
| Bundanoon Community First Responder Station | 5x Paramedics, 1x Community Emergency Response Vehicle | Bundanoon |
| Station: | Size: | Location: |
|---|---|---|
| Bankstown Ambulance Superstation | 170x Paramedics, 20x Ambulances, 8x Rapid Response Ambulances, 4x Command Vehicles, 2x Extended Care Vans | Campbelltown |
| Campbelltown Ambulance Station | 75x Paramedics, 8x Ambulances, 4x Rapid Response Ambulances, 2x Command Vehicles, 1x Extended Care Van | Bankstown |
| Fairfield Ambulance Station | 30x Paramedics, 6x Ambulances | Carramar |
| Macquarie Fields Ambulance Station | 20x Paramedics, 4x Ambulances | Macquarie Fields |
| Wiley Park Paramedic Response Point | 10x Paramedics, 1x Ambulance, 1x Rapid Response Ambulance | Roselands |
| Condell Park Paramedic Response Point | 10x Paramedics, 1x Ambulance, 1x Rapid Response Ambulance | Condell Park |
| Station: | Size: | Location: |
|---|---|---|
| Blacktown Ambulance Superstation | 170x Paramedics, 20x Ambulances, 8x Rapid Response Ambulances, 4x Command Vehicles, 2x Extended Care Vans | Blacktown |
| Northmead Ambulance Superstation | 170x Paramedics, 20x Ambulances, 8x Rapid Response Ambulances, 4x Command Vehicles, 2x Extended Care Vans | Northmead |
| Castle Hill Ambulance Station | 75x Paramedics, 8x Ambulances, 4x Rapid Response Ambulances, 2x Command Vehicles, 1x Extended Care Van | Castle Hill |
| Parramatta Ambulance Station | 30x Paramedics, 6x Ambulances | Parramatta |
| Riverstone Ambulance Station | 20x Paramedics, 4x Ambulances | Grantham Farm |
| Auburn Paramedic Response Point | 10x Paramedics, 1x Ambulance, 1x Rapid Response Ambulance | Auburn |
| Quakers Hill Paramedic Response Point | 10x Paramedics, 1x Ambulance, 1x Rapid Response Ambulance | Quakers Hill |
| Kellyville Paramedic Response Point | 10x Paramedics, 1x Ambulance, 1x Rapid Response Ambulance | Kellyville |
| Holroyd Paramedic Response Point | 10x Paramedics, 1x Ambulance, 1x Rapid Response Ambulance | Holroyd |
| Station: | Size: | Location: |
|---|---|---|
| Penrith Ambulance Superstation | 170x Paramedics, 20x Ambulances, 8x Rapid Response Ambulances, 4x Command Vehicles, 2x Extended Care Vans | Penrith |
| Richmond Ambulance Station | 75x Paramedics, 7x Ambulances, 1x 4WD Ambulance, 4x Rapid Response Ambulances, 2x Command Vehicles, 1x Extended Care Van | Richmond |
| Colyton Ambulance Station | 30x Paramedics, 6x Ambulances | Colyton |
| Tregear Ambulance Station | 30x Paramedics, 6x Ambulances | Tregear |
| Katoomba Ambulance Station | 30x Paramedics, 5x Ambulances, 1x 4WD Ambulance | Katoomba |
| Springwood Ambulance Station | 30x Paramedics, 5x Ambulances, 1x 4WD Ambulance | Springwood |
| Warragamba Ambulance Station | 10x Paramedics, 1x Ambulance, 1x 4WD Ambulance | Warragamba |
| Station: | Size: | Location: |
|---|---|---|
| Hamilton Ambulance Station | 75x Paramedics, 8x Ambulances, 4x Rapid Response Ambulances, 2x Command Vehicles, 1x Extended Care Van | Hamilton East |
| Cardiff Ambulance Station | 75x Paramedics, 8x Ambulances, 4x Rapid Response Ambulances, 2x Command Vehicles, 1x Extended Care Van | Cardiff South |
| Belmont Ambulance Station | 30x Paramedics, 6x Ambulances | Belmont |
| Toronto Ambulance Station | 30x Paramedics, 6x Ambulances | Toronto |
| Birmingham Gardens Ambulance Station | 30x Paramedics, 6x Ambulances | Birmingham Gardens |
| Nelson Bay Ambulance Station | 30x Paramedics, 5x Ambulances, 1x 4WD Ambulance | Salamander Bay |
| Boolaroo Ambulance Station | 20x Paramedics, 4x Ambulances | Boolaroo |
| Stockton Ambulance Station | 10x Paramedics, 2x Ambulances | Stockton |
| Tanilba Bay Ambulance Station | 10x Paramedics, 1x Ambulance, 1x 4WD Ambulance | Tanilba Bay |
| Station: | Size: | Location: |
|---|---|---|
| Rutherford Ambulance Station | 75x Paramedics, 8x Ambulances, 4x Rapid Response Ambulances, 2x Command Vehicles, 1x Extended Care Van | Rutherford |
| Beresfield Ambulance Station | 30x Paramedics, 6x Ambulances | Beresfield |
| Cessnock Ambulance Station | 30x Paramedics, 6x Ambulances | Cessnock |
| Raymond Terrace Ambulance Station | 30x Paramedics, 6x Ambulances | Raymond Terrace |
| Medowie Ambulance Station | 30x Paramedics, 6x Ambulances | Medowie |
| Muswellbrook Ambulance Station | 20x Paramedics, 4x Ambulances | Muswellbrook |
| Kurri Kurri Ambulance Station | 10x Paramedics, 2x Ambulances | Kurri Kurri |
| Tea Gardens Ambulance Station | 10x Paramedics, 2x Ambulances | Tea Gardens |
| Bulahdelah Ambulance Station | 10x Paramedics, 2x Ambulances | Bulahdelah |
| Stroud Ambulance Station | 10x Paramedics, 2x Ambulances | Stroud |
| Dungog Ambulance Station | 10x Paramedics, 2x Ambulances | Dungog |
| Singleton Ambulance Station | 10x Paramedics, 2x Ambulances | Singleton |
| Gloucester Ambulance Station | 10x Paramedics, 2x Ambulances | Gloucester |
| Scone Ambulance Station | 10x Paramedics, 2x Ambulances | Scone |
| Merriwa Ambulance Station | 10x Paramedics, 2x Ambulances | Merriwa |
| Murrurundi Ambulance Station | 10x Paramedics, 2x Ambulances | Murrurundi |
| Denman Community First Responder Station | 5x Paramedics, 1x Community Emergency Response Vehicle | Denman |
| Clarence Town Community First Responder Station | 5x Paramedics, 1x Community Emergency Response Vehicle | Clarence Town |
| Bulga Community First Responder Station | 5x Paramedics, 1x Community Emergency Response Vehicle | Bulga |
| Branxton Community First Responder Station | 5x Paramedics, 1x Community Emergency Response Vehicle | Branxton |
| Howes Valley Community First Responder Station | 5x Paramedics, 1x Community Emergency Response Vehicle | Howes Valley |
| Putty Community First Responder Station | 5x Paramedics, 1x Community Emergency Response Vehicle | Putty |
| Station: | Size: | Location: |
|---|---|---|
| Tamworth City Ambulance Station | 75x Paramedics, 8x Ambulances, 4x Rapid Response Ambulances, 2x Command Vehicles, 1x Extended Care Van | Tamworth |
| Armidale Ambulance Station | 30x Paramedics, 6x Ambulances | Armidale |
| Inverell Ambulance Station | 30x Paramedics, 6x Ambulances | Inverell |
| Tamworth South Ambulance Station | 20x Paramedics, 4x Ambulances | South Tamworth |
| Glen Innes Ambulance Station | 10x Paramedics, 2x Ambulances | Glen Innes |
| Tenterfield Ambulance Station | 10x Paramedics, 2x Ambulances | Tenterfield |
| Ashford Ambulance Station | 10x Paramedics, 2x Ambulances | Ashford |
| Warialda Ambulance Station | 10x Paramedics, 2x Ambulances | Warialda |
| Moree Ambulance Station | 10x Paramedics, 2x Ambulances | Moree |
| Mungindi Ambulance Station | 10x Paramedics, 2x Ambulances | Mungindi |
| Bingara Ambulance Station | 10x Paramedics, 2x Ambulances | Bingara |
| Wee Waa Ambulance Station | 10x Paramedics, 2x Ambulances | Wee Waa |
| Narrabri Ambulance Station | 10x Paramedics, 2x Ambulances | Narrabri |
| Barraba Ambulance Station | 10x Paramedics, 2x Ambulances | Barraba |
| Boggabri Ambulance Station | 10x Paramedics, 2x Ambulances | Boggabri |
| Manilla Ambulance Station | 10x Paramedics, 2x Ambulances | Manilla |
| Guyra Ambulance Station | 10x Paramedics, 2x Ambulances | Guyra |
| Gunnedah Ambulance Station | 10x Paramedics, 2x Ambulances | Gunnedah |
| Walcha Ambulance Station | 10x Paramedics, 2x Ambulances | Walcha |
| Quirindi Ambulance Station | 10x Paramedics, 2x Ambulances | Quirindi |
| Deepwater Community First Responder Station | 5x Paramedics, 1x Community Emergency Response Vehicle | Deepwater |
| Uralla Community First Responder Station | 5x Paramedics, 1x Community Emergency Response Vehicle | Uralla |
| Nundle Community First Responder Station | 5x Paramedics, 1x Community Emergency Response Vehicle | Nundle |
| Tambar Springs Community First Responder Station | 5x Paramedics, 1x Community Emergency Response Vehicle | Tambar Springs |
| Station: | Size: | Location: |
|---|---|---|
| Wollongong Ambulance Station | 75x Paramedics, 8x Ambulances, 4x Rapid Response Ambulances, 2x Command Vehicles, 1x Extended Care Van | Mangerton |
| Oak Flats Ambulance Station | 75x Paramedics, 8x Ambulances, 4x Rapid Response Ambulances, 2x Command Vehicles, 1x Extended Care Van | Oak Flats |
| Bomaderry Ambulance Station | 75x Paramedics, 8x Ambulances, 4x Rapid Response Ambulances, 2x Command Vehicles, 1x Extended Care Van | Bomaderry |
| Fairy Meadow Ambulance Station | 30x Paramedics, 6x Ambulances | North Wollongong |
| Bulli Ambulance Station | 30x Paramedics, 6x Ambulances | Bulli |
| Ulladulla Ambulance Station | 30x Paramedics, 5x Ambulances, 1x 4WD Ambulance | Ulladulla |
| Dapto Ambulance Station | 20x Paramedics, 4x Ambulances | Dapto |
| Warrawong Ambulance Station | 20x Paramedics, 4x Ambulances | Warrawong |
| Huskisson Ambulance Station | 20x Paramedics, 3x Ambulances, 1x 4WD Ambulance | Huskisson |
| Bay & Basin Ambulance Station (incl. Jervis Bay Territory) | 20x Paramedics, 3x Ambulances, 1x 4WD Ambulance | St Georges Basin |
| Helensburgh Ambulance Station | 10x Paramedics, 2x Ambulances | Helensburgh |
| Kiama Ambulance Station | 10x Paramedics, 2x Ambulances | Kiama |
| Kangaroo Valley Ambulance Station | 10x Paramedics, 2x Ambulances | Kangaroo Valley |
| Berry Ambulance Station | 10x Paramedics, 2x Ambulances | Berry |
| Culburra Ambulance Station | 10x Paramedics, 1x Ambulance, 1x 4WD Ambulance | Culburra Beach |
| Sussex Inlet Ambulance Station | 10x Paramedics, 1x Ambulance, 1x 4WD Ambulance | Sussex Inlet |
| Station: | Size: | Location: |
|---|---|---|
| Queanbeyan Ambulance Station | 75x Paramedics, 8x Ambulances, 4x Rapid Response Ambulances, 2x Command Vehicles, 1x Extended Care Van | Queanbeyan |
| Goulburn Ambulance Station | 30x Paramedics, 6x Ambulances | Goulburn |
| Batemans Bay Ambulance Station | 30x Paramedics, 5x Ambulances, 1x 4WD Ambulance | Surf Beach |
| Bega Ambulance Station | 30x Paramedics, 5x Ambulances, 1x 4WD Ambulance | Bega |
| Bungendore Ambulance Station | 10x Paramedics, 2x Ambulances | Bungendore |
| Yass Ambulance Station | 10x Paramedics, 2x Ambulances | Yass |
| Crookwell Ambulance Station | 10x Paramedics, 2x Ambulances | Crookwell |
| Boorowa Ambulance Station | 10x Paramedics, 2x Ambulances | Boorowa |
| Harden Ambulance Station | 10x Paramedics, 2x Ambulances | Harden |
| Cootamundra Ambulance Station | 10x Paramedics, 2x Ambulances | Cootamundra |
| Young Ambulance Station | 10x Paramedics, 2x Ambulances | Young |
| Temora Ambulance Station | 10x Paramedics, 2x Ambulances | Temora |
| Moruya Ambulance Station | 10x Paramedics, 1x Ambulance, 1x 4WD Ambulance | Moruya |
| Narooma Ambulance Station | 10x Paramedics, 1x Ambulance, 1x 4WD Ambulance | Narooma |
| Bermagui Ambulance Station | 10x Paramedics, 1x Ambulance, 1x 4WD Ambulance | Bermagui |
| Merimbula Ambulance Station | 10x Paramedics, 1x Ambulance, 1x 4WD Ambulance | Merimbula |
| Eden Ambulance Station | 10x Paramedics, 1x Ambulance, 1x 4WD Ambulance | Eden |
| Bombala Ambulance Station | 10x Paramedics, 1x Ambulance, 1x 4WD Ambulance | Bombala |
| Jindabyne Ambulance Station | 10x Paramedics, 1x Ambulance, 1x 4WD Ambulance | Jindabye |
| Cooma Ambulance Station | 10x Paramedics, 1x Ambulance, 1x 4WD Ambulance | Cooma |
| Braidwood Ambulance Station | 10x Paramedics, 1x Ambulance, 1x 4WD Ambulance | Braidwood |
| Ardlethan Ambulance Station | 10x Paramedics, 1x Ambulance, 1x 4WD Ambulance | Ardlethan |
| West Wyalong Ambulance Station | 10x Paramedics, 1x Ambulance, 1x 4WD Ambulance | West Wyalong |
| Perisher Valley Ambulance Station | 10x Paramedics, 2x Alpine 4WD Ambulances | Perisher Valley |
| Bigga Community First Responder Station | 5x Paramedics, 1x Community Emergency Response Vehicle | Bigga |
| Windellama Community First Responder Station | 5x Paramedics, 1x Community Emergency Response Vehicle | Windellama |
| Captains Flat Community First Responder Station | 5x Paramedics, 1x Community Emergency Response Vehicle | Captains Flat |
| Thredbo Community First Responder Station | 5x Paramedics, 1x Community Emergency Response Vehicle | Thredbo |
| Station: | Size: | Location: |
|---|---|---|
| Albury Ambulance Station | 75x Paramedics, 8x Ambulances, 4x Rapid Response Ambulances, 2x Command Vehicles, 1x Extended Care Van | Lavington |
| Wagga Wagga Ambulance Station | 75x Paramedics, 8x Ambulances, 4x Rapid Response Ambulances, 2x Command Vehicles, 1x Extended Care Van | Turvey Park |
| Griffith Ambulance Station | 30x Paramedics, 6x Ambulances | Griffith |
| Gundagai Ambulance Station | 10x Paramedics, 2x Ambulances | Gundagai |
| Holbrook Ambulance Station | 10x Paramedics, 2x Ambulances | Holbrook |
| Junee Ambulance Station | 10x Paramedics, 2x Ambulances | Junee |
| Lockhart Ambulance Station | 10x Paramedics, 2x Ambulances | Lockhart |
| Coolamon Ambulance Station | 10x Paramedics, 2x Ambulances | Coolamon |
| Narrandera Ambulance Station | 10x Paramedics, 2x Ambulances | Narrandera |
| Leeton Ambulance Station | 10x Paramedics, 2x Ambulances | Leeton |
| Hay Ambulance Station | 10x Paramedics, 2x Ambulances | Hay |
| Coleambally Ambulance Station | 10x Paramedics, 2x Ambulances | Coleambally |
| Jerilderie Ambulance Station | 10x Paramedics, 2x Ambulances | Jerilderie |
| Berrigan Ambulance Station | 10x Paramedics, 2x Ambulances | Berrigan |
| Corowa Ambulance Station | 10x Paramedics, 2x Ambulances | Corowa |
| Finley Ambulance Station | 10x Paramedics, 2x Ambulances | Finley |
| Deniliquin Ambulance Station | 10x Paramedics, 2x Ambulances | Deniliquin |
| Barham Ambulance Station | 10x Paramedics, 2x Ambulances | Barham |
| Hillston Ambulance Station | 10x Paramedics, 1x Ambulance, 1x 4WD Ambulance | Hillston |
| Tumut Ambulance Station | 10x Paramedics, 1x Ambulance, 1x 4WD Ambulance | Tumut |
| Batlow Ambulance Station | 10x Paramedics, 1x Ambulance, 1x 4WD Ambulance | Batlow |
| Tumbarumba Ambulance Station | 10x Paramedics, 1x Ambulance, 1x 4WD Ambulance | Tumbarumba |
| Balranald Ambulance Station | 10x Paramedics, 1x Ambulance, 1x 4WD Ambulance | Balranald |
| Tocumwal Community First Responder Station | 5x Paramedics, 1x Community Emergency Response Vehicle | Tocumwal |
| Culcairn Community First Responder Station | 5x Paramedics, 1x Community Emergency Response Vehicle | Culcairn |
| Henty Community First Responder Station | 5x Paramedics, 1x Community Emergency Response Vehicle | Henty |
| Goolgowi Community First Responder Station | 5x Paramedics, 1x Community Emergency Response Vehicle | Goolgowi |
| Station: | Size: | Location: |
|---|---|---|
| Coffs Harbour Ambulance Station | 75x Paramedics, 8x Ambulances, 4x Rapid Response Ambulances, 2x Command Vehicles, 1x Extended Care Van | Coffs Harbour |
| Port Macquarie Ambulance Station | 75x Paramedics, 8x Ambulances, 4x Rapid Response Ambulances, 2x Command Vehicles, 1x Extended Care Van | Port Macquarie |
| Taree Ambulance Station | 75x Paramedics, 8x Ambulances, 4x Rapid Response Ambulances, 2x Command Vehicles, 1x Extended Care Van | Taree |
| Forster Ambulance Station | 30x Paramedics, 5x Ambulances, 1x 4WD Ambulance | Forster |
| Tuncurry Ambulance Station | 30x Paramedics, 5x Ambulances, 1x 4WD Ambulance | Tuncurry |
| Kempsey Ambulance Station | 30x Paramedics, 5x Ambulances, 1x 4WD Ambulance | West Kempsey |
| Sawtell Ambulance Station | 20x Paramedics, 3x Ambulances, 1x 4WD Ambulance | Toormina |
| Laurieton Ambulance Station | 20x Paramedics, 3x Ambulances, 1x 4WD Ambulance | Laurieton |
| Old Bar Ambulance Station | 10x Paramedics, 1x Ambulance, 1x 4WD Ambulance | Old Bar |
| Lake Cathie Ambulance Station | 10x Paramedics, 1x Ambulance, 1x 4WD Ambulance | Lake Cathie |
| Wauchope Ambulance Station | 10x Paramedics, 1x Ambulance, 1x 4WD Ambulance | Wauchope |
| South West Rocks Ambulance Station | 10x Paramedics, 1x Ambulance, 1x 4WD Ambulance | South West Rocks |
| Macksville Ambulance Station | 10x Paramedics, 1x Ambulance, 1x 4WD Ambulance | North Macksville |
| Nambucca Heads Ambulance Station | 10x Paramedics, 1x Ambulance, 1x 4WD Ambulance | Nambucca Heads |
| Urunga Ambulance Station | 10x Paramedics, 1x Ambulance, 1x 4WD Ambulance | Urunga |
| Bellingen Ambulance Station | 10x Paramedics, 1x Ambulance, 1x 4WD Ambulance | Bellingen |
| Dorrigo Ambulance Station | 10x Paramedics, 1x Ambulance, 1x 4WD Ambulance | Dorrigo |
| Woolgoolga Ambulance Station | 10x Paramedics, 1x Ambulance, 1x 4WD Ambulance | Woolgoolga |
| Glenreagh Community First Responder Station | 5x Paramedics, 1x Community Emergency Response Vehicle | Genreagh |
| Nana Glen Community First Responder Station | 5x Paramedics, 1x Community Emergency Response Vehicle | Nana Glen |
| Lowanna Community First Responder Station | 5x Paramedics, 1x Community Emergency Response Vehicle | Lowanna |
| Ulong Community First Responder Station | 5x Paramedics, 1x Community Emergency Response Vehicle | Ulong |
| Bowraville Community First Responder Station | 5x Paramedics, 1x Community Emergency Response Vehicle | Bowraville |
| Wingham Community First Responder Station | 5x Paramedics, 1x Community Emergency Response Vehicle | Wingham |
| Station: | Size: | Location: |
|---|---|---|
| Tweed Heads Ambulance Station | 75x Paramedics, 8x Ambulances, 4x Rapid Response Ambulances, 2x Command Vehicles, 1x Extended Care Van | Tweed Heads |
| Lismore Ambulance Station | 75x Paramedics, 8x Ambulances, 4x Rapid Response Ambulances, 2x Command Vehicles, 1x Extended Care Van | Lismore |
| Byron Bay Ambulance Station | 30x Paramedics, 5x Ambulances, 1x 4WD Ambulance | Ewingsdale |
| Grafton Ambulance Station | 30x Paramedics, 5x Ambulances, 1x 4WD Ambulance | Grafton |
| Ballina Ambulance Station | 30x Paramedics, 5x Ambulances, 1x 4WD Ambulance | Ballina |
| Murwillumbah Ambulance Station | 30x Paramedics, 5x Ambulances, 1x 4WD Ambulance | Murwillumbah |
| Kingscliff Ambulance Station | 20x Paramedics, 3x Ambulances, 1x 4WD Ambulance | Kingscliff |
| Casino Ambulance Station | 20x Paramedics, 3x Ambulances, 1x 4WD Ambulance | Casino |
| Mullumbimby Ambulance Station | 10x Paramedics, 2x Ambulances | Mullumbimby |
| Maclean Ambulance Station | 10x Paramedics, 1x Ambulance, 1x 4WD Ambulance | Maclean |
| Iluka Ambulance Station | 10x Paramedics, 1x Ambulance, 1x 4WD Ambulance | Iluka |
| Yamba Ambulance Station | 10x Paramedics, 1x Ambulance, 1x 4WD Ambulance | Yamba |
| Evans Head Ambulance Station | 10x Paramedics, 1x Ambulance, 1x 4WD Ambulance | Evans Head |
| Bonalbo Ambulance Station | 10x Paramedics, 1x Ambulance, 1x 4WD Ambulance | Bonalbo |
| Kyogle Ambulance Station | 10x Paramedics, 1x Ambulance, 1x 4WD Ambulance | Kyogle |
| Urbenville Ambulance Station | 10x Paramedics, 1x Ambulance, 1x 4WD Ambulance | Urbenville |
| Pottsville Ambulance Station | 10x Paramedics, 1x Ambulance, 1x 4WD Ambulance | Pottsville |
| Alstonville Community First Responder Station | 5x Paramedics, 1x Community Emergency Response Vehicle | Alstonville |
| Coraki Community First Responder Station | 5x Paramedics, 1x Community Emergency Response Vehicle | Coraki |
| Wooli Community First Responder Station | 5x Paramedics, 1x Community Emergency Response Vehicle | Wooli |
| Station: | Size: | Location: |
|---|---|---|
| Orange Ambulance Station | 75x Paramedics, 8x Ambulances, 4x Rapid Response Ambulances, 2x Command Vehicles, 1x Extended Care Van | Orange |
| Bathurst Ambulance Station | 30x Paramedics, 6x Ambulances | Bathurst |
| Lithgow Ambulance Station | 30x Paramedics, 6x Ambulances | Lithgow |
| Coolah Ambulance Station | 10x Paramedics, 2x Ambulances | Coolah |
| Dunedoo Ambulance Station | 10x Paramedics, 2x Ambulances | Dunedoo |
| Gulgong Ambulance Station | 10x Paramedics, 2x Ambulances | Gulgong |
| Mudgee Ambulance Station | 10x Paramedics, 2x Ambulances | Mudgee |
| Rylstone Ambulance Station | 10x Paramedics, 2x Ambulances | Rylstone |
| Blayney Ambulance Station | 10x Paramedics, 2x Ambulances | Blayney |
| Oberon Ambulance Station | 10x Paramedics, 2x Ambulances | Oberon |
| Canowindra Ambulance Station | 10x Paramedics, 2x Ambulances | Canowindra |
| Molong Ambulance Station | 10x Paramedics, 2x Ambulances | Molong |
| Parkes Ambulance Station | 10x Paramedics, 2x Ambulances | Parkes |
| Cowra Ambulance Station | 10x Paramedics, 2x Ambulances | Cowra |
| Grenfell Ambulance Station | 10x Paramedics, 2x Ambulances | Grenfell |
| Forbes Ambulance Station | 10x Paramedics, 2x Ambulances | Forbes |
| Peak Hill Ambulance Station | 10x Paramedics, 1x Ambulance, 1x 4WD Ambulance | Peak Hill |
| Condobolin Ambulance Station | 10x Paramedics, 1x Ambulance, 1x 4WD Ambulance | Condobolin |
| Lake Cargelligo Ambulance Station | 10x Paramedics, 1x Ambulance, 1x 4WD Ambulance | Lake Cargelligo |
| Trundle Community First Responder Station | 5x Paramedics, 1x Community Emergency Response Vehicle | Trundle |
| Eugowra Community First Responder Station | 5x Paramedics, 1x Community Emergency Response Vehicle | Eugowra |
| Gooloogong Community First Responder Station | 5x Paramedics, 1x Community Emergency Response Vehicle | Gooloogong |
| Cudal Community First Responder Station | 5x Paramedics, 1x Community Emergency Response Vehicle | Cudal |
| Manildra Community First Responder Station | 5x Paramedics, 1x Community Emergency Response Vehicle | Manildra |
| Sofala Community First Responder Station | 5x Paramedics, 1x Community Emergency Response Vehicle | Sofala |
| Mount Wilson Community First Responder Station | 5x Paramedics, 1x Community Emergency Response Vehicle | Mount Wilson |
| Burraga Community First Responder Station | 5x Paramedics, 1x Community Emergency Response Vehicle | Burraga |
| Station: | Size: | Location: |
|---|---|---|
| Dubbo Ambulance Station | 75x Paramedics, 8x Ambulances, 4x Rapid Response Ambulances, 2x Command Vehicles, 1x Extended Care Van | Dubbo |
| Broken Hill Ambulance Station | 30x Paramedics, 4x Ambulances, 2x 4WD Ambulances | Broken Hill |
| Wellington Ambulance Station | 10x Paramedics, 2x Ambulances | Wellington |
| Narromine Ambulance Station | 10x Paramedics, 1x Ambulance, 1x 4WD Ambulance | Narromine |
| Tottenham Ambulance Station | 10x Paramedics, 1x Ambulance, 1x 4WD Ambulance | Tottenham |
| Nyngan Ambulance Station | 10x Paramedics, 1x Ambulance, 1x 4WD Ambulance | Nyngan |
| Warren Ambulance Station | 10x Paramedics, 1x Ambulance, 1x 4WD Ambulance | Ravenswood |
| Gilgandra Ambulance Station | 10x Paramedics, 1x Ambulance, 1x 4WD Ambulance | Gilgandra |
| Coonabarabran Ambulance Station | 10x Paramedics, 1x Ambulance, 1x 4WD Ambulance | Coonabarabran |
| Baradine Ambulance Station | 10x Paramedics, 1x Ambulance, 1x 4WD Ambulance | Baradine |
| Coonamble Ambulance Station | 10x Paramedics, 1x Ambulance, 1x 4WD Ambulance | Coonamble |
| Cobar Ambulance Station | 10x Paramedics, 1x Ambulance, 1x 4WD Ambulance | Cobar |
| Walgett Ambulance Station | 10x Paramedics, 1x Ambulance, 1x 4WD Ambulance | Walgett |
| Brewarrina Ambulance Station | 10x Paramedics, 1x Ambulance, 1x 4WD Ambulance | Brewarrina |
| Bourke Ambulance Station | 10x Paramedics, 1x Ambulance, 1x 4WD Ambulance | Bourke |
| Lightning Ridge Ambulance Station | 10x Paramedics, 1x Ambulance, 1x 4WD Ambulance | Lightning Ridge |
| Collarenebri Ambulance Station | 10x Paramedics, 1x Ambulance, 1x 4WD Ambulance | Collarenebri |
| Wentworth Ambulance Station | 10x Paramedics, 1x Ambulance, 1x 4WD Ambulance | Wentworth |
| Tibooburra Community First Responder Station | 5x Paramedics, 1x Community Emergency Response Vehicle | Tibooburra |
| Wanaaring Community First Responder Station | 5x Paramedics, 1x Community Emergency Response Vehicle | Wanaaring |
| Packsaddle Community First Responder Station | 5x Paramedics, 1x Community Emergency Response Vehicle | Packsaddle |
| Sturts Meadows Community First Responder Station | 5x Paramedics, 1x Community Emergency Response Vehicle | Fowlers Gap |
| White Cliffs Community First Responder Station | 5x Paramedics, 1x Community Emergency Response Vehicle | White Cliffs |
| Wilcannia Community First Responder Station | 5x Paramedics, 1x Community Emergency Response Vehicle | Wilcannia |
| Menindee Community First Responder Station | 5x Paramedics, 1x Community Emergency Response Vehicle | Menindee |
| Pooncarie Community First Responder Station | 5x Paramedics, 1x Community Emergency Response Vehicle | Pooncarie |
| Ivanhoe Community First Responder Station | 5x Paramedics, 1x Community Emergency Response Vehicle | Ivanhoe |
| Gulargambone Community First Responder Station | 5x Paramedics, 1x Community Emergency Response Vehicle | Gulargambone |
| Trangie Community First Responder Station | 5x Paramedics, 1x Community Emergency Response Vehicle | Trangie |
| Yeoval Community First Responder Station | 5x Paramedics, 1x Community Emergency Response Vehicle | Yeoval |
| Centre: | Size: | Location: |
|---|---|---|
| Sydney Control Centre | 100x Paramedics | Eveleigh |
| Northern Control Centre | 30x Paramedics | Charlestown |
| Southern Control Centre | 30x Paramedics | Warilla |
| Western Control Centre | 30x Paramedics | Dubbo |
| Unit: | Size: | Base: |
|---|---|---|
| Motorcycle Rapid Response Unit | 10x Paramedics, 6x Motorcycle Ambulances | Forest Lodge |
| Unit: | Size: | Base: |
|---|---|---|
| Special Operations Team Headquarters | 20x Special Operations Paramedics, 2x Rescue Trucks, 2x Forward Command Centres, 2x Rescue Support Vehicles, 2x Major Incident Support Vehicles, 2x Multipurpose Vehicles | Sydney Olympic Park |
| Alpine Operations Team | 20x Special Operations Paramedics, 1x Alpine Ambulance, 1x Over Snow Ambulance, 2x Snowmobiles | Perisher Valley |
| Special Operations Team - Central Coast | 15x Special Operations Paramedics, 2x Special Operations Response Vehicles, 2x 4WD Rescue Vehicles, 1x Hazardous Area Rescue Ambulance, 1x Flood Boat | Point Clare |
| Special Operations Team - South Western Sydney | 15x Special Operations Paramedics, 2x Special Operations Response Vehicles, 2x 4WD Rescue Vehicles, 1x Hazardous Area Rescue Ambulance, 1x Flood Boat | Bankstown |
| Special Operations Team - Northern Sydney | 10x Special Operations Paramedics, 2x Special Operations Response Vehicles, 2x 4WD Rescue Vehicles | St Ives |
| Special Operations Team - Southern Blue Mountains | 10x Special Operations Paramedics, 2x Special Operations Response Vehicles, 2x 4WD Rescue Vehicles | Katoomba |
| Special Operations Team - Macarthur | 10x Special Operations Paramedics, 2x Special Operations Response Vehicles, 2x 4WD Rescue Vehicles | Picton |
| Special Operations Team - Southern Sydney | 10x Special Operations Paramedics, 2x Special Operations Response Vehicles, 2x 4WD Rescue Vehicles | Caringbah |
| Special Operations Team - Illawarra | 10x Special Operations Paramedics, 2x Special Operations Response Vehicles, 2x 4WD Rescue Vehicles | Wollongong |
| Special Operations Team - Western Sydney | 10x Special Operations Paramedics, 2x Special Operations Response Vehicles, 2x 4WD Rescue Vehicles | Northmead |
| Special Operations Team - Northern Blue Mountains | 10x Special Operations Paramedics, 2x Special Operations Response Vehicles, 2x 4WD Rescue Vehicles | Lithgow |
| Special Operations Team Regional Rescue Unit - Wagga Wagga | 10x Special Operations Paramedics, 1x Rescue Truck, 1x Hazardous Area Rescue Ambulance, 1x Flood Boat | Turvey Park |
| Special Operations Team Regional Rescue Unit - Singleton | 10x Special Operations Paramedics, 1x Rescue Truck, 1x Hazardous Area Rescue Ambulance, 1x Flood Boat | Singleton |
| Special Operations Team Regional Rescue Unit - Tamworth | 10x Special Operations Paramedics, 1x Rescue Truck, 1x Hazardous Area Rescue Ambulance, 1x Flood Boat | Tamworth |
| Special Operations Team Regional Rescue Unit - Bomaderry | 10x Special Operations Paramedics, 1x Rescue Truck, 1x Hazardous Area Rescue Ambulance, 1x Flood Boat | Bomaderry |
| Special Operations Team Regional Rescue Unit - Cowra | 10x Special Operations Paramedics, 1x Rescue Truck, 1x Hazardous Area Rescue Ambulance, 1x Flood Boat | Cowra |
| Special Operations Team Regional Rescue Unit - Rutherford | 10x Special Operations Paramedics, 1x Rescue Truck, 1x Hazardous Area Rescue Ambulance, 1x Flood Boat | Rutherford |
NOTE: ACT Ambulance Service provides aeromedical retrieval services for the Southern Tablelands region of New South Wales through their SouthCare Aeromedical Retrieval Centre in Canberra. |
| Unit: | Size: | Base: |
|---|---|---|
| Aeromedical Control Centre | 15x Paramedics | Eveleigh |
| Fixed Wing Operations | 25x Special Operations Paramedics, 2x Pilatus PC-24s, 4x Beechcraft Super King Air 350s | Sydney-Bankstown Airport |
| Road Retrieval Operations | 20x Special Operations Paramedics, 8x Road Retrieval Ambulances | Sydney-Bankstown Airport |
| Helicopter Operations - Greater Sydney | 15x Special Operations Paramedics, 3x AgustaWestland AW139s (1 operates as Newborn Emergency Transport Service) | Sydney-Bankstown Airport |
| Helicopter Operations - Hunter | 5x Special Operations Paramedics, 1x AgustaWestland AW139 | Lake Macquarie Airport |
| Helicopter Operations - Illawarra | 5x Special Operations Paramedics, 1x AgustaWestland AW139 | Shellharbour Airport |
| Helicopter Operations - Central and Far West | 5x Special Operations Paramedics, 1x AgustaWestland AW139 | Orange Regional Airport |
| Helicopter Operations - New England | 5x Special Operations Paramedics, 1x AgustaWestland AW139 | Tamworth Regional Airport |
| Helicopter Operations - Northern Rivers | 5x Special Operations Paramedics, 1x AgustaWestland AW139 | Lismore Airport |
| Helicopter Operations - Mid North Coast | 5x Special Operations Paramedics, 1x AgustaWestland AW139 | Port Macquarie Airport |
| Helicopter Operations - South Coast | 5x Special Operations Paramedics, 1x AgustaWestland AW139 | Moruya Airport |
| Helicopter Operations - Riverina | 5x Special Operations Paramedics, 1x AgustaWestland AW139 | Wagga Wagga Regional Airport |
 |
| Type: | Amount: | Image: |
|---|---|---|
| Permanent Personnel | 600 | 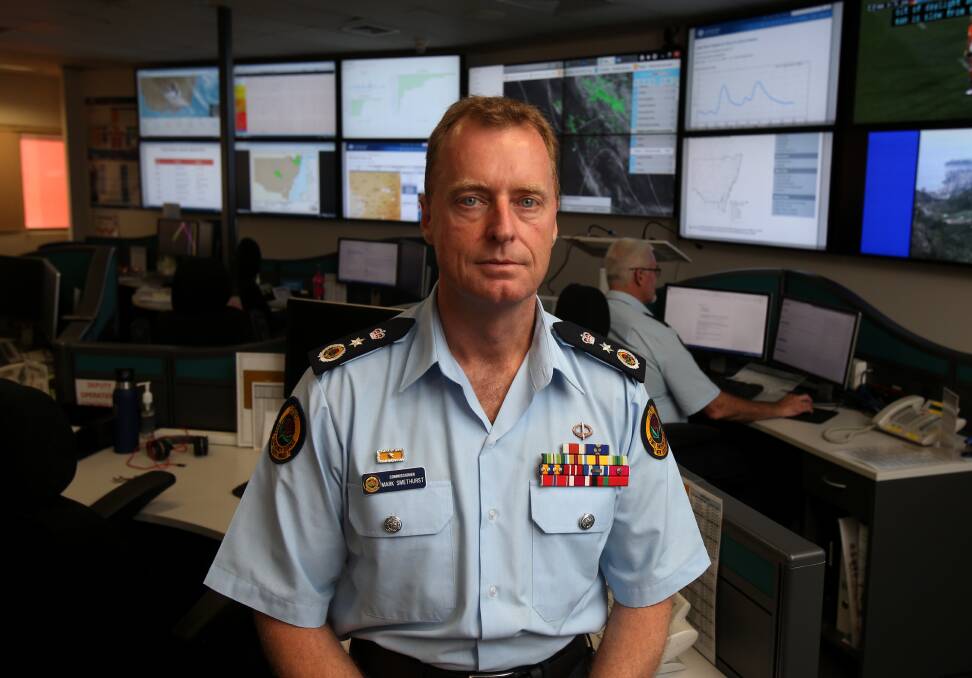 |
| Rescue Volunteers | 11,300 | 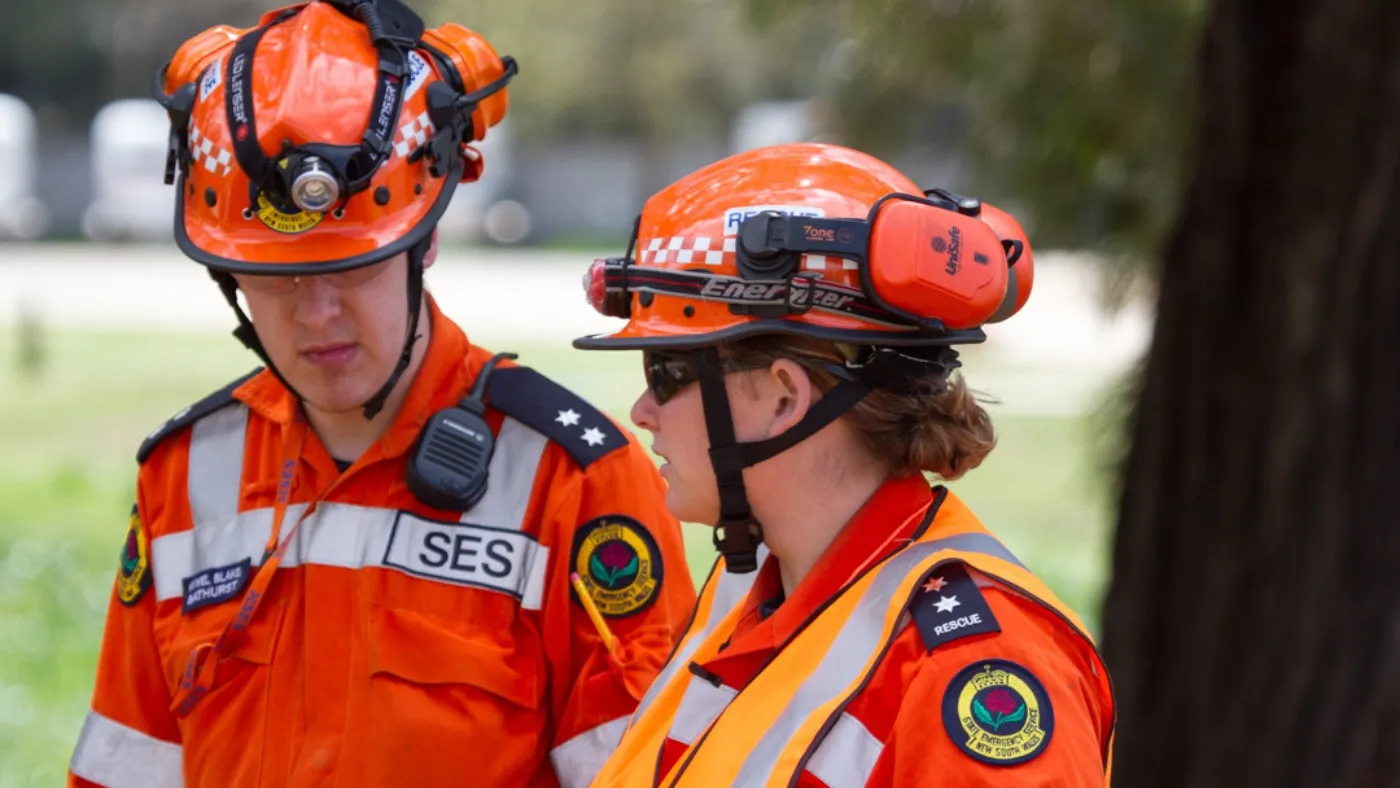 |
| Type: | Amount: | Image: |
|---|---|---|
| Rescue Truck | 238 |  |
| Heavy Rescue Truck | 82 |  |
| Rescue Vehicle | 100 |  |
| General Purpose Vehicle | 292 |  |
| Storm Response Vehicle | 99 | 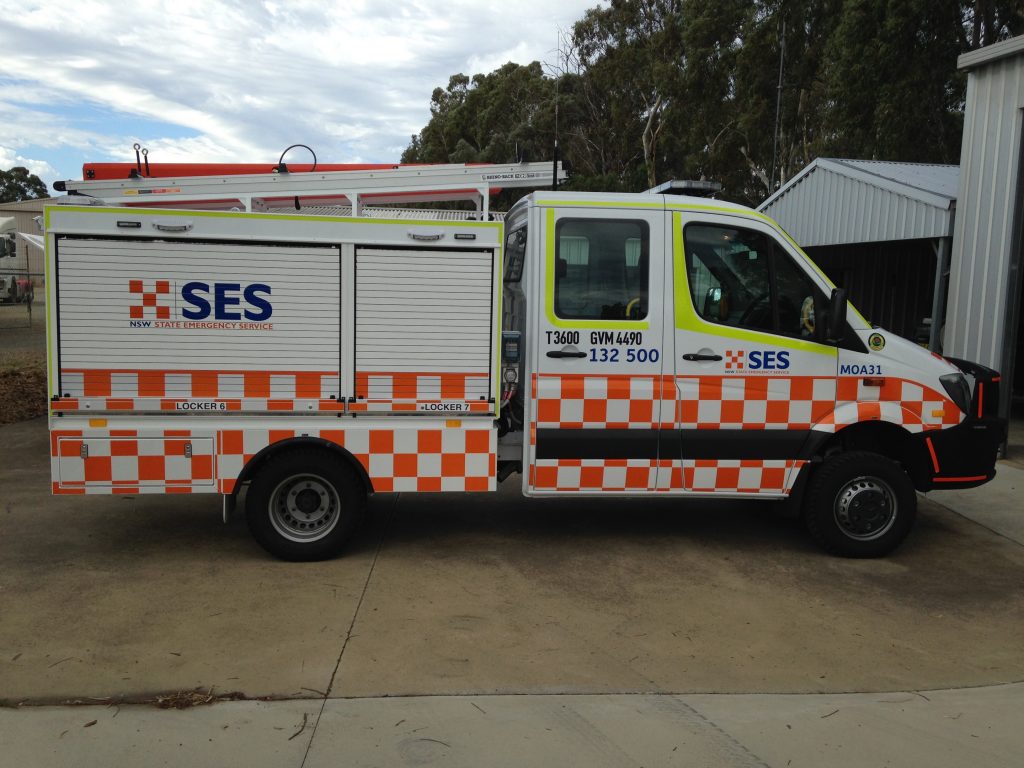 |
| High Clearance Vehicles | 20 | 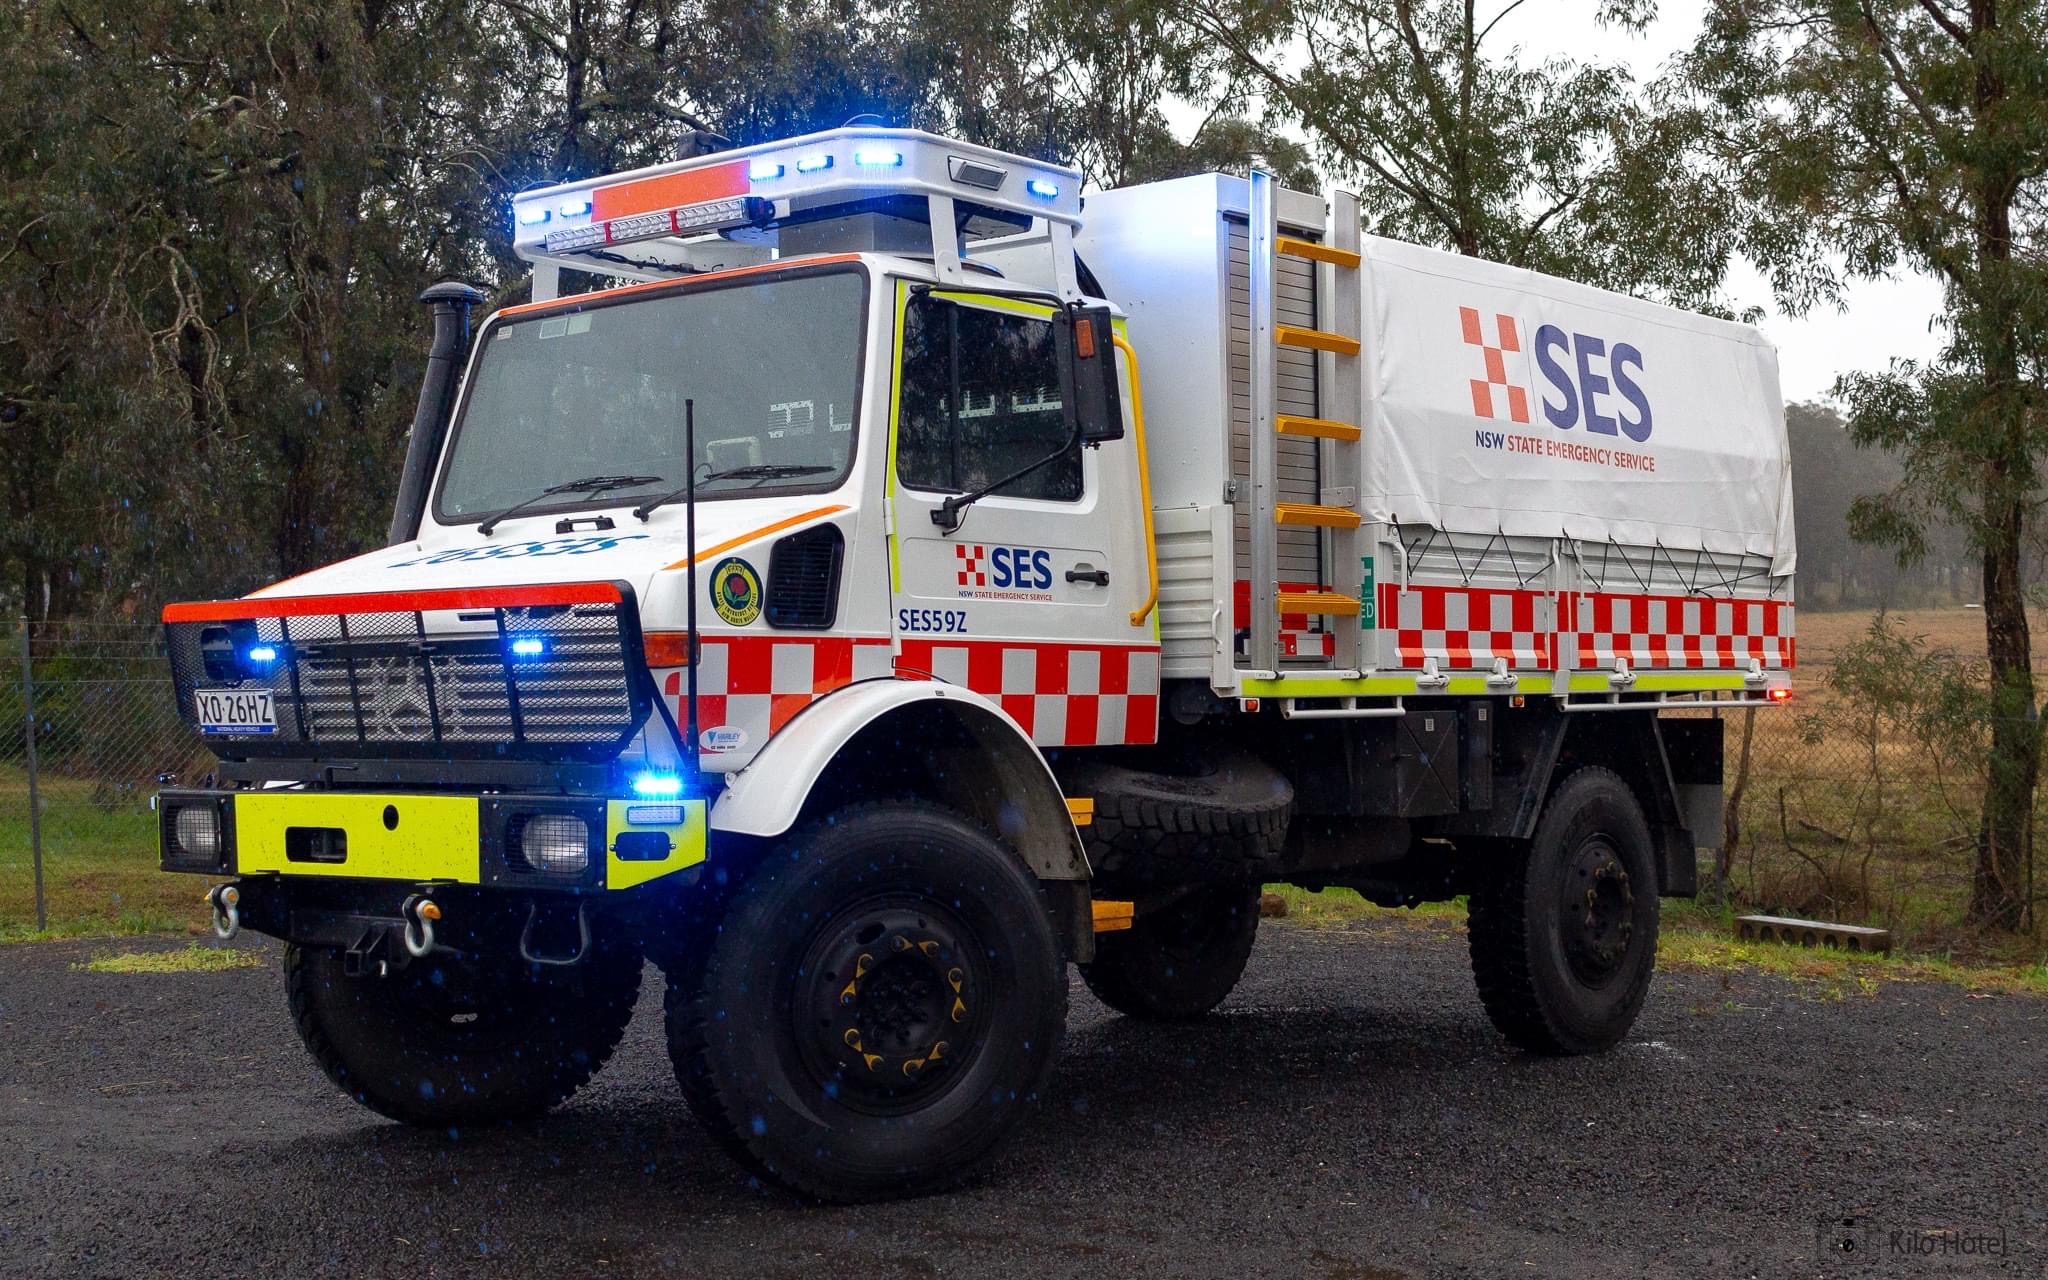 |
| Transport Bus | 34 |  |
| Logistics Support Vehicle | 5 | 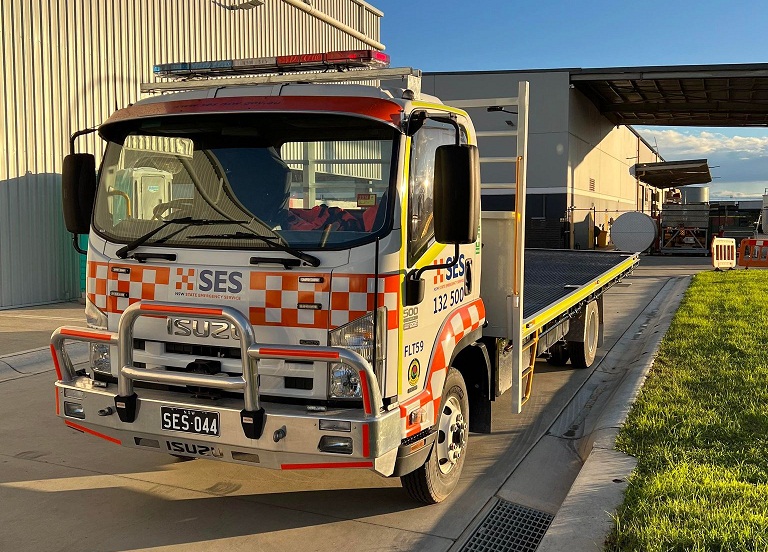 |
| Command Vehicle | 93 |  |
| Forward Command Vehicle | 8 | 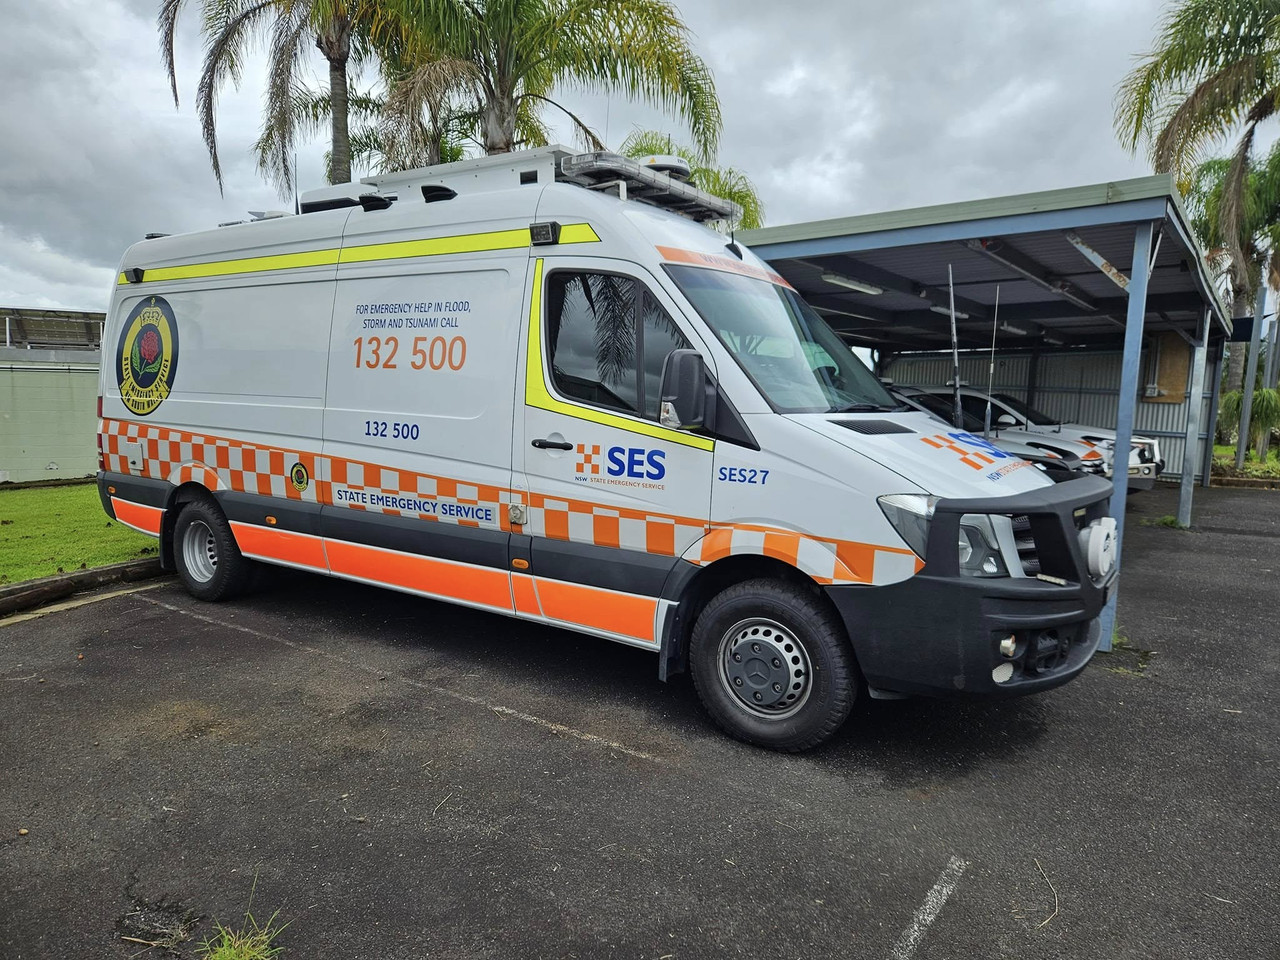 |
| Mobile Incident Command Centre | 2 | 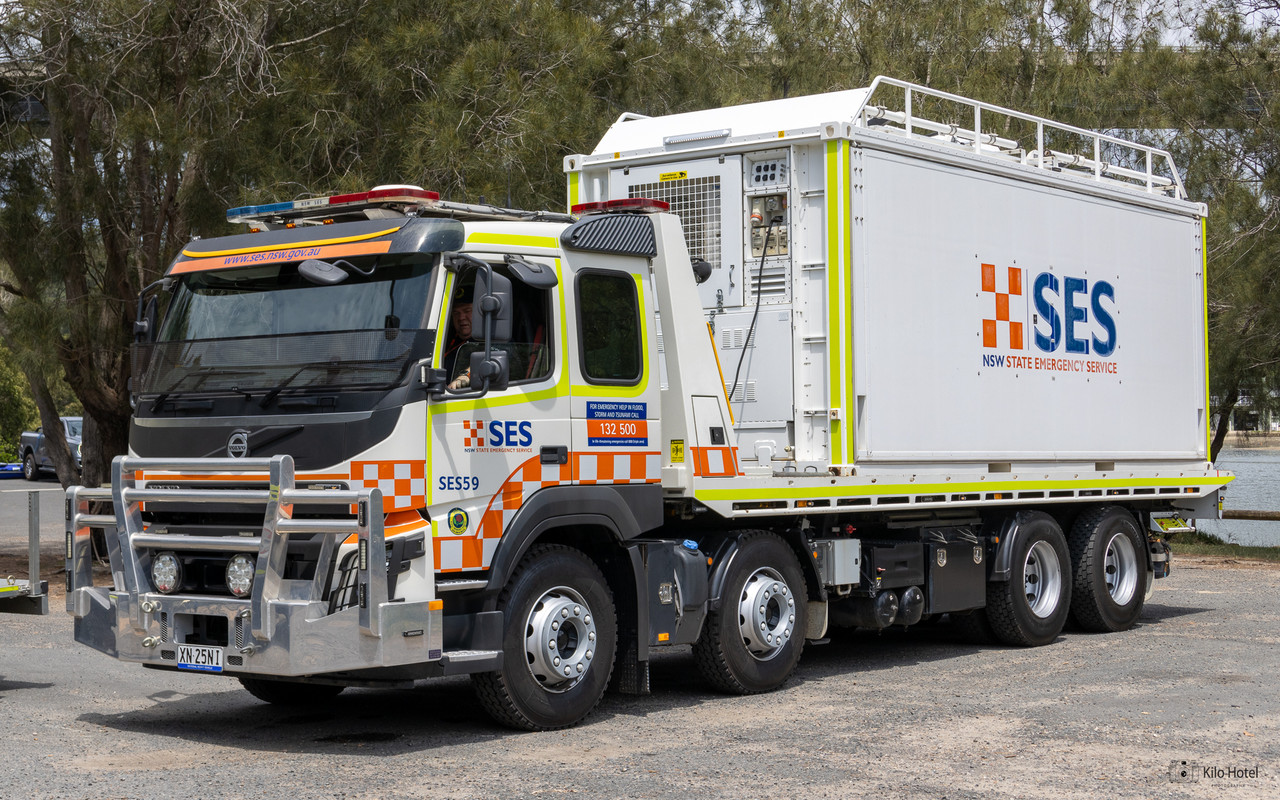 |
| Flood Boats | 225 | 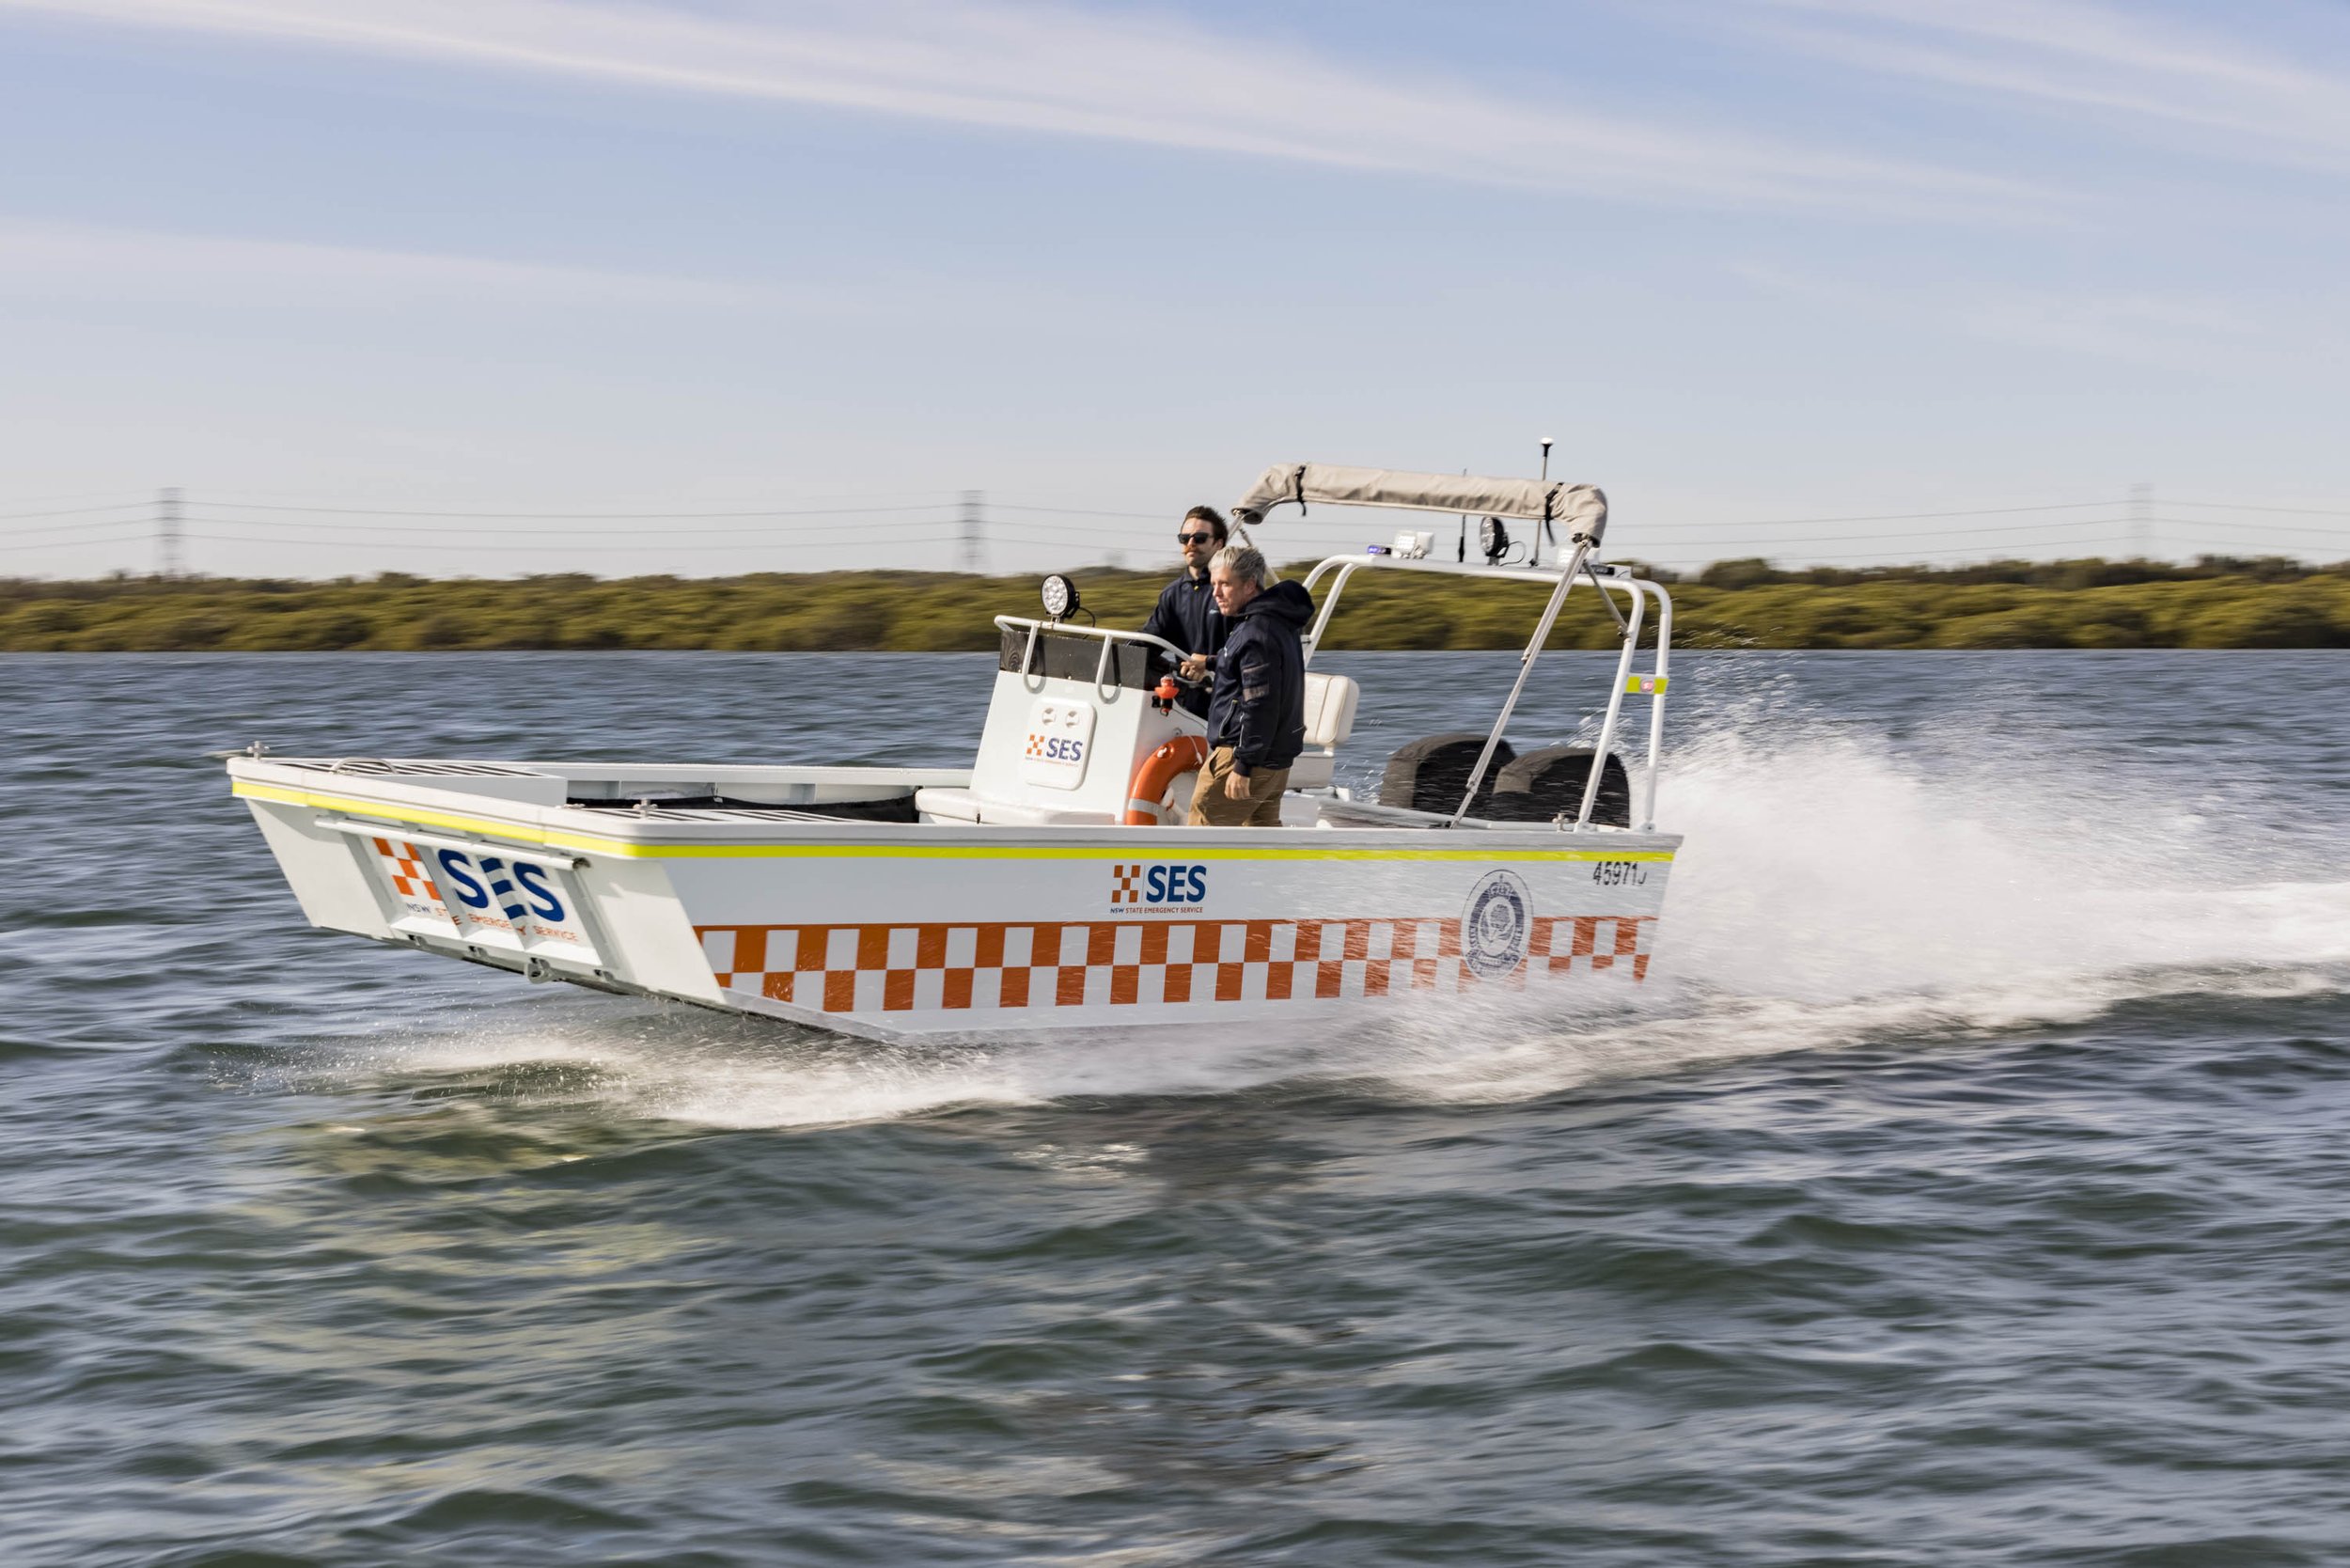 |
| Rigid-Hulled Inflatable Boats | 215 | 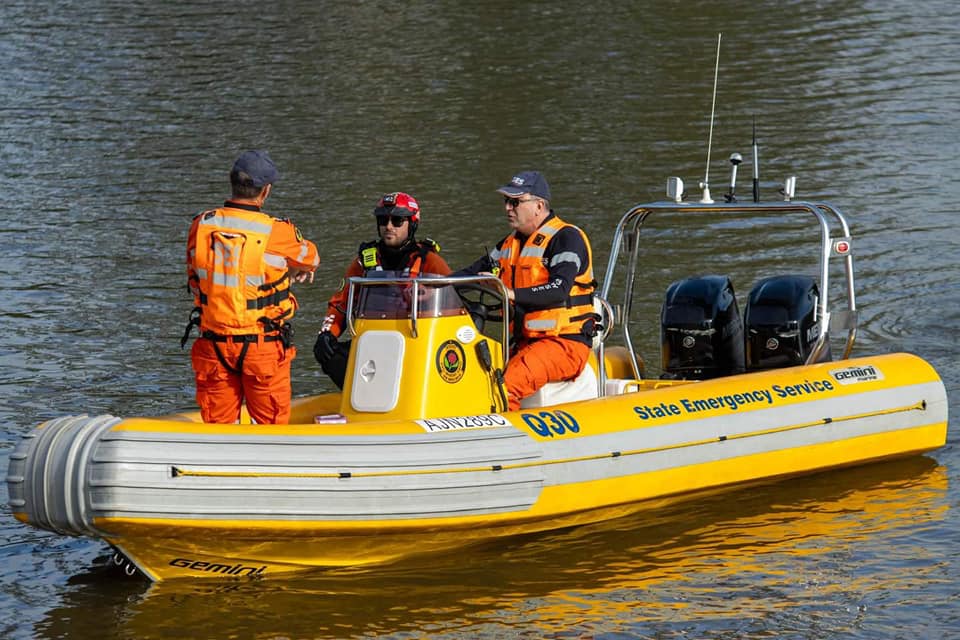 |
| Snowmobiles | 8 |  |
| All-Terrain Vehicles | 10 |  |
| Unit: | Size: | Base: |
|---|---|---|
| State Headquarters | 160x Permanent Personnel, 2x Mobile Incident Command Centres, 12x Command Vehicles | Wollongong |
| Unit: | Size: | Base: |
|---|---|---|
| Bush Search and Rescue Unit - Primary Squad | 140x Rescue Volunteers, 4x Rescue Trucks, 6x Rescue Vehicles, 4x General Purpose Vehicles, 4x All-Terrain Vehicles | Rooty Hill |
| Bush Search and Rescue Unit - Blue Mountains Squad | 20x Rescue Volunteers, 2x Rescue Vehicles, 1x All-Terrain Vehicle | Katoomba |
| Bush Search and Rescue Unit - Central Coast-Hunter Squad | 20x Rescue Volunteers, 2x Rescue Vehicles, 1x All-Terrain Vehicle | Tighes Hill |
| Bush Search and Rescue Unit - South Coast Squad | 20x Rescue Volunteers, 2x Rescue Vehicles, 1x All-Terrain Vehicle | Nowra |
| Bush Search and Rescue Unit - Southern Tablelands Squad | 20x Rescue Volunteers, 2x Rescue Vehicles, 1x All-Terrain Vehicle | Queanbeyan |
| Operational Support Unit | 100x Rescue Volunteers, 10x High Clearance Vehicles, 5x Logistics Support Vehicles | Spring Hill |
| Aviation Management Unit | 50x Rescue Volunteers, 5x Command Vehicles | Sydney-Bankstown Airport |
| Alpine Search and Rescue Unit | 30x Rescue Volunteers, 3x Rescue Vehicles, 8x Snowmobiles, 2x All-Terrain Vehicles | Jindabyne |
| Unit: | Size: | Base: |
|---|---|---|
| Metro Zone Headquarters | 60x Permanent Personnel, 4x Command Vehicles, 2x Forward Command Vehicles | Rhodes |
| Metro East Capability Unit | 120x Rescue Volunteers, 6x General Purpose Vehicles, 6x Command Vehicles | Bondi Junction |
| Metro West Capability Unit | 120x Rescue Volunteers, 6x General Purpose Vehicles, 6x Command Vehicles | Rhodes |
| Unit: | Size: | Location: |
|---|---|---|
| Sydney Southern Region Headquarters | 20x Permanent Personnel, 2x Command Vehicles | Bankstown |
| Waverley-Woollahra Unit | 200x Rescue Volunteers, 2x Heavy Rescue Trucks, 3x Rescue Trucks, 2x Rescue Vehicles, 3x Storm Response Vehicles, 3x General Purpose Vehicles, 2x Transport Buses, 5x Flood Boats, 5x Rigid-Hulled Inflatable Boats | Bondi Junction |
| Bankstown Unit | 200x Rescue Volunteers, 2x Heavy Rescue Trucks, 3x Rescue Trucks, 2x Rescue Vehicles, 3x Storm Response Vehicles, 3x General Purpose Vehicles, 2x Transport Buses, 5x Flood Boats, 5x Rigid-Hulled Inflatable Boats | Bass Hill |
| Campbelltown Unit | 200x Rescue Volunteers, 2x Heavy Rescue Trucks, 3x Rescue Trucks, 2x Rescue Vehicles, 3x Storm Response Vehicles, 3x General Purpose Vehicles, 2x Transport Buses, 5x Flood Boats, 5x Rigid-Hulled Inflatable Boats | Minto |
| Marrickville Unit | 200x Rescue Volunteers, 2x Heavy Rescue Trucks, 3x Rescue Trucks, 2x Rescue Vehicles, 3x Storm Response Vehicles, 3x General Purpose Vehicles, 2x Transport Buses, 5x Flood Boats, 5x Rigid-Hulled Inflatable Boats | Sydenham |
| Fairfield Unit | 200x Rescue Volunteers, 2x Heavy Rescue Trucks, 3x Rescue Trucks, 2x Rescue Vehicles, 3x Storm Response Vehicles, 3x General Purpose Vehicles, 2x Transport Buses, 5x Flood Boats, 5x Rigid-Hulled Inflatable Boats | Cabramatta |
| Hurstville Unit | 200x Rescue Volunteers, 2x Heavy Rescue Trucks, 3x Rescue Trucks, 2x Rescue Vehicles, 3x Storm Response Vehicles, 3x General Purpose Vehicles, 2x Transport Buses, 5x Flood Boats, 5x Rigid-Hulled Inflatable Boats | Mortdale |
| Sutherland Unit | 200x Rescue Volunteers, 2x Heavy Rescue Trucks, 3x Rescue Trucks, 2x Rescue Vehicles, 3x Storm Response Vehicles, 3x General Purpose Vehicles, 2x Transport Buses, 5x Flood Boats, 5x Rigid-Hulled Inflatable Boats | Sutherland |
| Ashfield-Leichhardt Unit | 200x Rescue Volunteers, 2x Heavy Rescue Trucks, 3x Rescue Trucks, 2x Rescue Vehicles, 3x Storm Response Vehicles, 3x General Purpose Vehicles, 2x Transport Buses, 5x Flood Boats, 5x Rigid-Hulled Inflatable Boats | Haberfield |
| City of Sydney Unit | 50x Rescue Volunteers, 1x Heavy Rescue Truck, 1x Rescue Vehicle, 1x Storm Response Vehicle, 1x General Purpose Vehicle, 1x Flood Boat, 1x Rigid-Hulled Inflatable Boat | Erskineville |
| Cronulla Unit | 50x Rescue Volunteers, 1x Heavy Rescue Truck, 1x Rescue Vehicle, 1x Storm Response Vehicle, 1x General Purpose Vehicle, 1x Flood Boat, 1x Rigid-Hulled Inflatable Boat | Cronulla |
| Kogarah Unit | 50x Rescue Volunteers, 1x Heavy Rescue Truck, 1x Rescue Vehicle, 1x Storm Response Vehicle, 1x General Purpose Vehicle, 1x Flood Boat, 1x Rigid-Hulled Inflatable Boat | Kogarah Bay |
| Randwick Unit | 50x Rescue Volunteers, 1x Heavy Rescue Truck, 1x Rescue Vehicle, 1x Storm Response Vehicle, 1x General Purpose Vehicle, 1x Flood Boat, 1x Rigid-Hulled Inflatable Boat | Maroubra |
| Liverpool Unit | 50x Rescue Volunteers, 1x Heavy Rescue Truck, 1x Rescue Vehicle, 1x Storm Response Vehicle, 1x General Purpose Vehicle, 1x Flood Boat, 1x Rigid-Hulled Inflatable Boat | Liverpool |
| Bayside Unit | 50x Rescue Volunteers, 1x Heavy Rescue Truck, 1x Rescue Vehicle, 1x Storm Response Vehicle, 1x General Purpose Vehicle, 1x Flood Boat, 1x Rigid-Hulled Inflatable Boat | Bexley |
| Camden Unit | 30x Rescue Volunteers, 1x Rescue Truck, 1x General Purpose Vehicle, 1x Flood Boat, 1x Rigid-Hulled Inflatable Boat | Narellan |
| Canterbury Unit | 30x Rescue Volunteers, 1x Rescue Truck, 1x General Purpose Vehicle, 1x Flood Boat, 1x Rigid-Hulled Inflatable Boat | Beverly Hills |
| Menai Unit | 30x Rescue Volunteers, 1x Rescue Truck, 1x General Purpose Vehicle, 1x Flood Boat, 1x Rigid-Hulled Inflatable Boat | Menai |
| Heathcote Unit | 30x Rescue Volunteers, 1x Rescue Truck, 1x General Purpose Vehicle, 1x Flood Boat, 1x Rigid-Hulled Inflatable Boat | Heathcote |
| Unit: | Size: | Location: |
|---|---|---|
| Sydney Northern Region Headquarters | 20x Permanent Personnel, 2x Command Vehicles | Hornsby |
| Warringah-Pittwater Unit | 200x Rescue Volunteers, 2x Heavy Rescue Trucks, 3x Rescue Trucks, 2x Rescue Vehicles, 3x Storm Response Vehicles, 3x General Purpose Vehicles, 2x Transport Buses, 5x Flood Boats, 5x Rigid-Hulled Inflatable Boats | Terrey Hills |
| Ku-ring-gai Unit | 200x Rescue Volunteers, 2x Heavy Rescue Trucks, 3x Rescue Trucks, 2x Rescue Vehicles, 3x Storm Response Vehicles, 3x General Purpose Vehicles, 2x Transport Buses, 5x Flood Boats, 5x Rigid-Hulled Inflatable Boats | North Wahroonga |
| Hornsby Unit | 200x Rescue Volunteers, 2x Heavy Rescue Trucks, 3x Rescue Trucks, 2x Rescue Vehicles, 3x Storm Response Vehicles, 3x General Purpose Vehicles, 2x Transport Buses, 5x Flood Boats, 5x Rigid-Hulled Inflatable Boats | Thornleigh |
| Mosman Unit | 200x Rescue Volunteers, 2x Heavy Rescue Trucks, 3x Rescue Trucks, 2x Rescue Vehicles, 3x Storm Response Vehicles, 3x General Purpose Vehicles, 2x Transport Buses, 5x Flood Boats, 5x Rigid-Hulled Inflatable Boats | Mosman |
| Ryde Unit | 200x Rescue Volunteers, 2x Heavy Rescue Trucks, 3x Rescue Trucks, 2x Rescue Vehicles, 3x Storm Response Vehicles, 3x General Purpose Vehicles, 2x Transport Buses, 5x Flood Boats, 5x Rigid-Hulled Inflatable Boats | Macquarie Park |
| North Sydney Unit | 50x Rescue Volunteers, 1x Heavy Rescue Truck, 1x Rescue Vehicle, 1x Storm Response Vehicle, 1x General Purpose Vehicle, 1x Flood Boat, 1x Rigid-Hulled Inflatable Boat | North Sydney |
| Willoughby-Lane Cove Unit | 50x Rescue Volunteers, 1x Heavy Rescue Truck, 1x Rescue Vehicle, 1x Storm Response Vehicle, 1x General Purpose Vehicle, 1x Flood Boat, 1x Rigid-Hulled Inflatable Boat | Naremburn |
| Manly Unit | 50x Rescue Volunteers, 1x Heavy Rescue Truck, 1x Rescue Vehicle, 1x Storm Response Vehicle, 1x General Purpose Vehicle, 1x Flood Boat, 1x Rigid-Hulled Inflatable Boat | Balgowlah |
| Hunters Hill Unit | 50x Rescue Volunteers, 1x Heavy Rescue Truck, 1x Rescue Vehicle, 1x Storm Response Vehicle, 1x General Purpose Vehicle, 1x Flood Boat, 1x Rigid-Hulled Inflatable Boat | Gladesville |
| Unit: | Size: | Location: |
|---|---|---|
| Sydney Western Region Headquarters | 20x Permanent Personnel, 2x Command Vehicles | Seven Hills |
| Blacktown Unit | 200x Rescue Volunteers, 2x Heavy Rescue Trucks, 3x Rescue Trucks, 2x Rescue Vehicles, 3x Storm Response Vehicles, 3x General Purpose Vehicles, 2x Transport Buses, 5x Flood Boats, 5x Rigid-Hulled Inflatable Boats | Prospect |
| Blue Mountains West Unit | 200x Rescue Volunteers, 2x Heavy Rescue Trucks, 3x Rescue Trucks, 2x Rescue Vehicles, 3x Storm Response Vehicles, 3x General Purpose Vehicles, 2x Transport Buses, 5x Flood Boats, 5x Rigid-Hulled Inflatable Boats | Katoomba |
| Hawkesbury Unit | 200x Rescue Volunteers, 2x Heavy Rescue Trucks, 3x Rescue Trucks, 2x Rescue Vehicles, 3x Storm Response Vehicles, 3x General Purpose Vehicles, 2x Transport Buses, 5x Flood Boats, 5x Rigid-Hulled Inflatable Boats | Wilberforce |
| The Hills Unit | 200x Rescue Volunteers, 2x Heavy Rescue Trucks, 3x Rescue Trucks, 2x Rescue Vehicles, 3x Storm Response Vehicles, 3x General Purpose Vehicles, 2x Transport Buses, 5x Flood Boats, 5x Rigid-Hulled Inflatable Boats | Baulkham Hills |
| Canada Bay Unit | 50x Rescue Volunteers, 1x Heavy Rescue Truck, 1x Rescue Vehicle, 1x Storm Response Vehicle, 1x General Purpose Vehicle, 1x Flood Boat, 1x Rigid-Hulled Inflatable Boat | Five Dock |
| Parramatta Unit | 50x Rescue Volunteers, 1x Heavy Rescue Truck, 1x Rescue Vehicle, 1x Storm Response Vehicle, 1x General Purpose Vehicle, 1x Flood Boat, 1x Rigid-Hulled Inflatable Boat | North Parramatta |
| Penrith Unit | 50x Rescue Volunteers, 1x Heavy Rescue Truck, 1x Rescue Vehicle, 1x Storm Response Vehicle, 1x General Purpose Vehicle, 1x Flood Boat, 1x Rigid-Hulled Inflatable Boat | Claremont Meadows |
| Blue Mountains East Unit | 50x Rescue Volunteers, 1x Heavy Rescue Truck, 1x Rescue Vehicle, 1x Storm Response Vehicle, 1x General Purpose Vehicle, 1x Flood Boat, 1x Rigid-Hulled Inflatable Boat | Faulconbridge |
| Burwood Unit | 50x Rescue Volunteers, 1x Heavy Rescue Truck, 1x Rescue Vehicle, 1x Storm Response Vehicle, 1x General Purpose Vehicle, 1x Flood Boat, 1x Rigid-Hulled Inflatable Boat | Croydon |
| Strathfield Unit | 50x Rescue Volunteers, 1x Heavy Rescue Truck, 1x Rescue Vehicle, 1x Storm Response Vehicle, 1x General Purpose Vehicle, 1x Flood Boat, 1x Rigid-Hulled Inflatable Boat | Strathfield |
| Mount Druitt Unit | 50x Rescue Volunteers, 1x Heavy Rescue Truck, 1x Rescue Vehicle, 1x Storm Response Vehicle, 1x General Purpose Vehicle, 1x Flood Boat, 1x Rigid-Hulled Inflatable Boat | Hebersham |
| Auburn Unit | 30x Rescue Volunteers, 1x Rescue Truck, 1x General Purpose Vehicle, 1x Flood Boat, 1x Rigid-Hulled Inflatable Boat | Auburn |
| Holroyd Unit | 30x Rescue Volunteers, 1x Rescue Truck, 1x General Purpose Vehicle, 1x Flood Boat, 1x Rigid-Hulled Inflatable Boat | Guildford West |
| Unit: | Size: | Location: |
|---|---|---|
| South Eastern Zone Headquarters | 30x Permanent Personnel, 2x Command Vehicles, 1x Forward Command Vehicle | Goulburn |
| Unit: | Size: | Location: |
|---|---|---|
| Illawarra South Coast Region Headquarters | 10x Permanent Personnel, 1x Command Vehicle | Spring Hill |
| Coastal Support Capability Unit | 40x Rescue Volunteers, 2x General Purpose Vehicles, 2x Command Vehicles | Spring Hill |
| Wollongong City Unit | 80x Rescue Volunteers, 1x Heavy Rescue Truck, 1x Rescue Truck, 1x Rescue Vehicle, 1x Storm Response Vehicle, 1x General Purpose Vehicle, 1x High Clearance Vehicle, 2x Flood Boats, 2x Rigid-Hulled Inflatable Boats | North Wollongong |
| Kiama Unit | 80x Rescue Volunteers, 1x Heavy Rescue Truck, 1x Rescue Truck, 1x Rescue Vehicle, 1x Storm Response Vehicle, 1x General Purpose Vehicle, 1x High Clearance Vehicle, 2x Flood Boats, 2x Rigid-Hulled Inflatable Boats | Kiama |
| Dapto Unit | 50x Rescue Volunteers, 1x Heavy Rescue Truck, 1x Rescue Vehicle, 1x Storm Response Vehicle, 1x General Purpose Vehicle, 1x Flood Boat, 1x Rigid-Hulled Inflatable Boat | Spring Hill |
| Shellharbour City Unit | 50x Rescue Volunteers, 1x Heavy Rescue Truck, 1x Rescue Vehicle, 1x Storm Response Vehicle, 1x General Purpose Vehicle, 1x Flood Boat, 1x Rigid-Hulled Inflatable Boat | Albion Park |
| Eden Unit | 30x Rescue Volunteers, 1x Rescue Truck, 1x General Purpose Vehicle, 1x Flood Boat, 1x Rigid-Hulled Inflatable Boat | Eden |
| Wollondilly Unit | 30x Rescue Volunteers, 1x Rescue Truck, 1x General Purpose Vehicle, 1x Flood Boat, 1x Rigid-Hulled Inflatable Boat | Picton |
| Wingecarribee Unit | 30x Rescue Volunteers, 1x Rescue Truck, 1x General Purpose Vehicle, 1x Flood Boat, 1x Rigid-Hulled Inflatable Boat | Mittagong |
| Batemans Bay Unit | 30x Rescue Volunteers, 1x Rescue Truck, 1x General Purpose Vehicle, 1x Flood Boat, 1x Rigid-Hulled Inflatable Boat | Batemans Bay |
| Moruya Unit | 30x Rescue Volunteers, 1x Rescue Truck, 1x General Purpose Vehicle, 1x Flood Boat, 1x Rigid-Hulled Inflatable Boat | Moruya |
| Ulladulla Unit | 30x Rescue Volunteers, 1x Rescue Truck, 1x General Purpose Vehicle, 1x Flood Boat, 1x Rigid-Hulled Inflatable Boat | Ulladulla |
| Nowra Unit | 30x Rescue Volunteers, 1x Rescue Truck, 1x General Purpose Vehicle, 1x Flood Boat, 1x Rigid-Hulled Inflatable Boat | Nowra |
| Moss Vale Unit | 30x Rescue Volunteers, 1x Rescue Truck, 1x General Purpose Vehicle, 1x Flood Boat, 1x Rigid-Hulled Inflatable Boat | Moss Vale |
| St Georges Basin Unit (incl. Jervis Bay Territory) | 30x Rescue Volunteers, 1x Rescue Truck, 1x General Purpose Vehicle, 1x Flood Boat, 1x Rigid-Hulled Inflatable Boat | St Georges Basin |
| Bega Unit | 20x Rescue Volunteers, 1x Rescue Truck, 1x General Purpose Vehicle | Bega |
| Bermagui Unit | 20x Rescue Volunteers, 1x Rescue Truck, 1x General Purpose Vehicle | Bermagui |
| Unit: | Size: | Location: |
|---|---|---|
| Southern Highlands Region Headquarters | 10x Permanent Personnel, 1x Command Vehicle | Goulburn |
| Inland Support Capability Unit | 40x Rescue Volunteers, 2x General Purpose Vehicles, 2x Command Vehicles | Goulburn |
| Queanbeyan Unit | 80x Rescue Volunteers, 1x Heavy Rescue Truck, 1x Rescue Truck, 1x Rescue Vehicle, 1x Storm Response Vehicle, 1x General Purpose Vehicle, 1x High Clearance Vehicle, 2x Flood Boats, 2x Rigid-Hulled Inflatable Boats | Queanbeyan |
| Goulburn Unit | 50x Rescue Volunteers, 1x Heavy Rescue Truck, 1x Rescue Vehicle, 1x Storm Response Vehicle, 1x General Purpose Vehicle, 1x Flood Boat, 1x Rigid-Hulled Inflatable Boat | Goulburn |
| Yass Unit | 30x Rescue Volunteers, 1x Rescue Truck, 1x General Purpose Vehicle, 1x Flood Boat, 1x Rigid-Hulled Inflatable Boat | Yass |
| Snowy River Unit | 30x Rescue Volunteers, 1x Rescue Truck, 1x General Purpose Vehicle, 1x Flood Boat, 1x Rigid-Hulled Inflatable Boat | Jindabyne |
| Bigga Unit | 30x Rescue Volunteers, 1x Rescue Truck, 1x General Purpose Vehicle, 1x Flood Boat, 1x Rigid-Hulled Inflatable Boat | Bigga |
| Braidwood Unit | 30x Rescue Volunteers, 1x Rescue Truck, 1x General Purpose Vehicle, 1x Flood Boat, 1x Rigid-Hulled Inflatable Boat | Braidwood |
| Captains Flat Unit | 30x Rescue Volunteers, 1x Rescue Truck, 1x General Purpose Vehicle, 1x Flood Boat, 1x Rigid-Hulled Inflatable Boat | Captains Flat |
| Collector Unit | 30x Rescue Volunteers, 1x Rescue Truck, 1x General Purpose Vehicle, 1x Flood Boat, 1x Rigid-Hulled Inflatable Boat | Collector |
| Cooma-Monaro Unit | 30x Rescue Volunteers, 1x Rescue Truck, 1x General Purpose Vehicle, 1x Flood Boat, 1x Rigid-Hulled Inflatable Boat | Polo Flat |
| Crookwell Unit | 30x Rescue Volunteers, 1x Rescue Truck, 1x General Purpose Vehicle, 1x Flood Boat, 1x Rigid-Hulled Inflatable Boat | Crookwell |
| Harden Unit | 30x Rescue Volunteers, 1x Rescue Truck, 1x General Purpose Vehicle, 1x Flood Boat, 1x Rigid-Hulled Inflatable Boat | Harden |
| Sutton Unit | 30x Rescue Volunteers, 1x Rescue Truck, 1x General Purpose Vehicle, 1x Flood Boat, 1x Rigid-Hulled Inflatable Boat | Sutton |
| Windellama Unit | 30x Rescue Volunteers, 1x Rescue Truck, 1x General Purpose Vehicle, 1x Flood Boat, 1x Rigid-Hulled Inflatable Boat | Windellama |
| Bungendore Unit | 20x Rescue Volunteers, 1x Rescue Truck, 1x General Purpose Vehicle | Bungendore |
| Young Unit | 20x Rescue Volunteers, 1x Rescue Truck, 1x General Purpose Vehicle | Young |
| Bombala Unit | 10x Rescue Volunteers, 1x Rescue Truck | Bombala |
| Nimmitabel Unit | 10x Rescue Volunteers, 1x Rescue Truck | Nimmitabel |
| Unit: | Size: | Location: |
|---|---|---|
| Southern Zone Headquarters | 30x Permanent Personnel, 2x Command Vehicles, 1x Forward Command Vehicle | Wagga Wagga |
| Unit: | Size: | Location: |
|---|---|---|
| Murrumbidgee Region Headquarters | 10x Permanent Personnel, 1x Command Vehicle | Ashmont |
| Murrumbidgee Capability Unit | 40x Rescue Volunteers, 2x General Purpose Vehicles, 2x Command Vehicles | Ashmont |
| Wagga Wagga Unit | 50x Rescue Volunteers, 1x Heavy Rescue Truck, 1x Rescue Vehicle, 1x Storm Response Vehicle, 1x General Purpose Vehicle, 1x Flood Boat, 1x Rigid-Hulled Inflatable Boat | Ashmont |
| Griffith Unit | 30x Rescue Volunteers, 1x Rescue Truck, 1x General Purpose Vehicle, 1x Flood Boat, 1x Rigid-Hulled Inflatable Boat | Griffith |
| Leeton Unit | 30x Rescue Volunteers, 1x Rescue Truck, 1x General Purpose Vehicle, 1x Flood Boat, 1x Rigid-Hulled Inflatable Boat | Leeton |
| Tumut Unit | 30x Rescue Volunteers, 1x Rescue Truck, 1x General Purpose Vehicle, 1x Flood Boat, 1x Rigid-Hulled Inflatable Boat | Tumut |
| Coleambally Unit | 20x Rescue Volunteers, 1x Rescue Truck, 1x General Purpose Vehicle | Coleambally |
| Cootamundra Unit | 20x Rescue Volunteers, 1x Rescue Truck, 1x General Purpose Vehicle | Cootamundra |
| Goolgowi Unit | 20x Rescue Volunteers, 1x Rescue Truck, 1x General Purpose Vehicle | Goolgowi |
| Gundagai Unit | 20x Rescue Volunteers, 1x Rescue Truck, 1x General Purpose Vehicle | Gundagai |
| Hay Unit | 20x Rescue Volunteers, 1x Rescue Truck, 1x General Purpose Vehicle | Hay |
| Junee Unit | 20x Rescue Volunteers, 1x Rescue Truck, 1x General Purpose Vehicle | Junee |
| Temora Unit | 20x Rescue Volunteers, 1x Rescue Truck, 1x General Purpose Vehicle | Temora |
| The Rock Unit | 20x Rescue Volunteers, 1x Rescue Truck, 1x General Purpose Vehicle | The Rock |
| Narrandera Unit | 10x Rescue Volunteers, 1x Rescue Truck | Narrandera |
| Coolamon Unit | 10x Rescue Volunteers, 1x Rescue Truck | Coolamon |
| Hillston Unit | 10x Rescue Volunteers, 1x Rescue Truck | Hillston |
| Unit: | Size: | Location: |
|---|---|---|
| Murray Region Headquarters | 10x Permanent Personnel, 1x Command Vehicle | Lavington |
| Murray Capability Unit | 40x Rescue Volunteers, 2x General Purpose Vehicles, 2x Command Vehicles | Lavington |
| Albury Unit | 50x Rescue Volunteers, 1x Heavy Rescue Truck, 1x Rescue Vehicle, 1x Storm Response Vehicle, 1x General Purpose Vehicle, 1x Flood Boat, 1x Rigid-Hulled Inflatable Boat | Thurgoona |
| Tocumwal Unit | 30x Rescue Volunteers, 1x Rescue Truck, 1x General Purpose Vehicle, 1x Flood Boat, 1x Rigid-Hulled Inflatable Boat | Tocumwal |
| Deniliquin-Conargo Unit | 20x Rescue Volunteers, 1x Rescue Truck, 1x General Purpose Vehicle | Deniliquin |
| Holbrook Unit | 20x Rescue Volunteers, 1x Rescue Truck, 1x General Purpose Vehicle | Holbrook |
| Barham Unit | 20x Rescue Volunteers, 1x Rescue Truck, 2x Flood Boats | Barham |
| Moama Unit | 20x Rescue Volunteers, 1x Rescue Truck, 2x Flood Boats | Moama |
| Wentworth Unit | 20x Rescue Volunteers, 1x Rescue Truck, 2x Flood Boats | Wentworth |
| Corowa Unit | 20x Rescue Volunteers, 1x Rescue Truck, 2x Flood Boats | Corowa |
| Mathoura Unit | 20x Rescue Volunteers, 1x Rescue Truck, 2x Flood Boats | Mathoura |
| Tumbarumba Shire Unit | 10x Rescue Volunteers, 1x Rescue Truck | Tumbarumba |
| Urana Unit | 10x Rescue Volunteers, 1x Rescue Truck | Urana |
| Culcairn Unit | 10x Rescue Volunteers, 1x Rescue Truck | Culcairn |
| Balranald Unit | 10x Rescue Volunteers, 1x Rescue Truck | Balranald |
| Jerilderie Unit | 10x Rescue Volunteers, 1x Rescue Truck | Jerilderie |
| Khancoban Unit | 10x Rescue Volunteers, 1x Rescue Truck | Khancoban |
| Unit: | Size: | Location: |
|---|---|---|
| Lachlan Region Headquarters | 10x Permanent Personnel, 1x Command Vehicle | Parkes |
| Lachlan Capability Unit | 40x Rescue Volunteers, 2x General Purpose Vehicles, 2x Command Vehicles | Parkes |
| Parkes Unit | 30x Rescue Volunteers, 1x Rescue Truck, 1x General Purpose Vehicle, 1x Flood Boat, 1x Rigid-Hulled Inflatable Boat | Parkes |
| Forbes Unit | 30x Rescue Volunteers, 1x Rescue Truck, 1x General Purpose Vehicle, 1x Flood Boat, 1x Rigid-Hulled Inflatable Boat | Forbes |
| Condobolin Unit | 30x Rescue Volunteers, 1x Rescue Truck, 1x General Purpose Vehicle, 1x Flood Boat, 1x Rigid-Hulled Inflatable Boat | Condobolin |
| Peak Hill Unit | 20x Rescue Volunteers, 1x Rescue Truck, 1x General Purpose Vehicle | Peak Hill |
| Cowra Unit | 20x Rescue Volunteers, 1x Rescue Truck, 1x General Purpose Vehicle | Cowra |
| Euabalong Unit | 20x Rescue Volunteers, 1x Rescue Truck, 1x General Purpose Vehicle | Euabalong |
| Gooloogong Unit | 20x Rescue Volunteers, 1x Rescue Truck, 1x General Purpose Vehicle | Gooloogong |
| Grenfell Unit | 20x Rescue Volunteers, 1x Rescue Truck, 1x General Purpose Vehicle | Grenfell |
| Trundle Unit | 20x Rescue Volunteers, 1x Rescue Truck, 1x General Purpose Vehicle | Trundle |
| West Wyalong Unit | 20x Rescue Volunteers, 1x Rescue Truck, 1x General Purpose Vehicle | West Wyalong |
| Lake Cargelligo Unit | 10x Rescue Volunteers, 1x Rescue Truck | Lake Cargelligo |
| Unit: | Size: | Location: |
|---|---|---|
| Northern Zone Headquarters | 30x Permanent Personnel, 2x Command Vehicles, 1x Forward Command Vehicle | Metford |
| Unit: | Size: | Location: |
|---|---|---|
| Hunter Region Headquarters | 10x Permanent Personnel, 1x Command Vehicle | Metford |
| Hunter Capability Unit | 40x Rescue Volunteers, 2x General Purpose Vehicles, 2x Command Vehicles | Metford |
| City of Newcastle Unit | 80x Rescue Volunteers, 1x Heavy Rescue Truck, 1x Rescue Truck, 1x Rescue Vehicle, 1x Storm Response Vehicle, 1x General Purpose Vehicle, 1x High Clearance Vehicle, 2x Flood Boats, 2x Rigid-Hulled Inflatable Boats | Tighes Hill |
| Gosford Unit | 80x Rescue Volunteers, 1x Heavy Rescue Truck, 1x Rescue Truck, 1x Rescue Vehicle, 1x Storm Response Vehicle, 1x General Purpose Vehicle, 1x High Clearance Vehicle, 2x Flood Boats, 2x Rigid-Hulled Inflatable Boats | Erina |
| Lake Macquarie City Unit | 60x Rescue Volunteers, 1x Heavy Rescue Truck, 1x Rescue Vehicle, 1x Storm Response Vehicle, 2x General Purpose Vehicles, 1x Flood Boat, 1x Rigid-Hulled Inflatable Boat | Boolaroo |
| Singleton Unit | 60x Rescue Volunteers, 1x Heavy Rescue Truck, 1x Rescue Vehicle, 1x Storm Response Vehicle, 2x General Purpose Vehicles, 1x Flood Boat, 1x Rigid-Hulled Inflatable Boat | Singleton |
| Wyong Unit | 50x Rescue Volunteers, 1x Heavy Rescue Truck, 1x Rescue Vehicle, 1x Storm Response Vehicle, 1x General Purpose Vehicle, 1x Flood Boat, 1x Rigid-Hulled Inflatable Boat | Wyong |
| Maitland City Unit | 50x Rescue Volunteers, 1x Heavy Rescue Truck, 1x Rescue Vehicle, 1x Storm Response Vehicle, 1x General Purpose Vehicle, 1x Flood Boat, 1x Rigid-Hulled Inflatable Boat | Rutherford |
| Port Stephens Unit | 50x Rescue Volunteers, 1x Heavy Rescue Truck, 1x Rescue Vehicle, 1x Storm Response Vehicle, 1x General Purpose Vehicle, 1x Flood Boat, 1x Rigid-Hulled Inflatable Boat | Ferodale |
| Muswellbrook Unit | 30x Rescue Volunteers, 1x Rescue Truck, 1x General Purpose Vehicle, 1x Flood Boat, 1x Rigid-Hulled Inflatable Boat | Muswellbrook |
| Scone Unit | 30x Rescue Volunteers, 1x Rescue Truck, 1x General Purpose Vehicle, 1x Flood Boat, 1x Rigid-Hulled Inflatable Boat | Scone |
| Forster-Pacific Palms Unit | 30x Rescue Volunteers, 1x Rescue Truck, 1x General Purpose Vehicle, 1x Flood Boat, 1x Rigid-Hulled Inflatable Boat | Charlotte Bay |
| Cooranbong Unit | 30x Rescue Volunteers, 1x Rescue Truck, 1x General Purpose Vehicle, 1x Flood Boat, 1x Rigid-Hulled Inflatable Boat | Cooranbong |
| Tomaree Unit | 30x Rescue Volunteers, 1x Rescue Truck, 1x General Purpose Vehicle, 1x Flood Boat, 1x Rigid-Hulled Inflatable Boat | Corlette |
| Cessnock City Unit | 20x Rescue Volunteers, 1x Rescue Truck, 1x General Purpose Vehicle | Cessnock |
| Aberdeen Unit | 20x Rescue Volunteers, 1x Rescue Truck, 1x General Purpose Vehicle | Aberdeen |
| Dungog Unit | 20x Rescue Volunteers, 1x Rescue Truck, 1x General Purpose Vehicle | Dungog |
| Merriwa Unit | 20x Rescue Volunteers, 1x Rescue Truck, 1x General Purpose Vehicle | Merriwa |
| Murrurundi Unit | 20x Rescue Volunteers, 1x Rescue Truck, 1x General Purpose Vehicle | Murrurundi |
| Stroud Unit | 20x Rescue Volunteers, 1x Rescue Truck, 1x General Purpose Vehicle | Booral |
| Swansea-Catherine Hill Bay Unit | 20x Rescue Volunteers, 1x Rescue Truck, 1x General Purpose Vehicle | Catherine Hill Bay |
| Denman Unit | 10x Rescue Volunteers, 1x Rescue Truck | Denman |
| Unit: | Size: | Location: |
|---|---|---|
| Mid North Coast Region Headquarters | 10x Permanent Personnel, 1x Command Vehicle | Taree |
| Mid North Coast Capability Unit | 40x Rescue Volunteers, 2x General Purpose Vehicles, 2x Command Vehicles | Taree |
| Port Macquarie-Hastings Unit | 80x Rescue Volunteers, 1x Heavy Rescue Truck, 1x Rescue Truck, 1x Rescue Vehicle, 1x Storm Response Vehicle, 1x General Purpose Vehicle, 1x High Clearance Vehicle, 2x Flood Boats, 2x Rigid-Hulled Inflatable Boats | Port Macquarie |
| Macleay Valley Unit | 60x Rescue Volunteers, 1x Heavy Rescue Truck, 1x Rescue Vehicle, 1x Storm Response Vehicle, 2x General Purpose Vehicles, 1x Flood Boat, 1x Rigid-Hulled Inflatable Boat | West Kempsey |
| Taree City Unit | 60x Rescue Volunteers, 1x Heavy Rescue Truck, 1x Rescue Vehicle, 1x Storm Response Vehicle, 2x General Purpose Vehicles, 1x Flood Boat, 1x Rigid-Hulled Inflatable Boat | Taree |
| Gloucester Shire Unit | 50x Rescue Volunteers, 1x Heavy Rescue Truck, 1x Rescue Vehicle, 1x Storm Response Vehicle, 1x General Purpose Vehicle, 1x Flood Boat, 1x Rigid-Hulled Inflatable Boat | Gloucester |
| Wauchope Unit | 30x Rescue Volunteers, 1x Rescue Truck, 1x General Purpose Vehicle, 1x Flood Boat, 1x Rigid-Hulled Inflatable Boat | Wauchope |
| Wingham Unit | 30x Rescue Volunteers, 1x Rescue Truck, 1x General Purpose Vehicle, 1x Flood Boat, 1x Rigid-Hulled Inflatable Boat | Wingham |
| Camden-Haven Unit | 30x Rescue Volunteers, 1x Rescue Truck, 1x General Purpose Vehicle, 1x Flood Boat, 1x Rigid-Hulled Inflatable Boat | Laurieton |
| Harrington Unit | 20x Rescue Volunteers, 1x Rescue Truck, 1x General Purpose Vehicle | Harrington |
| Nabiac Unit | 20x Rescue Volunteers, 1x Rescue Truck, 1x General Purpose Vehicle | Nabiac |
| South West Rocks Unit | 20x Rescue Volunteers, 1x Rescue Truck, 1x General Purpose Vehicle | South West Rocks |
| Gladstone Unit | 10x Rescue Volunteers, 1x Rescue Truck | Gladstone |
| Lord Howe Island Unit | 10x Rescue Volunteers, 1x Rescue Vehicle | Lord Howe Island |
| Unit: | Size: | Location: |
|---|---|---|
| North Eastern Zone Headquarters | 30x Permanent Personnel, 2x Command Vehicles, 1x Forward Command Vehicle | Goonellabah |
| Unit: | Size: | Location: |
|---|---|---|
| Richmond-Tweed Region Headquarters | 10x Permanent Personnel, 1x Command Vehicle | Goonellabah |
| Northern Rivers Capability Unit | 40x Rescue Volunteers, 2x General Purpose Vehicles, 2x Command Vehicles | Goonellabah |
| Tweed Heads Unit | 80x Rescue Volunteers, 1x Heavy Rescue Truck, 1x Rescue Truck, 1x Rescue Vehicle, 1x Storm Response Vehicle, 1x General Purpose Vehicle, 1x High Clearance Vehicle, 2x Flood Boats, 2x Rigid-Hulled Inflatable Boats | Banora Point |
| Lismore City Unit | 80x Rescue Volunteers, 1x Heavy Rescue Truck, 1x Rescue Truck, 1x Rescue Vehicle, 1x Storm Response Vehicle, 1x General Purpose Vehicle, 1x High Clearance Vehicle, 2x Flood Boats, 2x Rigid-Hulled Inflatable Boats | Lismore |
| Tweed Coast Unit | 80x Rescue Volunteers, 1x Heavy Rescue Truck, 1x Rescue Truck, 1x Rescue Vehicle, 1x Storm Response Vehicle, 1x General Purpose Vehicle, 1x High Clearance Vehicle, 2x Flood Boats, 2x Rigid-Hulled Inflatable Boats | Pottsville |
| Ballina Unit | 50x Rescue Volunteers, 1x Heavy Rescue Truck, 1x Rescue Vehicle, 1x Storm Response Vehicle, 1x General Purpose Vehicle, 1x Flood Boat, 1x Rigid-Hulled Inflatable Boat | Ballina |
| Mullumbimby Unit | 50x Rescue Volunteers, 1x Heavy Rescue Truck, 1x Rescue Vehicle, 1x Storm Response Vehicle, 1x General Purpose Vehicle, 1x Flood Boat, 1x Rigid-Hulled Inflatable Boat | Mullumbimby |
| Casino Unit | 30x Rescue Volunteers, 1x Rescue Truck, 1x General Purpose Vehicle, 1x Flood Boat, 1x Rigid-Hulled Inflatable Boat | Casino |
| Kyogle Unit | 30x Rescue Volunteers, 1x Rescue Truck, 1x General Purpose Vehicle, 1x Flood Boat, 1x Rigid-Hulled Inflatable Boat | Kyogle |
| Murwillumbah Unit | 30x Rescue Volunteers, 1x Rescue Truck, 1x General Purpose Vehicle, 1x Flood Boat, 1x Rigid-Hulled Inflatable Boat | Murwillumbah |
| Tabulam Unit | 30x Rescue Volunteers, 1x Rescue Truck, 1x General Purpose Vehicle, 1x Flood Boat, 1x Rigid-Hulled Inflatable Boat | Tabulam |
| Urbenville Unit | 30x Rescue Volunteers, 1x Rescue Truck, 1x General Purpose Vehicle, 1x Flood Boat, 1x Rigid-Hulled Inflatable Boat | Urbenville |
| Coraki Unit | 20x Rescue Volunteers, 1x Rescue Truck, 1x General Purpose Vehicle | Coraki |
| Woodburn Unit | 20x Rescue Volunteers, 1x Rescue Truck, 1x General Purpose Vehicle | Woodburn |
| Broadwater Unit | 20x Rescue Volunteers, 1x Rescue Truck, 1x General Purpose Vehicle | Broadwater |
| Unit: | Size: | Location: |
|---|---|---|
| Clarence-Nambucca Region Headquarters | 10x Permanent Personnel, 1x Command Vehicle | South Grafton |
| Clarence-Coffs Capability Unit | 40x Rescue Volunteers, 2x General Purpose Vehicles, 2x Command Vehicles | South Grafton |
| Coffs Harbour City Unit | 80x Rescue Volunteers, 1x Heavy Rescue Truck, 1x Rescue Truck, 1x Rescue Vehicle, 1x Storm Response Vehicle, 1x General Purpose Vehicle, 1x High Clearance Vehicle, 2x Flood Boats, 2x Rigid-Hulled Inflatable Boats | Coffs Harbour |
| Grafton City Unit | 30x Rescue Volunteers, 1x Rescue Truck, 1x General Purpose Vehicle, 1x Flood Boat, 1x Rigid-Hulled Inflatable Boat | Grafton |
| Nambucca Unit | 30x Rescue Volunteers, 1x Rescue Truck, 1x General Purpose Vehicle, 1x Flood Boat, 1x Rigid-Hulled Inflatable Boat | Macksville |
| Copmanhurst Unit | 30x Rescue Volunteers, 1x Rescue Truck, 1x General Purpose Vehicle, 1x Flood Boat, 1x Rigid-Hulled Inflatable Boat | Junction Hill |
| Corindi-Woolgoolga Unit | 30x Rescue Volunteers, 1x Rescue Truck, 1x General Purpose Vehicle, 1x Flood Boat, 1x Rigid-Hulled Inflatable Boat | Corindi Beach |
| Nymboida Unit | 30x Rescue Volunteers, 1x Rescue Truck, 1x General Purpose Vehicle, 1x Flood Boat, 1x Rigid-Hulled Inflatable Boat | Coutts Crossing |
| Dorrigo Unit | 30x Rescue Volunteers, 1x Rescue Truck, 1x General Purpose Vehicle, 1x Flood Boat, 1x Rigid-Hulled Inflatable Boat | Dorrigo |
| Lawrence Unit | 30x Rescue Volunteers, 1x Rescue Truck, 1x General Purpose Vehicle, 1x Flood Boat, 1x Rigid-Hulled Inflatable Boat | Lawrence |
| Maclean Unit | 30x Rescue Volunteers, 1x Rescue Truck, 1x General Purpose Vehicle, 1x Flood Boat, 1x Rigid-Hulled Inflatable Boat | Maclean |
| Urunga Unit | 30x Rescue Volunteers, 1x Rescue Truck, 1x General Purpose Vehicle, 1x Flood Boat, 1x Rigid-Hulled Inflatable Boat | Urunga |
| Ulmarra Unit | 20x Rescue Volunteers, 1x Rescue Truck, 1x General Purpose Vehicle | Ulmarra |
| Bellingen Unit | 20x Rescue Volunteers, 1x Rescue Truck, 1x General Purpose Vehicle | Bellingen |
| Brushgrove Unit | 20x Rescue Volunteers, 1x Rescue Truck, 1x General Purpose Vehicle | Brushgrove |
| Wooli-Yuraygir Unit | 20x Rescue Volunteers, 1x Rescue Truck, 1x General Purpose Vehicle | Wooli |
| Yamba Unit | 20x Rescue Volunteers, 1x Rescue Truck, 1x General Purpose Vehicle | Yamba |
| Unit: | Size: | Location: |
|---|---|---|
| North Western Zone Headquarters | 30x Permanent Personnel, 2x Command Vehicles, 1x Forward Command Vehicle | West Tamworth |
| Unit: | Size: | Location: |
|---|---|---|
| North West Region Headquarters | 10x Permanent Personnel, 1x Command Vehicle | Moree |
| North West Capability Unit | 40x Rescue Volunteers, 2x General Purpose Vehicles, 2x Command Vehicles | Moree |
| Tenterfield Unit | 30x Rescue Volunteers, 1x Rescue Truck, 1x General Purpose Vehicle, 1x Flood Boat, 1x Rigid-Hulled Inflatable Boat | Tenterfield |
| Bingara Unit | 30x Rescue Volunteers, 1x Rescue Truck, 1x General Purpose Vehicle, 1x Flood Boat, 1x Rigid-Hulled Inflatable Boat | Bingara |
| Deepwater Unit | 30x Rescue Volunteers, 1x Rescue Truck, 1x General Purpose Vehicle, 1x Flood Boat, 1x Rigid-Hulled Inflatable Boat | Deepwater |
| Glen Innes Unit | 30x Rescue Volunteers, 1x Rescue Truck, 1x General Purpose Vehicle, 1x Flood Boat, 1x Rigid-Hulled Inflatable Boat | Glen Innes |
| Inverell Unit | 30x Rescue Volunteers, 1x Rescue Truck, 1x General Purpose Vehicle, 1x Flood Boat, 1x Rigid-Hulled Inflatable Boat | Inverell |
| Ashford Unit | 20x Rescue Volunteers, 1x Rescue Truck, 1x General Purpose Vehicle | Ashford |
| Garah Unit | 20x Rescue Volunteers, 1x Rescue Truck, 1x General Purpose Vehicle | Garah |
| Moree Unit | 20x Rescue Volunteers, 1x Rescue Truck, 1x General Purpose Vehicle | Moree |
| Tingha Unit | 20x Rescue Volunteers, 1x Rescue Truck, 1x General Purpose Vehicle | Tingha |
| Warialda Unit | 20x Rescue Volunteers, 1x Rescue Truck, 1x General Purpose Vehicle | Warialda |
| Yetman Unit | 20x Rescue Volunteers, 1x Rescue Truck, 1x General Purpose Vehicle | Yetman |
| Boggabilla Unit | 10x Rescue Volunteers, 1x Rescue Truck | Boggabilla |
| Mungindi Unit | 10x Rescue Volunteers, 1x Rescue Truck | Mungindi |
| Unit: | Size: | Location: |
|---|---|---|
| Namoi Region Headquarters | 10x Permanent Personnel, 1x Command Vehicle | Gunnedah |
| Namoi Capability Unit | 40x Rescue Volunteers, 2x General Purpose Vehicles, 2x Command Vehicles | Gunnedah |
| Tamworth Unit | 50x Rescue Volunteers, 1x Heavy Rescue Truck, 1x Rescue Vehicle, 1x Storm Response Vehicle, 1x General Purpose Vehicle, 1x Flood Boat, 1x Rigid-Hulled Inflatable Boat | Taminda |
| Armidale-Dumaresq Unit | 50x Rescue Volunteers, 1x Heavy Rescue Truck, 1x Rescue Vehicle, 1x Storm Response Vehicle, 1x General Purpose Vehicle, 1x Flood Boat, 1x Rigid-Hulled Inflatable Boat | Armidale |
| Boggabri Unit | 30x Rescue Volunteers, 1x Rescue Truck, 1x General Purpose Vehicle, 1x Flood Boat, 1x Rigid-Hulled Inflatable Boat | Boggabri |
| Gunnedah Unit | 30x Rescue Volunteers, 1x Rescue Truck, 1x General Purpose Vehicle, 1x Flood Boat, 1x Rigid-Hulled Inflatable Boat | Gunnedah |
| Guyra Unit | 30x Rescue Volunteers, 1x Rescue Truck, 1x General Purpose Vehicle, 1x Flood Boat, 1x Rigid-Hulled Inflatable Boat | South Guyra |
| Narrabri Unit | 30x Rescue Volunteers, 1x Rescue Truck, 1x General Purpose Vehicle, 1x Flood Boat, 1x Rigid-Hulled Inflatable Boat | Narrabri |
| Pilliga Unit | 30x Rescue Volunteers, 1x Rescue Truck, 1x General Purpose Vehicle, 1x Flood Boat, 1x Rigid-Hulled Inflatable Boat | Pilliga |
| Tambar Springs Unit | 20x Rescue Volunteers, 1x Rescue Truck, 1x General Purpose Vehicle | Tambar Springs |
| Liverpool Plains Shire Unit | 20x Rescue Volunteers, 1x Rescue Truck, 1x General Purpose Vehicle | Quirindi |
| Manilla Unit | 20x Rescue Volunteers, 1x Rescue Truck, 1x General Purpose Vehicle | Manilla |
| Uralla Unit | 20x Rescue Volunteers, 1x Rescue Truck, 1x General Purpose Vehicle | Uralla |
| Walcha Unit | 20x Rescue Volunteers, 1x Rescue Truck, 1x General Purpose Vehicle | Walcha |
| Wee Waa Unit | 20x Rescue Volunteers, 1x Rescue Truck, 1x General Purpose Vehicle | Wee Waa |
| Barraba Unit | 10x Rescue Volunteers, 1x Rescue Truck | Barraba |
| Nundle Unit | 10x Rescue Volunteers, 1x Rescue Truck | Nundle |
| Unit: | Size: | Location: |
|---|---|---|
| Western Zone Headquarters | 30x Permanent Personnel, 2x Command Vehicles, 1x Forward Command Vehicle | Dubbo |
| Unit: | Size: | Location: |
|---|---|---|
| Central West Region Headquarters | 10x Permanent Personnel, 1x Command Vehicle | Robin Hill |
| Central West Capability Unit | 40x Rescue Volunteers, 2x General Purpose Vehicles, 2x Command Vehicles | Robin Hill |
| Bathurst Unit | 50x Rescue Volunteers, 1x Heavy Rescue Truck, 1x Rescue Vehicle, 1x Storm Response Vehicle, 1x General Purpose Vehicle, 1x Flood Boat, 1x Rigid-Hulled Inflatable Boat | South Bathurst |
| Orange City Unit | 50x Rescue Volunteers, 1x Heavy Rescue Truck, 1x Rescue Vehicle, 1x Storm Response Vehicle, 1x General Purpose Vehicle, 1x Flood Boat, 1x Rigid-Hulled Inflatable Boat | Orange |
| Eugowra Unit | 30x Rescue Volunteers, 1x Rescue Truck, 1x General Purpose Vehicle, 1x Flood Boat, 1x Rigid-Hulled Inflatable Boat | Eugowra |
| Molong Unit | 30x Rescue Volunteers, 1x Rescue Truck, 1x General Purpose Vehicle, 1x Flood Boat, 1x Rigid-Hulled Inflatable Boat | Molong |
| Oberon Unit | 30x Rescue Volunteers, 1x Rescue Truck, 1x General Purpose Vehicle, 1x Flood Boat, 1x Rigid-Hulled Inflatable Boat | Oberon |
| Blayney Unit | 20x Rescue Volunteers, 1x Rescue Truck, 1x General Purpose Vehicle | Blayney |
| Burraga Unit | 20x Rescue Volunteers, 1x Rescue Truck, 1x General Purpose Vehicle | Burraga |
| Canowindra Unit | 20x Rescue Volunteers, 1x Rescue Truck, 1x General Purpose Vehicle | Canowindra |
| Lithgow Unit | 20x Rescue Volunteers, 1x Rescue Truck, 1x General Purpose Vehicle | Pottery Estate |
| Portland Unit | 20x Rescue Volunteers, 1x Rescue Truck, 1x General Purpose Vehicle | Portland |
| Sofala Unit | 20x Rescue Volunteers, 1x Rescue Truck, 1x General Purpose Vehicle | Sofala |
| Unit: | Size: | Location: |
|---|---|---|
| Macquarie Region Headquarters | 10x Permanent Personnel, 1x Command Vehicle | Dubbo |
| Macquarie Capability Unit | 40x Rescue Volunteers, 2x General Purpose Vehicles, 2x Command Vehicles | Dubbo |
| Dubbo Unit | 50x Rescue Volunteers, 1x Heavy Rescue Truck, 1x Rescue Vehicle, 1x Storm Response Vehicle, 1x General Purpose Vehicle, 1x Flood Boat, 1x Rigid-Hulled Inflatable Boat | Dubbo |
| Lightning Ridge Unit | 30x Rescue Volunteers, 1x Rescue Truck, 1x General Purpose Vehicle, 1x Flood Boat, 1x Rigid-Hulled Inflatable Boat | Lightning Ridge |
| Mudgee Unit | 30x Rescue Volunteers, 1x Rescue Truck, 1x General Purpose Vehicle, 1x Flood Boat, 1x Rigid-Hulled Inflatable Boat | Caerleon |
| Gilgandra Unit | 30x Rescue Volunteers, 1x Rescue Truck, 1x General Purpose Vehicle, 1x Flood Boat, 1x Rigid-Hulled Inflatable Boat | Gilganda |
| Baradine Unit | 20x Rescue Volunteers, 1x Rescue Truck, 1x General Purpose Vehicle | Baradine |
| Coonamble Unit | 20x Rescue Volunteers, 1x Rescue Truck, 1x General Purpose Vehicle | Coonamble |
| Dunedoo Unit | 20x Rescue Volunteers, 1x Rescue Truck, 1x General Purpose Vehicle | Dunedoo |
| Narromine Unit | 20x Rescue Volunteers, 1x Rescue Truck, 1x General Purpose Vehicle | Narromine |
| Nyngan Unit | 20x Rescue Volunteers, 1x Rescue Truck, 1x General Purpose Vehicle | Nyngan |
| Walgett Unit | 20x Rescue Volunteers, 1x Rescue Truck, 1x General Purpose Vehicle | Walgett |
| Wellington Unit | 20x Rescue Volunteers, 1x Rescue Truck, 1x General Purpose Vehicle | Wellington |
| Glengarry Unit | 20x Rescue Volunteers, 1x Rescue Truck, 1x General Purpose Vehicle | Cumborah |
| Carinda Unit | 10x Rescue Volunteers, 1x Rescue Truck | Carinda |
| Warren Unit | 10x Rescue Volunteers, 1x Rescue Truck | Warren |
| Rylstone Unit | 10x Rescue Volunteers, 1x Rescue Truck | Rylstone |
| Collarenebri Unit | 10x Rescue Volunteers, 1x Rescue Truck | Collarenebri |
| Unit: | Size: | Location: |
|---|---|---|
| Far West Region Headquarters | 10x Permanent Personnel, 1x Command Vehicle | Cobar |
| Far West Capability Unit | 40x Rescue Volunteers, 2x General Purpose Vehicles, 2x Command Vehicles | Cobar |
| Broken Hill Unit | 50x Rescue Volunteers, 1x Heavy Rescue Truck, 1x Rescue Vehicle, 1x Storm Response Vehicle, 1x General Purpose Vehicle, 1x Flood Boat, 1x Rigid-Hulled Inflatable Boat | Broken Hill |
| Cobar Unit | 30x Rescue Volunteers, 1x Rescue Truck, 1x General Purpose Vehicle, 1x Flood Boat, 1x Rigid-Hulled Inflatable Boat | Cobar |
| Bourke Unit | 20x Rescue Volunteers, 1x Rescue Truck, 1x General Purpose Vehicle | North Bourke |
| Brewarrina Unit | 20x Rescue Volunteers, 1x Rescue Truck, 1x General Purpose Vehicle | Brewarrina |
| Goodooga Unit | 20x Rescue Volunteers, 1x Rescue Truck, 1x General Purpose Vehicle | Goodooga |
| Ivanhoe Unit | 20x Rescue Volunteers, 1x Rescue Truck, 1x General Purpose Vehicle | Ivanhoe |
| Packsaddle Unit | 20x Rescue Volunteers, 1x Rescue Truck, 1x General Purpose Vehicle | Packsaddle |
| Tibooburra Unit | 20x Rescue Volunteers, 1x Rescue Truck, 1x General Purpose Vehicle | Tibooburra |
| White Cliffs Unit | 20x Rescue Volunteers, 1x Rescue Truck, 1x General Purpose Vehicle | White Cliffs |
| Wilcannia Unit | 20x Rescue Volunteers, 1x Rescue Truck, 1x General Purpose Vehicle | Wilcannia |
| Menindee Unit | 10x Rescue Volunteers, 1x Rescue Truck | Menindee |
 |
| Type: | Amount: | Image: |
|---|---|---|
| Rescue Volunteers | 1,600 | 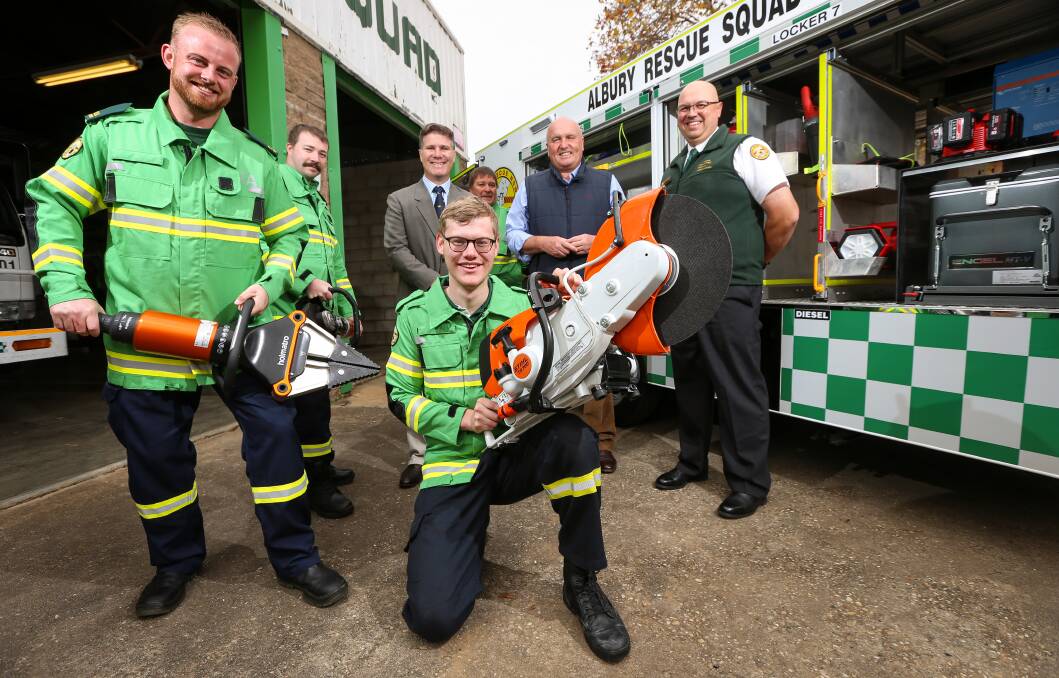 |
| Type: | Amount: | Image: |
|---|---|---|
| Rescue Truck | 39 | 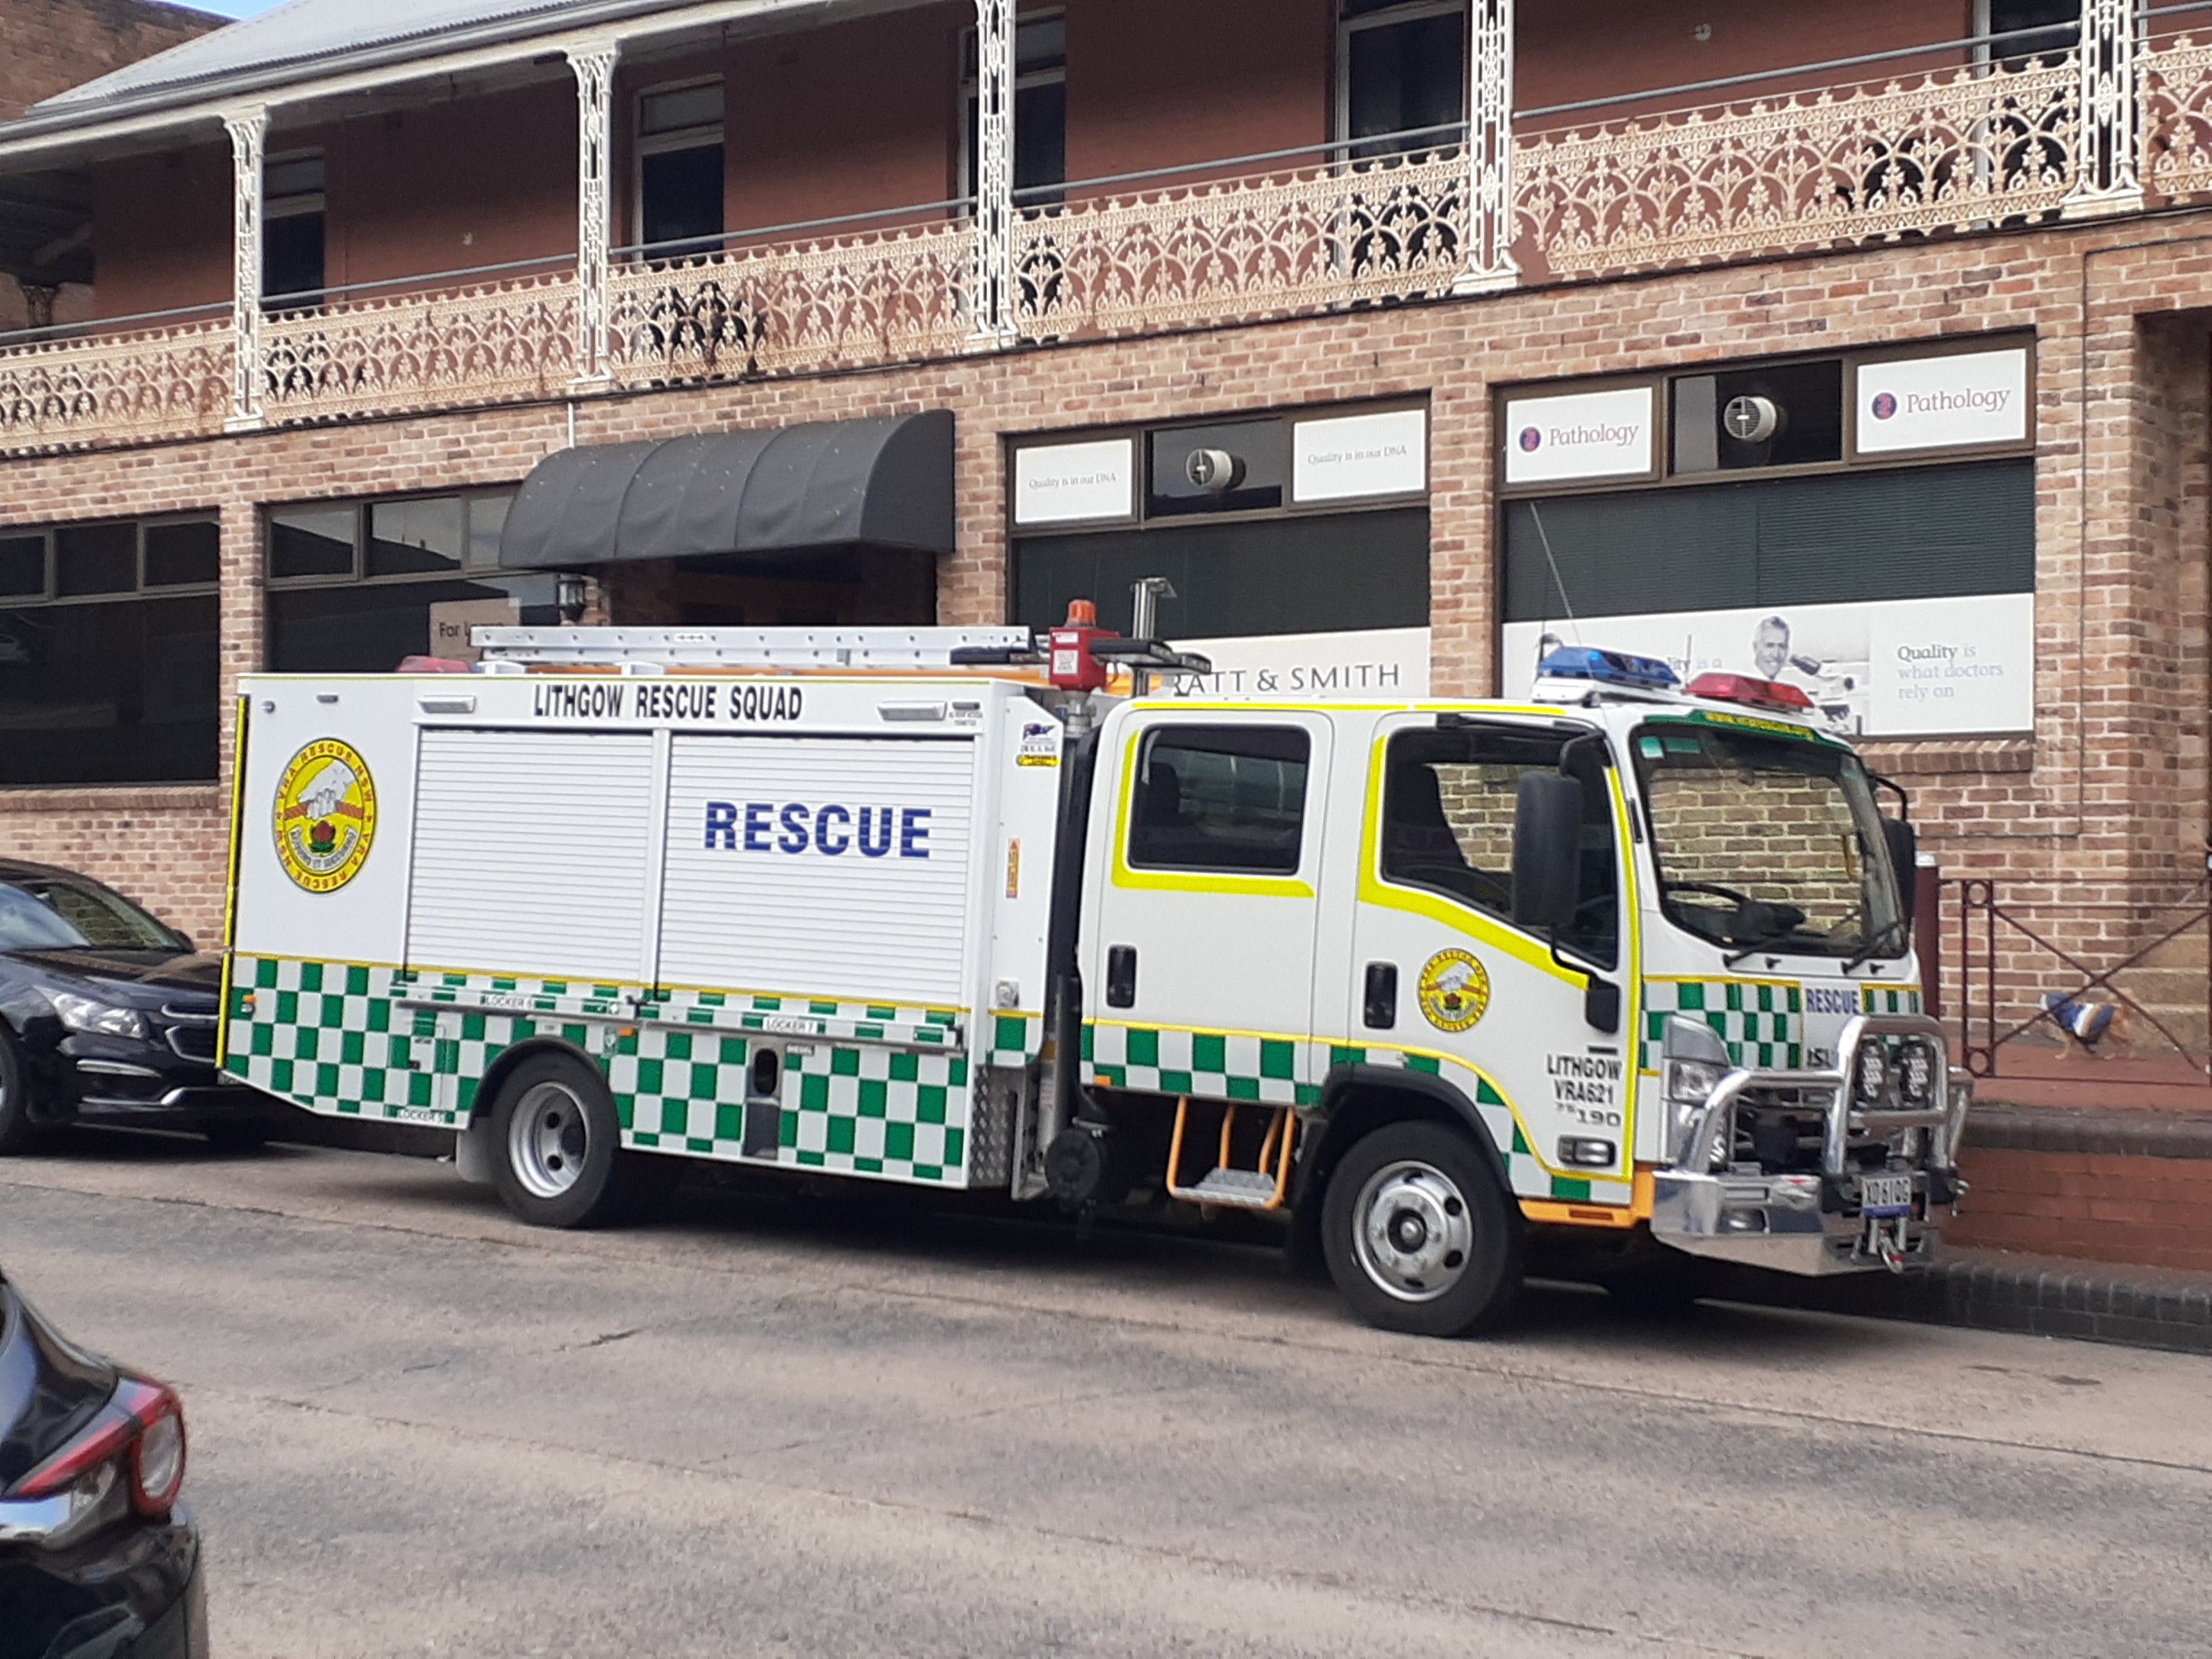 |
| Heavy Rescue Truck | 10 | 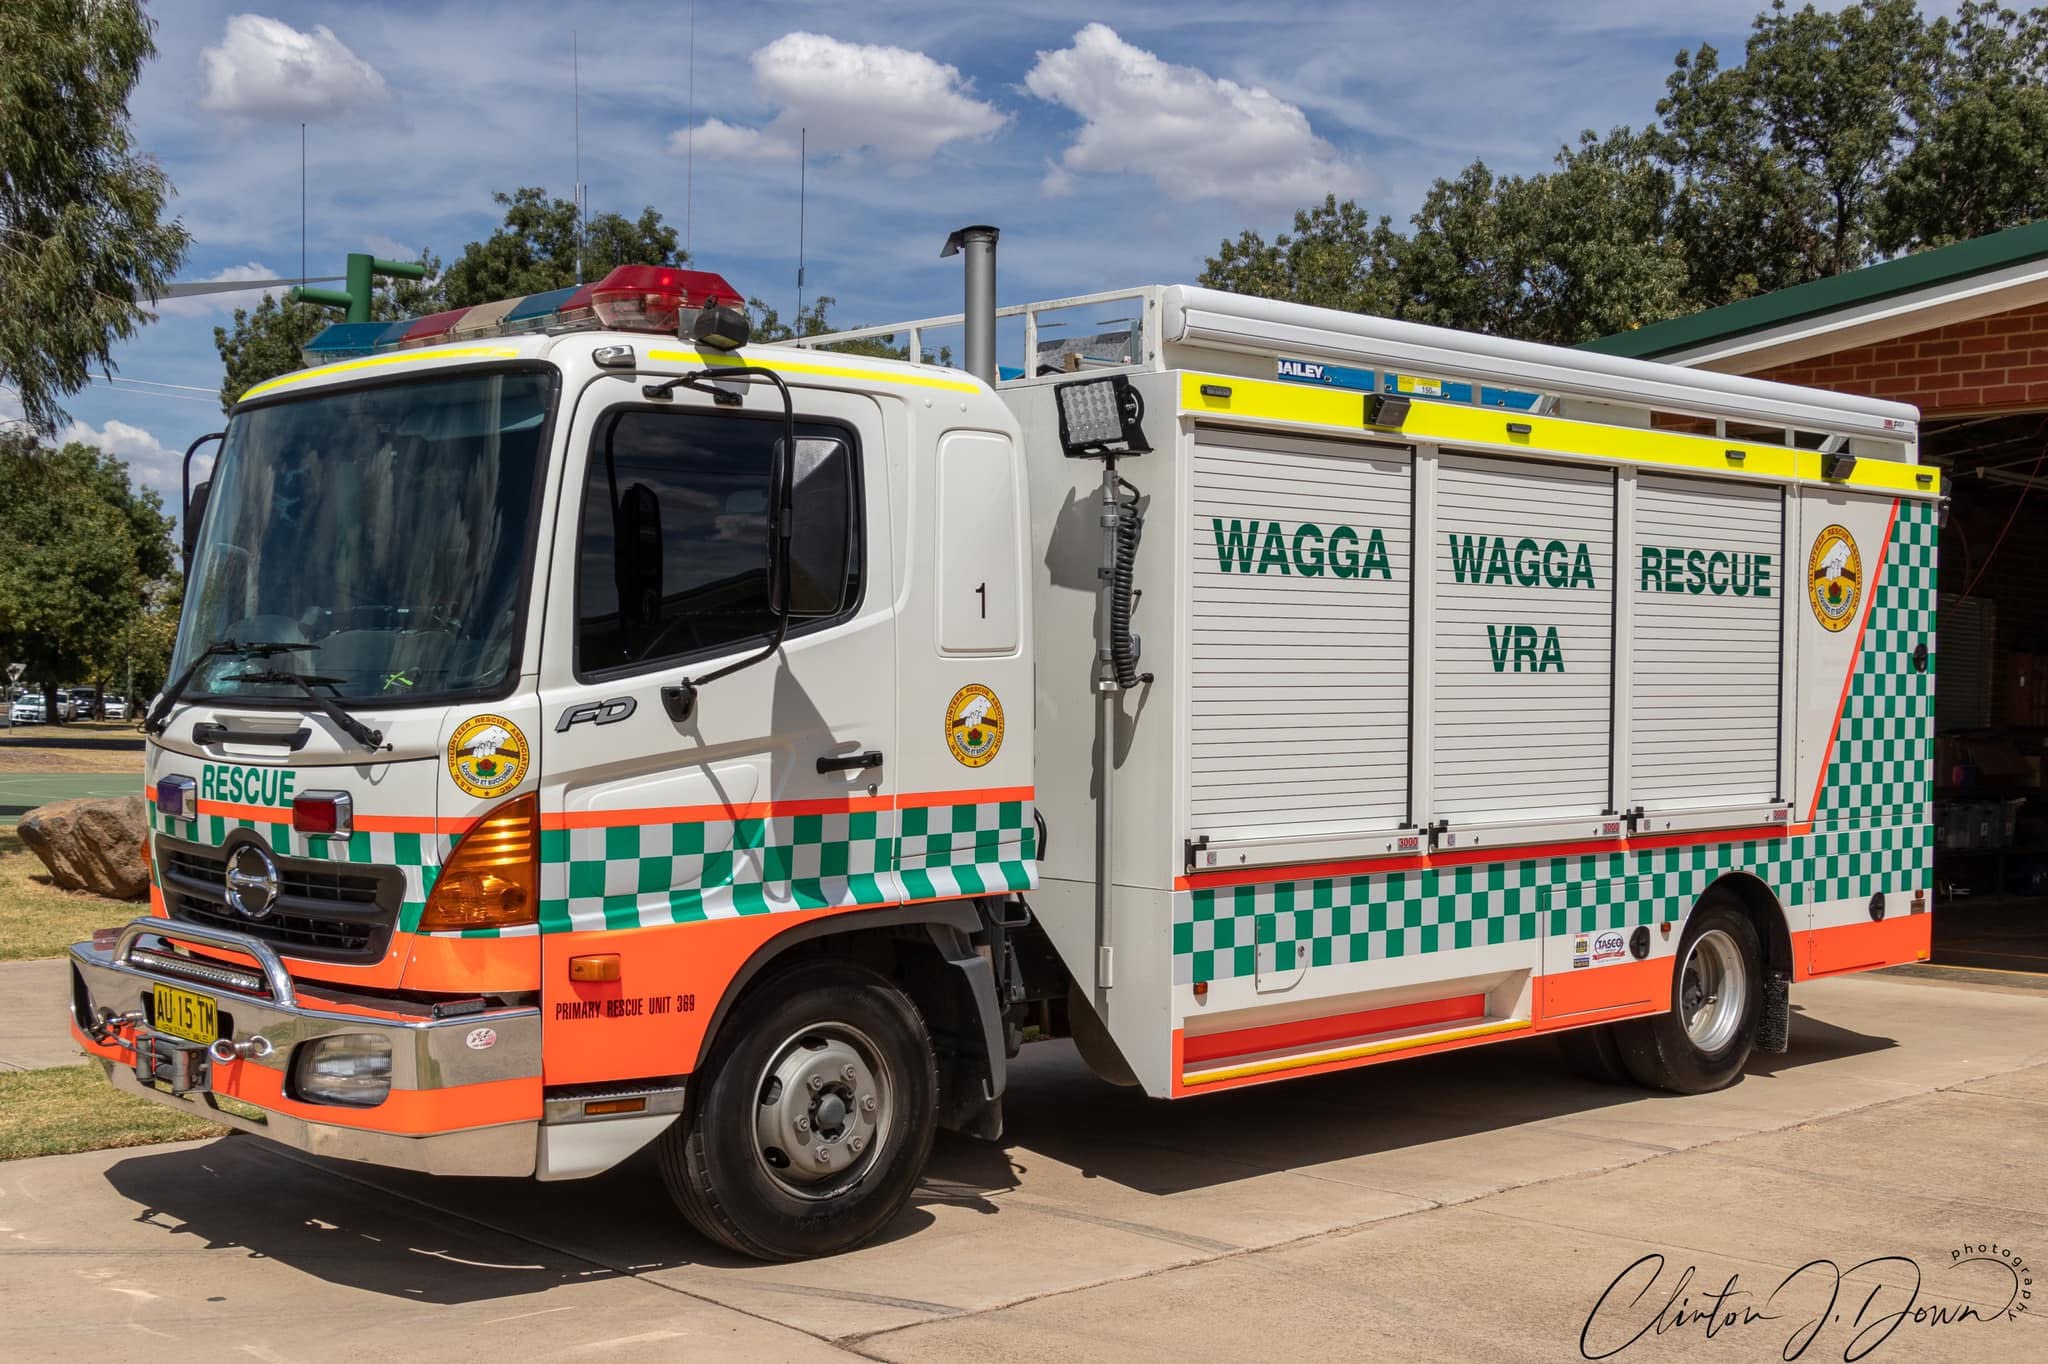 |
| Rescue Vehicle | 46 | 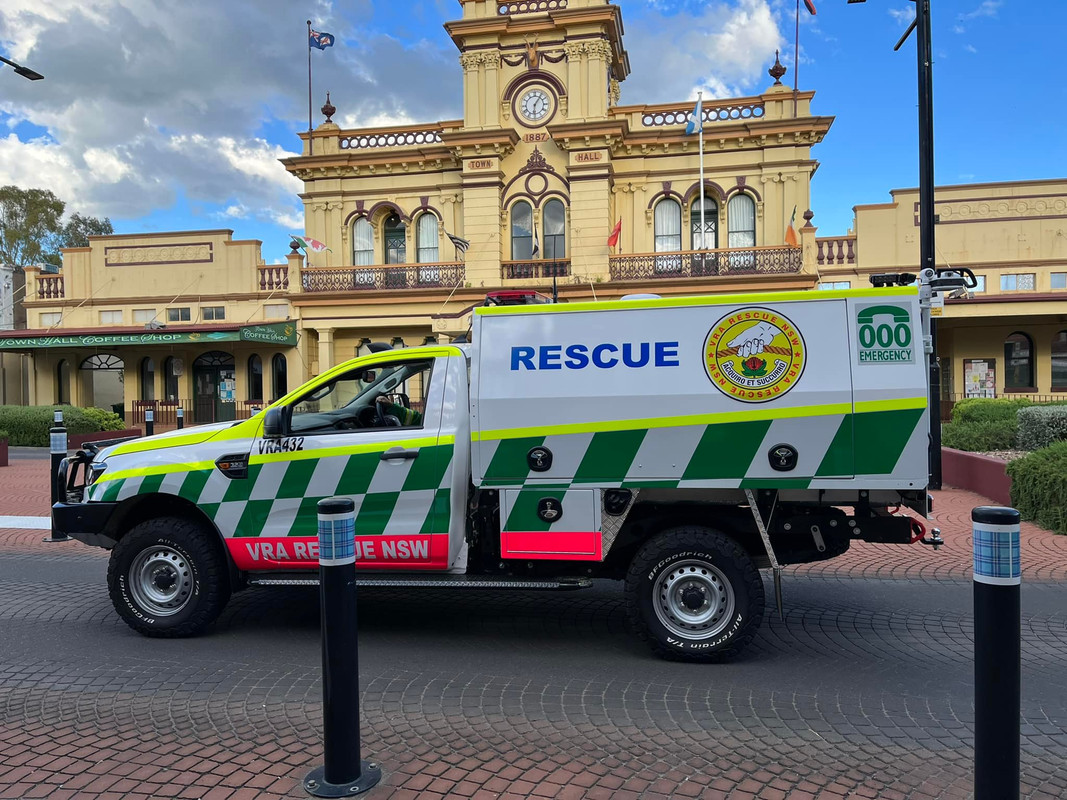 |
| General Purpose Vehicle | 31 |  |
| Command Vehicle | 30 | 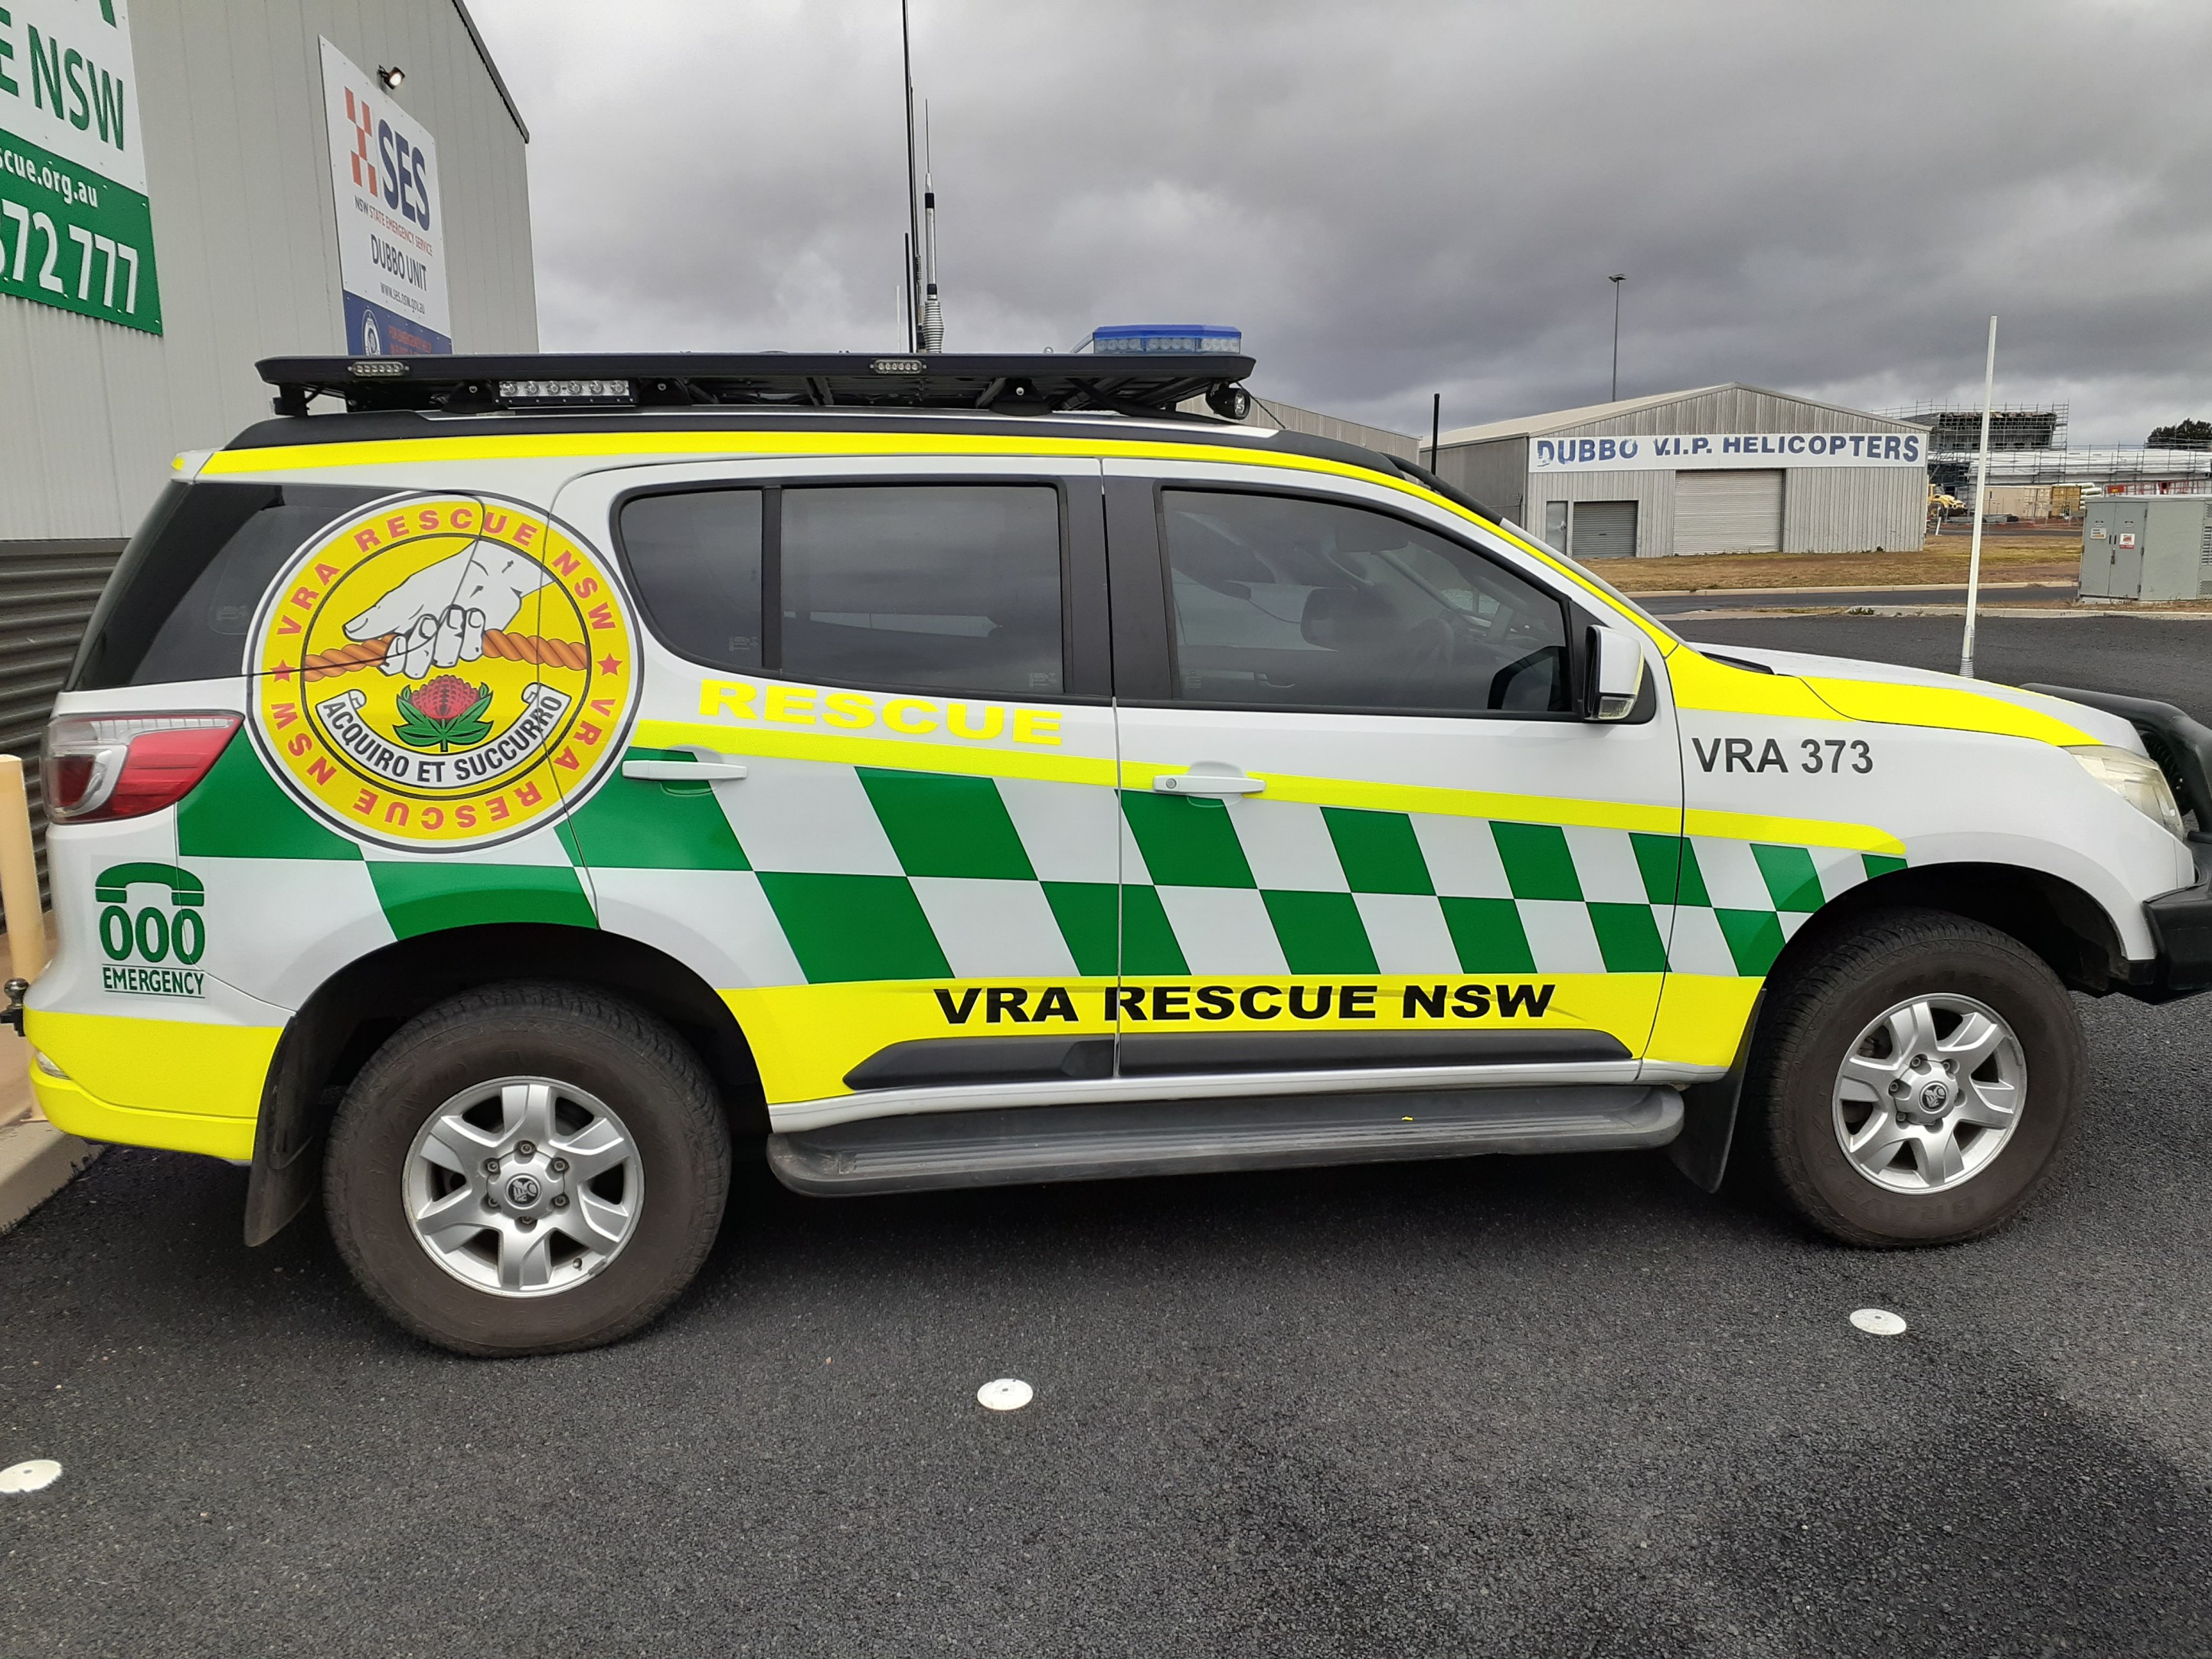 |
| Flood Boats | 15 |  |
| Lake Rescue Boat | 3 | 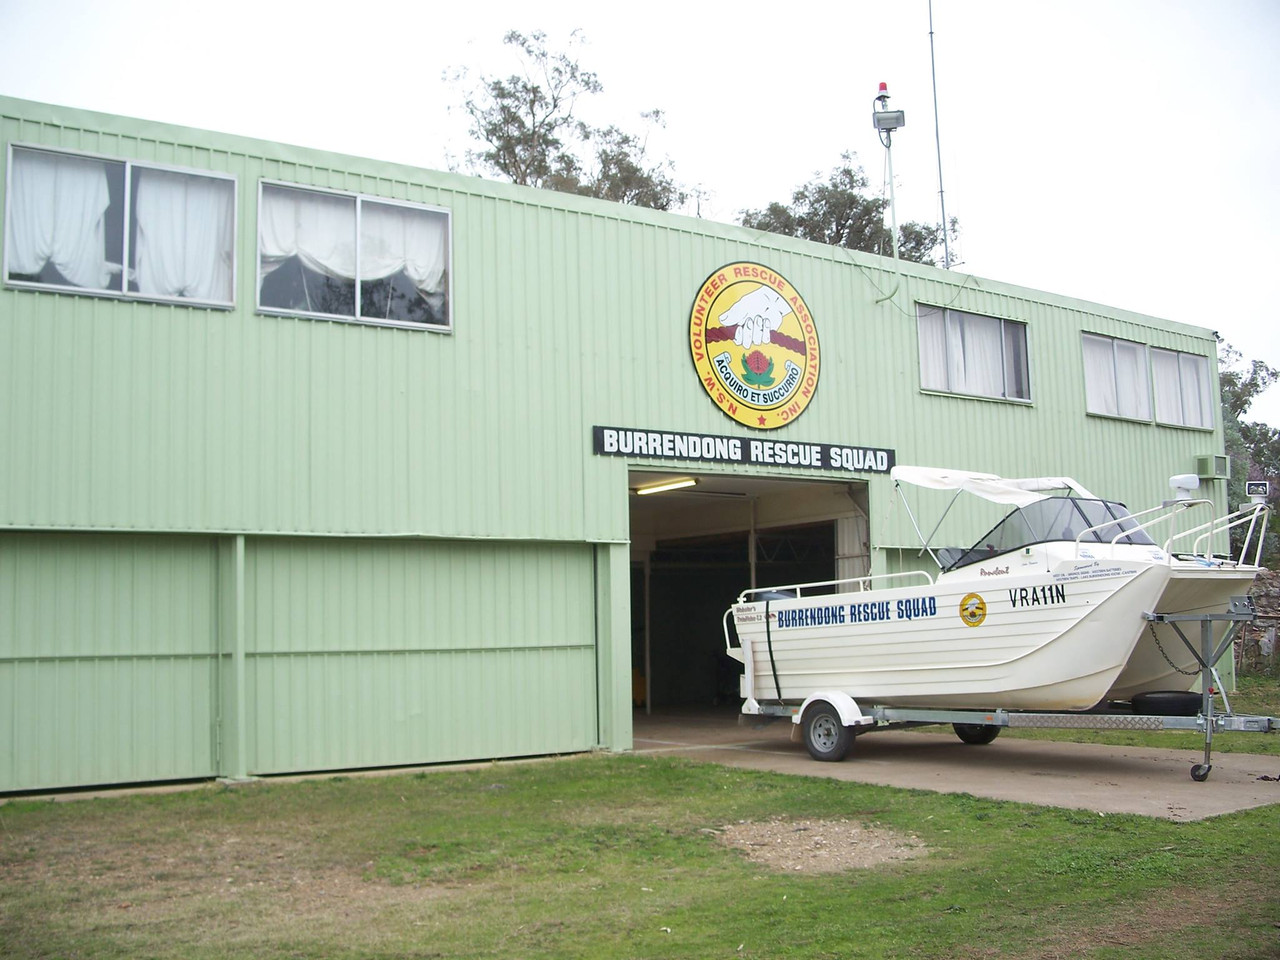 |
| Unit: | Size: | Location: |
|---|---|---|
| State Headquarters | 100x Rescue Volunteers, 4x Command Vehicles, 6x General Purpose Vehicles | Dubbo |
| State Rescue Group | 40x Rescue Volunteers, 1x Rescue Truck, 2x Rescue Vehicles, 1x General Purpose Vehicle | Dubbo |
| Cave Rescue Squad | 40x Rescue Volunteers, 1x Rescue Truck, 1x Rescue Vehicle, 1x General Purpose Vehicle, 1x Command Vehicle | Bankstown Aerodrome |
| Search Dogs Squad | 35x Rescue Volunteers, 10x General Purpose Vehicles | Dubbo |
| Unit: | Size: | Location: |
|---|---|---|
| Region 1 Headquarters | 10x Rescue Volunteers, 1x Command Vehicle | Casino |
| Casino Unit | 50x Rescue Volunteers, 1x Heavy Rescue Truck, 1x Rescue Truck, 2x Rescue Vehicles, 1x General Purpose Vehicle | Casino |
| Tweed District Unit | 45x Rescue Volunteers, 1x Rescue Truck, 2x Rescue Vehicles, 1x General Purpose Vehicle, 1x Flood Boat | Chinderah |
| Taree Unit | 40x Rescue Volunteers, 1x Heavy Rescue Truck, 1x Rescue Truck, 1x Rescue Vehicle, 1x General Purpose Vehicle | Taree |
| Brunswick Valley and District Unit | 30x Rescue Volunteers, 1x Heavy Rescue Truck, 1x Rescue Vehicle, 1x Command Vehicle | Brunswick Heads |
| Brunswick Valley and District Unit - Byron Bay Satellite | 20x Rescue Volunteers, 1x Rescue Truck, 1x Rescue Vehicle | Byron Bay |
| Norfolk Island Unit | 20x Rescue Volunteers, 1x Rescue Truck, 1x General Purpose Vehicle | Burnt Pine |
| Nambucca District Unit | 20x Rescue Volunteers, 1x Rescue Truck, 1x Command Vehicle | Nambucca Heads |
| Unit: | Size: | Location: |
|---|---|---|
| Region 2 Headquarters | 10x Rescue Volunteers, 1x Command Vehicle | Glen Innes |
| Glen Innes Unit | 40x Rescue Volunteers, 1x Rescue Truck, 2x Rescue Vehicles, 1x Command Vehicle | Glen Innes |
| Narrabri Unit | 35x Rescue Volunteers, 1x Rescue Truck, 1x Rescue Vehicle, 1x General Purpose Vehicle, 1x Flood Boat | Narrabri |
| Quirindi and District Unit | 30x Rescue Volunteers, 1x Heavy Rescue Truck, 1x Rescue Truck, 1x Rescue Vehicle | Quirindi |
| Guyra Unit | 30x Rescue Volunteers, 1x Heavy Rescue Truck, 1x Rescue Vehicle, 1x Command Vehicle | Guyra |
| Manilla Unit | 30x Rescue Volunteers, 1x Rescue Truck, 1x Rescue Vehicle, 1x General Purpose Vehicle | Manilla |
| Inverell Unit | 25x Rescue Volunteers, 1x Rescue Truck, 1x Rescue Vehicle, 1x Flood Boat | Inverell |
| Barraba Unit | 20x Rescue Volunteers, 1x Rescue Truck, 1x Rescue Vehicle | Barraba |
| Unit: | Size: | Location: |
|---|---|---|
| Region 3 Headquarters | 10x Rescue Volunteers, 1x Command Vehicle | Dubbo |
| Dubbo Unit | 55x Rescue Volunteers, 1x Rescue Truck, 2x Rescue Vehicles, 1x General Purpose Vehicle, 1x Command Vehicle, 1x Flood Boat | Dubbo |
| Rylstone-Kandos and District Unit | 45x Rescue Volunteers, 1x Rescue Truck, 1x Rescue Vehicle, 2x Command Vehicles, 1x Flood Boat | Rylstone |
| Lithgow and District Unit | 40x Rescue Volunteers, 1x Rescue Truck, 1x Rescue Vehicle, 1x General Purpose Vehicle, 1x Command Vehicle | Lithgow |
| Burren Junction Unit | 40x Rescue Volunteers, 1x Rescue Truck, 1x Rescue Vehicle, 1x General Purpose Vehicle, 1x Command Vehicle | Burren Junction |
| Gulgong Unit | 30x Rescue Volunteers, 2x Rescue Trucks, 1x Rescue Vehicle | Gulgong |
| Narromine Unit | 30x Rescue Volunteers, 1x Rescue Truck, 1x Rescue Vehicle, 1x General Purpose Vehicle | Narromine |
| Coolah and District Unit | 30x Rescue Volunteers, 1x Rescue Truck, 1x Rescue Vehicle, 1x Command Vehicle | Coolah |
| Coonabarabran Unit | 30x Rescue Volunteers, 1x Rescue Truck, 1x Rescue Vehicle, 1x Command Vehicle | Coonabarabran |
| Mendooran and District Unit | 30x Rescue Volunteers, 1x Rescue Truck, 1x General Purpose Vehicle, 1x Command Vehicle | Mendooran |
| Mudgee Unit | 20x Rescue Volunteers, 1x Heavy Rescue Truck, 1x Rescue Vehicle | Mudgee |
| Burrendong Unit | 10x Rescue Volunteers, 1x Lake Rescue Boat | Mumbil |
| Unit: | Size: | Location: |
|---|---|---|
| Region 4 Headquarters | 10x Rescue Volunteers, 1x Command Vehicle | Warnervale |
| Central Coast Unit | 55x Rescue Volunteers, 1x Heavy Rescue Truck, 1x Rescue Truck, 1x Rescue Vehicle, 2x General Purpose Vehicles, 1x Flood Boat | Warnervale |
| Wollongong Unit | 45x Rescue Volunteers, 1x Rescue Truck, 1x Rescue Vehicle, 1x General Purpose Vehicle, 1x Command Vehicle, 1x Flood Boat | North Wollongong |
| Cessnock District Unit | 35x Rescue Volunteers, 1x Heavy Rescue Truck, 1x Rescue Vehicle, 1x General Purpose Vehicle, 1x Flood Boat | Cessnock |
| Bega District Unit | 30x Rescue Volunteers, 1x Rescue Truck, 1x Rescue Vehicle, 1x General Purpose Vehicle | Bega |
| Narooma Unit | 30x Rescue Volunteers, 1x Rescue Truck, 1x Rescue Vehicle, 1x General Purpose Vehicle | Narooma |
| Merriwa and District Unit | 30x Rescue Volunteers, 1x Rescue Truck, 1x Rescue Vehicle, 1x Command Vehicle | Merriwa |
| Cessnock District Unit - Kurri Kurri Satellite | 20x Rescue Volunteers, 1x Rescue Truck, 1x Rescue Vehicle | Kurri Kurri |
| Unit: | Size: | Location: |
|---|---|---|
| Region 5 Headquarters | 10x Rescue Volunteers, 1x Command Vehicle | Albury |
| Albury & Border Unit | 60x Rescue Volunteers, 1x Rescue Truck, 1x Rescue Vehicle, 2x General Purpose Vehicles, 1x Lake Rescue Boat, 2x Flood Boats | Albury |
| Wagga Wagga Unit | 45x Rescue Volunteers, 1x Heavy Rescue Truck, 2x Rescue Vehicles, 1x Command Vehicle, 1x Flood Boat | Wagga Wagga |
| Deniliquin Unit | 45x Rescue Volunteers, 1x Rescue Truck, 1x Rescue Vehicle, 1x General Purpose Vehicle, 1x Command Vehicle, 1x Flood Boat | Deniliquin |
| Binalong Unit | 40x Rescue Volunteers, 1x Rescue Truck, 1x General Purpose Vehicle, 1x Command Vehicle, 1x Lake Rescue Boat | Binalong |
| Leeton Unit | 35x Rescue Volunteers, 1x Rescue Truck, 2x Rescue Vehicles, 1x Flood Boat | Leeton |
| Narrandera Unit | 35x Rescue Volunteers, 1x Rescue Truck, 1x Rescue Vehicle, 1x Command Vehicle, 1x Flood Boat | Narrandera |
| Corowa Unit | 35x Rescue Volunteers, 1x Rescue Truck, 1x General Purpose Vehicle, 1x Command Vehicle, 1x Flood Boat | Corowa |
| Coleambally Unit | 30x Rescue Volunteers, 1x Heavy Rescue Truck, 1x Rescue Vehicle, 1x General Purpose Vehicle | Coleambally |
| Batlow Unit | 30x Rescue Volunteers, 1x Rescue Truck, 1x Rescue Vehicle, 1x Command Vehicle | Batlow |
| Balranald Unit | 20x Rescue Volunteers, 1x Rescue Truck, 1x Rescue Vehicle | Balranald |
| Junee Unit | 20x Rescue Volunteers, 1x Rescue Truck, 1x Rescue Vehicle | Junee |
| Type: | Amount: | Image: |
|---|---|---|
| Park Rangers | 2,000 | |
| Seasonal Firefighters | 1,200 | 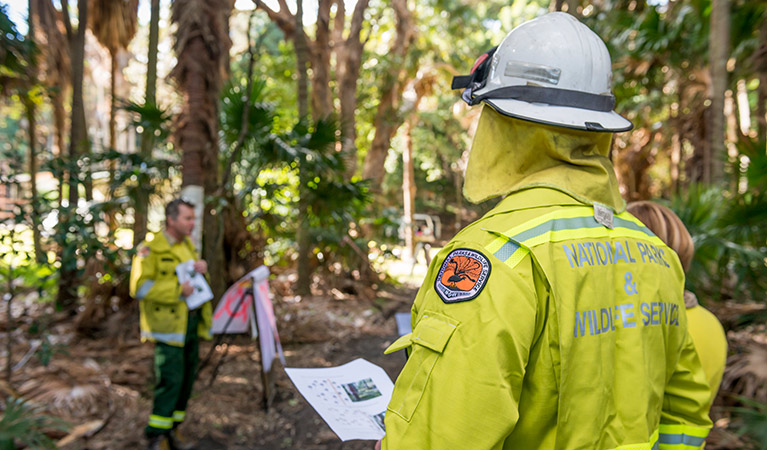 |
| Type: | Amount: | Image: |
|---|---|---|
| Patrol Cars | 750 |  |
| Light Tanker | 92 | 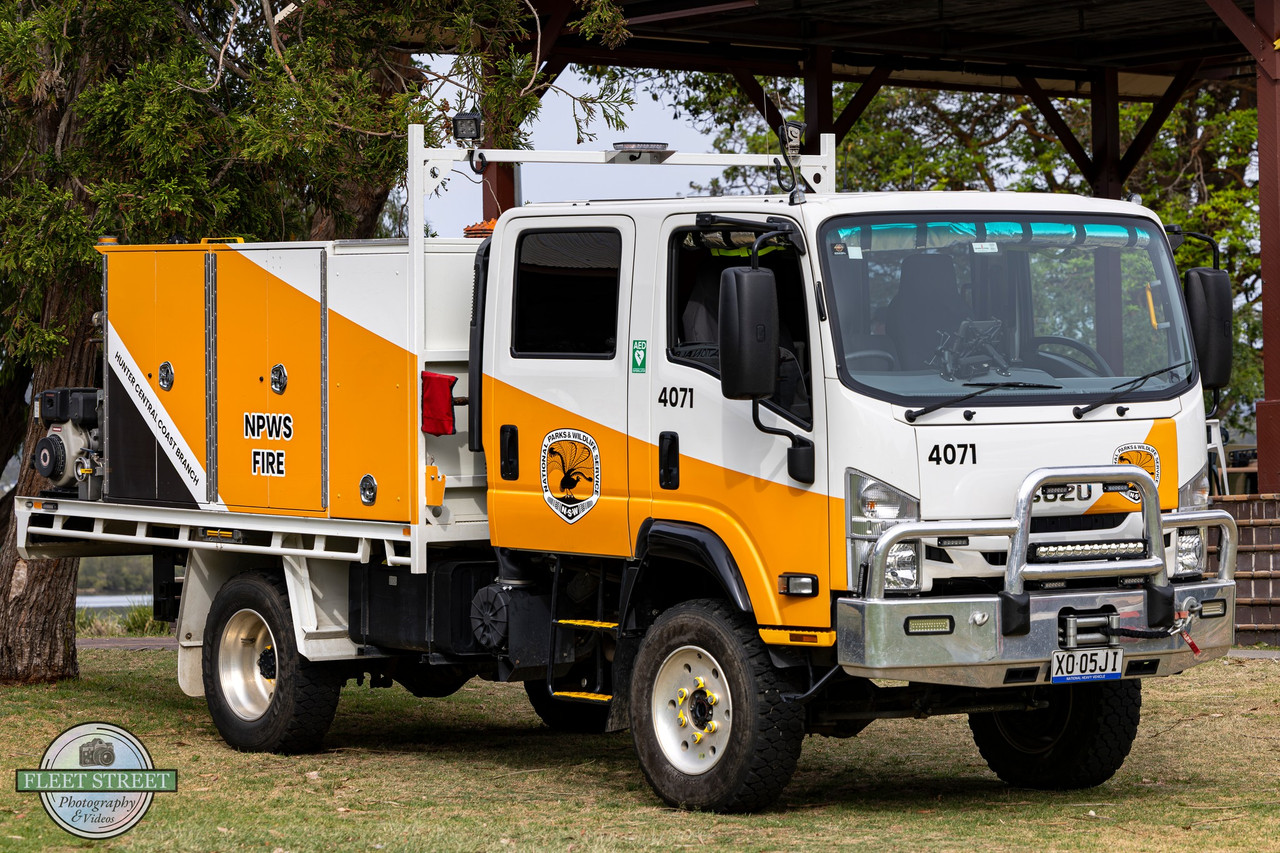 |
| Light Unit | 368 |  |
| Command Vehicle | 115 |  |
| Eurocopter AS350 Squirrel | 5 | 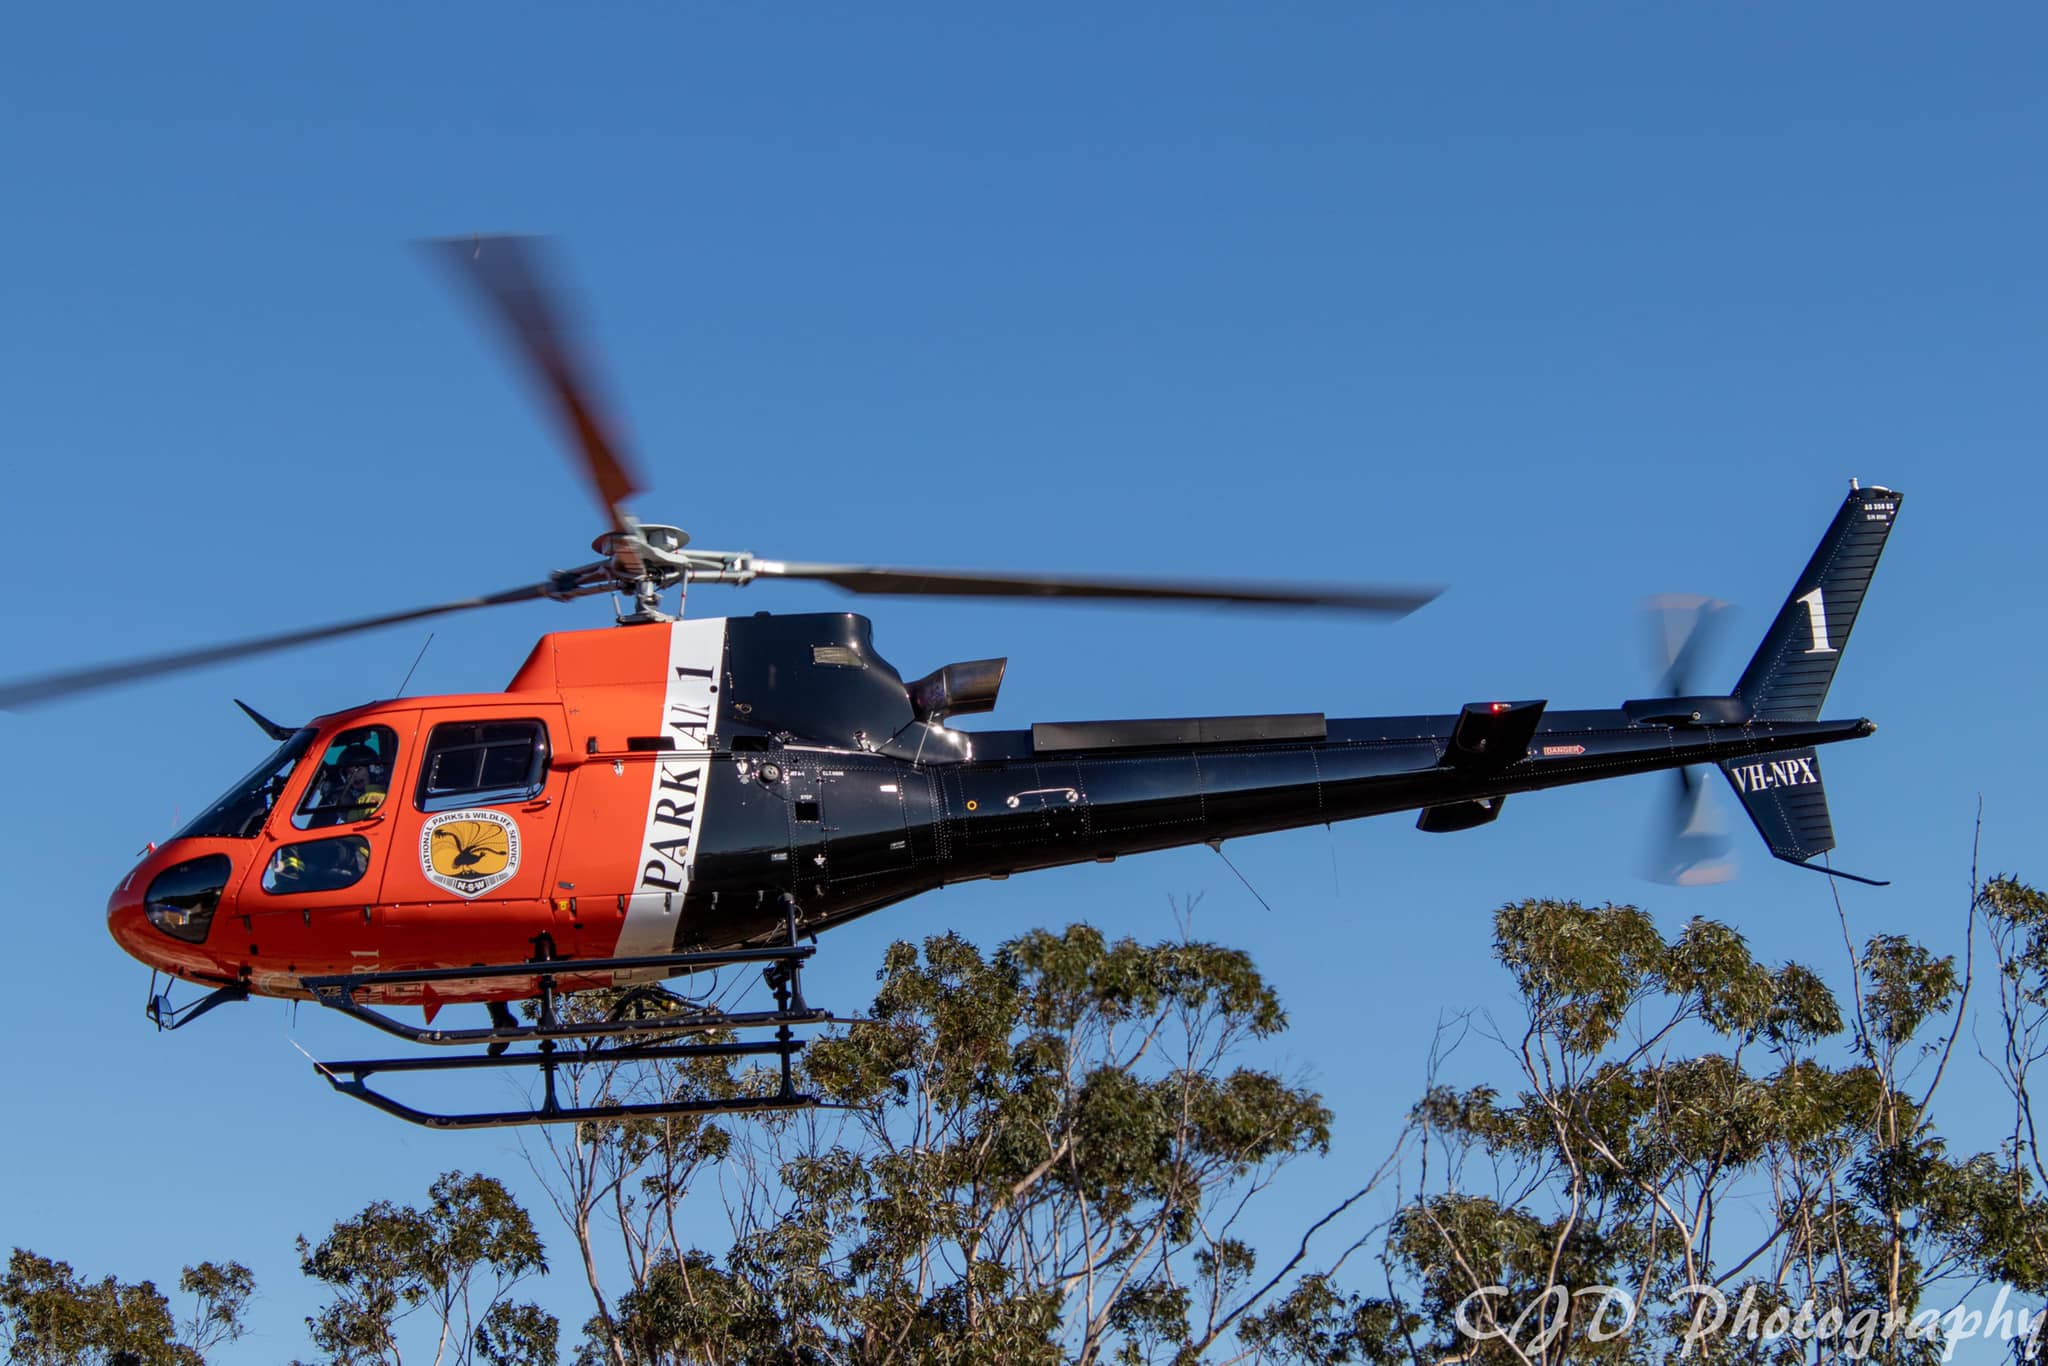 |
| Cessna 208 Caravan | 2 | -Cessna-208B-Grand-Caravan-at-Wagga-Wagga-Airp.jpg) |
| Landing Craft | 1 |  |
| Small Patrol Craft | 30 |  |
| Region: | Size: | Base: | Protected Areas: |
|---|---|---|---|
| North Coast Region | 300x Park Rangers, 120x Patrol Cars | Coffs Harbour |
|
| Southeast & Tablelands Region | 250x Park Rangers, 100x Patrol Cars | Queanbeyan |
|
| Sydney & Surrounds Region | 200x Park Rangers, 80x Patrol Cars, 1x Landing Craft | Lindfield |
|
| Hunter & Central Coast Region | 200x Park Rangers, 80x Patrol Cars | Newcastle |
|
| Illawarra-Shoalhaven Region | 150x Park Rangers, 60x Patrol Cars | Wollongong |
|
| Region: | Size: | Base: | Protected Areas: |
|---|---|---|---|
| New England-North West Region | 250x Park Rangers, 100x Patrol Cars | Armidale |
|
| Central West & Orana Region | 150x Park Rangers, 60x Patrol Cars | Dubbo |
|
| Far West Region | 150x Park Rangers, 60x Patrol Cars | Broken Hill |
|
| Riverina-Murray Region | 150x Park Rangers, 60x Patrol Cars | Griffith |
|
| Unit: | Size: | Base: |
|---|---|---|
| National Parks and Wildlife Service Park Air | 50x Seasonal Firefighters, 5x Eurocopter AS350 Squirrels, 2x Cessna 208 Caravan | Sydney-Bankstown Airport |
| North Coast Region | 200x Seasonal Firefighters, 16x Light Tankers, 64x Light Units, 20x Command Vehicles | Coffs Harbour |
| Sydney & Surrounds Region | 150x Seasonal Firefighters, 12x Light Tankers, 48x Light Units, 15x Command Vehicles | Lindfield |
| Southeast & Tablelands Region | 150x Seasonal Firefighters, 12x Light Tankers, 48x Light Units, 15x Command Vehicles | Queanbeyan |
| Hunter & Central Coast Region | 150x Seasonal Firefighters, 12x Light Tankers, 48x Light Units, 15x Command Vehicles | Newcastle |
| New England-North West Region | 150x Seasonal Firefighters, 12x Light Tankers, 48x Light Units, 15x Command Vehicles | Armidale |
| Illawarra-Shoalhaven Region | 100x Seasonal Firefighters, 8x Light Tankers, 32x Light Units, 10x Command Vehicles | Wollongong |
| Central West & Orana Region | 100x Seasonal Firefighters, 8x Light Tankers, 32x Light Units, 10x Command Vehicles | Dubbo |
| Riverina-Murray Region | 100x Seasonal Firefighters, 8x Light Tankers, 32x Light Units, 10x Command Vehicles | Griffith |
| Far West Region | 50x Seasonal Firefighters, 4x Light Tankers, 16x Light Units, 5x Command Vehicles | Broken Hill |
 |
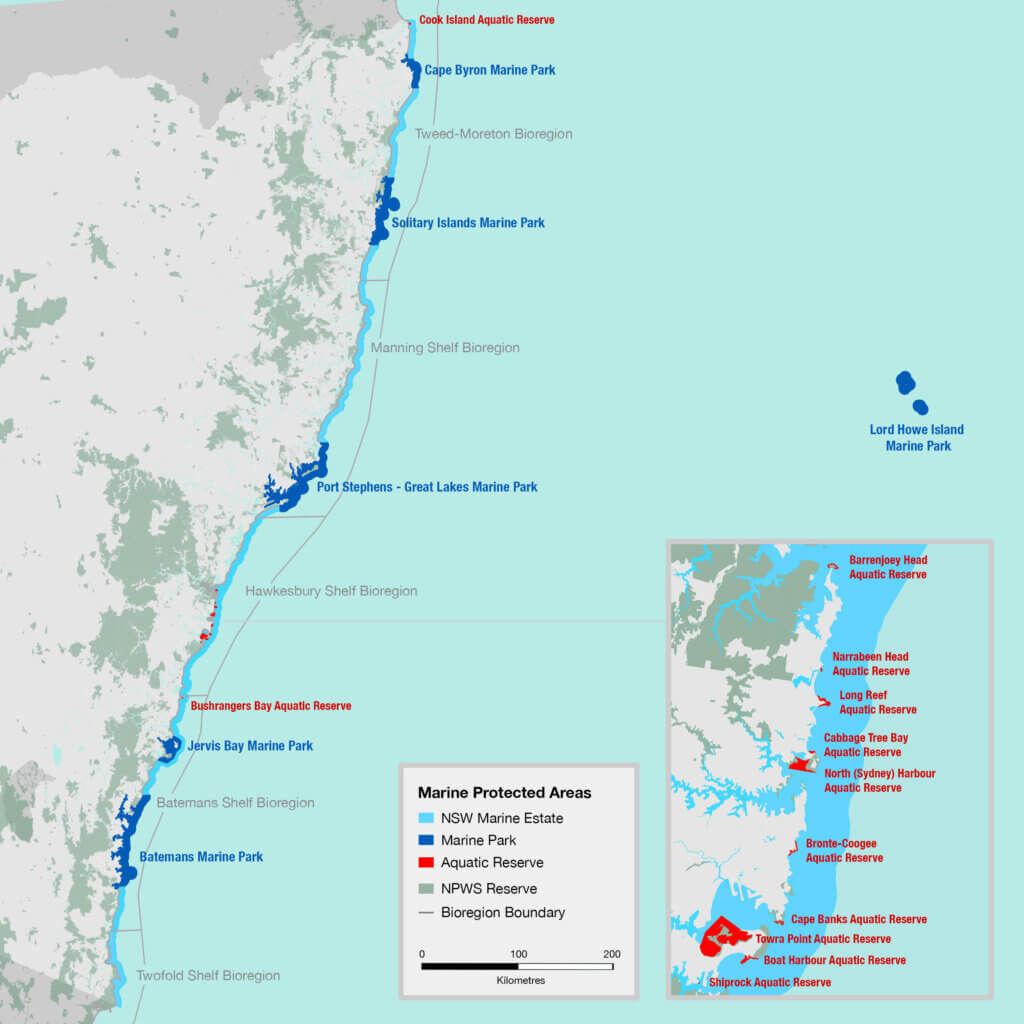 |
| Region: | Size: | Base: | Protected Areas: |
|---|---|---|---|
| Tweed-Moreton Region | 25x Park Rangers, 6x Small Patrol Craft | Coffs Harbour |
|
| Manning Shelf Region | 25x Park Rangers, 6x Small Patrol Craft | Anna Bay |
|
| Northern Sydney Region | 25x Park Rangers, 6x Small Patrol Craft | Mosman |
|
| Southern Sydney Region | 25x Park Rangers, 6x Small Patrol Craft | Kurnell |
|
| Batemans Region | 25x Park Rangers, 6x Small Patrol Craft | Narooma |
|
 |
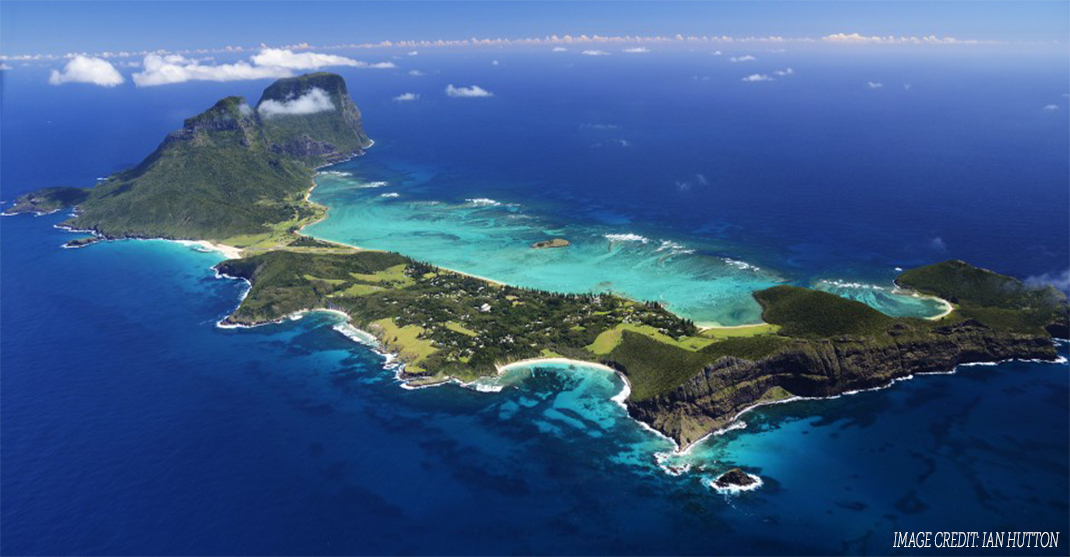 |
Overview |
The Lord Howe Island Board is a NSW Statutory Authority established under the Lord Howe Island Act 1953, to administer Lord Howe Island, an unincorporated island territory within the jurisdiction of the State of New South Wales in the Tasman Sea between Australia and New Zealand. It comprises seven members, of whom four are directly elected by the island population, and reports directly to the New South Wales Minister for Environment, and is responsible for the care, control and management of the island. Its duties include the:
|
| Region: | Size: | Base: | Protected Areas: |
|---|---|---|---|
| Lord Howe Island Region | 35x Park Rangers, 14x Patrol Cars | Lord Howe Island |
|
 |
| Protected Area: | Size: | Location: |
|---|---|---|
| Jenolan Karst Conservation Reserve | 10x Park Rangers, 4x Patrol Cars | Oberon |
| Wombeyan Karst Conservation Reserve | 10x Park Rangers, 4x Patrol Cars | Taralga |
| Borenore Karst Conservation Reserve | 10x Park Rangers, 4x Patrol Cars | Orange |
| Abercrombie Karst Conservation Reserve | 10x Park Rangers, 4x Patrol Cars | Trunkey Creek |
| Type: | Amount: | Image: |
|---|---|---|
| Forestry Rangers | 600 (all firefighting accredited) |  |
| Seasonal Firefighters | 130 |  |
| Type: | Amount: | Image: |
|---|---|---|
| Patrol Cars | 265 |  |
| Medium Tankers | 130 |  |
| Light Tankers | 65 | 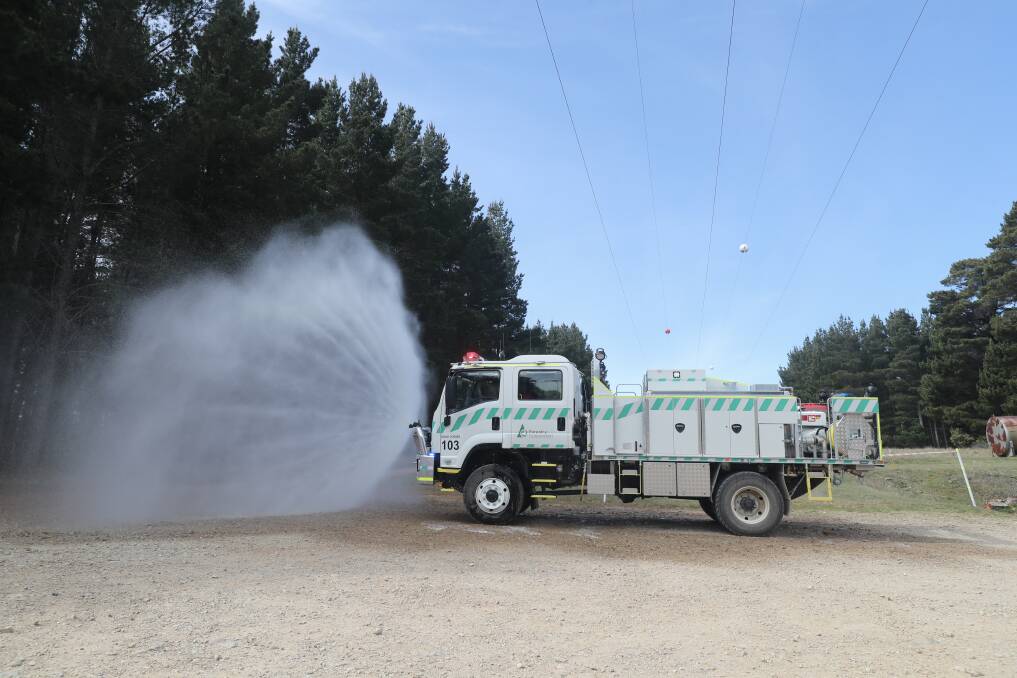 |
| Light Unit | 195 |  |
| Unit: | Size: | Base: | Forests Managed: |
|---|---|---|---|
| Head Office | 15x Forestry Rangers, 5x Patrol Cars | West Pennant Hills |
|
| Region: | Size: | Base: | Forests Managed: | Fire Towers: |
|---|---|---|---|---|
| Central Region | 90x Forestry Rangers, 20x Seasonal Firefighters, 40x Patrol Cars, 20x Medium Tankers, 10x Light Tankers, 30x Light Units | Wauchope |
|
|
| North East Region | 90x Forestry Rangers, 20x Seasonal Firefighters, 40x Patrol Cars, 20x Medium Tankers, 10x Light Tankers, 30x Light Units | Coffs Harbour |
|
|
| Western Region | 90x Forestry Rangers, 20x Seasonal Firefighters, 40x Patrol Cars, 20x Medium Tankers, 10x Light Tankers, 30x Light Units | Dubbo |
|
|
| Southern Region | 90x Forestry Rangers, 20x Seasonal Firefighters, 40x Patrol Cars, 20x Medium Tankers, 10x Light Tankers, 30x Light Units | Batemans Bay |
|
|
| Region: | Size: | Base: | Forests Managed: | Fire Towers: |
|---|---|---|---|---|
| Bathurst Region | 45x Forestry Rangers, 10x Seasonal Firefighters, 20x Patrol Cars, 10x Medium Tankers, 5x Light Tankers, 15x Light Units | Bathurst |
|
|
| Tumut Region | 45x Forestry Rangers, 10x Seasonal Firefighters, 20x Patrol Cars, 10x Medium Tankers, 5x Light Tankers, 15x Light Units | Tumut |
|
|
| Bombala Region | 45x Forestry Rangers, 10x Seasonal Firefighters, 20x Patrol Cars, 10x Medium Tankers, 5x Light Tankers, 15x Light Units | Bombala |
|
|
| Grafton Region | 45x Forestry Rangers, 10x Seasonal Firefighters, 20x Patrol Cars, 10x Medium Tankers, 5x Light Tankers, 15x Light Units | Grafton |
|
|
| Walcha Region | 45x Forestry Rangers, 10x Seasonal Firefighters, 20x Patrol Cars, 10x Medium Tankers, 5x Light Tankers, 15x Light Units | Walcha |
|
|
 |  |
| Type: | Amount: | Image: |
|---|---|---|
| Marine Rescue Volunteers | 3,000 | 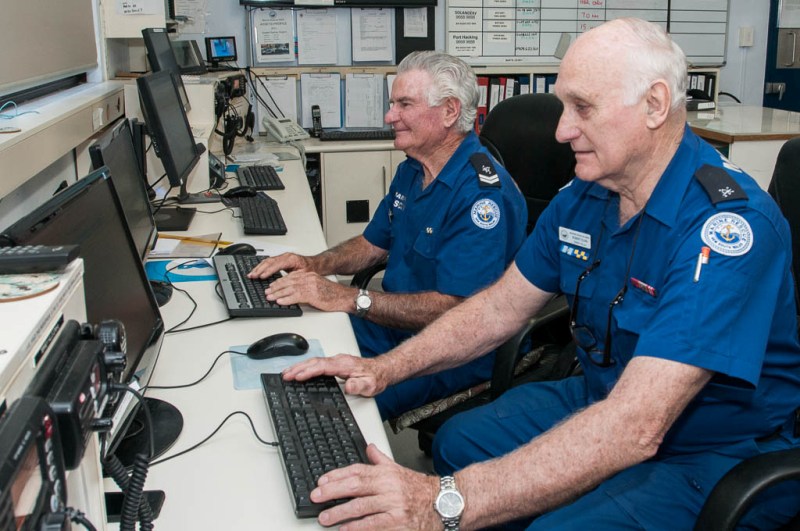 |
| Type: | Amount: | Image: |
|---|---|---|
| Large Marine Rescue Boat | 38 |  |
| Medium Marine Rescue Boat | 42 |  |
| MV Fearless | 1 | 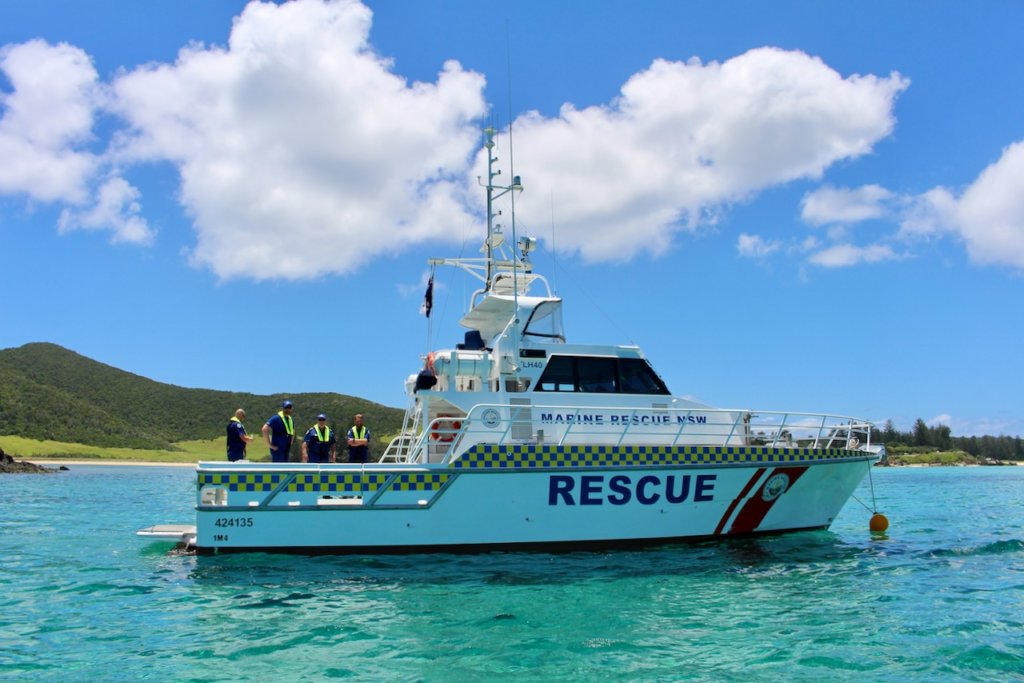 |
| Lake Rescue Boat | 1 | 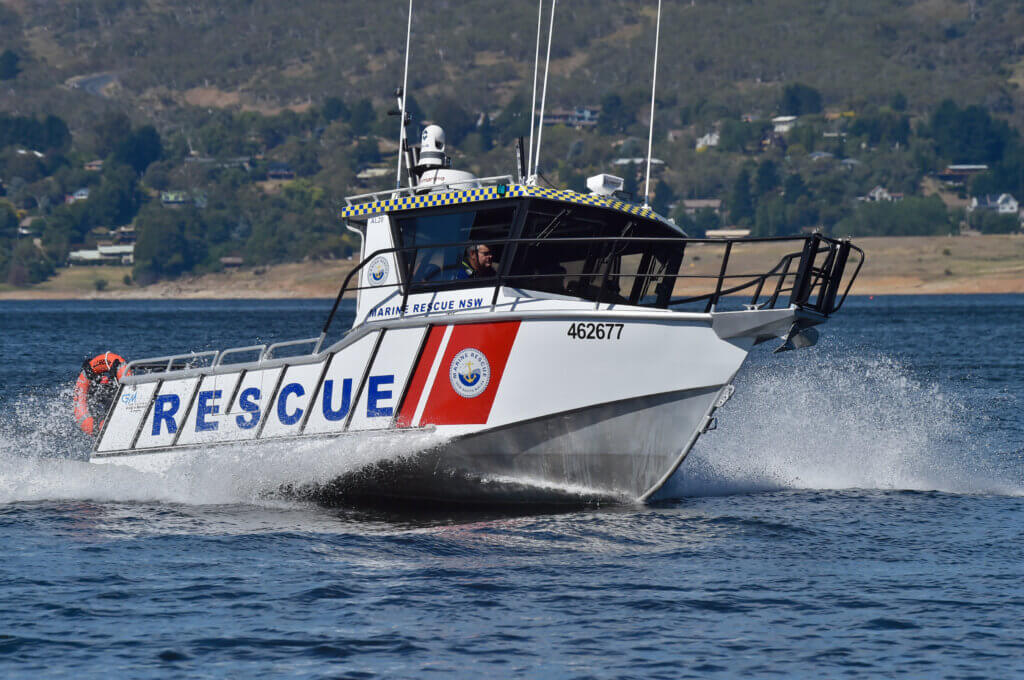 |
| River Rescue Boat | 1 | |
| Light Boats | 44 |  |
| Jet Ski | 20 |  |
| Logistics Support Vehicle | 46 |  |
| Command Vehicle | 6 |  |
| Unit: | Size: | Location: |
|---|---|---|
| Marine Rescue Brunswick | 80x Marine Rescue Volunteers, 1x Large Marine Rescue Boat, 1x Medium Marine Rescue Boat, 1x Light Boat, 2x Jet Skis, 1x Logistics Support Vehicle | Brunswick Heads |
| Marine Rescue Point Danger | 60x Marine Rescue Volunteers, 1x Large Marine Rescue Boat, 1x Medium Marine Rescue Boat, 1x Light Boat, 1x Logistics Support Vehicle | Tweed Heads and Coolangatta, Queensland (on the boundary) |
| Marine Rescue Cape Byron | 60x Marine Rescue Volunteers, 1x Large Marine Rescue Boat, 1x Medium Marine Rescue Boat, 1x Light Boat, 1x Logistics Support Vehicle | Byron Bay |
| Marine Rescue Ballina | 60x Marine Rescue Volunteers, 1x Large Marine Rescue Boat, 1x Medium Marine Rescue Boat, 1x Light Boat, 1x Logistics Support Vehicle | Ballina |
| Marine Rescue Evans Head | 60x Marine Rescue Volunteers, 1x Large Marine Rescue Boat, 1x Medium Marine Rescue Boat, 1x Light Boat, 1x Logistics Support Vehicle | Evans Head |
| Marine Rescue Iluka-Yamba | 60x Marine Rescue Volunteers, 1x Large Marine Rescue Boat, 1x Medium Marine Rescue Boat, 1x Light Boat, 1x Logistics Support Vehicle | Iluka |
| Marine Rescue Wooli | 60x Marine Rescue Volunteers, 1x Large Marine Rescue Boat, 1x Medium Marine Rescue Boat, 1x Light Boat, 1x Logistics Support Vehicle | Wooli |
| Unit: | Size: | Location: |
|---|---|---|
| Marine Rescue Port Macquarie | 80x Marine Rescue Volunteers, 1x Large Marine Rescue Boat, 1x Medium Marine Rescue Boat, 1x Light Boat, 2x Jet Skis, 1x Logistics Support Vehicle | Port Macquarie |
| Marine Rescue Forster-Tuncurry | 80x Marine Rescue Volunteers, 1x Large Marine Rescue Boat, 1x Medium Marine Rescue Boat, 1x Light Boat, 2x Jet Skis, 1x Logistics Support Vehicle | Forster |
| Marine Rescue Woolgoolga | 60x Marine Rescue Volunteers, 1x Large Marine Rescue Boat, 1x Medium Marine Rescue Boat, 1x Light Boat, 1x Logistics Support Vehicle | Arrawarra Headland |
| Marine Rescue Coffs Harbour | 60x Marine Rescue Volunteers, 1x Large Marine Rescue Boat, 1x Medium Marine Rescue Boat, 1x Light Boat, 1x Logistics Support Vehicle | Coffs Harbour |
| Marine Rescue Trial Bay | 60x Marine Rescue Volunteers, 1x Large Marine Rescue Boat, 1x Medium Marine Rescue Boat, 1x Light Boat, 1x Logistics Support Vehicle | South West Rocks |
| Marine Rescue Camden Haven | 60x Marine Rescue Volunteers, 1x Large Marine Rescue Boat, 1x Medium Marine Rescue Boat, 1x Light Boat, 1x Logistics Support Vehicle | Laurieton |
| Marine Rescue Crowdy-Harrington | 60x Marine Rescue Volunteers, 1x Large Marine Rescue Boat, 1x Medium Marine Rescue Boat, 1x Light Boat, 1x Logistics Support Vehicle | Harrington |
| Marine Rescue Lord Howe Island | 50x Marine Rescue Volunteers, MV Fearless, 1x Logistics Support Vehicle | Lord Howe Island |
| Marine Rescue Nambucca | 35x Marine Rescue Volunteers, 1x Medium Marine Rescue Boat, 1x Light Boat, 1x Logistics Support Vehicle | Nambucca Heads |
| Unit: | Size: | Location: |
|---|---|---|
| Lake Macquarie Search and Rescue Coordination Centre | 50x Marine Rescue Volunteers, 1x Command Vehicle | Swansea Heads |
| Marine Rescue Brisbane Water | 80x Marine Rescue Volunteers, 1x Large Marine Rescue Boat, 1x Medium Marine Rescue Boat, 1x Light Boat, 2x Jet Skis, 1x Logistics Support Vehicle | Point Clare |
| Marine Rescue Lake Macquarie | 80x Marine Rescue Volunteers, 1x Large Marine Rescue Boat, 1x Medium Marine Rescue Boat, 1x Light Boat, 2x Jet Skis, 1x Logistics Support Vehicle | Swansea Heads |
| Marine Rescue Tuggerah Lakes | 80x Marine Rescue Volunteers, 1x Large Marine Rescue Boat, 1x Medium Marine Rescue Boat, 1x Light Boat, 2x Jet Skis, 1x Logistics Support Vehicle | Toukley |
| Marine Rescue Port Stephens | 60x Marine Rescue Volunteers, 1x Large Marine Rescue Boat, 1x Medium Marine Rescue Boat, 1x Light Boat, 1x Logistics Support Vehicle | Nelson Bay |
| Marine Rescue Lemon Tree Passage | 60x Marine Rescue Volunteers, 1x Large Marine Rescue Boat, 1x Medium Marine Rescue Boat, 1x Light Boat, 1x Logistics Support Vehicle | Lemon Tree Passage |
| Marine Rescue Newcastle | 60x Marine Rescue Volunteers, 1x Large Marine Rescue Boat, 1x Medium Marine Rescue Boat, 1x Light Boat, 1x Logistics Support Vehicle | Wickham |
| Marine Rescue Terrigal | 60x Marine Rescue Volunteers, 1x Large Marine Rescue Boat, 1x Medium Marine Rescue Boat, 1x Light Boat, 1x Logistics Support Vehicle | Terrigal |
| Marine Rescue Norah Head | 35x Marine Rescue Volunteers, 1x Medium Marine Rescue Boat, 1x Light Boat, 1x Logistics Support Vehicle | Norah Head |
| Unit: | Size: | Location: |
|---|---|---|
| State Communications Centre | 100x Marine Rescue Volunteers, 3x Command Vehicles | Belrose |
| Marine Rescue Hawkesbury | 60x Marine Rescue Volunteers, 1x Large Marine Rescue Boat, 1x Medium Marine Rescue Boat, 1x Light Boat, 1x Logistics Support Vehicle | Mooney Mooney |
| Marine Rescue Cottage Point | 60x Marine Rescue Volunteers, 1x Large Marine Rescue Boat, 1x Medium Marine Rescue Boat, 1x Light Boat, 1x Logistics Support Vehicle | Cottage Point |
| Marine Rescue Broken Bay | 60x Marine Rescue Volunteers, 1x Large Marine Rescue Boat, 1x Medium Marine Rescue Boat, 1x Light Boat, 1x Logistics Support Vehicle | Bayview |
| Marine Rescue Middle Harbour | 60x Marine Rescue Volunteers, 1x Large Marine Rescue Boat, 1x Medium Marine Rescue Boat, 1x Light Boat, 1x Logistics Support Vehicle | Mosman |
| Marine Rescue Port Jackson | 60x Marine Rescue Volunteers, 1x Large Marine Rescue Boat, 1x Medium Marine Rescue Boat, 1x Light Boat, 1x Logistics Support Vehicle | Drummoyne |
| Marine Rescue Botany | 60x Marine Rescue Volunteers, 1x Large Marine Rescue Boat, 1x Medium Marine Rescue Boat, 1x Light Boat, 1x Logistics Support Vehicle | Cronulla |
| Unit: | Size: | Location: |
|---|---|---|
| Hill 60 Search and Rescue Coordination Centre | 50x Marine Rescue Volunteers, 1x Command Vehicle | Port Kembla |
| Marine Rescue Port Kembla | 80x Marine Rescue Volunteers, 1x Large Marine Rescue Boat, 1x Medium Marine Rescue Boat, 1x Light Boat, 2x Jet Skis, 1x Logistics Support Vehicle | Port Kembla |
| Marine Rescue Jervis Bay | 80x Marine Rescue Volunteers, 1x Large Marine Rescue Boat, 1x Medium Marine Rescue Boat, 1x Light Boat, 2x Jet Skis, 1x Logistics Support Vehicle | Huskisson |
| Marine Rescue Shellharbour | 60x Marine Rescue Volunteers, 1x Large Marine Rescue Boat, 1x Medium Marine Rescue Boat, 1x Light Boat, 1x Logistics Support Vehicle | Shellharbour |
| Marine Rescue Shoalhaven | 60x Marine Rescue Volunteers, 1x Large Marine Rescue Boat, 1x Medium Marine Rescue Boat, 1x Light Boat, 1x Logistics Support Vehicle | Crookhaven Heads |
| Marine Rescue Ulladulla | 60x Marine Rescue Volunteers, 1x Large Marine Rescue Boat, 1x Medium Marine Rescue Boat, 1x Light Boat, 1x Logistics Support Vehicle | Ulladulla |
| Marine Rescue Sussex Inlet | 35x Marine Rescue Volunteers, 1x Medium Marine Rescue Boat, 1x Light Boat, 1x Logistics Support Vehicle | Sussex Inlet |
| Marine Rescue Kioloa | 35x Marine Rescue Volunteers, 1x Medium Marine Rescue Boat, 1x Light Boat, 1x Logistics Support Vehicle | Kioloa |
| Unit: | Size: | Location: |
|---|---|---|
| Eden Search and Rescue Coordination Centre | 60x Marine Rescue Volunteers, 1x Command Vehicle | Eden |
| Marine Rescue Batemans Bay | 80x Marine Rescue Volunteers, 1x Large Marine Rescue Boat, 1x Medium Marine Rescue Boat, 1x Light Boat, 2x Jet Skis, 1x Logistics Support Vehicle | Batemans Bay |
| Marine Rescue Tuross-Moruya | 80x Marine Rescue Volunteers, 1x Large Marine Rescue Boat, 1x Medium Marine Rescue Boat, 1x Light Boat, 2x Jet Skis, 1x Logistics Support Vehicle | Tuross Head |
| Marine Rescue Narooma | 60x Marine Rescue Volunteers, 1x Large Marine Rescue Boat, 1x Medium Marine Rescue Boat, 1x Light Boat, 1x Logistics Support Vehicle | Narooma |
| Marine Rescue Bermagui | 60x Marine Rescue Volunteers, 1x Large Marine Rescue Boat, 1x Medium Marine Rescue Boat, 1x Light Boat, 1x Logistics Support Vehicle | Bermagui |
| Marine Rescue Merimbula | 60x Marine Rescue Volunteers, 1x Large Marine Rescue Boat, 1x Medium Marine Rescue Boat, 1x Light Boat, 1x Logistics Support Vehicle | Merimbula |
| Marine Rescue Eden | 60x Marine Rescue Volunteers, 1x Large Marine Rescue Boat, 1x Medium Marine Rescue Boat, 1x Light Boat, 1x Logistics Support Vehicle | Eden |
| Marine Rescue Alpine Lakes | 35x Marine Rescue Volunteers, 1x Lake Rescue Boat, 1x Light Boat, 2x Logistics Support Vehicles | Berridale |
| Marine Rescue Moama | 35x Marine Rescue Volunteers, 1x River Rescue Boat, 1x Light Boat, 1x Logistics Support Vehicle | Moama |
 |
Sydney Motorway Network |
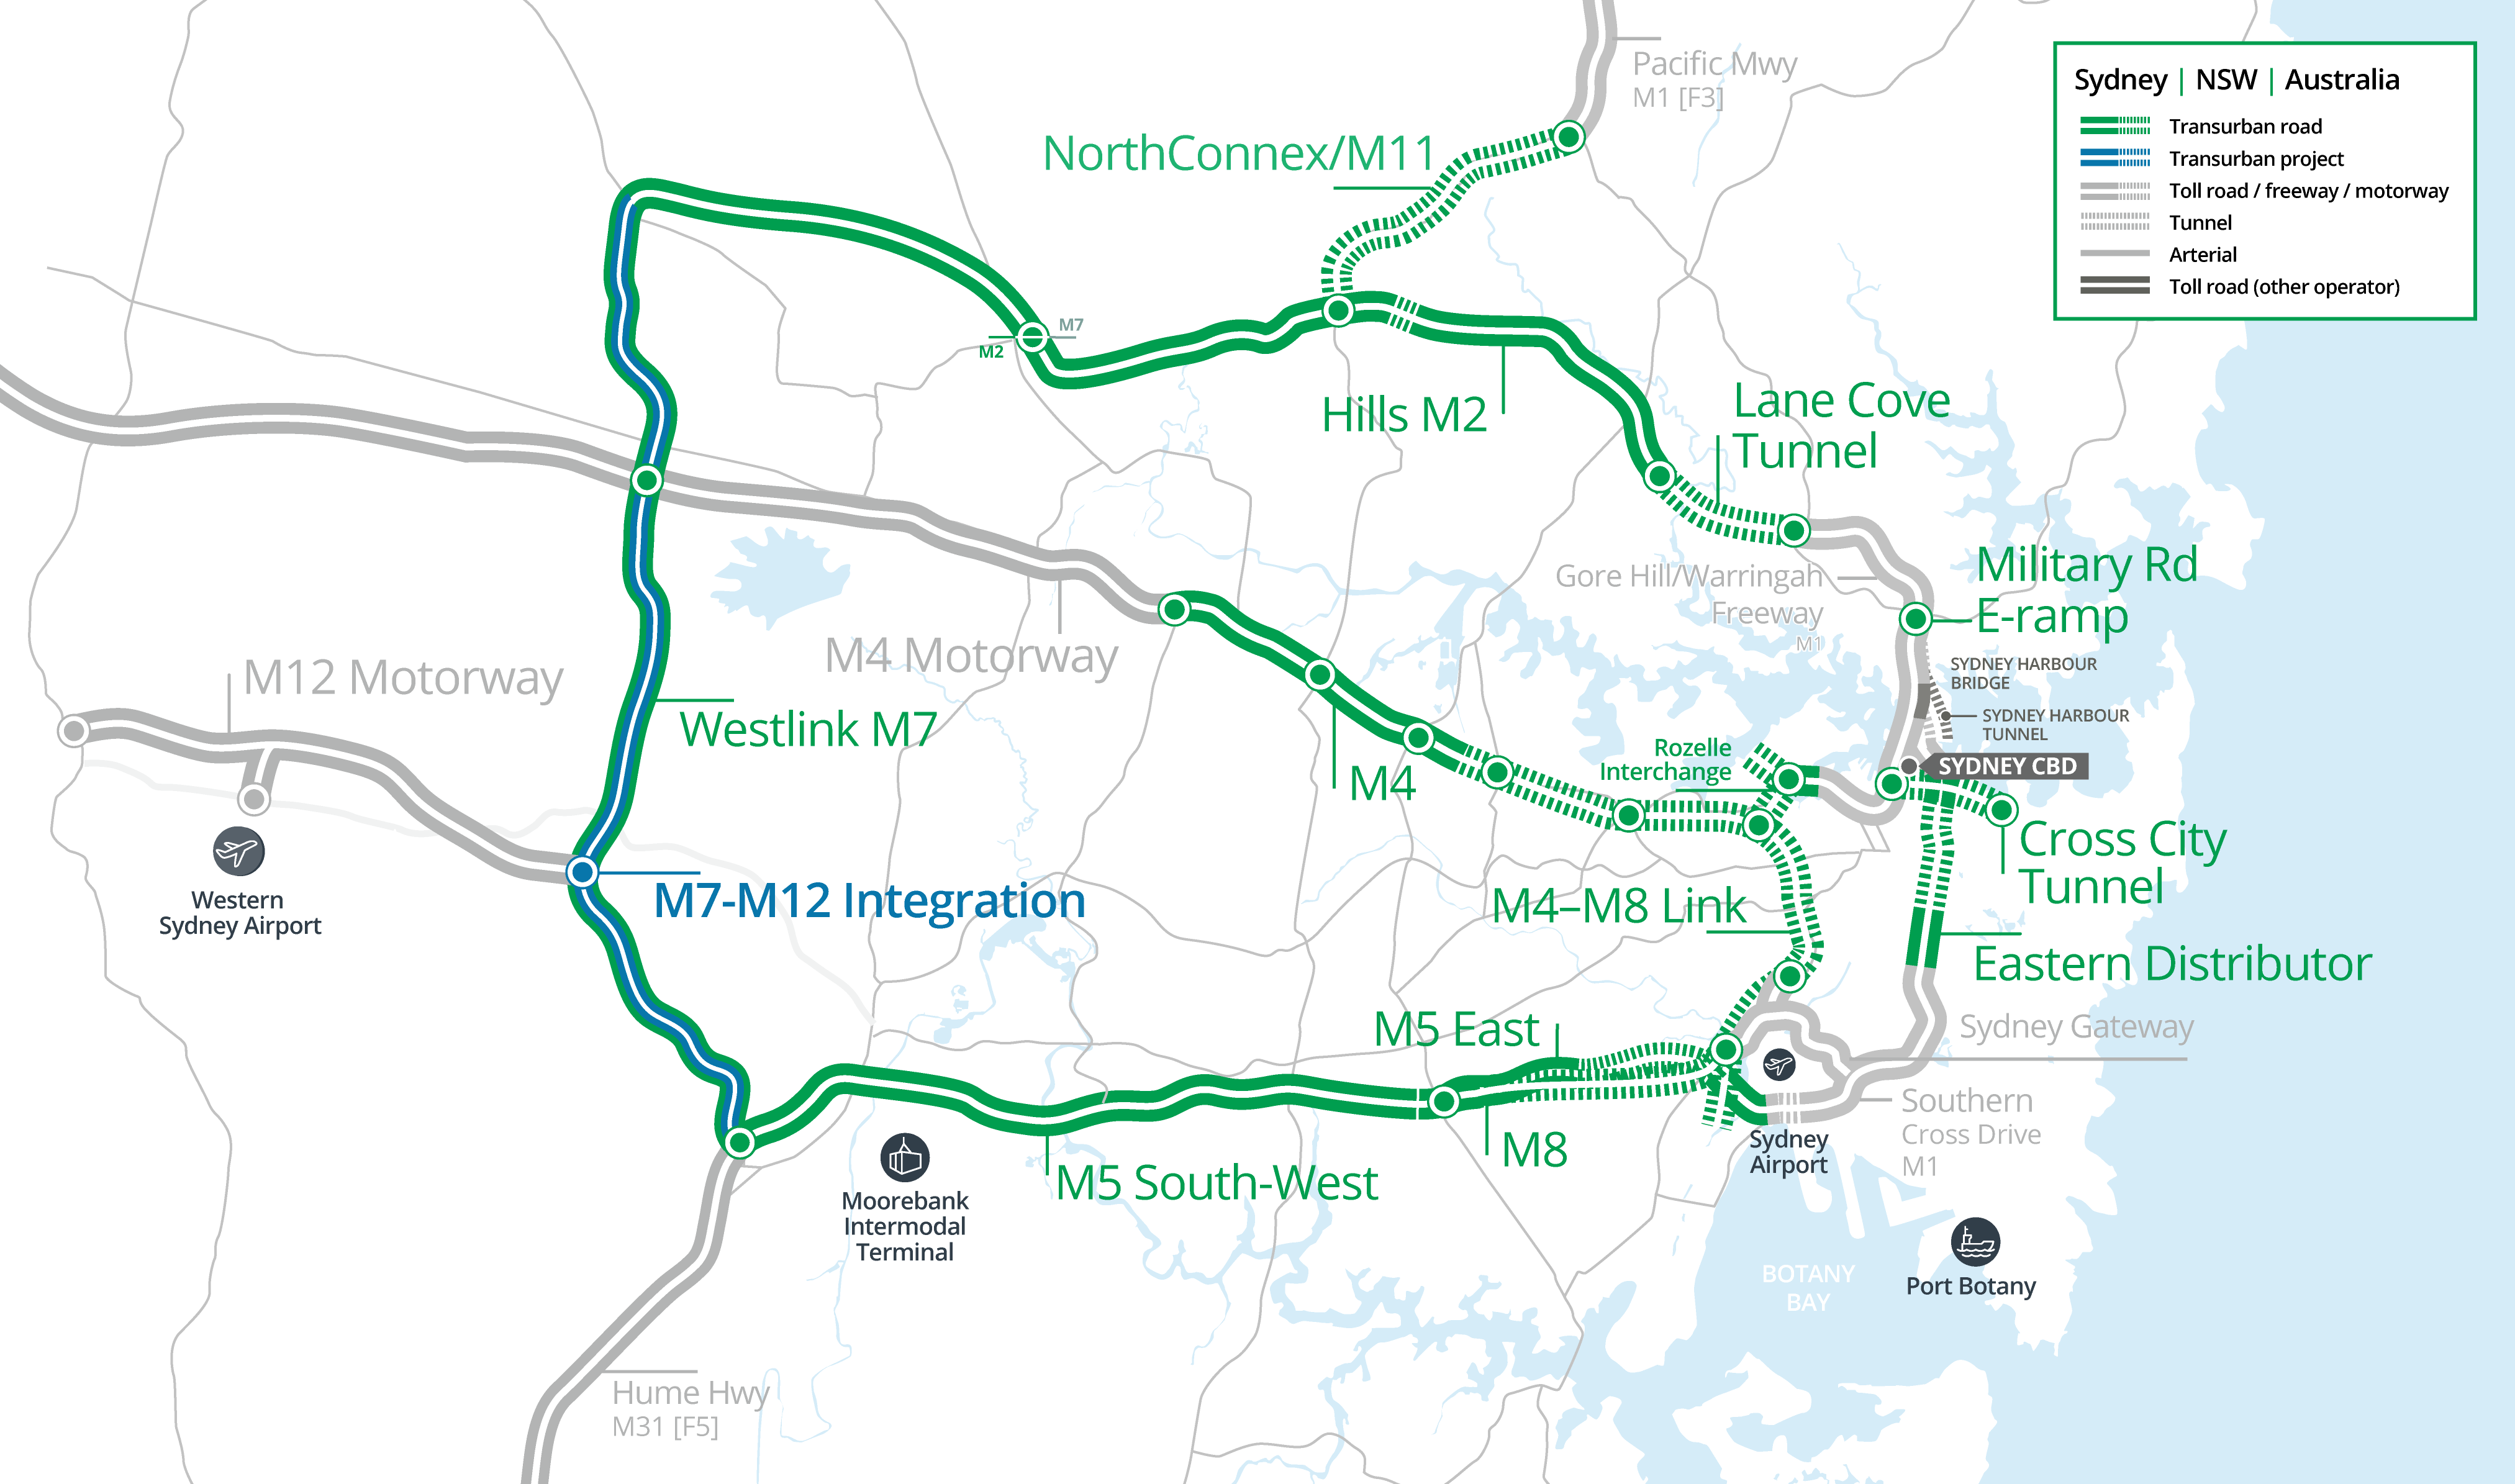 |
New South Wales Highway Network |
 |
| Type: | Amount: | Image: |
|---|---|---|
| Transport Safety Inspectors | 200 |  |
| Maritime Safety Inspectors | 200 |  |
| Incident Response Officers | 100 |  |
| Type: | Amount: | Image: |
|---|---|---|
| Patrol Cars | 100 |  |
| Incident Response Vans | 40 |  |
| Incident Response Vehicles | 20 |  |
| Patrol Boats | 50 | 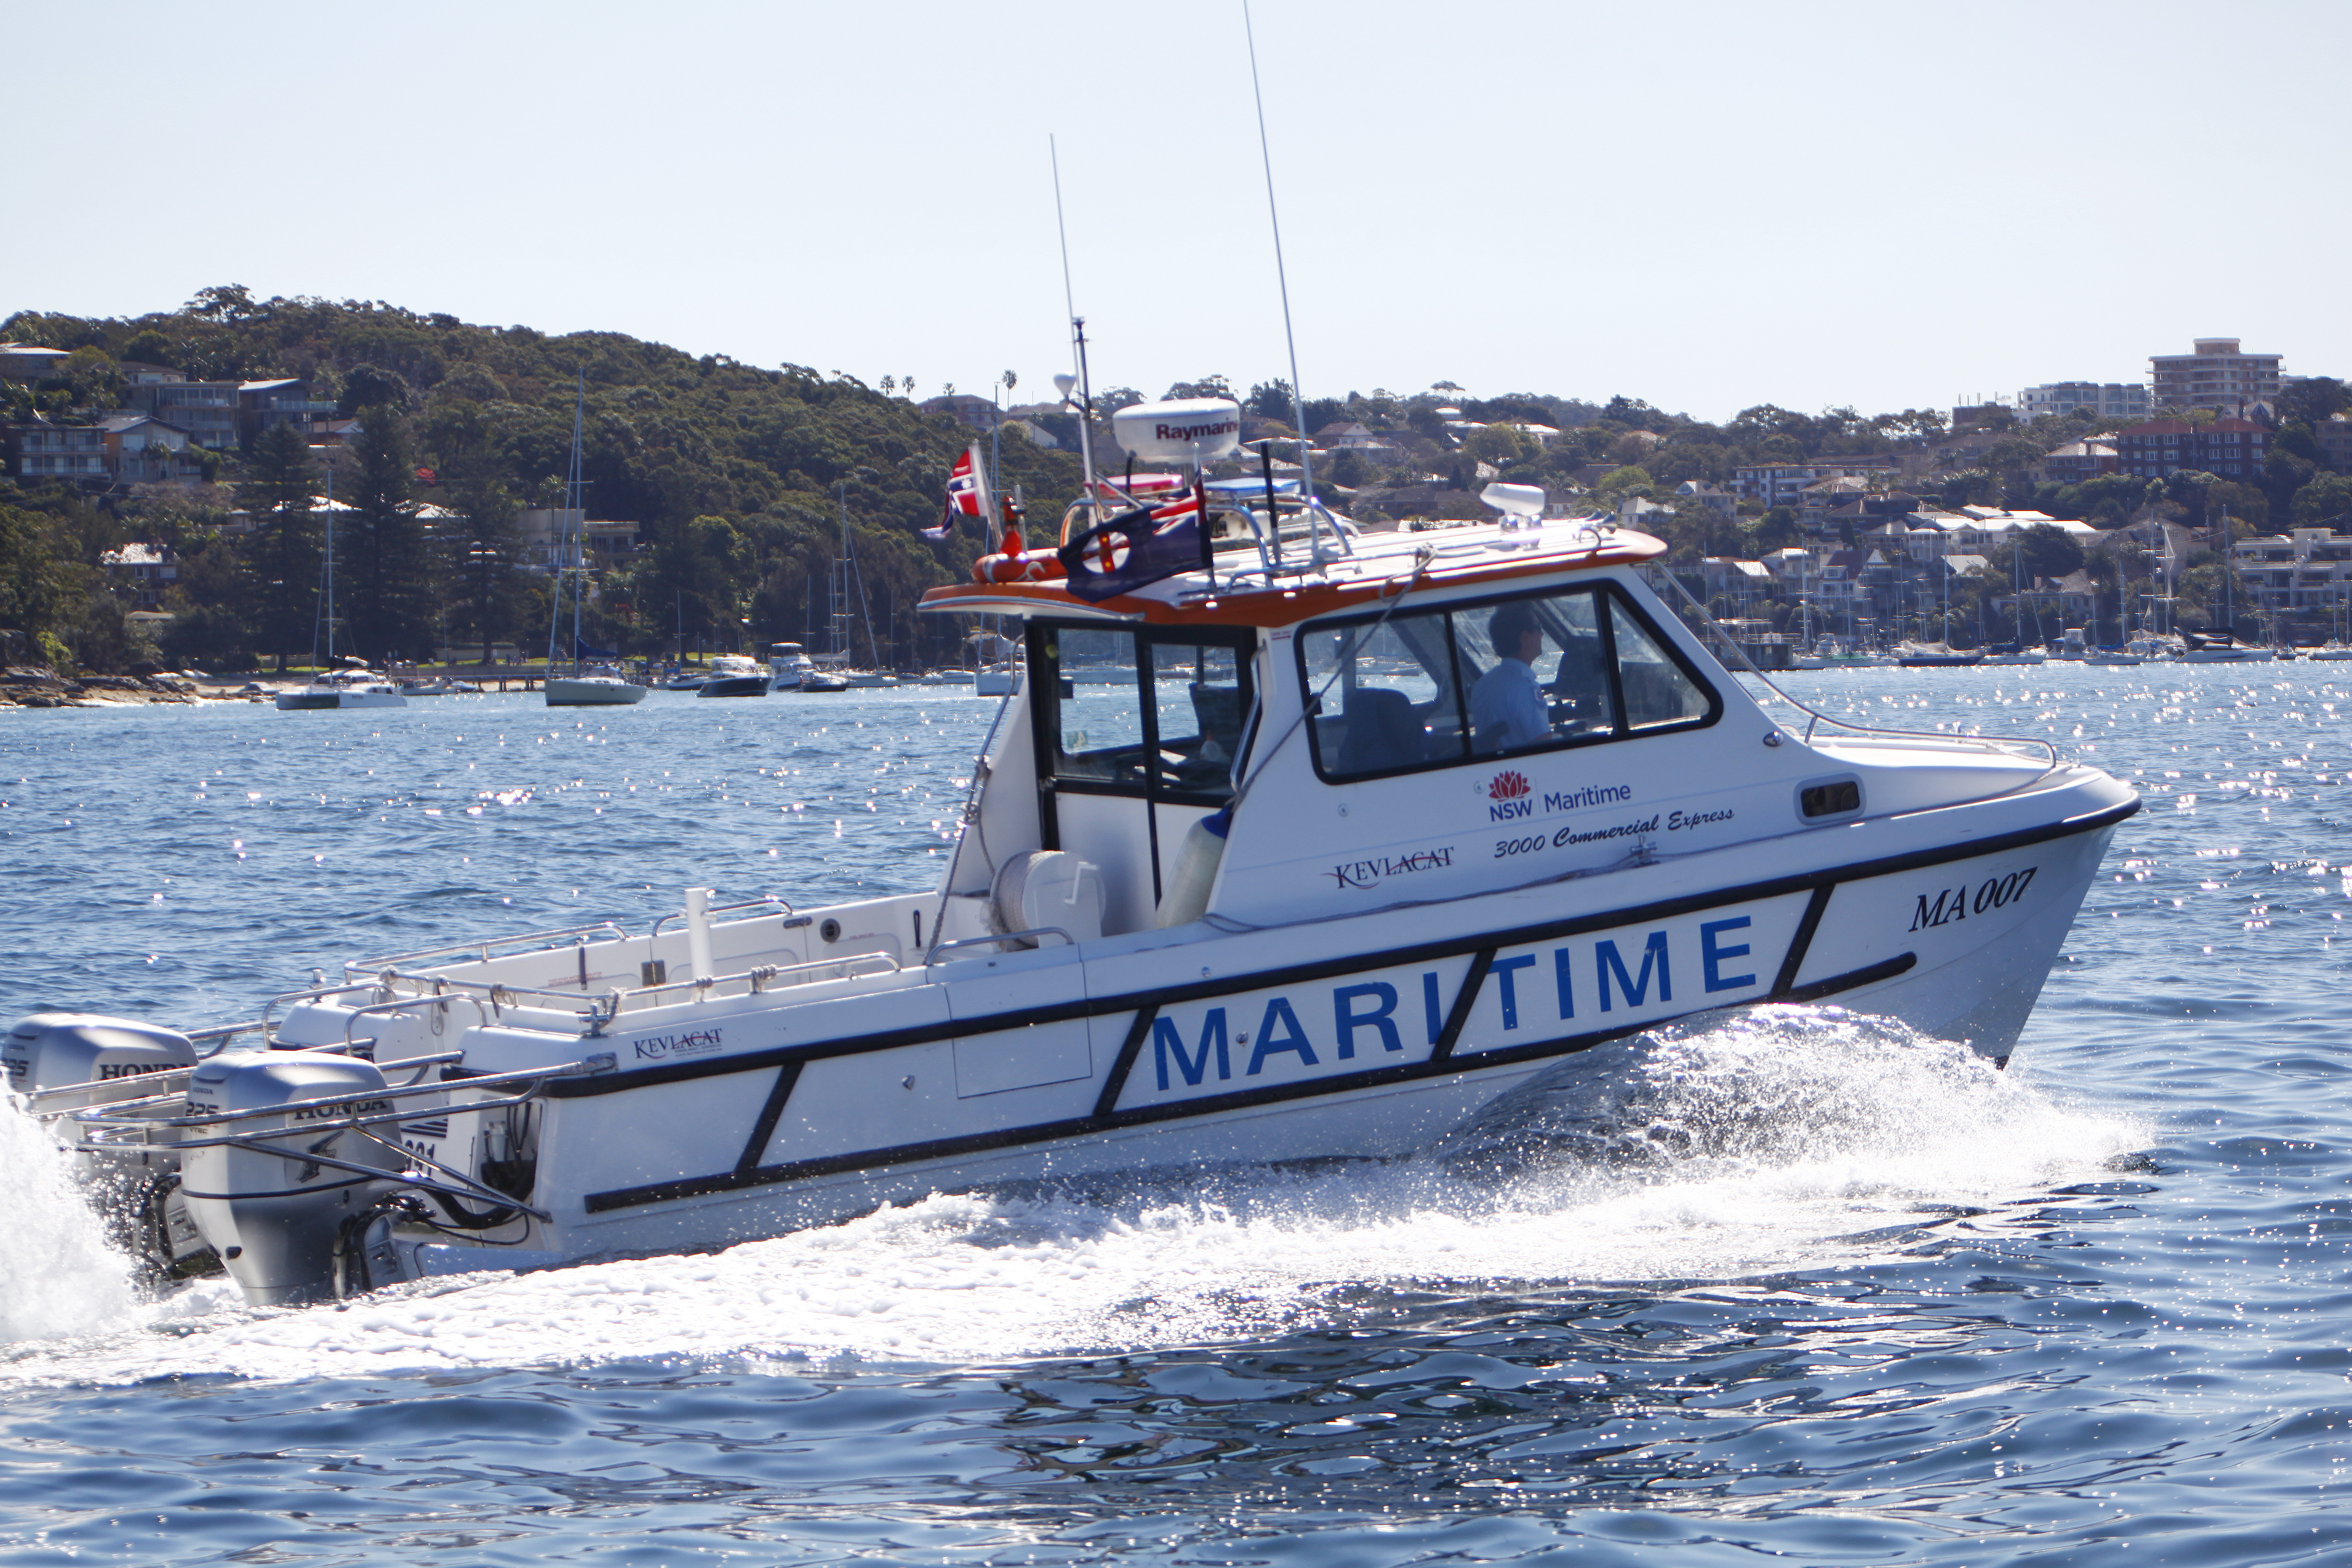 |
| Region: | Size: | Base: |
|---|---|---|
| Sydney Region | 100x Transport Safety Inspectors, 50x Patrol Cars | Eveleigh |
| Hunter Region | 20x Transport Safety Inspectors, 10x Patrol Cars | Newcastle |
| Southern Region | 20x Transport Safety Inspectors, 10x Patrol Cars | Wollongong |
| Northern Region | 20x Transport Safety Inspectors, 10x Patrol Cars | Coffs Harbour |
| South West Region | 20x Transport Safety Inspectors, 10x Patrol Cars | Wagga Wagga |
| Western Region | 20x Transport Safety Inspectors, 10x Patrol Cars | Dubbo |
| Region: | Size: | Base: |
|---|---|---|
| Eastern Sydney Region | 25x Incident Response Officers, 10x Incident Response Vans, 5x Incident Response Vehicles | Eveleigh |
| Northern Sydney Region | 25x Incident Response Officers, 10x Incident Response Vans, 5x Incident Response Vehicles | Macquarie Park |
| Western Sydney Region | 25x Incident Response Officers, 10x Incident Response Vans, 5x Incident Response Vehicles | Old Guildford |
| Southern Sydney Region | 25x Incident Response Officers, 10x Incident Response Vans, 5x Incident Response Vehicles | Revesby |
| Region: | Size: | Base: |
|---|---|---|
| Sydney Region | 80x Maritime Safety Inspectors, 20x Patrol Boats | Rozelle |
| Hunter Region | 40x Maritime Safety Inspectors, 10x Patrol Boats | Carrington |
| Illawarra Region | 40x Maritime Safety Inspectors, 10x Patrol Boats | Port Kembla |
| Southern Region | 20x Maritime Safety Inspectors, 5x Patrol Boats | Eden |
| Northern Region | 20x Maritime Safety Inspectors, 5x Patrol Boats | Coffs Harbour |
| Type: | Amount: | Image: |
|---|---|---|
| Port Officers | 400 |  |
| Type: | Amount: | Image: |
|---|---|---|
| Pilot and Security Vessels | 12 |  |
| Fireboats | 4 | 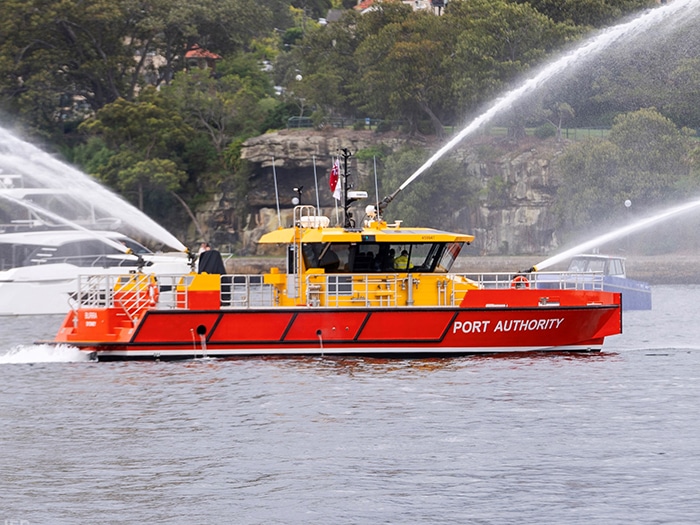 |
| Emergency Response Vessels | 11 | 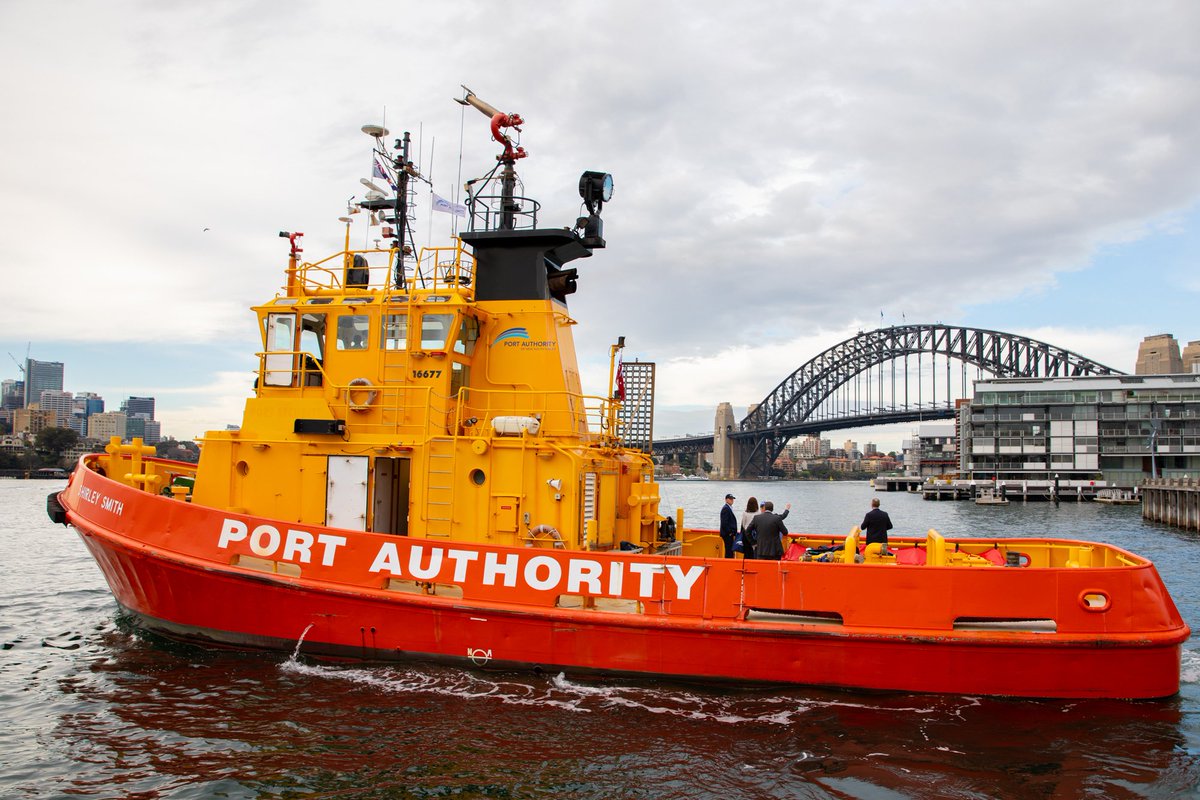 |
| Crane Vessels | 2 | 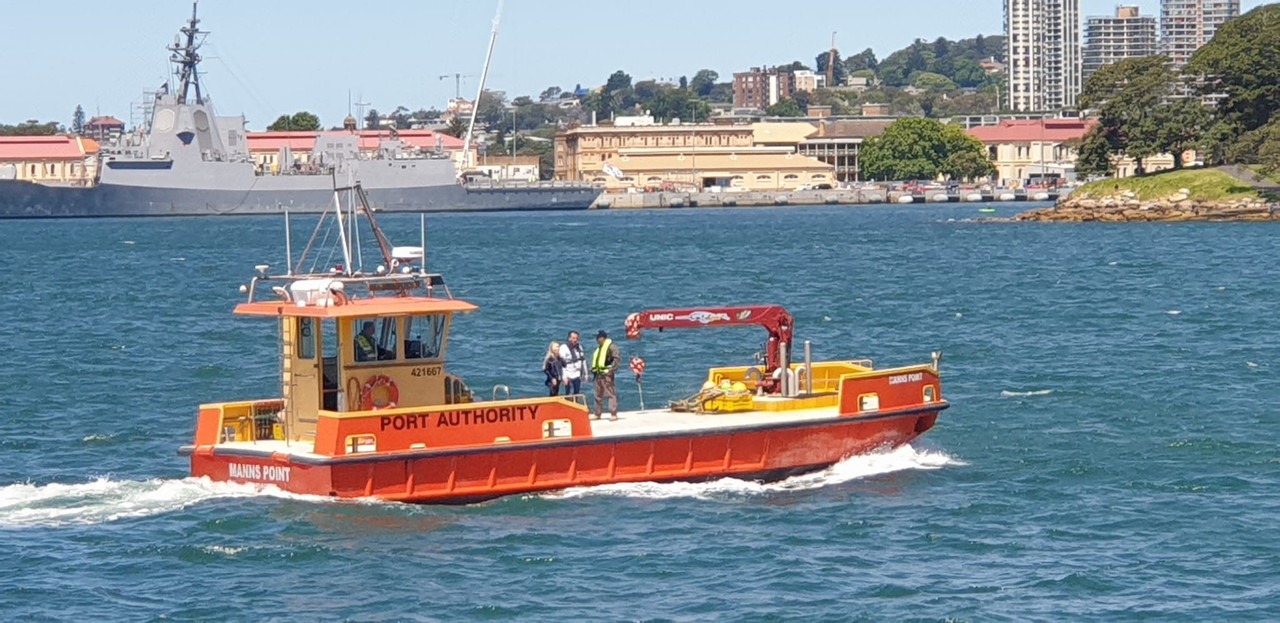 |
| Survey Vessels | 2 |  |
| Port: | Size: | Base: |
|---|---|---|
| Sydney Harbour | 130x Port Officers, 2x Pilot and Security Vessels, 2x Fireboats, 3x Emergency Response Vessels, 2x Crane Vessels, 2x Survey Vessels | Pyrmont |
| Port Botany | 100x Port Officers, 3x Pilot and Security Vessels, 2x Fireboats, 3x Emergency Response Vessels | Port Botany |
| Newcastle Harbour | 70x Port Officers, 4x Pilot and Security Vessels, 1x Emergency Response Vessel | Carrington |
| Port Kembla | 60x Port Officers, 2x Pilot and Security Vessels, 2x Emergency Response Vessels | Port Kembla |
| Port of Yamba | 25x Port Officers, 1x Pilot and Security Vessel, 1x Emergency Response Vessel | Yamba |
| Port of Eden | 15x Port Officers, 1x Emergency Response Vessel | Eden |
Last edited: